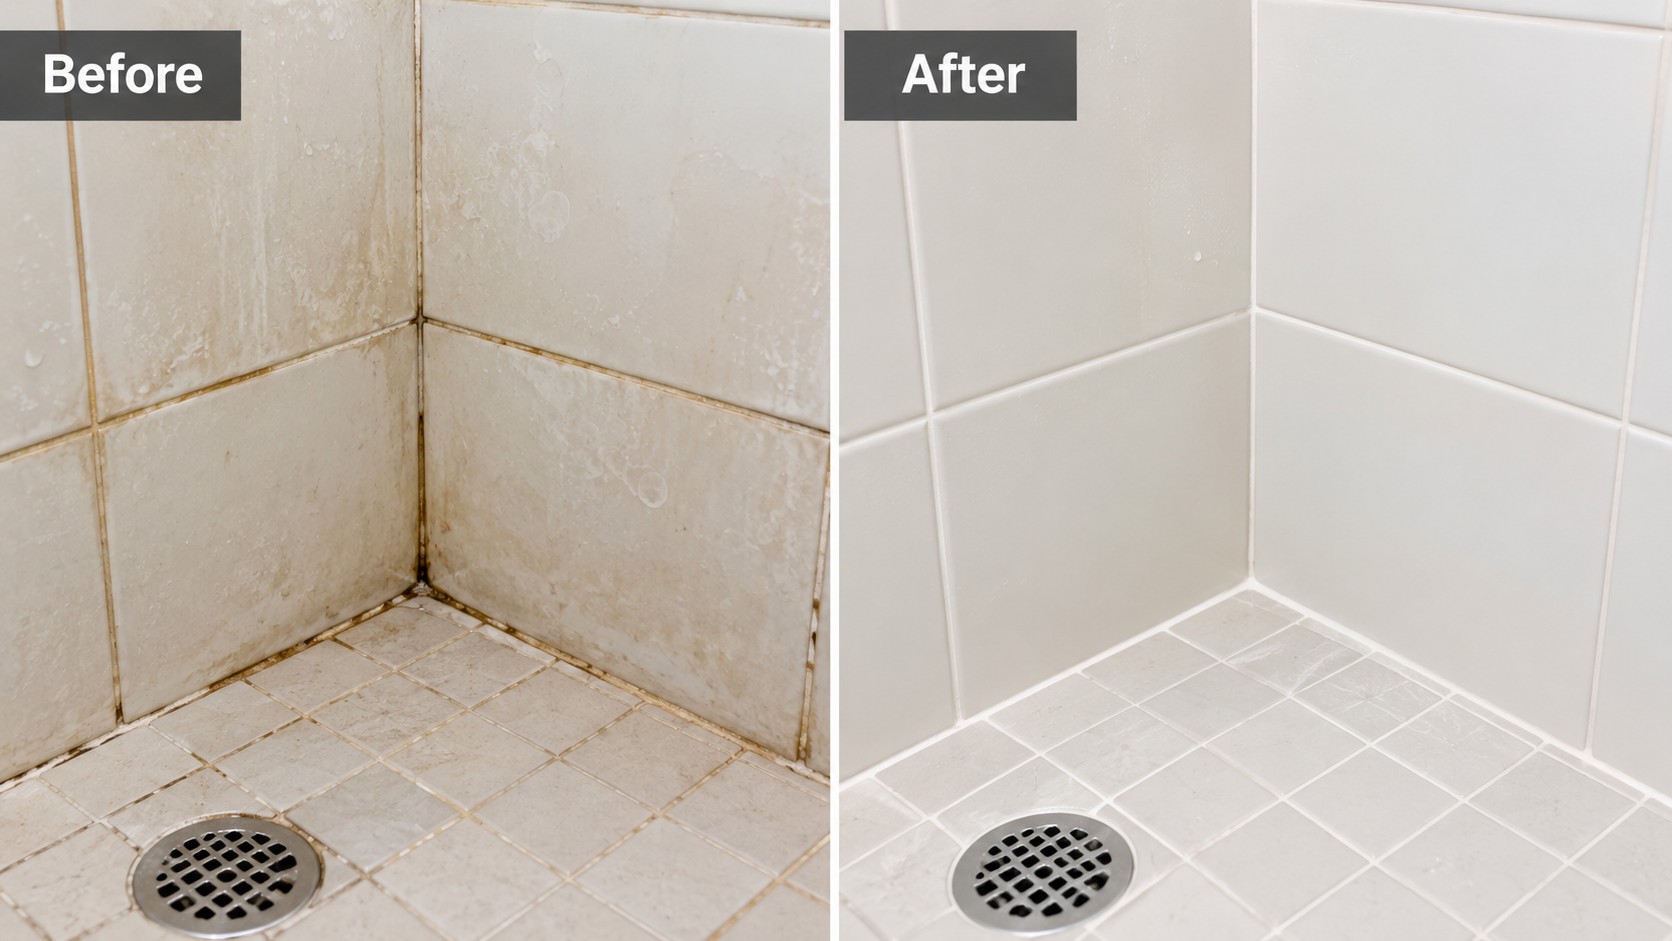
Grout Cleaner

Bathroom Grout Cleaner: Complete Guide to Cleaner Tiles (2026)

By Updated: June 2026 Last Reviewed: June 2026 14 min read
Quick Answer

The best way to clean bathroom grout is to apply a dedicated bathroom grout cleaner directly to grout lines, allow it to sit for 5–15 minutes, scrub with a stiff grout brush using back-and-forth strokes, rinse thoroughly, and dry the area completely. For light buildup, baking soda and hydrogen peroxide paste is highly effective. For heavier staining or mold, a commercial grout cleaner designed for porous surfaces gives more consistent results. The single most important habit: dry the bathroom properly after every use to prevent moisture from re-staining grout.

A clean bathroom can instantly change how your home feels — but dirty grout lines have a way of undermining everything else you do. You can scrub the tiles until they shine, polish the taps, fold the towels perfectly, and still walk in and feel like it is not quite clean because those grout lines are grey, stained, or dark. It is one of the most frustrating cleaning problems in the home, and one of the most solvable.

The issue is that most people approach bathroom grout cleaning the wrong way. They use the same product they use on tile surfaces, scrub briefly, and wonder why the results are disappointing. Grout is not like tile. It is porous, narrow — typically a 1/8 grout line on most bathroom floors — and sits in a permanently damp environment. It needs a different approach, a different product, and a little more patience.

I have spent years testing grout cleaning methods across bathroom floors, shower enclosures, and wall tiles — in my own bathrooms and in the homes of others. This guide covers everything I have learned: why bathroom grout gets dirty so quickly, how to choose the right cleaner for your specific situation, the correct technique, and the maintenance habits that make every future clean noticeably easier.

Why Does Bathroom Grout Get Dirty So Fast?

Understanding the cause makes it much easier to choose the right solution. Bathroom grout does not get dirty randomly — it follows a predictable pattern driven by four specific environmental factors.

💧 Constant Moisture

Bathrooms stay humid long after showers end. Grout absorbs this moisture along with everything dissolved in it — soap, minerals, bacteria. Without proper ventilation, grout never fully dries between uses.

🧴 Soap and Product Residue

Soap, shampoo, conditioner, and body wash leave behind residue that hardens on grout surfaces over time. This residue attracts more dirt, creating a cycle of rapid discoloration.

🪨 Hard Water Deposits

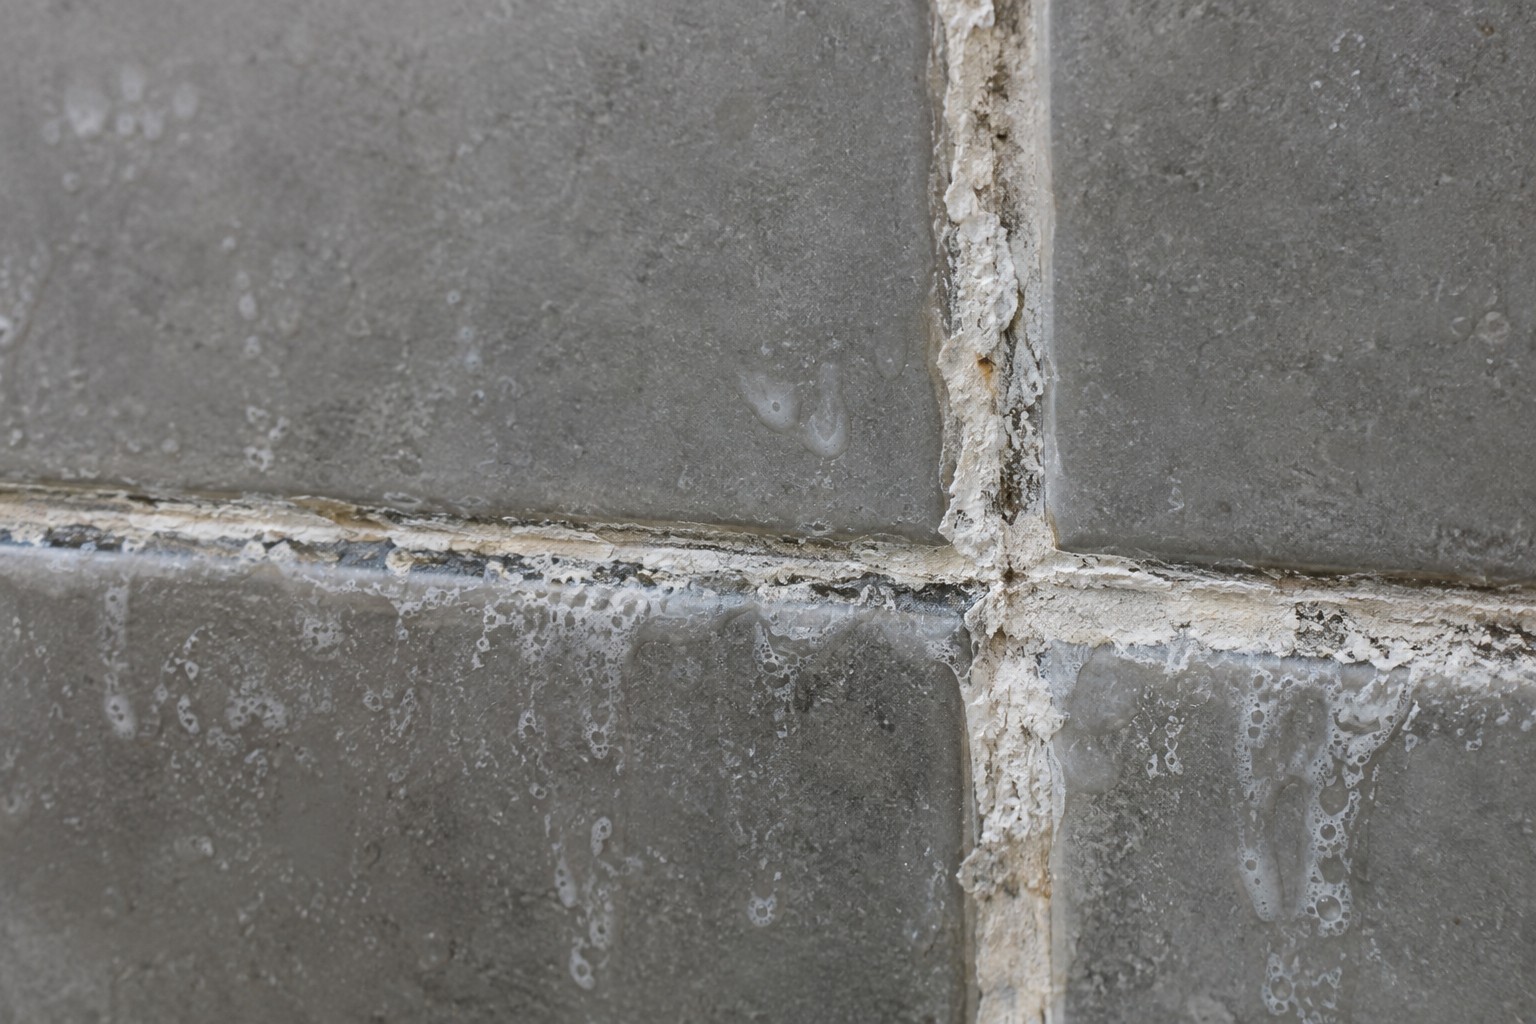
In hard water areas, calcium and magnesium minerals in tap water deposit on grout as water evaporates. These create white, chalky marks that alkaline cleaners cannot shift — they require mild acid to dissolve.

🦠 Mold and Mildew

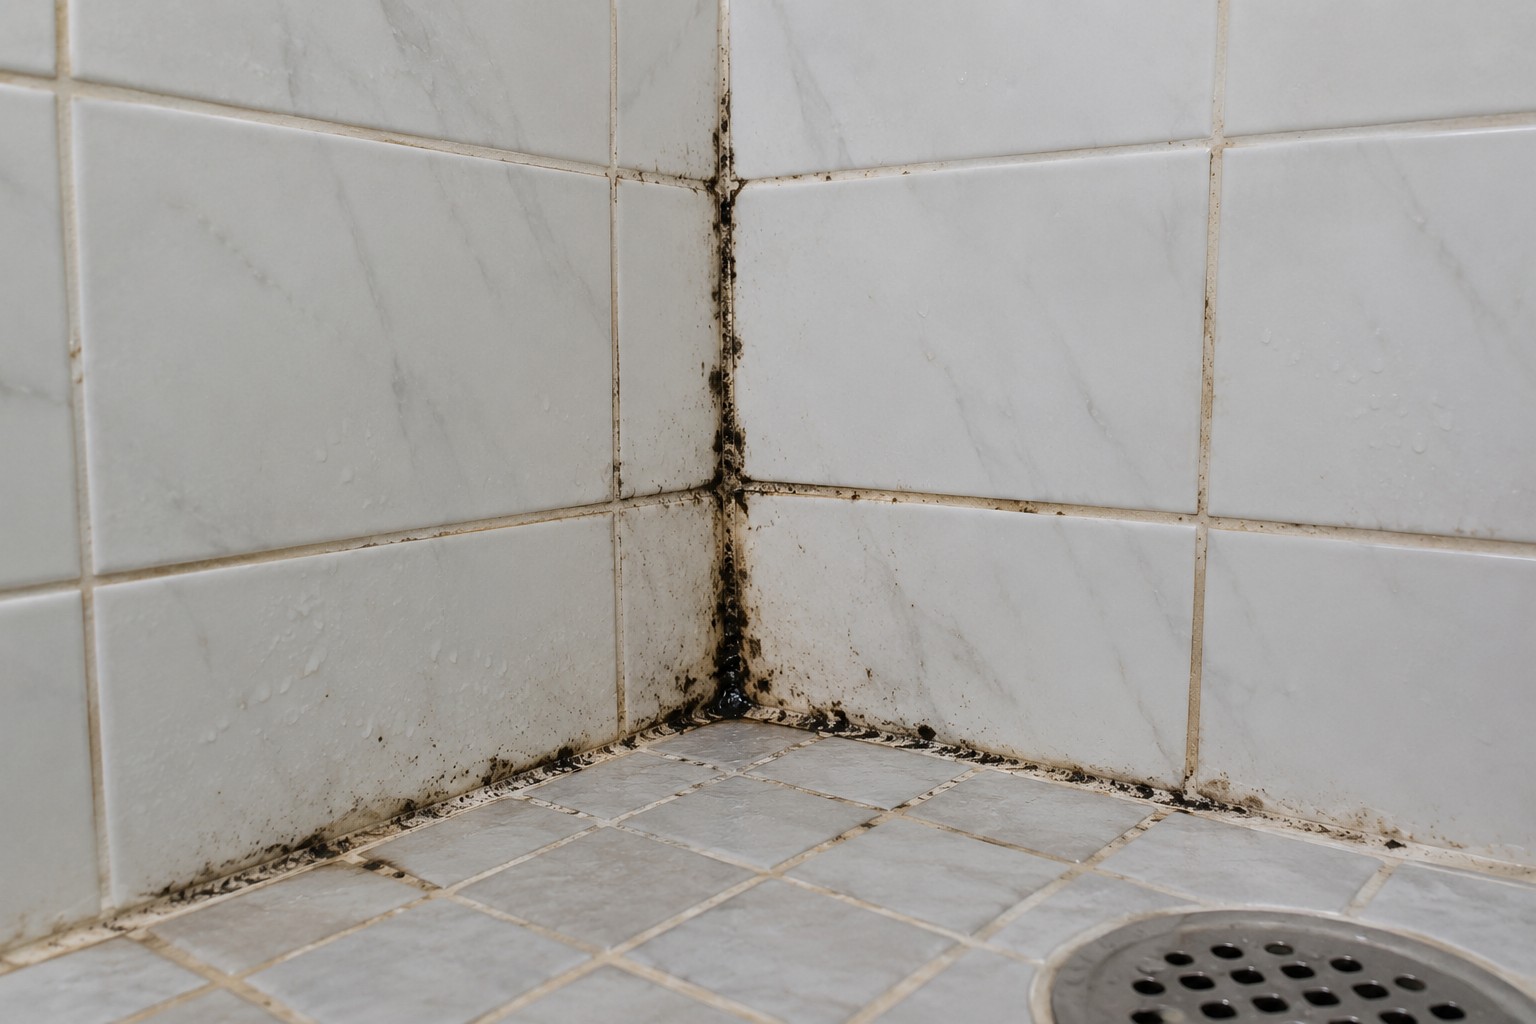
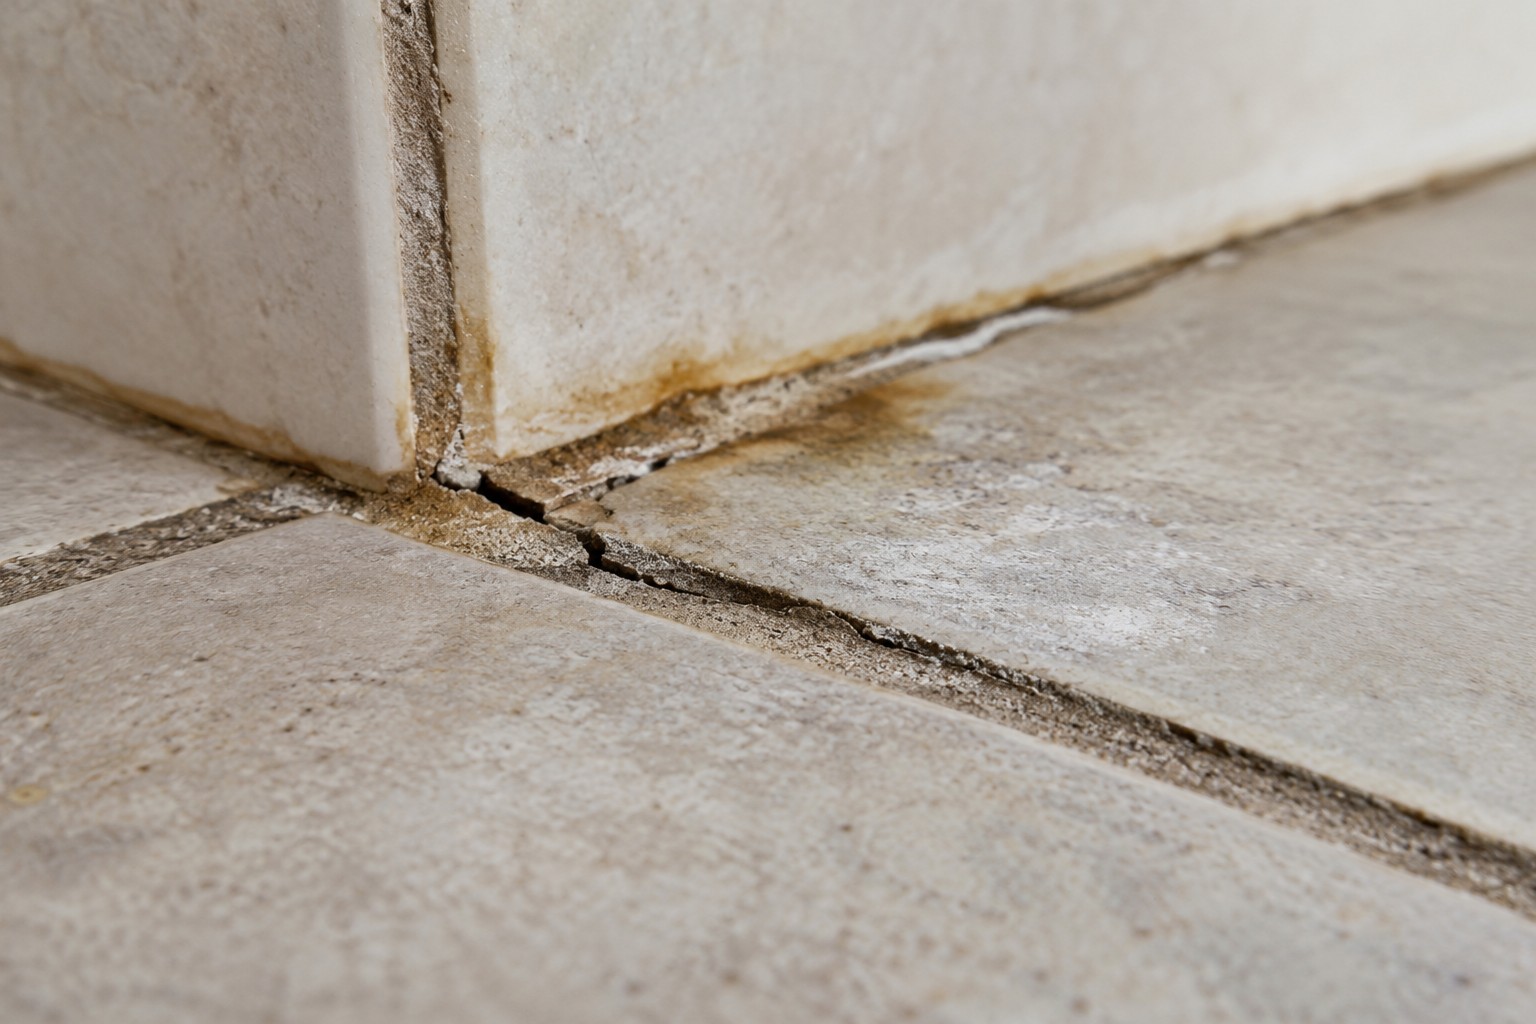
Warm, damp bathroom conditions are ideal for mold. It appears first as dark spots or a pink tinge and penetrates deeper into grout if left untreated. Regular cleaning is the only reliable prevention.

Grout is porous — it acts like a sponge. Every time you shower, mop, or rinse the bathroom, porous grout absorbs a little more of whatever is in the water. Over weeks and months, that accumulation changes the colour and texture of grout from the inside out, which is why surface scrubbing alone often produces disappointing results. The best bathroom grout cleaner works by penetrating those pores and breaking down what has bonded to the grout material itself.

Why a Dedicated Bathroom Grout Cleaner Makes a Difference

The most common mistake is reaching for a general tile spray and expecting it to clean the grout as well. Tiles and grout are fundamentally different surfaces, and they respond differently to cleaners.

Feature Bathroom Grout Cleaner Regular Tile Cleaner
Designed for grout lines Yes — specifically formulated for porous surfaces Sometimes — usually for tile only
Removes deep buildup More effective — penetrates pores Limited — surface action only
Targets porous areas Yes Usually no
Mold and mildew action Most formulas include this Varies by product
Safe on colored grout Check label — bleach-based may discolor Generally yes
Everyday tile shine Secondary benefit Primary function

A grout-focused cleaner works differently to a tile cleaner because it is designed to sit in narrow, porous grout lines rather than spread across a flat tile surface. The formula needs to be more viscous to stay in the grout channel, more penetrating to reach embedded dirt, and often more chemically targeted to tackle mold and mineral deposits that tile surfaces simply do not face in the same way.

How to Clean Bathroom Grout: Step-by-Step

The right technique makes as much difference as the right product. I have watched people use excellent grout cleaners and get poor results because they rushed the process — specifically the dwell time. Here is the method that consistently delivers the best results:

  1. Remove loose dirt and debris first Sweep or vacuum the bathroom floor before you apply any liquid cleaner. Loose dust, hair, and grit mix with wet cleaner and create a muddy paste that spreads across the floor instead of being lifted from grout lines. On walls and shower surfaces, rinse briefly with warm water. This takes two minutes and noticeably improves the final result.
  2. Apply the bathroom grout cleaner directly to grout lines Apply the product directly onto grout lines — not just across the whole tile surface. Use a squeeze bottle, brush, or the product's applicator to concentrate the cleaner where it needs to work. For shower walls, a gel or foam formula clings to vertical surfaces better than a spray, which tends to drip before it has time to work. Make sure every stained section is covered.
  3. Allow the full dwell time — do not rush this This is the most important step that most people get wrong. Leave the cleaner to sit for at least 5 minutes for light maintenance cleaning, 10–15 minutes for moderate staining, and up to 30 minutes for heavy buildup or mold. The cleaner needs time to break down the bonds between dirt and the grout surface. Wiping it off early dramatically reduces effectiveness — the product has not finished working yet.
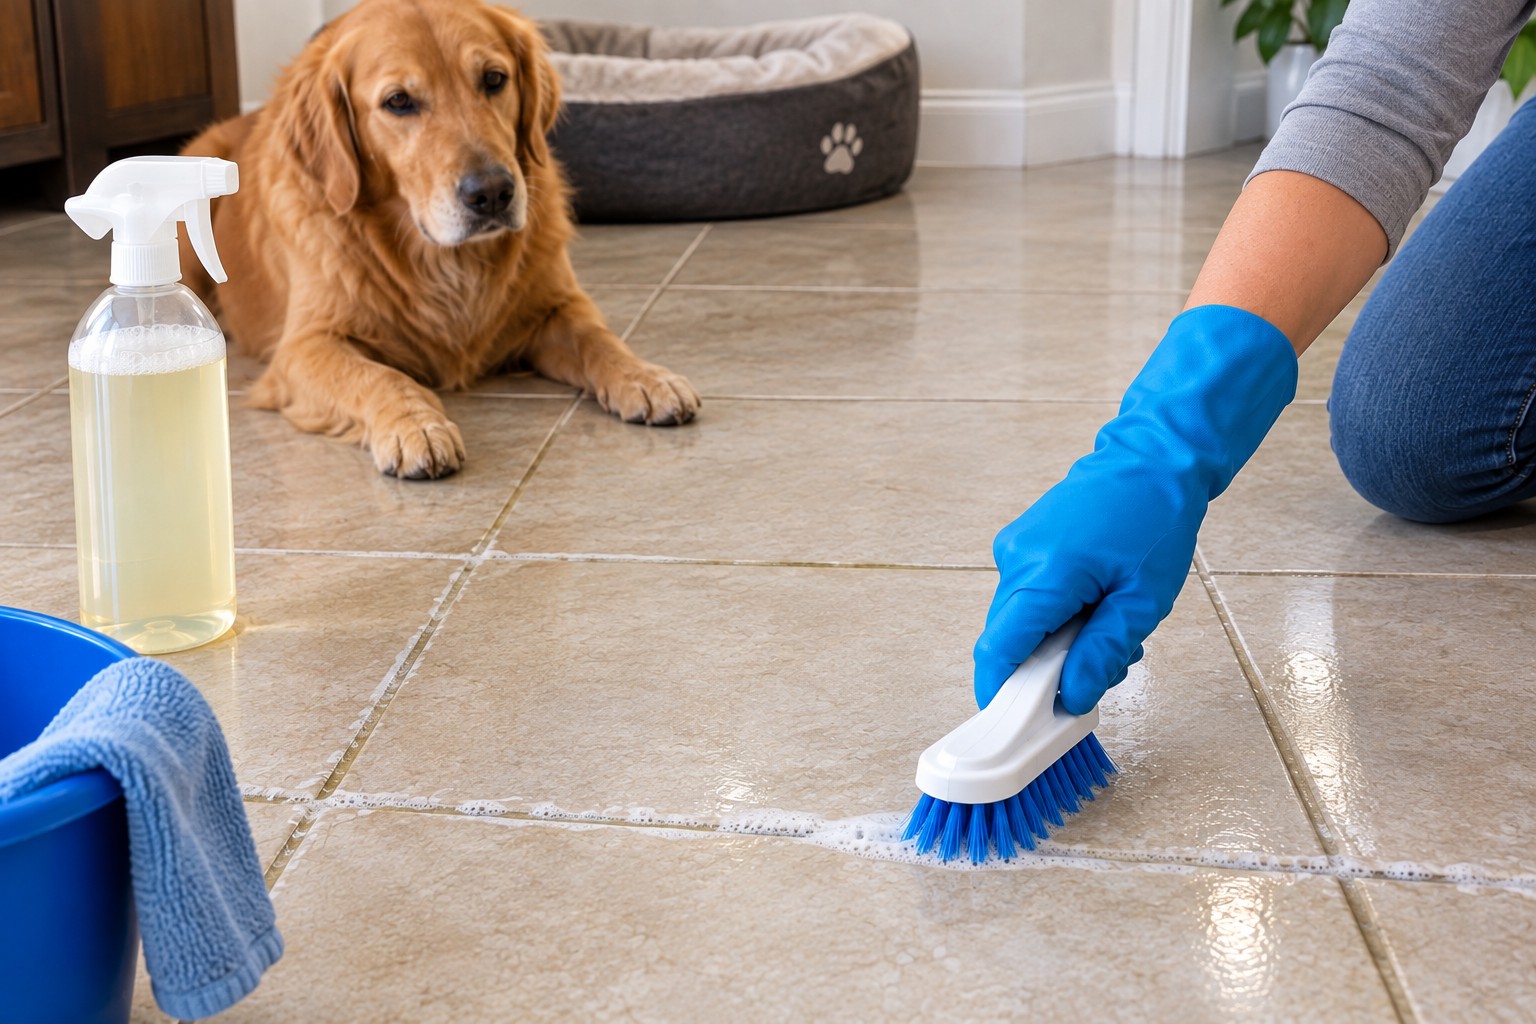
  4. Scrub with a dedicated grout brush Use a narrow, stiff-bristled grout brush — not a general bathroom scrubber, not a toothbrush. A proper grout brush concentrates pressure along the grout line and covers the surface far faster. Use short back-and-forth strokes along each grout line rather than circular motions, which tend to push loosened dirt onto tile rather than out of the grout channel. Apply firm but controlled pressure.
  5. Rinse the area thoroughly Rinse with clean water, removing all loosened dirt and cleaning product residue from both grout lines and tile surfaces. This step matters more than most people realise — cleaner residue left on grout can actually attract new dirt faster than uncleaned grout would. Rinse until the water runs completely clear.
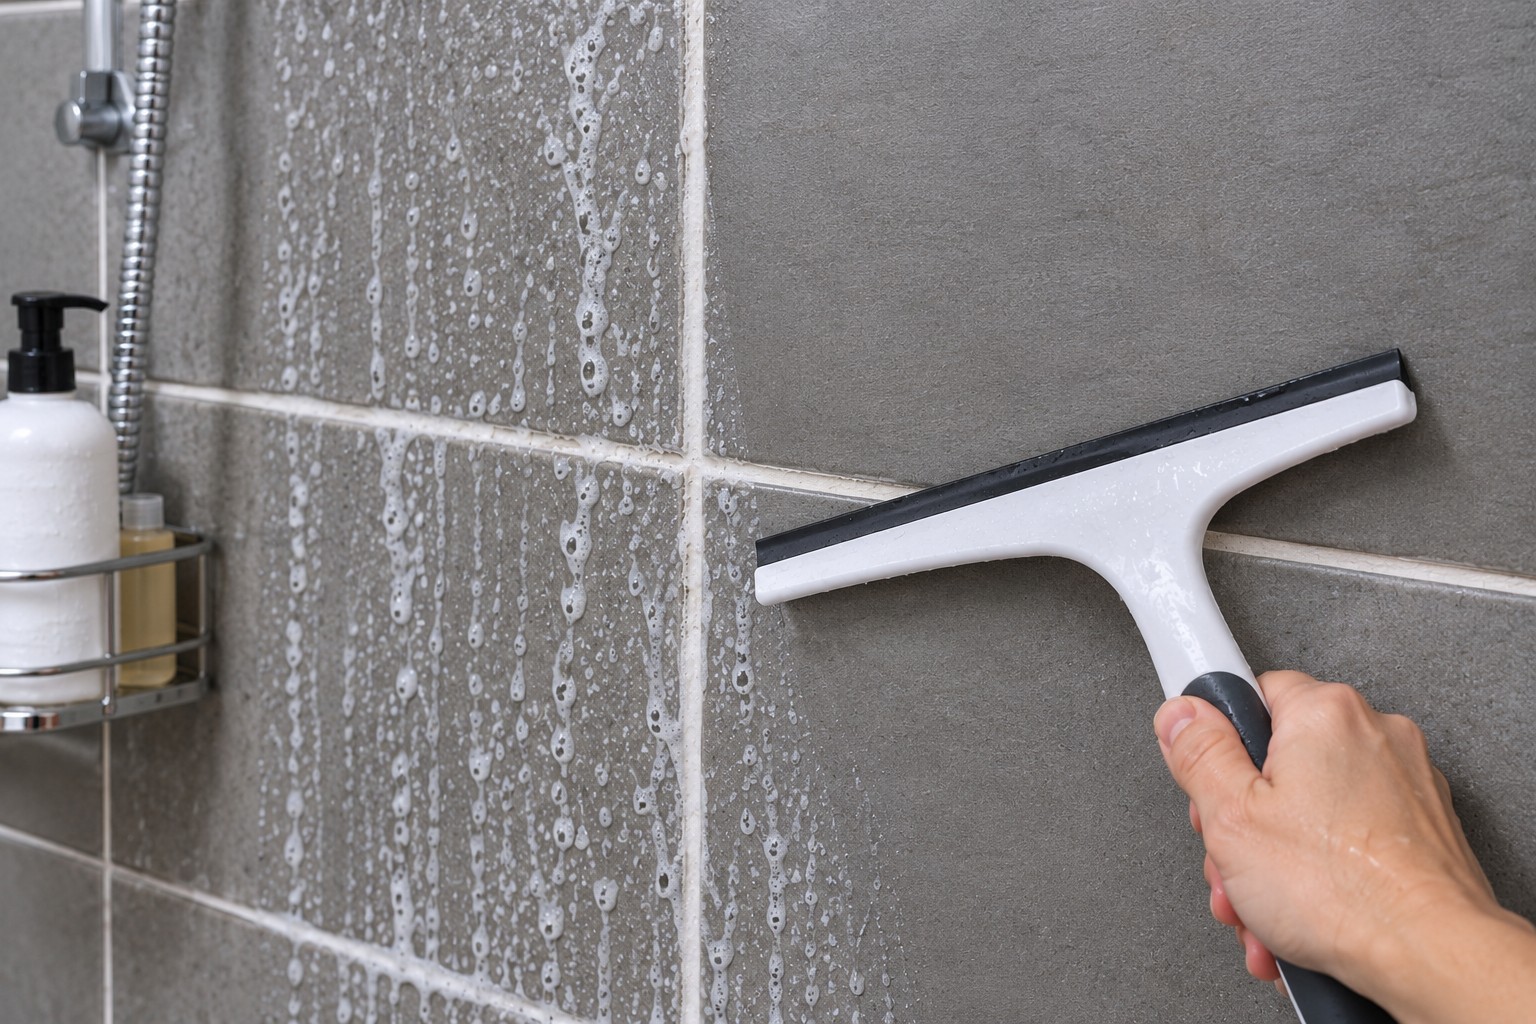
  6. Dry the bathroom properly This is the step that determines how quickly grout gets dirty again. Use a microfiber cloth on floor grout, a squeegee on wall tiles, and run the exhaust fan for at least 30 minutes. If there is no fan, open the door and a nearby window. Grout that stays damp reabsorbs moisture and airborne particles immediately. Proper drying is the most important long-term maintenance habit you can build.

Choosing the Right Bathroom Floor Grout Cleaner

Bathroom floors take more punishment than almost any other surface in the home — constant foot traffic, water exposure, soap, and humidity, every single day. Choosing the right bathroom floor grout cleaner depends on what your grout is actually dealing with.

For Everyday Dirt and Foot Traffic

A neutral pH cleaner or a mild baking soda paste is sufficient for bathroom floors cleaned regularly. These formulas are gentle enough for weekly use without degrading grout over time. If the floor grout is sealed, even warm water and dish soap applied with a grout brush gives good results between deeper cleans.

For Soap Scum and Product Residue

Choose a surfactant-based grout cleaner — surfactants are specifically designed to break down the fatty residue in soap, shampoo, and body wash. Many commercial bathroom grout cleaners include surfactants as the primary active ingredient. Apply, dwell, scrub, rinse. For heavy soap scum on bathroom floor grout, a second application is often more effective than scrubbing harder on the first.

For Discolored or Yellowed Grout

Oxygen bleach cleaners (hydrogen peroxide-based) are the safest and most effective option for whitening discolored bathroom floor grout. Unlike chlorine bleach, they do not produce harsh fumes, are safer for repeated use, and are gentler on colored grout. Apply, allow a longer dwell time (15–20 minutes), scrub, and rinse. Results improve significantly with a second treatment if the grout has been discolored for a long time.

For Mold and Mildew

Look for a cleaner specifically labeled as antimicrobial or antifungal. Many bathroom grout cleaners include these properties, but not all — check the label. For persistent mold on bathroom floor grout, an oxygen bleach paste applied with longer dwell time is highly effective for surface mold. If mold returns within days of cleaning, it has penetrated deeper into the grout and may need professional re-grouting.

For Different Tile Types

Always check tile compatibility before choosing a cleaner. Ceramic and porcelain tiles handle most grout cleaners safely. Natural stone tiles — marble, limestone, travertine, slate — require pH-neutral cleaners only. Acid-based cleaners etch natural stone permanently. Bleach-based cleaners can discolor stone and strip sealant. If you are unsure of your tile type, test in a small hidden area first.

⚠ Important: Never use acid-based cleaners (including undiluted white vinegar) on natural stone tiles. The etching damage is permanent and cannot be reversed. If your bathroom has marble, travertine, or limestone tiles, use only a pH-neutral cleaner specifically labeled as stone-safe.

Natural vs Commercial Bathroom Grout Cleaner

Both approaches work — the right choice depends on the severity of the problem and your personal preference around chemical products.

Natural Cleaning Methods That Actually Work

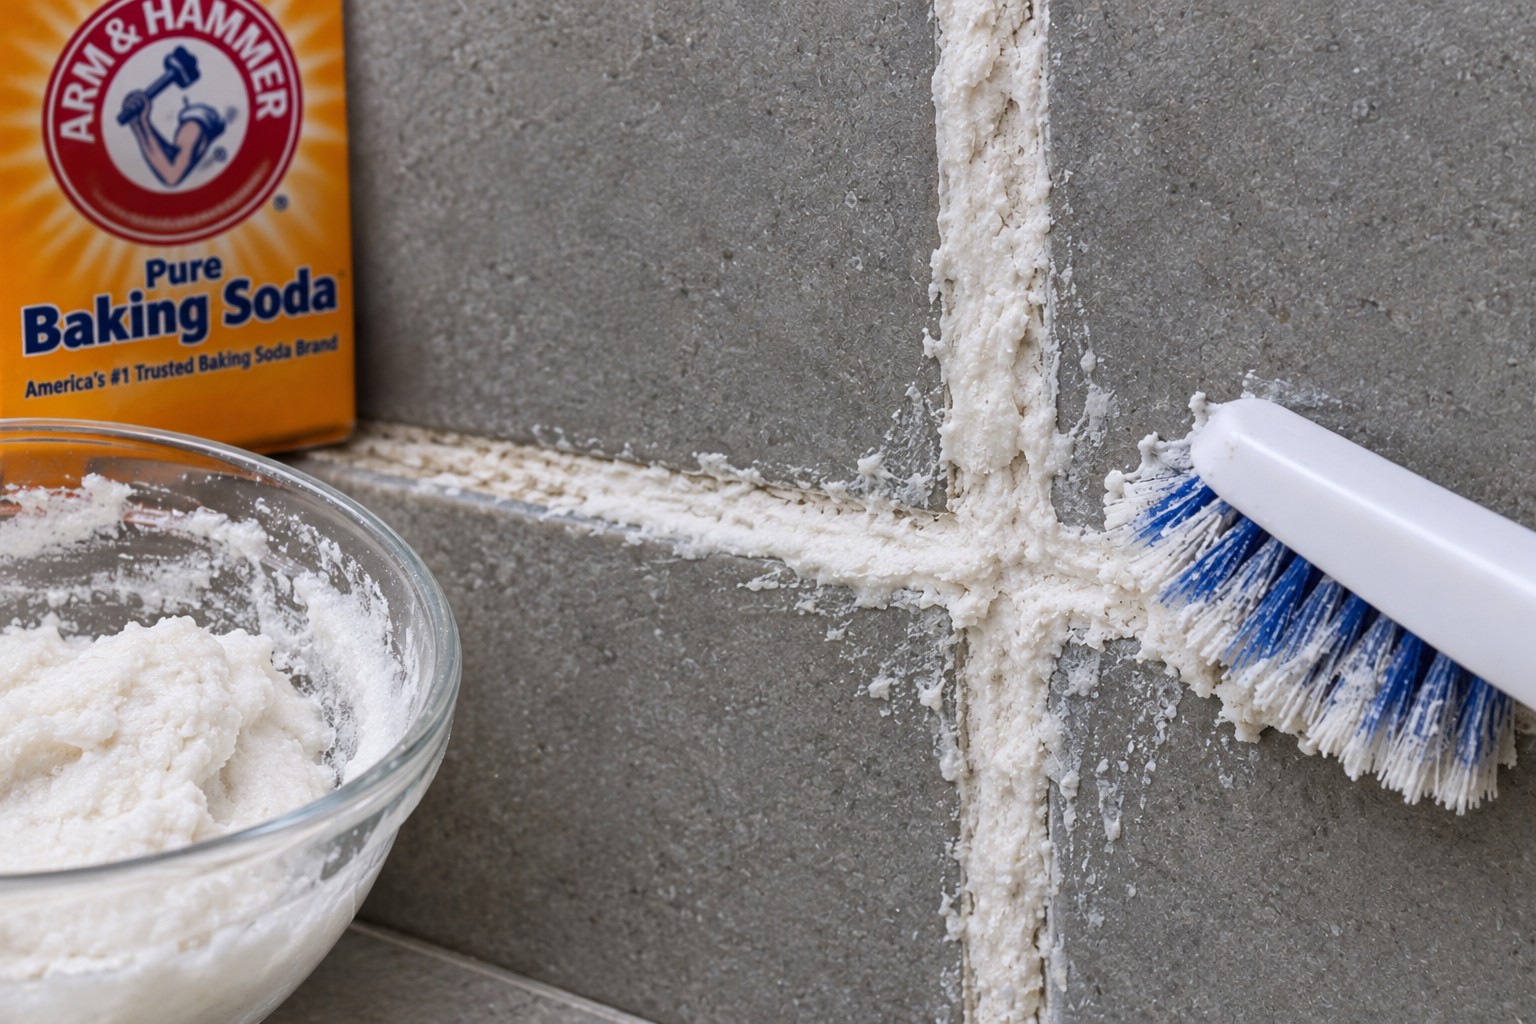
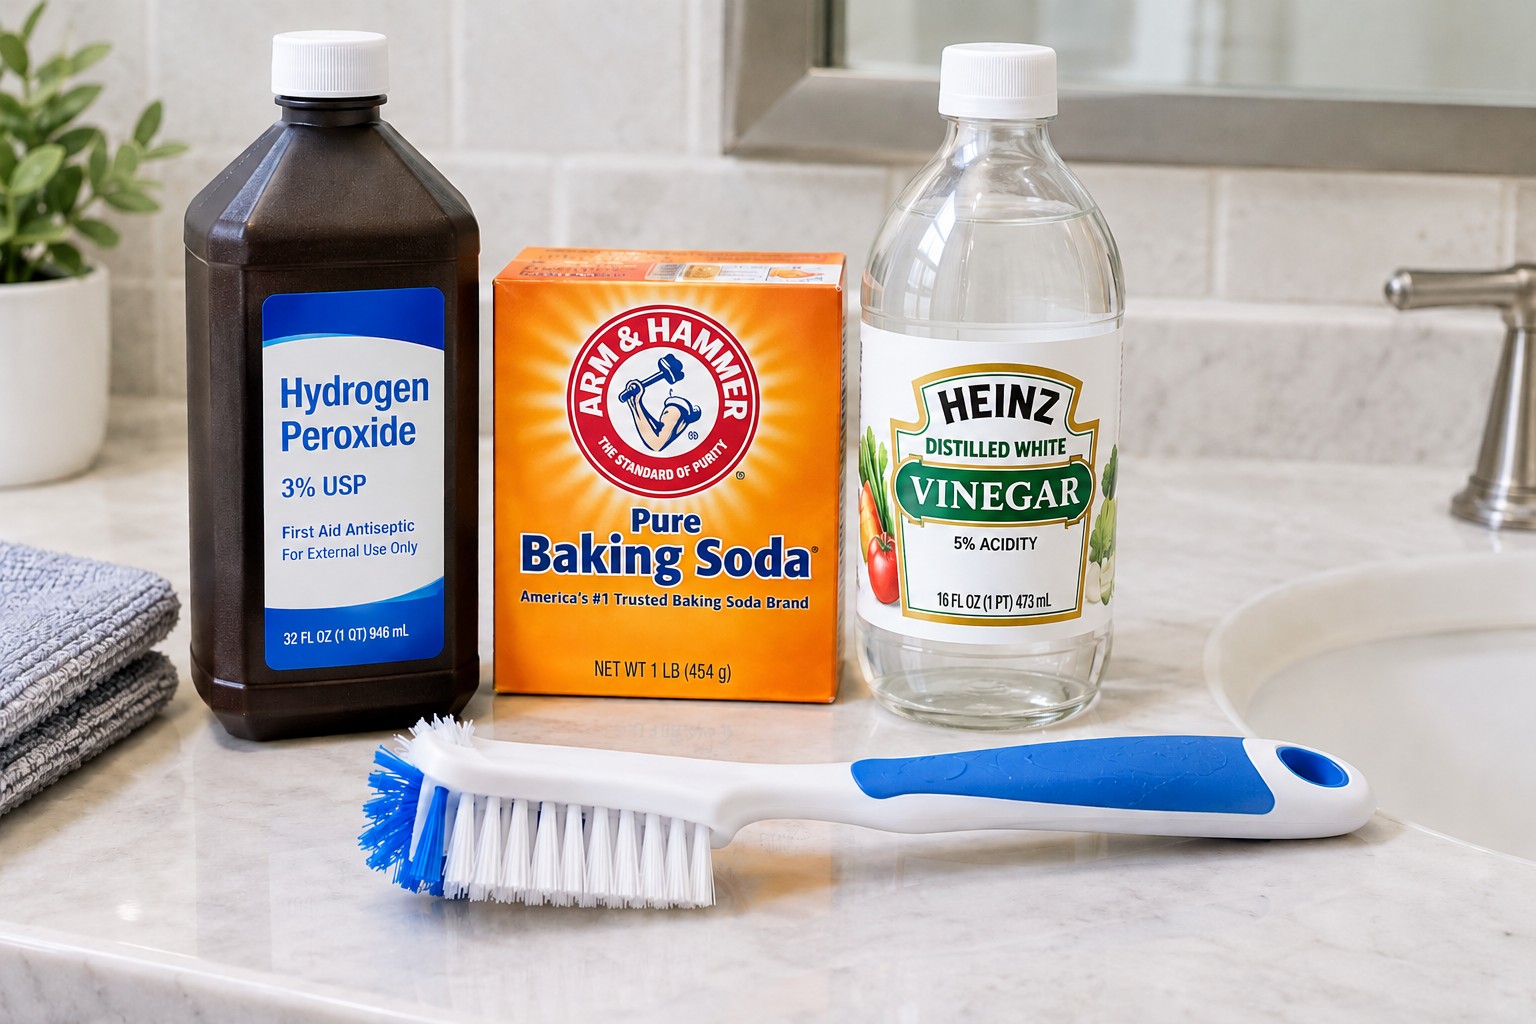
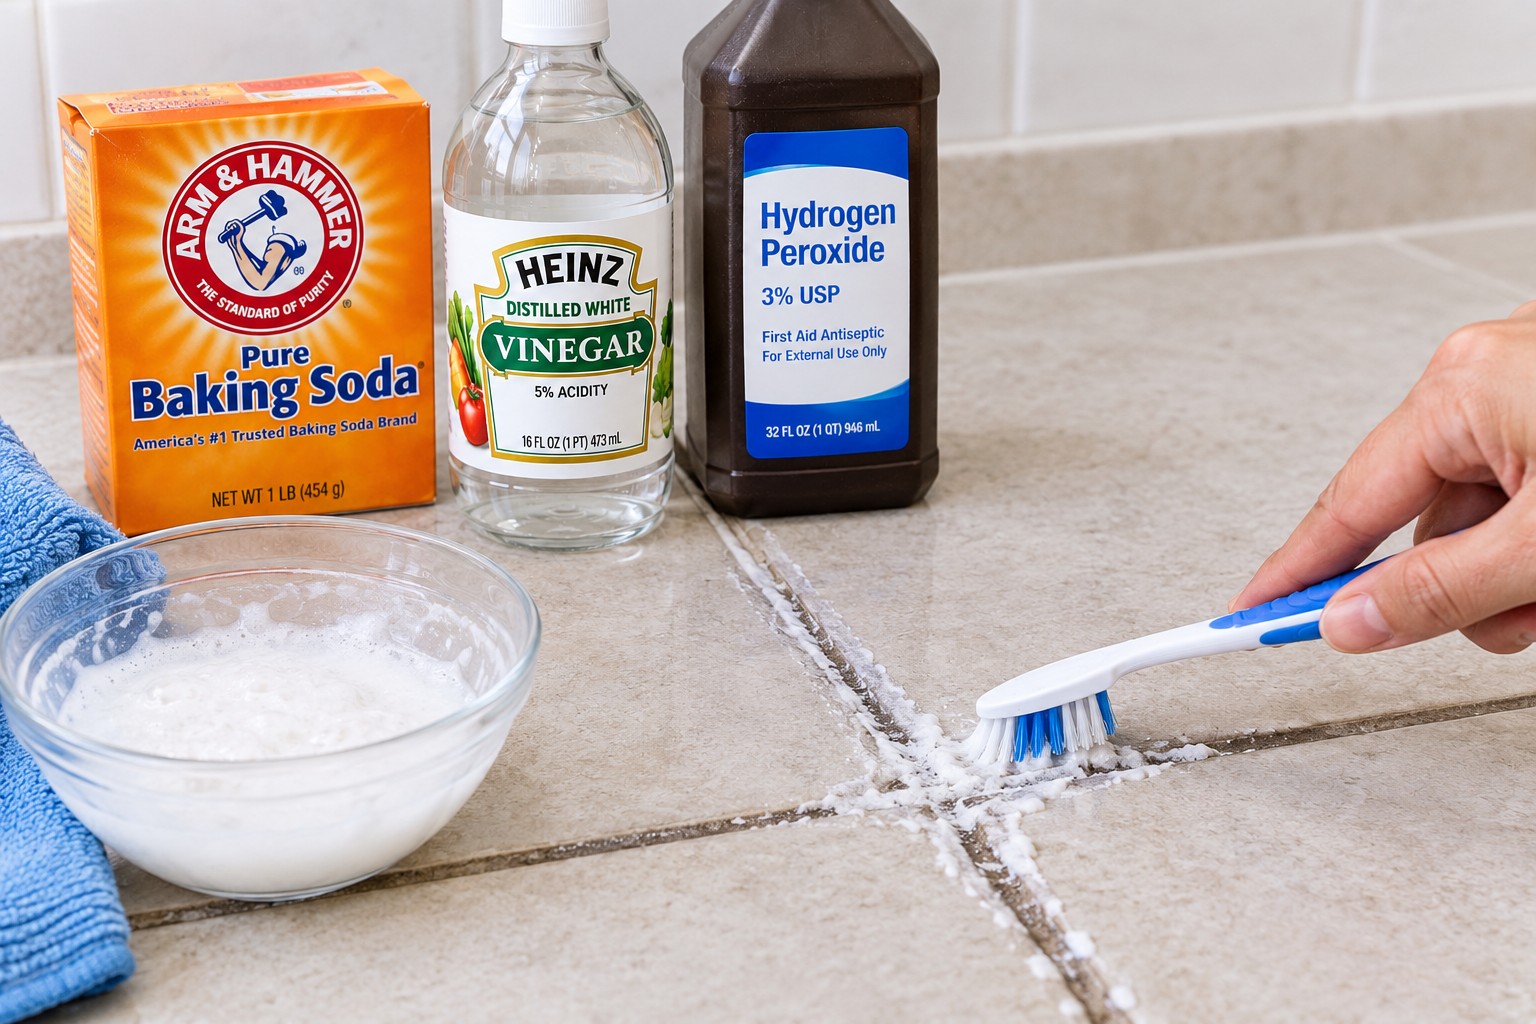
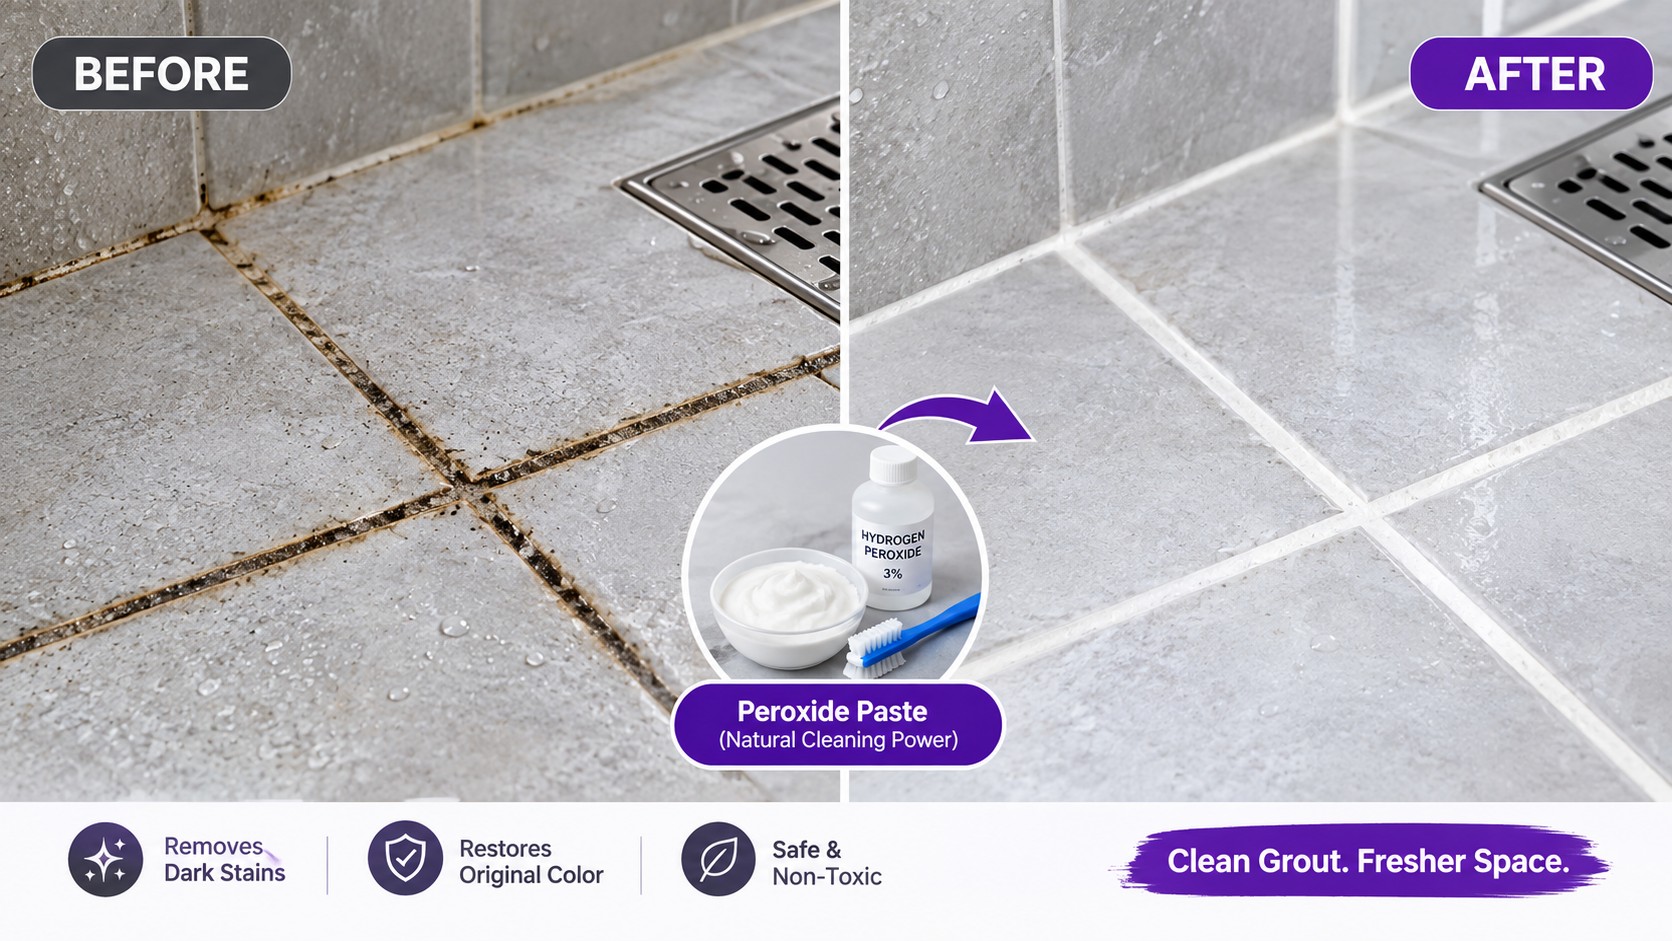
Baking soda and hydrogen peroxide paste is the most effective natural option I have tested for bathroom grout. Mix equal parts baking soda and 3% hydrogen peroxide into a thick paste — add one teaspoon of dish soap for bathroom floor grout with grease or soap scum buildup. Apply to grout lines, leave for 15–20 minutes, scrub with a grout brush, rinse. It whitens, disinfects, and handles moderate staining reliably. This is the recipe our full homemade grout cleaner guide walks through in detail.

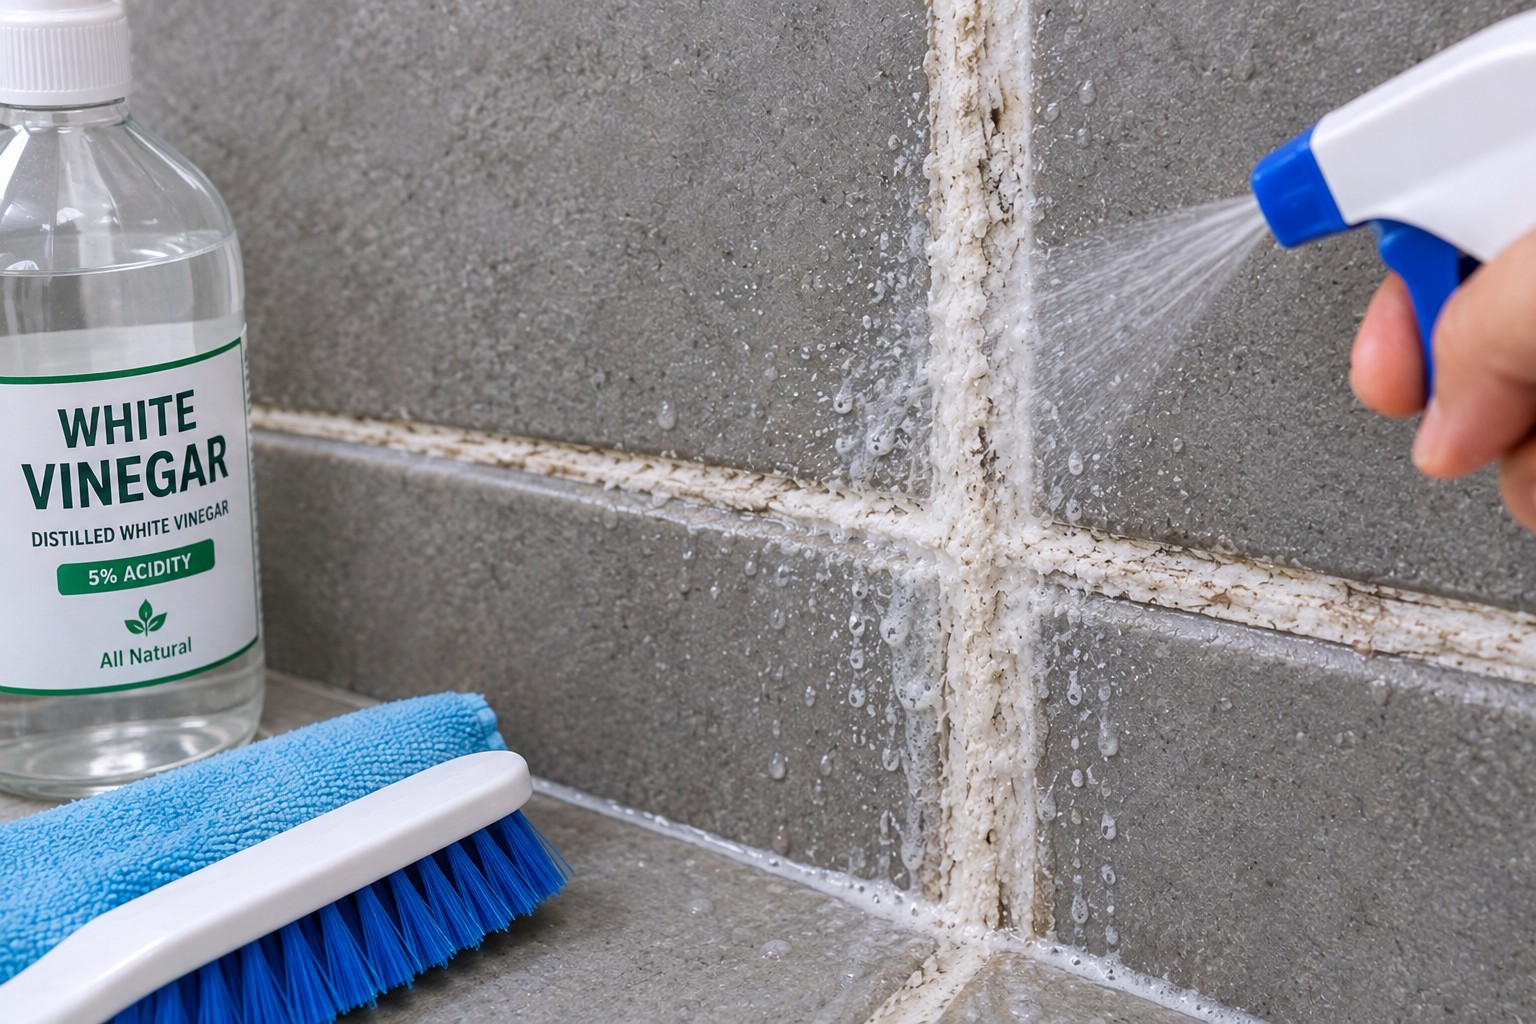
White vinegar diluted 50/50 with water works specifically on hard water mineral deposits — the white chalky marks that appear where water sits and evaporates. Apply, leave for 10 minutes, scrub, rinse. Effective on this specific problem, but useless on soap scum or mold, and it must never be used on natural stone tile.

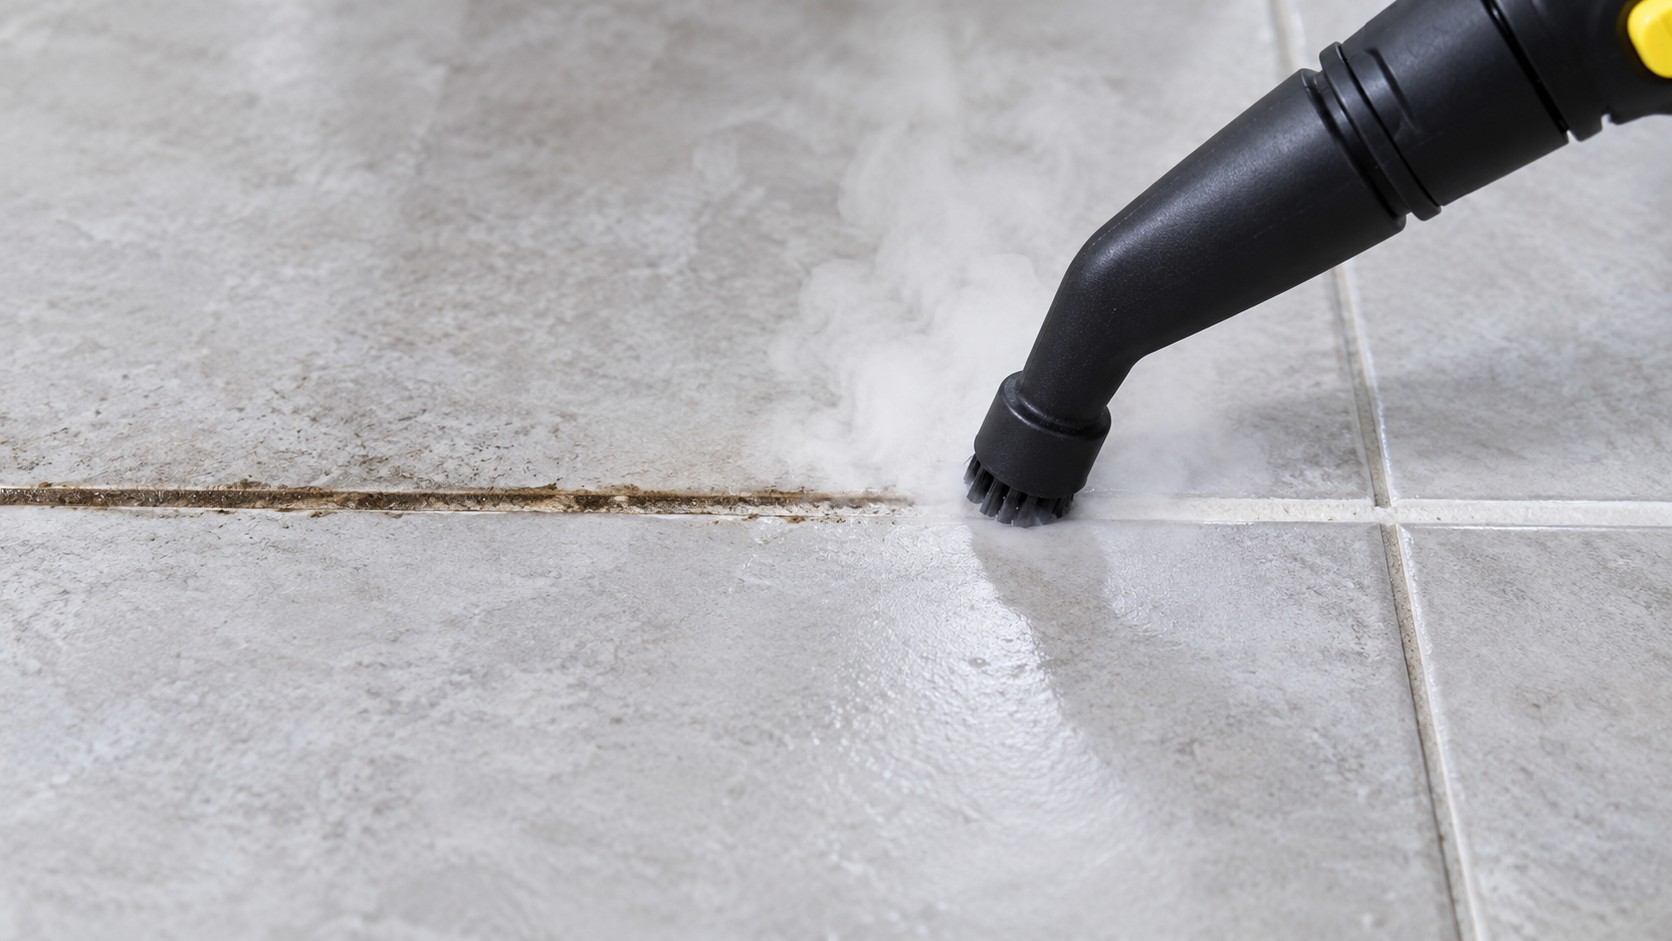
Steam cleaning is excellent for bathroom grout that you want to clean without any products at all. A steam tile grout cleaner with a narrow brush attachment gets into grout lines and uses heat to loosen dirt and kill surface mold without chemicals. Particularly useful for bathroom floors with heavy tile coverage.

When to Use a Commercial Bathroom Grout Cleaner

Natural methods have real limits. Grout that has been neglected for months, grout with deeply embedded mold, or grout that has turned genuinely dark and discolored will likely need a commercial cleaner to see meaningful results on the first clean. A dedicated commercial formula is also faster and more consistent on large bathroom floors where mixing paste repeatedly becomes impractical.

The best approach for most bathrooms: use a commercial cleaner once to get the grout back to a clean baseline, then maintain it with the baking soda and peroxide paste monthly. That combination is more effective and more economical than either approach alone. For a full comparison of the best commercial options, see our best tile grout cleaners guide.

How Often Should You Clean Bathroom Grout?

Daily Habits

  • Squeegee or wipe shower walls
  • Remove standing water from floor
  • Run exhaust fan 30 min after showering
  • Wipe up soap spills immediately

Weekly Maintenance

  • Spray cleaner on grout lines
  • Light scrub with grout brush
  • Rinse and dry thoroughly
  • Best for high-use or family bathrooms

Monthly Deep Clean

  • Full product application — longer dwell
  • All grout lines, floor and walls
  • Steam clean if available
  • Re-seal grout every 6–12 months

The frequency that keeps bathroom grout cleanest is not the most thorough — it is the most consistent. A 10-minute weekly wipe with a mild cleaner and grout brush prevents the kind of buildup that later needs an hour-long deep clean to shift. Getting into the habit of cleaning small stains while they are still fresh is the single biggest practical difference between bathroom grout that stays clean and grout that becomes a persistent problem.

Common Bathroom Grout Cleaning Mistakes

  • Not allowing dwell time Spraying cleaner and scrubbing immediately gives the product no time to penetrate grout pores and break down bonded residue. Most cleaners need a minimum of 5 minutes. Rushing this step is the most common reason grout cleaning produces disappointing results.
  • 🧽
    Using a general scrubbing pad instead of a grout brush Wide scrubbing pads clean tile surfaces but do not reach inside narrow grout lines. A dedicated grout brush with stiff, narrow bristles applies pressure directly to the grout channel where the dirt actually is.
  • 💧
    Not drying the bathroom after cleaning Leaving the bathroom wet after cleaning allows moisture back into the freshly cleaned grout almost immediately. Dry with a cloth or squeegee, then ventilate for 30 minutes minimum. Proper drying extends how long your clean lasts.
  • 🧪
    Using too much product More cleaner does not mean better results — it means more residue to rinse away and a higher chance of leaving product behind in grout lines. Follow the product guidelines. Dwell time matters far more than quantity.
  • Ignoring small stains until they become big ones A small soap scum mark cleaned within a week takes 30 seconds to remove. Left for a month it bonds to the grout and may need multiple treatments. Spot-cleaning as you go is more effective than infrequent deep cleaning.
  • 🪨
    Using harsh brushes that damage grout Metal bristle brushes or very coarse abrasive pads can scratch and gradually erode grout surfaces, making them more porous and prone to future staining. Use stiff nylon bristle grout brushes rather than metal tools.

Bathroom Tile and Grout Maintenance: Best Routine

Daily

  • Remove excess water from tile surfaces
  • Squeegee shower walls after use
  • Keep surfaces as dry as possible

Weekly

  • Wipe down tiles with mild cleaner
  • Scrub grout lines with brush
  • Rinse and dry thoroughly

Monthly

  • Deep clean all grout lines
  • Address any mold or staining
  • Apply grout sealer as needed

This routine works because it prevents problems rather than reacting to them. The daily steps — removing water and ventilating — cost almost no time but dramatically reduce the pace at which grout accumulates staining. The weekly scrub catches anything the daily habits miss before it bonds permanently. The monthly deep clean handles whatever still builds up despite the regular maintenance.

Expert Tips from Jack Martin

  • Run the exhaust fan for 30 minutes after every shower — not just while showering. The humidity that encourages mold and soap scum buildup peaks in the 10–20 minutes after the shower stops. This is the most effective single habit for keeping bathroom grout clean long-term.
  • Use a grout brush, not a toothbrush — a proper grout brush covers the same area in one-fifth the time and applies far more effective pressure. It is a £5–£10 tool that makes a genuinely noticeable difference in results.
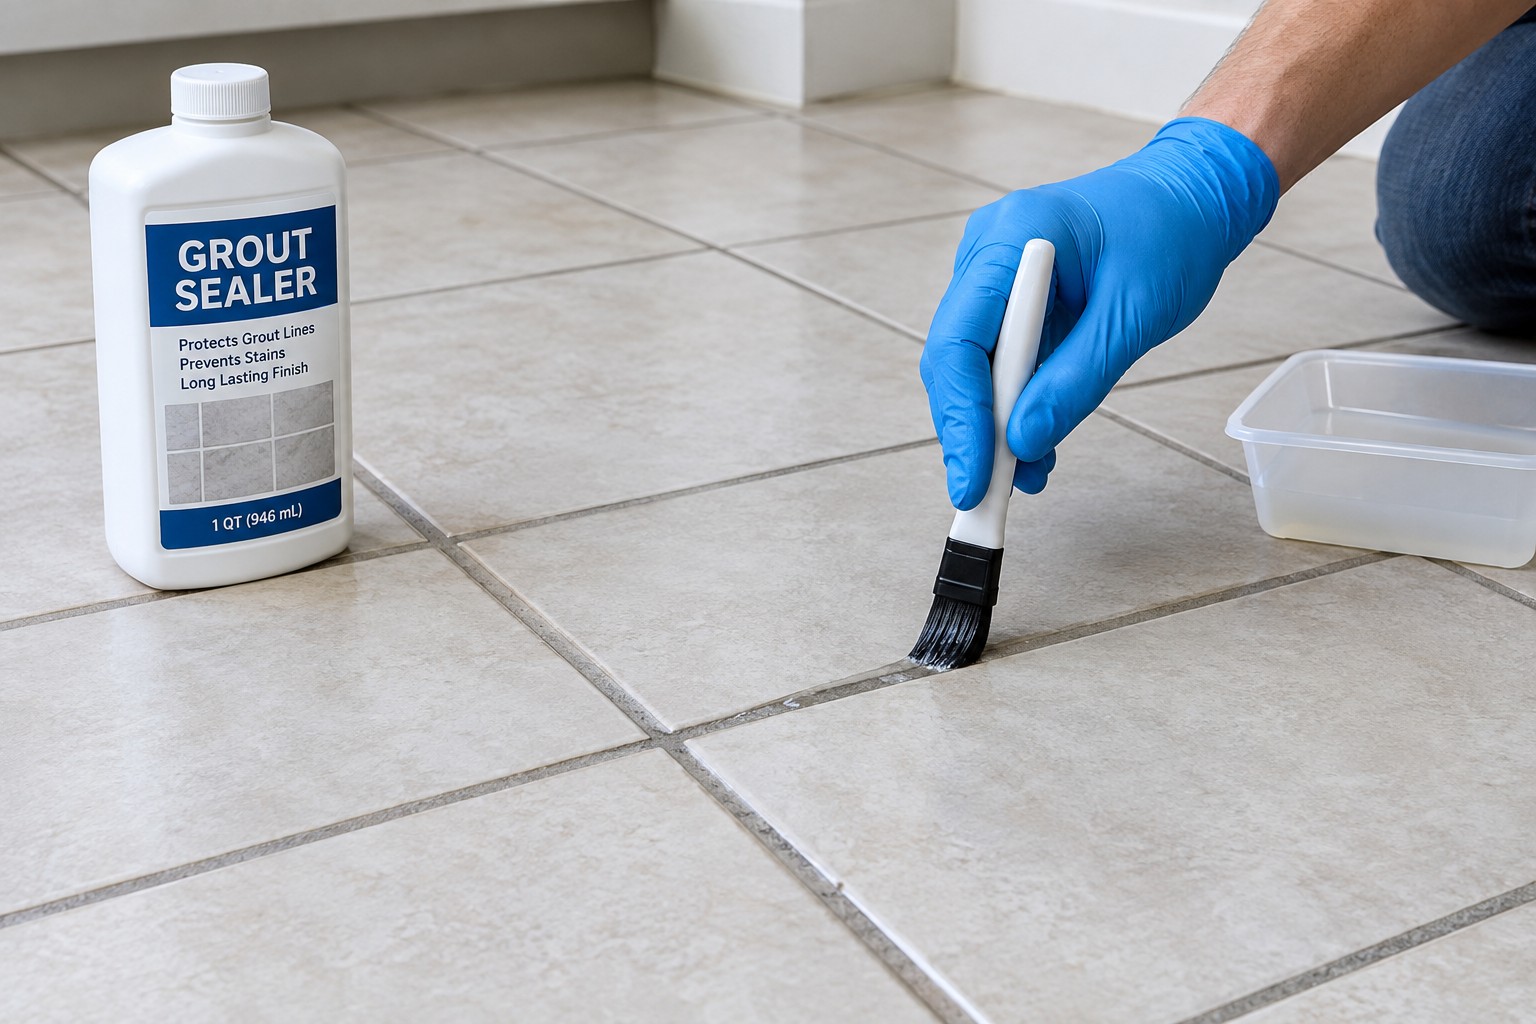
  • Seal grout every 6–12 months — sealed grout resists staining dramatically better because the surface pores are filled. Products like soap scum and mold cannot penetrate as easily. Apply sealant once the grout is completely dry after a deep clean. See our guide on how to seal grout in 7 steps.
  • Do not mix bleach and vinegar — even in a bathroom, this combination produces toxic chlorine gas. If you use both in your cleaning routine, rinse thoroughly between products and never apply one immediately after the other.
  • Address pink grout immediately — pink or orange-tinted grout is caused by Serratia marcescens bacteria, not mold. It spreads quickly in damp conditions but responds well to hydrogen peroxide-based cleaners. Consistent ventilation prevents it from returning.
  • Clean small stains fast — soap scum cleaned within the same week it appears wipes off in seconds. Left for a month, it requires significantly more product and effort. The smallest intervention done consistently saves the most time overall.

Frequently Asked Questions

What is the best bathroom grout cleaner?
The best bathroom grout cleaner depends on your grout condition and tile type. For regular maintenance on ceramic or porcelain tile, a baking soda and hydrogen peroxide paste is highly effective and inexpensive. For heavier staining, discoloration, or mold, a commercial grout cleaner with antimicrobial action and a longer dwell time delivers more consistent results. For natural stone tiles, only use pH-neutral cleaners specifically labeled as stone-safe.
How do I clean bathroom grout naturally?
The most effective natural method is a paste made from equal parts baking soda and 3% hydrogen peroxide. Apply it directly to grout lines, leave for 15–20 minutes, scrub with a stiff grout brush, and rinse well. For hard water marks specifically, diluted white vinegar (50/50 with water) works well — but never use it on natural stone tiles. For a chemical-free approach, a steam cleaner with a grout brush attachment is also highly effective on bathroom floor and wall grout.
Can I use tile cleaner on bathroom grout?
A standard tile cleaner can remove surface dirt from grout, but it is not designed to penetrate porous grout lines or tackle embedded staining, mold, or mineral deposits. For genuinely clean grout rather than just clean-looking tile, use a cleaner specifically formulated for grout. The difference in results is significant, particularly on grout that has not been deep cleaned recently.
How do I clean bathroom floor grout?
Sweep or vacuum the floor first to remove loose debris. Apply a bathroom floor grout cleaner directly to grout lines and allow it to sit for 5–15 minutes. Scrub with a narrow grout brush using back-and-forth strokes along each grout line. Rinse thoroughly with clean water and dry the floor with a mop or microfiber cloth. For large bathroom floors, work in sections so the product does not dry out before you scrub it.
Why does bathroom grout turn dark?
Bathroom grout turns dark primarily due to a combination of moisture absorption, soap and shampoo residue, mold and mildew growth, and mineral deposits from hard water. Because grout is porous, it absorbs these substances over time and they discolor the material from inside the grout rather than just on the surface. This is why surface wiping often has limited effect — the discoloration needs a cleaner that penetrates the grout pores.
How often should bathroom grout be cleaned?
High-use family bathrooms benefit from a light grout clean every week and a deeper treatment monthly. Less frequently used bathrooms can go two to three weeks between light cleans. The most effective maintenance approach is not frequency of deep cleaning — it is the daily habit of removing moisture from tile surfaces and ventilating the bathroom after every shower, which dramatically slows the rate at which grout stains in the first place.
Does grout cleaner damage tiles?
A suitable grout cleaner used correctly should not damage tiles. The main risks are acid-based cleaners on natural stone (causes etching), bleach-based cleaners on colored grout (causes bleaching), and very abrasive formulas on polished tile surfaces. Always check the cleaner's compatibility with your specific tile type before using, and test a small hidden area first if you are unsure.
Should I seal bathroom grout after cleaning?
Yes, and it makes a significant practical difference. Grout sealer fills the surface pores that absorb dirt, soap scum, and mold spores, making every future clean faster and more effective. Apply sealer once the grout is completely dry after a deep clean — wait at least 24 hours. Most bathroom grout benefits from resealing every 6–12 months depending on how heavily the bathroom is used.

Key Takeaways

  • Bathroom grout gets dirty faster than most surfaces because it is porous, narrow, and permanently exposed to moisture, soap, and humidity.
  • A dedicated bathroom grout cleaner penetrates grout pores and targets the specific problems tiles face — soap scum, mold, and mineral deposits — in ways a general tile cleaner cannot.
  • Dwell time is the most important part of the process — leave the cleaner for at least 5–15 minutes before scrubbing. Rushing this step is the main reason results disappoint.
  • A proper grout brush produces noticeably better results than a toothbrush or general scrubber — it is one of the most cost-effective cleaning upgrades you can make.
  • Natural stone tiles (marble, limestone, travertine) require pH-neutral cleaners only. Acid or bleach-based products cause permanent damage.
  • Dry the bathroom thoroughly after every clean and run the exhaust fan for 30 minutes after every shower. These habits slow re-staining more than any product can.
  • Seal grout every 6–12 months after deep cleaning to dramatically reduce how quickly stains, mold, and soap scum return.

Conclusion

A clean bathroom genuinely requires attention to both tiles and grout — and the two need different approaches. Tiles are smooth, non-porous, and respond to almost any surface cleaner. Grout is porous, narrow, and needs a product that can penetrate and break down what has bonded inside those tiny channels over weeks of daily use.

The good news is that once you have the right product and the right technique — proper dwell time, a dedicated grout brush, and thorough rinsing and drying — bathroom grout cleaning becomes genuinely manageable. Not a major project. Not something you dread. A 10-minute weekly maintenance session and a deeper monthly clean is all most bathrooms need to stay looking genuinely fresh.

Whether you are dealing with soap scum on shower wall grout, hard water marks on bathroom floor tiles, or mold that has been building up for longer than you want to admit, the solution is the same: choose the right cleaner for your tile type, give it time to work, use the right brush, and build a consistent maintenance habit. Everything else is detail.

For more on specific cleaning methods, explore our guides on steam cleaning grout, homemade grout cleaner recipes, and the best grout cleaner for shower tiles.

Looking for the Right Grout Cleaner?

Explore our complete guide to the best grout cleaning products for every bathroom surface, tile type, and cleaning challenge.

See Best Grout Cleaners →
				
					console.log( 'Code is Poetry' );


Orange Peel Vinegar Cleaner: A Simple Eco-Friendly Cleaning Hack

In an era where more families are paying attention to the products they use inside their homes, natural cleaning solutions are becoming more popular than ever. One homemade cleaner that continues trending across the United States is Orange Peel Vinegar Cleaner. This powerful DIY solution combines white vinegar with fresh citrus peels to create a cleaner that helps remove grease, grime, soap scum, and odors without relying on harsh chemicals. Homeowners love it because it is affordable, eco-friendly, easy to make, and surprisingly effective for daily cleaning tasks.

Unlike many store-bought sprays filled with artificial fragrances and strong chemicals, homemade vinegar and orange peel cleaner uses simple ingredients that most people already have at home. The natural oils inside orange peels work together with vinegar to create a multi-purpose cleaner suitable for kitchens, bathrooms, tile floors, and many household surfaces. Whether you are searching for how to make vinegar and orange peel cleaner, wondering how long to soak orange peels in vinegar, or looking for a natural orange peel vinegar bug spray, this guide covers everything you need to know.

Why Orange Peel Vinegar Cleaner Is Becoming So Popular

The growing popularity of natural cleaning products is not just a trend. Many people are trying to reduce chemical exposure inside their homes while still maintaining clean and fresh spaces. Traditional cleaning sprays often contain strong synthetic ingredients that can leave behind overpowering smells and chemical residues.

Orange Peel Vinegar Cleaner offers a simple alternative using the natural power of citrus oils and vinegar acidity.

The Science Behind Orange Peel and Vinegar Cleaner

White vinegar contains acetic acid, which helps dissolve mineral buildup, soap scum, grease, and sticky residue. Orange peels contain a natural oil called limonene, which is commonly used in industrial degreasers because of its ability to break down oils and grime naturally.

When orange peels soak in vinegar, the citrus oils slowly infuse into the liquid, creating a cleaner that is stronger and fresher than plain vinegar alone.

Benefits of Orange Peel CleanerBenefits of Orange Peel Cleaner

  • Fresh natural citrus scent
  • Low-cost homemade cleaner
  • Reduces plastic cleaning waste
  • Natural grease-cutting power
  • Eco-friendly cleaning option
  • Uses leftover orange peels
  • Multipurpose household cleaner

How to Make Vinegar and Orange Peel Cleaner

One reason this DIY cleaner has become so popular is because it requires very little effort and only a few ingredients. Instead of throwing away orange peels after eating fruit, you can turn them into a practical household cleaner.

Orange Peel and Vinegar Cleaner Recipe

Ingredients

  • Peels from 4–6 oranges
  • White distilled vinegar
  • Large glass jar
  • Spray bottle
  • Water for dilution

Step-by-Step Instructions

Start by placing fresh orange peels into a large glass jar. Fill the container about halfway or slightly more depending on how strong you want the citrus infusion to become. Pour white vinegar into the jar until all peels are fully covered. It is important to keep the peels submerged to help prevent mold growth during the soaking process.

Seal the jar tightly and place it in a cool dark cabinet. Over time, the vinegar will pull natural oils from the peels, creating a citrus-infused cleaning solution with improved grease-fighting power and a softer scent.

Once the soaking process is complete, strain the liquid carefully and transfer it into a spray bottle. Before using, dilute the concentrate with equal parts water.

How Long to Soak Orange Peels in Vinegar

One of the most common questions homeowners ask is: How Long Do You Leave Orange Peels in Vinegar?

The soaking process is important because this is how the vinegar absorbs the natural citrus oils from the peels.

Recommended Soaking Time

  • Minimum soaking time: 7 days
  • Best soaking period: 2 weeks
  • Strong citrus scent: Up to 4 weeks
  • Store in cool dark place during infusion

Most DIY cleaning experts recommend allowing the peels to soak for about two weeks. During this time, the vinegar becomes darker in color and develops a stronger orange scent. The longer the peels soak, the more concentrated the citrus oils become.

Pro Tip

Gently shake the jar every few days to help circulate the vinegar and improve the infusion process.

Homemade Vinegar and Orange Peel Cleaner for Kitchens

The kitchen is one of the best places to use Orange Peel Vinegar Cleaner because grease and sticky residue collect quickly on surfaces. The limonene from the citrus peels helps break down oily buildup while vinegar helps dissolve grime and eliminate odors.

Many homeowners use this cleaner on:Orange Peel Vinegar Cleaner

  • Kitchen counters
  • Cabinet doors
  • Refrigerator shelves
  • Microwave exteriors
  • Stovetops
  • Sink surfaces

For stubborn grease, spray the cleaner directly on the surface and allow it to sit for several minutes before wiping clean with a microfiber cloth.

Orange Peel Cleaner for Bathrooms and Tile

Bathrooms often develop soap scum, hard water spots, and dirty grout lines. Orange Peel Vinegar Cleaner works well in bathrooms because vinegar naturally dissolves mineral buildup while citrus oils help freshen the room.

Best Bathroom Uses

  • Shower doors
  • Bathroom sinks
  • Tile walls
  • Faucets
  • Toilet exteriors
  • Bathroom counters

For grout cleaning, spray directly onto grout lines, let the solution sit for several minutes, then scrub gently using a small brush.

How to Use Your DIY Cleaning Spray

Once your cleaner is ready, using it properly helps improve cleaning performance and protect surfaces.

How to Use Orange Peel and Vinegar Cleaner

The best method is to dilute the cleaner before spraying. Mixing equal parts concentrate and water creates a balanced cleaning solution suitable for most surfaces.

Simple Cleaning Process

  1. Spray onto dirty surface
  2. Allow cleaner to sit briefly
  3. Wipe with microfiber cloth
  4. Repeat if necessary for heavy buildup

For grease or soap scum, allowing the cleaner to sit for 2–5 minutes helps loosen stubborn grime.

Orange Peel and Vinegar Bug Spray

Another reason this cleaner has become popular is because some homeowners use it as a natural orange peel and vinegar bug spray. Citrus scents and vinegar may help discourage certain insects around doors, patios, and windows.

Vinegar and Orange Peel Bug Spray Uses

Many people spray it around:

  • Window frames
  • Doorways
  • Outdoor tables
  • Patio furniture
  • Trash bins
  • Garden edges

While this homemade spray may help repel ants and some insects naturally, it is not a replacement for professional pest control in serious infestations.

Why Homeowners Prefer Natural DIY Cleaners

Natural DIY cleaners continue growing in popularity because homeowners want practical alternatives to heavily scented chemical products. Homemade citrus cleaners help reduce indoor chemical exposure while also lowering cleaning costs.

Another major advantage is sustainability. Instead of throwing away citrus peels, they are reused to create an effective household product.

Reasons People Choose DIY Cleaners

  • Better indoor air quality
  • Reduced plastic waste
  • Budget-friendly cleaning
  • Eco-conscious lifestyle
  • Safer around food preparation areas

Common Mistakes to Avoid

Even though Orange Peel Vinegar Cleaner is natural, vinegar is still acidic and should not be used on every surface.

Avoid Using On

  • Granite countertops
  • Marble surfaces
  • Natural stone tile
  • Waxed wood floors
  • Electronics and screens

It is also important never to mix vinegar with bleach because harmful fumes can form.

Final Thoughts

Orange Peel Vinegar Cleaner is more than just a DIY trend. It is an affordable, eco-friendly, and practical cleaning solution that helps homeowners reduce harsh chemicals while still keeping their homes fresh and clean. Whether you want a natural kitchen degreaser, bathroom cleaner, tile spray, or even a simple orange peel vinegar bug spray, this homemade cleaner offers a versatile option using ingredients already available in most homes. By learning how to make vinegar and orange peel cleaner and understanding how long to soak orange peels in vinegar, you can create a powerful cleaning solution that supports a cleaner and healthier home naturally.

Frequently Asked Questions

Yes, orange peel vinegar cleaner can help remove grease from many household surfaces. The acidity of vinegar works to break down grease and grime, while the natural citrus oils found in orange peels provide additional degreasing properties. After soaking orange peels in vinegar for 2–4 weeks, the infused cleaner can be used on countertops, stovetops, sinks, and other non-porous surfaces to cut through light to moderate grease buildup naturally.

Orange peel and vinegar bug spray can be effective as a natural insect repellent for certain pests, including ants, fruit flies, and some crawling insects. The strong scent of citrus oils from orange peels, combined with the acidity of vinegar, may help deter bugs from treated areas. While it can reduce pest activity and serve as a chemical-free alternative, it is generally less effective than commercial insecticides for severe infestations and works best as a preventive measure.

yes, you can use lemon peels instead of orange peels when making citrus-infused vinegar. In fact, many people prefer lemon peels because they contain high levels of natural citrus oils that provide a fresh scent and excellent cleaning properties. Simply place the lemon peels in a jar, cover them with white vinegar, and let the mixture steep for 2 to 4 weeks. Once strained, the lemon-infused vinegar can be used as a natural cleaner, deodorizer, and grease-cutting solution for a variety of household surfaces.

How to Remove Hard Water Stains from Tile and Grout (USA Guide 2026)

Hard Water Stains are one of the most persistent and frustrating cleaning problems faced by homeowners across the United States, especially in areas where water contains high levels of minerals like calcium and magnesium. If you’ve ever noticed a cloudy white film on your bathroom tiles, chalky residue on your shower walls, or darkened grout lines that refuse to come clean no matter how much you scrub, then you are dealing with Hard Water Stains. These stains not only make your home look dull and unclean but can also gradually damage the surface of tiles and weaken grout if left untreated for long periods. In this complete USA-focused guide, you will learn exactly how to remove Hard Water Stains from tile and grout using proven, safe, and effective methods that actually work in real homes.

Understanding Hard Water Stains in American Homes

Hard Water Stains are a widespread problem across the United States, especially in states like Texas, California, Arizona, and Nevada where water contains a high concentration of minerals such as calcium and magnesium.

Hard Water Stains in American Homes

When this mineral-rich water is used daily in showers, sinks, and kitchens, it slowly leaves behind deposits as it evaporates. These deposits build up over time, forming stubborn Hard Water Stains that cling tightly to tile surfaces and penetrate deep into porous grout lines. What may begin as a faint white haze can gradually turn into thick, crusty residue that becomes increasingly difficult to remove using standard household cleaners. Because of this, understanding how Hard Water Stains form and behave is essential for choosing the right cleaning methods and preventing long-term damage to your tiles and grout.

  Key Points to Understand

  • Hard Water Stains are mineral deposits left behind after water evaporation
  • Common in US regions with high mineral (calcium & magnesium) content
  • Frequently found on:
  • Start as a light white film but can become thick and stubborn over time
  • Regular cleaners often fail to remove deep buildup
  • Early prevention and proper cleaning methods are crucial

By understanding the root cause of Hard Water Stains, you can take the right steps to remove them effectively and keep your surfaces clean for longer.

My Real Experience Cleaning Tile and Grout at Home

When I first encountered this issue in my own home, I assumed a standard bathroom cleaner would be enough to restore the shine of my tiles. However, after multiple attempts, the results were disappointing. The surface dirt disappeared, but the white mineral stains remained, and the grout still looked dark and uneven. It was clear that regular cleaning methods were not designed to tackle mineral deposits. After researching and experimenting with different approaches, I tried a simple vinegar-based solution and allowed it to sit on the tiles before lightly scrubbing. The difference was immediately noticeable. The tiles regained much of their original shine, and the grout began to lighten after repeated treatments. This experience highlighted that removing Hard Water Stains is not about scrubbing harder but about using the right technique and giving the solution time to break down the minerals.

Step-by-Step Method to Remove Hard Water Stains from Tile and Grout

Removing Hard Water Stains from tile and grout requires the right method so that mineral buildup is dissolved without damaging the surface. A simple solution made with white vinegar and warm water works effectively because vinegar helps break down calcium and magnesium deposits that cause Hard Water Stains.

Hard Water Stains Step-by-Step

Start by mixing equal parts vinegar and warm water, then spray it evenly across the affected tiles and grout lines. Make sure the surface is fully covered so the solution can work properly. Let it sit for 10 to 15 minutes to loosen the buildup. After that, gently scrub using a soft-bristle brush or sponge to lift the stains without harming the grout. Once the stains begin to fade, rinse the area thoroughly with clean water and wipe it dry with a microfiber cloth to prevent new Hard Water Stains from forming.

Cleaning Steps

  • Mix equal parts white vinegar and warm water
  • Spray the solution on tile and grout
  • Leave it for 10–15 minutes
  • Gently scrub with a soft brush or sponge
  • Rinse with clean water
  • Dry the surface with a microfiber cloth

Important Tips

  • Use gentle pressure while scrubbing
  • Avoid abrasive tools that can damage grout
  • Always dry the surface after cleaning to reduce buildup

Deep Cleaning Grout for Stubborn Stains

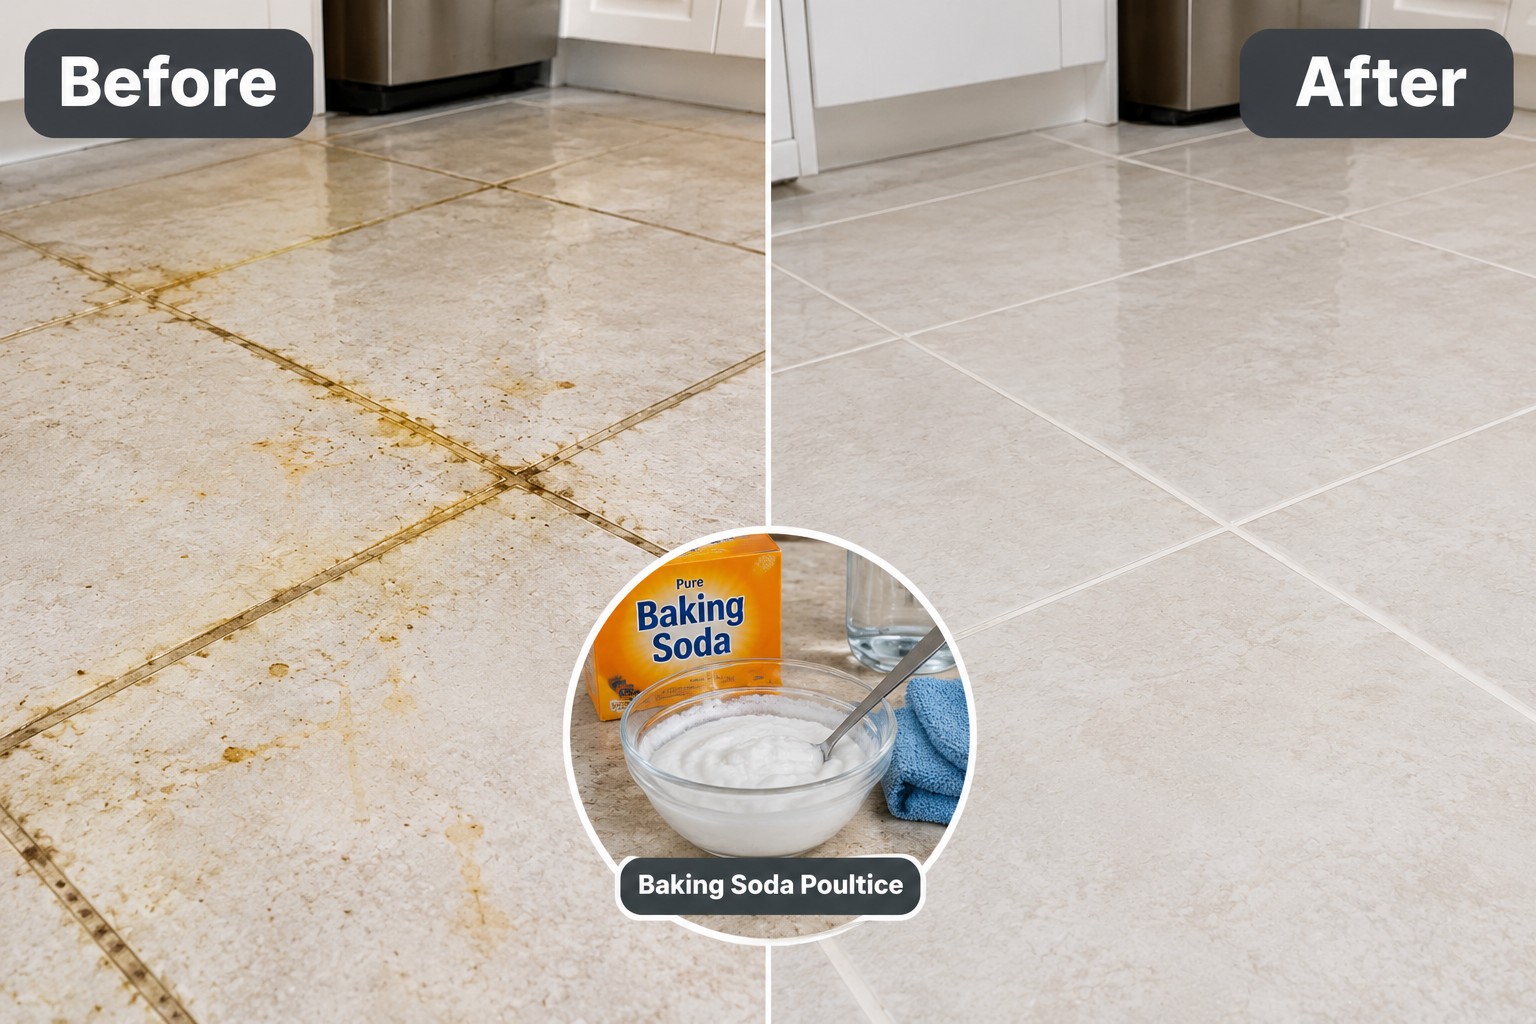
In cases where grout lines are heavily stained and vinegar alone is not enough, a baking soda paste can significantly improve results. Baking soda acts as a mild abrasive that helps lift deep-set stains without causing damage. To use this method, mix baking soda with a small amount of water to create a thick paste and apply it directly to the grout lines. Once applied, spray vinegar over the paste, which will create a fizzing reaction that helps break down the mineral buildup. Allow the mixture to sit for several minutes before gently scrubbing with a brush. This method is particularly effective for restoring grout that has become discolored due to long-term exposure to Hard Water Stains.

When to Use Commercial Cleaners

Natural methods work well for most cases, but sometimes Hard Water Stains become too stubborn to remove with basic solutions. When mineral buildup has hardened over time or covers large areas, using a commercial cleaner becomes necessary. These cleaners are specially formulated to break down tough deposits quickly and restore the appearance of tile and grout. However, not all products are suitable for every surface, so choosing the right one is important to avoid damage.

When You Should Use Them

  • When Hard Water Stains do not respond to vinegar or baking soda
  • If buildup is thick, crusty, or has been there for a long time
  • For large areas that need faster and deeper cleaning
  • When grout lines remain dark after multiple cleaning attempts

How to Use Safely

  • Choose a cleaner made for tile and grout surfaces
  • Always test on a small hidden area first
  • Follow product instructions carefully
  • Avoid leaving the cleaner on for too long
  • Rinse thoroughly after use

Important Points

  • Strong cleaners can remove stains faster but may damage surfaces if overused
  • Frequent use of harsh chemicals can weaken grout over time
  • Use only when needed, not as a regular cleaning solution

Using commercial products the right way helps remove stubborn Hard Water Stains effectively while keeping your tile and grout safe.

Common Mistakes That Make Hard Water Stains Worse

When dealing with Hard Water Stains, many homeowners unknowingly make cleaning mistakes that can worsen the problem instead of fixing it. These stains require the right approach, and using incorrect methods can damage tiles, weaken grout, and make the buildup even harder to remove. Understanding what not to do is just as important as knowing the correct cleaning method.

Mistakes to Avoid

  • Using abrasive tools like steel wool or hard brushes that scratch tiles and damage grout
  • Scrubbing too aggressively, which pushes Hard Water Stains deeper into grout lines
  • Mixing different cleaning chemicals without proper knowledge, leading to harmful reactions
  • Using strong cleaners too frequently, which can weaken grout over time
  • Skipping regular cleaning, allowing mineral deposits to build up and harden
  • Not rinsing properly, leaving residue that attracts more buildup

Why These Mistakes Matter

  • Damaged grout becomes more porous and absorbs more stains
  • Scratched tiles lose their shine and become harder to clean
  • Built-up Hard Water Stains become thicker and more stubborn over time
  • Improper cleaning can lead to long-term surface damage

Better Approach

  • Use gentle tools like soft brushes or sponges
  • Apply cleaning solutions and let them sit before scrubbing
  • Clean regularly to prevent heavy buildup
  • Always rinse and dry surfaces after cleaning

Avoiding these common mistakes will help you remove Hard Water Stains more effectively and keep your tile and grout in good condition for a longer time.

Preventing Hard Water Stains in the Long Term

Prevention is always easier than removal when it comes to Hard Water Stains. One of the simplest ways to reduce buildup is to wipe down tiles and shower walls after each use, preventing water from evaporating and leaving behind minerals. Installing a water softener is another effective long-term solution, as it reduces the mineral content in your water supply. Using a squeegee on glass and tile surfaces after showering can also significantly minimize residue. Regular maintenance, even if it involves quick weekly cleaning, can prevent stains from becoming severe and save time in the long run.

Choosing the Right Tools for Effective Cleaning

Removing Hard Water Stains from tile and grout becomes much easier when you use the right tools. The wrong tools can scratch tile surfaces, damage grout, or spread stains instead of removing them. On the other hand, proper cleaning tools help lift mineral deposits safely while protecting the finish of your tiles. Choosing the right combination of brushes, cloths, and applicators ensures better results with less effort and helps maintain surfaces for the long term.

Essential Cleaning Tools

  • Soft-bristle brush
    Ideal for grout lines, as it removes Hard Water Stains without damaging or wearing down the grout
  • Microfiber cloth
    Perfect for wiping and drying tiles, leaving no lint, streaks, or residue behind
  • Non-abrasive sponge
    Suitable for general tile cleaning and safe for delicate surfaces
  • Spray bottle
    Helps apply cleaning solutions evenly across tiles and grout for better coverage

Tools to Avoid

  • Hard brushes that can erode grout
  • Steel wool or metal scrubbers that scratch tile surfaces
  • Rough pads that leave permanent marks

Why the Right Tools Matter

  • Prevent damage while removing Hard Water Stains
  • Improve cleaning efficiency with less effort
  • Help solutions work more effectively on mineral buildup
  • Extend the life of tile and grout surfaces

Using the correct tools not only makes cleaning easier but also ensures that Hard Water Stains are removed safely without causing long-term damage to your tiles and grout.

When Cleaning Is Not Enough

There are situations where even the best cleaning methods cannot fully restore grout, especially if it has been neglected for years or has suffered structural damage. In such cases, regrouting may be necessary. This involves removing the old grout and applying a new layer, which can completely transform the appearance of your tiles. While this requires more effort and cost, it is often the best solution for severely damaged grout that cannot be restored through cleaning alone.

Final Thoughts

Dealing with Hard Water Stains from tile and grout may seem overwhelming at first, but with the right approach, it becomes a manageable task. The key is to use effective cleaning solutions like vinegar and baking soda, apply them correctly, and maintain a consistent cleaning routine. For homeowners in the United States, where hard water is a common issue, adopting preventive measures such as drying surfaces and using water softeners can make a significant difference. By following the methods outlined in this guide, you can restore the appearance of your tiles, protect your grout, and maintain a cleaner, healthier living space.

FAQ

1.How to remove hard water stains?
Hard water stains can be effectively removed by using a vinegar and water solution that helps dissolve mineral deposits. Spray the solution on the affected surface, allow it to sit for several minutes, and then gently scrub before rinsing thoroughly with clean water.

2.How to remove hard water stains from plastic?
To remove hard water stains from plastic surfaces, a baking soda paste works well. Apply the paste, gently rub the area with a soft cloth or sponge, and rinse with water to restore the surface without causing damage.

3.How do you remove hard water stains from windows?
Hard water stains on windows can be removed using a vinegar solution sprayed directly onto the glass. After letting it sit briefly, wipe it clean with a microfiber cloth to achieve a streak-free finish.

4.How to get rid of hard water stains in shower?
Regular use of a vinegar-based cleaner can help remove and prevent hard water stains in the shower. Cleaning the area weekly and wiping surfaces dry after use can significantly reduce buildup over time.

5.How to remove hard water stains from car windows?
Car windows can be cleaned using a vinegar and water mixture or a specialized glass cleaner. Apply the solution, wipe gently with a microfiber cloth, and repeat if necessary for stubborn stains.

6.Hard water stain remover from tiles in bathroom?
Bathroom tiles can be cleaned using natural solutions like vinegar and baking soda or with a commercial tile-safe cleaner designed to remove mineral deposits effectively.

7.How to clean shower tiles without scrubbing?
To clean shower tiles without scrubbing, spray a vinegar-based or commercial cleaner on the surface, let it sit for an extended period, and then rinse thoroughly, allowing the solution to break down the stains on its own.

What Are the Benefits of Professional HVAC Cleaning Services?

Your HVAC system works every day to keep your home comfortable, but over time dust, allergens, and debris can build up inside the ducts and vents. This buildup can affect indoor air quality and reduce system efficiency. That is why many homeowners choose HVAC Cleaning Services to keep their heating and cooling systems running smoothly. Just like using a grout cleaner helps maintain clean tile lines, professional HVAC cleaning helps maintain cleaner air throughout your home.

What Are HVAC Cleaning Services?

HVAC Cleaning Services involve cleaning different parts of the heating and cooling system such as air ducts, vents, coils, and filters. Professionals use specialized tools and equipment to remove dust, dirt, and contaminants that collect inside the system. Over time these particles circulate through your home every time the HVAC system runs.

Why HVAC Systems Get Dirty

HVAC systems naturally collect dust and debris because they move air throughout the house. Outdoor pollutants, pet hair, pollen, and everyday dust can enter the duct system. Moisture can also cause mold growth inside ducts. Without regular cleaning, these contaminants continue to circulate in the air.

Benefits of Professional HVAC Cleaning Services

Home HVAC Cleaning Services?

Professional HVAC Cleaning Services provide several important benefits for homeowners. Clean systems help improve air quality, increase efficiency, and create a healthier living environment.

Improved Indoor Air Quality

One of the biggest advantages of professional cleaning is better indoor air quality. Dust, mold spores, and allergens can build up inside ductwork and spread throughout the home. Cleaning removes these pollutants and helps reduce breathing problems and allergies.

Better Energy Efficiency

A dirty HVAC system has to work harder to push air through blocked ducts and filters. This extra effort increases energy use and raises utility bills. Clean ducts allow air to flow freely, helping the system run more efficiently and use less energy.

Longer HVAC System Lifespan

Heating and cooling systems are expensive to repair or replace. Dust and debris can damage important components such as motors, fans, and coils. Regular HVAC Cleaning Services help reduce wear and tear and extend the life of the equipment.

Reduction in Dust Inside the Home

Many homeowners notice that dust quickly returns to furniture and floors even after cleaning. This often happens because dust is circulating through dirty air ducts. Once ducts are professionally cleaned, less dust moves through the home.

Elimination of Unpleasant Odors

Musty or stale smells sometimes appear when the HVAC system is running. These odors may come from mold, dust buildup, or trapped debris inside the ducts. Professional cleaning removes these sources and improves the freshness of indoor air.

Signs Your HVAC System Needs Cleaning

There are several signs that indicate your HVAC system may need professional cleaning.

Excess Dust Around Vents

Dust buildup around vents or registers often means dust is circulating through the duct system.

Allergy Symptoms Indoors

Frequent sneezing, coughing, or irritation when indoors may indicate poor air quality caused by dirty ducts.

Weak Airflow

If airflow from vents feels weaker than usual, debris inside the ductwork could be blocking air movement.

Unusual Smells

Strange odors when the HVAC system turns on can be caused by mold or dust inside the system.

Professional HVAC Cleaning vs DIY Cleaning

Some homeowners try to clean vents and ducts themselves, but DIY cleaning usually only removes surface dust.

DIY Cleaning

Homeowners can vacuum vents, wipe registers, and replace air filters regularly. These steps help with basic maintenance but cannot clean the entire system.

Professional HVAC Cleaning Services

Professionals use powerful vacuum systems and specialized brushes that reach deep inside the ductwork. This allows them to remove contaminants from areas that are impossible to clean with regular household tools.

How Often Should HVAC Systems Be Cleaned?

Most experts recommend scheduling HVAC Cleaning Services every three to five years. However, some homes may need cleaning more frequently depending on living conditions.

How Often Should HVAC Systems Be Cleaned?

Homes with pets, smokers, or people with allergies often require more frequent cleaning. Newly renovated homes may also need duct cleaning because construction dust can enter the system.

HVAC Cleaning and Overall Home Cleanliness

Many homeowners focus on cleaning visible areas such as floors, countertops, and tile surfaces. Products like a grout cleaner are commonly used to remove dirt from tile grout lines. While this helps keep surfaces clean, indoor air quality also plays an important role in maintaining a healthy home.

Even if floors and tiles are spotless, dirty air ducts can spread dust throughout the house. Professional HVAC cleaning works together with regular home cleaning to create a healthier indoor environment.

What Happens During Professional HVAC Cleaning?

Professional cleaning services follow a step-by-step process to clean the entire HVAC system.

Inspection

Technicians inspect the system to identify dust buildup, mold, or blockages inside the ducts.

Duct Cleaning

Specialized vacuum equipment removes dust and debris from air ducts and vents.

Component Cleaning

Important parts such as coils, fans, and blowers are cleaned to improve system performance.

Airflow Testing

After cleaning, technicians check airflow to ensure the system is operating efficiently.

Tips to Keep Your HVAC System Clean

Regular maintenance can help keep your HVAC system clean between professional services.

Change Air Filters Regularly

Replacing filters every one to three months helps prevent dust from entering the duct system.

Keep Vents Clean

Dust and vacuum vents regularly to reduce buildup around registers.

Schedule Routine Inspections

Annual HVAC inspections help identify problems before they become serious.

Maintain a Clean Home

Keeping floors and surfaces clean and using products like a grout cleaner for tile areas helps reduce dust that can enter the HVAC system.

Frequently Asked Questions

What are HVAC Cleaning Services?

HVAC Cleaning Services involve removing dust, dirt, and contaminants from air ducts, vents, and system components to improve air quality and efficiency.

Do HVAC Cleaning Services improve air quality?

Yes, cleaning removes allergens and pollutants that circulate through the air, helping improve indoor air quality.

How long does HVAC cleaning take?

Most professional HVAC cleaning services take between two and four hours depending on the size of the home and the condition of the duct system.

Is HVAC cleaning worth the cost?

For many homeowners, the benefits such as improved air quality, energy savings, and longer system life make the service worthwhile.

How often should HVAC systems be cleaned?

Experts usually recommend cleaning every three to five years, although homes with pets or allergies may require more frequent cleaning.

Can HVAC cleaning reduce dust in the home?

Yes, removing dust buildup inside ducts can reduce the amount of dust circulating through the house.

Is HVAC cleaning similar to using a grout cleaner?

Not exactly. A grout cleaner removes dirt from tile grout lines, while HVAC cleaning removes dust and contaminants from the air circulation system.

Final Thoughts

Professional HVAC Cleaning Services play an important role in maintaining a healthy and comfortable home. Clean ducts help improve indoor air quality, increase energy efficiency, and extend the lifespan of your HVAC system.

Just like regular home cleaning and using a grout cleaner helps maintain clean surfaces, keeping your HVAC system clean ensures that the air circulating through your home remains fresh and healthy. Investing in professional cleaning can make a noticeable difference in both comfort and overall home maintenance.

Which Areas of Your Home Face the Grout Problems?

Grout plays an important role in keeping tiled surfaces strong and visually appealing, but it is also one of the first things to show signs of wear. Even if your tiles look clean, stained or damaged grout can make an entire room appear dirty or poorly maintained. Understanding which areas of your home face the most grout problems helps you take the right preventive steps and choose the right grout cleaner or homemade tile grout cleaner before stains become permanent.

Different areas of a home experience different types of stress. Some deal with moisture every day, others with grease, and some with constant foot traffic. Each of these conditions affects grout in a unique way.

Bathroom Areas With the Most Grout Issues

Bathroom grout Problems

Bathrooms are the most common place for grout problems.

Reasons bathroom grout deteriorates quickly

  • Constant exposure to water and humidity
  • Soap, shampoo, and body wash residue
  • Mold and mildew growth
  • Limited ventilation in many bathrooms

Grout around showers, tubs, and sinks absorbs moisture over time. When it does not dry properly, it becomes a breeding ground for mold and discoloration.

A homemade tile grout cleaner made with baking soda and hydrogen peroxide can be effective for routine bathroom maintenance when used consistently.

Kitchen Grout Problem Areas

Kitchen Grout Problem

Kitchens present a different set of challenges for grout.

Common causes of kitchen grout staining

  • Cooking grease and oil splatter
  • Food spills and sauces
  • Heat from stoves and ovens
  • Heavy foot traffic on kitchen floors

Grout behind stoves and sinks tends to darken faster because grease particles stick to the porous surface. Floor grout also traps dirt carried in from other areas of the house.

Using a mild grout cleaner regularly is more effective than waiting for stains to build up.

Entryways and Hallways

Entryways and Hallways Grout Problem

Entryways and hallways may not see much moisture, but they still face serious grout problems.

Why grout darkens in these areas

  • Dirt and dust brought in on shoes
  • Sand and debris grinding into grout lines
  • Constant daily foot traffic

Over time, grout in these areas often turns dark even when the tiles themselves look clean.

Laundry Rooms and Utility Areas

Laundry grout Problem

Laundry rooms are often overlooked when it comes to grout maintenance.

Common laundry room grout issues

  • Water splashes from washing machines
  • Detergent and fabric softener residue
  • Humidity from appliances

Detergent residue can harden inside grout lines, making stains difficult to remove without regular cleaning.

Outdoor Tile Areas Such as Patios and Balconies

Outdoor Tile Areas Such as Patios and Balconies grout Problem

Outdoor tiled areas experience the harshest conditions.

Outdoor grout problems include

  • Rainwater absorption
  • Sun exposure and UV damage
  • Mold and algae growth
  • Temperature changes that cause cracking

Outdoor grout often requires both cleaning and sealing to remain in good condition.

Why Grout Gets Dirty Faster Than Tile

Grout is porous, while most tiles are not.

This means grout

  • Absorbs liquids easily
  • Traps dirt and bacteria
  • Stains faster than tile surfaces

Because of this, grout needs more frequent maintenance than tile.

Best Grout Cleaner Solutions

The best Grout Cleaner solutions focus on preventing and fixing the Most Grout Problems found in kitchens, bathrooms, and entryways. Moisture, grease, and foot traffic cause grout to stain and weaken over time. A simple homemade grout cleaner made from baking soda and vinegar can lift surface stains, while oxygen-based cleaners work well for deeper discoloration. Regular scrubbing and sealing help protect grout from mold and buildup. Choosing the right grout cleaner early keeps tiles looking fresh and extends their lifespan.

Frequently Asked Questions About Grout Problems

Which area of the home has the worst grout problems

Bathrooms experience the most grout problems due to constant moisture, humidity, and limited airflow.

How often should grout be cleaned in high use areas

Bathrooms should be cleaned weekly
Kitchens every one to two weeks
Entryways every two to three weeks
Outdoor tile areas once a month

Is a homemade tile grout cleaner effective

Yes. Homemade solutions work well for routine cleaning and light stains.

Effective homemade options include

Is hydrogen peroxide safe for grout

Hydrogen peroxide is generally safe for most grout types when used correctly. It helps break down stains and kill bacteria.

Always test on a small hidden area first.

When should a commercial grout cleaner be used

A commercial grout cleaner is recommended when

  • Grout is deeply stained
  • Mold continues to return
  • Homemade cleaners no longer work

Conclusion

Grout problems are closely tied to how different areas of a home are used. Bathrooms and kitchens experience the most issues due to moisture and grease, while entryways and outdoor areas suffer from dirt and environmental exposure. Regular maintenance using the right grout cleaner or a gentle homemade tile grout cleaner can prevent many of these problems from becoming permanent.

Hydrogen peroxide is a helpful and affordable ingredient for maintaining clean grout when used properly. Consistent care, proper ventilation, and early cleaning are the most effective ways to keep grout looking fresh and extend its lifespan.

Homemade Tile & Grout Cleaner Tested in Real Homes

First‑Hand Experience (Real Home Testing & Practical Use)

This guide is based on what we found out by trying things out in homes in the United States. We did this in bathrooms and kitchens with the kind of tiles that people usually have in their houses and apartments in America. The things we are telling you to do were tried out over a week on the kind of grout that is made with cement, which is what most homes in the United States have on their floors. We tried these methods on porcelain tiles, which are very common in American homes.

After repeated use, one method stood out as both safe and effective without damaging grout — baking soda combined with 3% hydrogen peroxide.

Expert Insight: What Actually Works (Based on Real Cleaning Experience)

Vinegar + Baking Soda: Popular but Misleading (Expert Explanation)

Many DIY blogs recommend mixing vinegar and baking soda for grout cleaning. While it looks powerful due to fizzing, this reaction actually neutralizes both ingredients.

Why it’s a problem:

  • Vinegar (acid) + baking soda (base) cancel each other out
  • Minimal real cleaning power
  • Frequent use can weaken cement‑based grout used in most U.S. homes

Professional verdict: This combo is not recommended as a primary grout cleaner.

Best Homemade Grout Cleaner (Tested, Safe & Practical)

Baking Soda + 3% Hydrogen Peroxide Paste

Ingredients (Easy to Find in the U.S.):

  • 1/2 cup baking soda
  • 1/4 cup 3% hydrogen peroxide (drugstore grade)
  • Optional: a few drops of mild dish soap

How to Use:

  1. Mix into a thick paste
  2. Apply directly to grout lines
  3. Let it sit for 10–15 minutes
  4. Scrub gently with a grout brush or old toothbrush
  5. Rinse thoroughly with warm water

Why this works:

  • Baking soda gently lifts dirt without scratching
  • Hydrogen peroxide releases oxygen to break down stains
  • Safe for regular maintenance when used correctly

Tile & Grout Safety Guide (Material‑Based Safety Standards)

Homemade Grout Cleaner

Common DIY Mistakes Homeowners Make (From Real‑World Use)

  • Mixing bleach with vinegar or peroxide (toxic fumes)
  • Using hard wire brushes that erode grout
  • Applying one cleaner to all tile types
  • Skipping grout sealing after deep cleaning

When Homemade Cleaners Aren’t Enough (Real‑Life Scenarios)

DIY cleaning may not be enough if:

  • Grout has deep black stains or long‑term mold
  • Discoloration returns quickly
  • Moisture problems exist

In these cases, oxygen‑based commercial grout cleaners or professional services used across the U.S. are more effective.

Why You Can Trust This Guide (Experience, Accuracy & Safety)

I have actually cleaned a lot of homes. Take care of my own home. This guide is based on that experience. It talks about the things you usually find in homes in the United States. The advice in this guide is simple. You can really use it.

Every single recommendation that we make puts safety first then accuracy and then long-term results. We do not want to give you fixes that will not last. What we want to give you are solutions that will protect your surfaces and your health and your home for a long time.

You can trust that the methods shared here are designed to be reliable, responsible, and effective for real-life use.

FAQs (Answered from Practical Experience)

Is vinegar ever safe for grout?
Only occasionally on ceramic or porcelain tile surfaces — not for routine grout cleaning.

Is hydrogen peroxide safe for home use?
Yes, 3% hydrogen peroxide is safe when used properly. Always spot the test first.

How often should grout be cleaned?
Every 2–3 months for most U.S. homes; more often in showers.

Is hydrogen peroxide better than vinegar for grout?

For grout, yes. Hydrogen peroxide cleans by releasing oxygen and does not weaken grout like acidic cleaners can. Vinegar may damage cement-based grout if used often.

How can I prevent grout from getting dirty again?

Keep grout dry, clean spills quickly, use ventilation in bathrooms, and clean lightly on a regular schedule. Sealing grout is one of the most effective ways to keep it looking clean.

Final Verdict

Baking soda and hydrogen peroxide continue to be among the most reliable options for homeowners looking for a safe and efficient homemade grout cleaner. This easy mixture eliminates buildup, stains, and dirt without gradually weakening or harming grout. It works gently while still producing strong results, in contrast to harsh chemical cleaners.

This approach is perfect for long-term care in American homes, where tile and grout are frequently used in kitchens and bathrooms. It is backed by practical research and real-world experience. It keeps your surfaces clean, strong, and appealing.

You can safeguard your house and your investment by selecting cleaners that are gentler and more intelligent. Instead of being harsh, clean more wisely.

Exterior Home Cleaning: Your House Deserves Better Than Dirt

Let’s be real—nobody wants to clean the outside of their house. You glance at the green grime on your siding, spot the moss on your roof, see the streaky windows, and say, “Eh, I’ll deal with that later.”

Well, later is here. This is your sign. Your nudge. Your reality check.

Exterior home cleaning isn’t some Pinterest fantasy of perfectly manicured homes. It’s real-world maintenance. It’s how you stop your house from looking like it’s been through a storm and start making it look like you actually live there—on purpose.

Ready? Let’s get into it.

Why Bother Cleaning the Outside of Your Home?

Here’s the ugly truth: your house is going through it.

Rain dumps mud down your siding. Wind slaps leaves and dust at your windows like it’s mad at you. Mold creeps in where the sun doesn’t shine. Your driveway becomes an oil-stained parking lot. And those gutters? Well, they’ve seen things.

But here’s the thing—if you keep letting it pile up, you’re not just hurting your curb appeal. You’re slowly wrecking your investment.

Here’s what regular exterior home cleaning really gives you:

  • A clean, breathable space

  • Fewer repairs (and headaches)

  • Better home value

  • A healthier environment

  • And honestly… less shame when people pull into your driveway

Step One: House Washing—Time to Strip Off the Grime

The siding on your home is like your skin—it takes the hits. Sun, wind, bugs, dust, and all kinds of grime stick to it. You might not notice how filthy it’s gotten until you start cleaning and suddenly your beige house is… actually beige again?

Pressure Wash or Soft Wash?

Let’s clear this up:

  • Pressure washing is good with hard materials such as brick or stone as it uses high-pressure water.

  • Soft washing allows low pressure on the surfaces along with biodegradable cleansers-its ideal to work on a more sensitive surface such as vinyl siding or painted wood.

When you consider doing this yourself, take care. Put full pressure on the wrong setting and you will make your paint strip or crack your siding. Not cute.

Pro tip: Try a soft wash first. Less drama. More shine.

Step Two: Roof Cleaning—Your Shingles Are Begging for It

Not all people can (or should) clean their roofs on their own. You need more than a hose and a dream.

The thing is, that streaking on your roof? No, that is not character. That’s algae. The green tufts? That’s moss. And though it seems like it would make your home look like a forest cabin, it is in fact draining moisture and stripping years off the life of your roof.

The technique used by pros is called soft washing, and it combines a low amount of pressure and biodegradable cleaners. It gives them an opportunity to remove all that dirty stuff off the shingles without tearing them to shreds.

Got moss? Donkey, you need to handle it. Moss traps moisture, ruins the roof, and before you know it, you’ve got leaks dripping onto your couch during dinner.

Roof cleaning is your house’s annual check-up. Not glamorous, not Instagram-worthy, but vital. It saves roofs. Yours included.

Step Three: Gutter Cleaning—The Job Never Ends As Long As There’s Gravity

No one leaps out of bed thinking, “Today’s a great day to clean the gutters!” It’s messy. It’s thankless. But it has to be done.

Water only knows how to flow down. So if your gutters are stuffed full of leaves, sticks, grit, and all kinds of mystery gunk, the water’s going to find other ways—into your walls, your siding, your foundation. And none of those are good options.

Gutters get clogged faster than you’d think—especially if you’ve got trees nearby. When they’re blocked, they overflow. And when they overflow, things get ugly.

At a minimum, clean them out in spring and fall. If you can’t—or just won’t—hire someone who will. Your future self will thank you during the next downpour.

Step Four: Driveway & Walkway Cleaning—Because People Do Look Down

Your driveway takes a beating. Tire marks, oil leaks, dirt buildup—it’s the first thing people drive on and the last thing most homeowners think about. And walkways? Those suckers turn into slippery moss patches before you even realize it.

Driveways and paths are responsive to pressure washing. It cleans the years of dirt away within minutes. Chips in concrete, pavers or asphalt; whatever it is, they can be surprisingly resilient with a little TLC.

Bonus: More than being prettier, clean walkways also eliminate slip and fall hazards. They’re safer. Less falling, less slipping, less tripping, less lawsuit liability on behalf of your stupid clumsy neighbor Steve.

Step Five: Deck & Fence Cleaning—Backyard Vibes Matter Too

Let’s go out back. What do you see? A tired deck? A discolored fence? Stains from last summer’s barbecue that you promised you’d clean and never did?

Wood gets weathered. Vinyl gets dusty. Even treated lumber starts looking sad after a few seasons. But don’t panic—it can all bounce back.

Venture one of the cleaners available instead of deck-safe or a soft wash of the wood. You should pressure-wash, in case you know what you are doing (and keep its pressure low, to prevent splintering the boards). Fences–especially white vinyl ones–all too frequently take nothing but a bit of soap and a scrubbing to appear brand new.

Give them love. Your backyard will feel 10x better.

Step Six: Window Cleaning—Let the Sunshine (Actually) In

Here’s a little secret: cleaning your windows outside makes your whole house look brighter. Literally. You’d be shocked how much dirt is blocking your view—and your light.

Use a squeegee and a good window cleaning solution. Get up close. Remove the screens and wash them too (they’re dust magnets). If your windows are high up, get an extension pole or—better yet—hire a window guy.

After it’s done, you’ll feel like you live in a whole new place. Trust me.

Step Seven: Mold & Mildew—Get Rid of the Funk

That green or black junk growing on your siding or walkway? That’s not just gross. It’s mold or mildew. And it is not getting better by itself.

It lives on wet and shadow. It is uncontrollable like gossip in a small village.

  • vinegar, baking soda, elbow grease in case of light stains.

  • On harder things: commercial mold removers or oxygen bleach.

  • For “oh no, it’s everywhere”: hire a professional.

And once it’s gone, keep it gone by improving airflow and redirecting water away from walls and shaded corners.

The Tiny Details That Make a Huge Difference

Once the heavy lifting is done, don’t forget the little stuff:

  • Wipe down porch lights.

  • Rinse off the mailbox.

  • Clean your door handles.

  • Shake out or replace that filthy doormat.

  • Wash planters, porch furniture, even the garage door.

These finishing touches take your house from “clean” to polished.

Seasonal Breakdown: What to Clean and When

You don’t have to tackle everything in one go. Here’s a basic seasonal cheat sheet:

Spring:

  • Wash siding

  • Clean windows and screens

  • Empty gutters

Summer:

  • Power wash driveway

  • Scrub patio furniture

  • Deck and fence maintenance

Fall:

  • Gutters (again)

  • Moss/mold check

  • Roof inspection

Winter:

  • Spot clean salt and grime

  • Entryway touch-ups

  • Plan ahead for next year

Stay on top of it, and it never becomes overwhelming.

DIY or Hire a Pro? Let’s Be Honest

Ask yourself two questions:

  1. Do I have the time?

  2. Do I have the tools (and know-how) to not make it worse?

If the answer to both is yes, then by all means—DIY it. Just be careful. Don’t go blasting paint off your siding or sending water under your shingles. And stay off steep roofs unless you’re into hospital visits.

If you’re short on time, hate cleaning, or just want it done fast and right—hire a crew. A solid pro will clean more thoroughly in half the time without damaging anything. Totally worth it.

Want to Be Kind to the Planet? Clean Smart

Eco-friendly exterior cleaning is 100% doable. You don’t have to nuke your lawn or poison your rose bushes.

  • Use biodegradable soap.

  • Do not use bleach.

  • Use natural cleaners such as vinegar or citrus to do small cleaners.

  • You can save water- do not just watch the hose go crazy.

You can have a clean home and a clean conscience.

Final Words: Your Home Deserves to Shine

Here’s the truth—exterior home cleaning isn’t just a weekend project. It’s how you show respect for your space. It’s how you protect your investment. And yeah, it’s how you stop your house from looking like it was abandoned in a storm.

So whether you’re scrubbing the siding yourself or calling in a pro with a power washer and a van full of gear—just get it done.

You’ll feel better. Your house will look better. And everyone who walks by will wonder how you keep it looking so fresh.

Floors That Don’t Lie: Why You Need Professional Tile and Grout Cleaning Services

Here is a little truth bomb to you: Your floors are ratting you out.

Yeah, they are. All those coffee spills, muddy foot prints, pasta sauce splatters and goo that never quite got cleared off? You tile has memory. Even worse your grout? It never forgets it. And the moment you feel that there is an urgent need to get your kitchen floor out of a crime documentary and into the light again, it is high time to quit the homemade cleaning routine and call up those with the knowledge and expertise. This is not flashy. It is smartness. And in case you have not had the chance to check out professional tile and grout cleaning services yet, well, you are about to find out exactly why they are the unheralded saviors of a clean, healthy-feeling terrific-looking home.

First Off, What the Heck Is Professional Tile and Grout Cleaning Anyway?

Glad you asked. Because if you think it’s just some guy with a mop charging you premium prices, you’re in for a surprise. These services are run by technicians who use high-powered equipment (we’re talking steam, pressure, extraction—the works) to pull years of embedded grime, bacteria, and funk right out of your grout lines and tile pores. It’s like sending your floors to a day spa where they come back glowing and six years younger. They do not only clean the floors. They clean thoroughly, sanitize, deodorise and sometimes cover them so that they stay free in the future

Why Toothbrushing Can t (or Won t) Cut It (Literally or Figuratively)

Of course, you can go on your knees and scrub like Cinderella. You will feel productive even. The thing is the problem here: Grout is porous. This translates to the fact that it absorbs moisture, dirt, bacteria and the rest in the middle like a sponge that is dry. Your cleaning is likely to touch the surface unless you have hot water extraction on an industrial basis. And we won t even say what can be done to a tile and grout using the wrong cleaning product as far as being bleached, stained or even softened. It is not only ineffective but can be even harmful.

Here’s What You Get When You Call the Pros

Here’s What You Get When You Call the Pros Let’s break this down step-by-step, because what actually happens during professional tile and grout cleaning services is more thorough than most people realize:

1. Inspection

They visit your premise trying to assess the quality of the tile and grout, whether it is damaged, stained, or in the case of molds, or eroded. It is not a universal thing.

2. Pre-Treatment

They visit your premise trying to assess the quality of the tile and grout, whether it is damaged, stained, or in the case of molds, or eroded. It is not a universal thing.

3. Agitation

No, not emotional distress—this step involves scrubbing the cleaning solution deep into grout lines using mechanical brushes.

4. Hot Water Pressure Rinse

It is the heavy artillery. The process removes all contents on the grout and tile surfaces through water at high pressure.

5. Extraction

The suction force removes all remnants of filthy water and garbage as well as the residual cleaning solution.

6. Optional Sealing

Want to keep it clean longer? This step adds a protective seal over the grout, helping prevent new stains from soaking in

Real Talk: The Perks of Letting Someone Else Do It Right

Here’s where it gets good. Hiring a professional means:
  • Cleaner Air in Your Home: Mold spores and bacteria love to chill in your grout. Removing them improves your indoor air quality.
  • Better Looking Floors: Obvious one. Dingy floors instantly level up after a deep clean.
  • Longer Tile Lifespan: Grit, soap scum, and dirt wear tile down. Deep cleaning helps them last longer.
  • You Save Your Knees and Back: It’s called labor for a reason.
  • Zero Guesswork: Pros know which solution works for your tile type. You don’t risk wrecking your floors with bleach

Where You Need This the Most

Some areas of your home are dirt magnets. These spots are practically begging for a deep clean:
  • Bathrooms: Mildew, body oils, soap scum—it’s a germ party in there.
  • Kitchens: Spills, grease, and dropped food love to hide in grout.
  • Entryways: High traffic means constant grime buildup.
  • Mudrooms: Name says it all.
  • Business Facilities: Restaurants, salons, medical offices, they should be kept impeccable regarding clients and inspectors.

What Does This Cost? And Is It Worth It?

So, what happened is? It is usual at $0.75 to 2.50 per square foot which is dependent on:
  • How dirty the grout is
  • Type of tile (ceramic, porcelain, natural stone)
  • Size of the area
  • Whether or not you add sealing
Let’s say you have a 150 sq ft kitchen. That could run you anywhere from $112 to $375. Is it worth it? Heck yes. Compare that to the time, frustration, and risk of ruining your floors trying to DIY the same results.

How to Keep It Clean Longer (So You’re Not Calling Monthly)

Want to stretch the time between deep cleans? Here’s the human-approved cheat sheet:
  • Wipe spills immediately. Don’t let liquids sit.
  • Use doormats. Less dirt brought in translates to less in your floors.
  • Mop and sweep on a regular basis. Apply soft mop and PH neutral cleaner.
  • Re-seal your grout once in 12-18 months. It is floor sunscreen.

Can You DIY This Level of Clean? Not Really.

Let’s put it this way: can you bake a pizza at home? Sure. Will it be as good as a wood-fired Neapolitan pie from a place that’s been doing it for 30 years? Not a chance. Same goes for grout cleaning. Your little handheld steamer or vinegar spray bottle won’t hit the bacteria hiding inches deep in porous grout.

A Few Red Flags to Watch Out For When Hiring a Service

If you decide to book professional tile and grout cleaning services, make sure you’re not getting hustled. Avoid companies that:
  • Don’t offer an upfront quote
  • Refuse to explain their process
  • Don’t use sealing products unless requested
  • Have no real online reviews or references
  • Show up with just a mop and bucket (major red flag)
Good pros bring professional equipment, offer transparency, and back their work.

So, Should You Book It?

If your tile floors look like they’ve been through a war and your grout has gone from white to mystery gray, the answer is: absolutely. Tile and grout cleaning services are not only able to give your floor back the shininess, but it will seem so new. And having to sell your house or impress your in-laws or even live a little bit cleaner, it is one of the simplest bargains you can take.

5 Rapid Fire FAQs (Everybody Wonders about This)

Q1: What is the time consumption?

Usually 1-2 hours for an average room. Larger or dirtier spaces may take longer.

Q2: Will my floors be wet?

Briefly. Most of the moisture is extracted, but allow for drying time of about 30-60 minutes.

Q3: is it pet/kid safe?

Absolutely. All you have to do is to ask the company whether they utilise nature friendly solutions that are non toxic.

Q4: What is the frequency of doing it?

Once a year for homes with kids or pets. Every 18 months for low-traffic homes.

Q5: Do I really need to seal my grout?

If you want to protect it and keep it cleaner longer? Yes. 100% yes.

Final Thought

Grout does not lie. If it looks dirty, then it is dirty. And no-light-size candle, air freshener or new rug can ever cover that up forever. Then give your floors the makeover they need. Schedule the service, relax and let the pros handle the job. Your knees, your nose and your houseguests will thank you.

Eco-Friendly Grout Cleaning Methods for a Green Home

Ever find yourself scrubbing your bathroom floor, only to step back and think, “Why does this grout still look gross?” Same here. No matter how much I cleaned, those little lines between the tiles always seemed to hang on to grime like their life depended on it.

For the longest time, I reached for the strongest stuff under the sink—bleach sprays, mystery foams, even that blue gel that smells like a swimming pool. It worked… sort of. But it also gave me headaches and made the whole bathroom smell like a chemical factory.

That’s when I decided to try something different. I started testing natural grout cleaning methods—ones that wouldn’t burn my nostrils or make me wonder what I was breathing in. And guess what? They worked. Some are even better than the store-bought junk. If you’re curious about grout cleaning methods the green way, without all the harsh stuff, keep reading. I’ve tried everything on this list myself—no guesswork, no fluff.

Why Ditch the Chemicals?

Let’s be real for a second. Most traditional cleaners are effective—but they come with a lot of warnings. “Use gloves.” “Ventilate the room.” “Call poison control if ingested.” Yikes.

When I started switching over to eco-friendly products a few years back, grout cleaner wasn’t even on my radar. But then I realized: if this stuff is strong enough to bleach mold, what’s it doing to the air I breathe, or the water that goes down my drain?

That’s when I began looking for non-toxic grout cleaning options. Not just for my own health—but for the planet, too. And the best part? I didn’t have to give up clean grout.

Why Grout Gets So Gross (So Fast)

If you’ve ever wondered why your grout gets dirty way faster than your tiles, it’s because grout is porous. Kind of like a sponge. It soaks up anything that hits it—soap scum, moisture, grease, dirt, and whatever your dog tracks in.

It also holds onto the stuff you use to clean it. That means if you’re scrubbing with chemicals, some of that residue sticks around—and not in a good way.

That’s why chemical-free grout cleaning isn’t just a nice idea—it actually makes sense if you want to avoid breathing or absorbing who-knows-what.

Natural Grout Cleaners That Actually Work

Natural Grout Cleaners That Actually Work

I’m not big on gimmicks, so when I say these worked for me, I mean it. Most of them use things you probably already have at home.

1. Baking Soda + Vinegar

This combo is an old-school classic, and for good reason. It fizzes, it cleans, and it’s oddly satisfying.

Here’s what I do:

  • Sprinkle baking soda over the grout lines.

  • Fill a spray bottle with half white vinegar, half water.

  • Spray it right over the baking soda—get ready for that foamy reaction!

  • Let it sit for 5–10 minutes.

  • Scrub with a toothbrush or soft brush.

  • Rinse with warm water and wipe dry.

Simple, cheap, and zero fumes.

2. Hydrogen Peroxide + Baking Soda Paste

I found this one when I moved into a place with really bad grout stains. It worked like a charm—and didn’t leave a strong smell behind.

What to do:

  • Mix baking soda and hydrogen peroxide into a thick paste.

  • Spread it over the stained grout.

  • Wait 10–15 minutes.

  • Scrub gently and rinse clean.

It’s powerful but doesn’t damage the grout the way bleach does.

3. Castile Soap and Warm Water

If your grout just needs a refresh, not a deep clean, this one’s perfect.

Just add a few drops of Castile soap to a bowl of warm water. Dip a cloth in, wring it out, and wipe down your grout lines. Easy. No fancy tools needed. I use this one as a weekly touch-up between deeper cleans.

Not Into DIY? Store-Bought Green Options Exist

Not Into DIY? Store-Bought Green Options Exist

I get it—not everyone wants to mix their own concoctions in the kitchen. The good news? There are plenty of green grout cleaners out there that work just as well.

When I’m buying, I look for labels like:

  • Plant-based

  • Non-toxic

  • Biodegradable

  • Fragrance-free or essential oil scented

Some of my go-to brands:

  • Better Life

  • Puracy

  • ECOS

  • Seventh Generation

Just remember to flip that bottle around and read the ingredients. If it reads like a chemistry textbook, probably not as “green” as it claims.

The Steam Cleaner That Changed Everything

Okay, this isn’t a DIY cleaner, but it deserves a shoutout. A few years ago, I picked up a handheld steam cleaner on a whim. It’s now one of my favorite cleaning tools, hands down.

No chemicals. Just water, heat, and some serious grime-busting power.

You press a button, steam hits the grout, and suddenly all that hidden dirt just… lets go. It’s honestly kind of magical. If you’re serious about sustainable grout cleaning, a steam cleaner is worth every penny.

Preventative Maintenance = Less Deep Cleaning

Here’s a little trick I swear by: do a little bit, often.

After I shower or cook, I give the tiles and grout a quick spray with a diluted vinegar mix (half water, half vinegar). Takes less than a minute. Keeps buildup at bay.

I also use a microfiber cloth once a week to wipe down the areas where dirt shows up the most. No paper towel waste, and it works way better at grabbing gunk.

Keeping Grout Protected (Without Harsh Sealers)

So you’ve scrubbed your grout and it looks great. Now what?

Most commercial sealers are loaded with chemicals and VOCs. But there are safer options out there—eco-safe grout sealers that are water-based and low in toxins. Look for ones specifically labeled low-VOC or non-toxic.

Oh, and one more thing: make sure your bathroom has decent airflow. Mold loves trapped moisture. Open a window, turn on the fan, and let things dry out.

Stuff I Regret Using So You Don’t Have To

I’ve made a few mistakes over the years, and maybe this can help you avoid them:

  • Bleach – Works fast, but it weakens grout over time and makes it more porous.

  • Ammonia – The fumes alone are reason enough to skip it.

  • Colorful cleaners – They stained my grout, and it took ages to fix.

  • Steel wool or abrasive pads – Bad for grout and even worse for tile.

Stick to gentle tools and ingredients you trust.

Final Thoughts: Clean Grout, Clear Conscience

I didn’t switch to natural cleaning overnight. It started with small changes—like swapping out one cleaner at a time. But now, my home feels fresher, and I don’t have to worry about what’s lurking in the air or the water I rinse down the drain.

These eco-friendly grout cleaning methods aren’t just good for your floors—they’re good for you, your family, your pets, and the planet.

So next time your grout’s looking rough, skip the harsh stuff. Try something simple, something clean, something green.

You might just be surprised by how much better your home feels.

Frequently Asked Questions (FAQs)

1. Can I use vinegar on all grout types?
Not really—avoid using it on natural stone like marble. It’s fine for ceramic or porcelain tile though.

2. How often should I clean my grout?
A light clean weekly and a deeper scrub every month or so works well.

3. Is hydrogen peroxide safe for grout?
Yes! It’s a gentle, effective cleaner that tackles stains without the harsh smell of bleach.

4. What’s the easiest way to maintain clean grout?
Keep a spray bottle of diluted vinegar and water handy. A quick spritz and wipe each day does wonders.

5. Should I invest in a steam cleaner?
If you like deep cleaning without chemicals, 100% yes. It’s a game-changer.

The Ultimate Guide to Electric Grout Removers: Make Tile Cleaning a Breeze

Have you ever spent hours on your knees scraping out old grout, only to feel like you barely made a dent? Yeah, we’ve all been there—elbow-deep in tile gunk, dreaming of a better way. Well, let me introduce you to your new best friend: the electric grout remover. This little powerhouse might not wear a cape, but trust me, it’s the hero your bathroom (and your back) deserves.

Whether you’re redoing your bathroom, refreshing your kitchen backsplash, or just tired of dingy grout, this guide is your go-to resource. We’ll dive into what electric grout removers are, how they work, which ones are worth your money, and tips for using them like a pro—even if you’re a total newbie.

What Is an Electric Grout Remover, Anyway?

Let’s break it down. An electric grout remover is a handheld power tool designed to take the grunt work out of grout removal. Instead of scraping by hand or wrestling with a chisel and hammer (who has time for that?), you just turn it on and let it do the heavy lifting.

These tools usually come with oscillating or rotating tips that are strong enough to dig out old grout without damaging the surrounding tiles. Some models even have variable speeds and changeable attachments, so you can customize your approach depending on the tile type and grout condition.

Bottom line? It’s like a magic eraser for bad grout jobs—only way cooler.

Why Choose an Electric Grout Remover?

Okay, but why not just use a manual grout scraper? Great question! Here’s why going electric might just change your life (or at least your tile game):

1. Way Less Effort

Say goodbye to sore arms and aching knees. A power grout remover cuts through hardened grout like butter, saving you hours of backbreaking work.

2. Faster Results

What used to take all weekend can now be done in an afternoon. Imagine that—free time!

3. Precision Without Tile Damage

Quality electric grout removal tools are designed to be precise, so you don’t end up chipping or cracking your beautiful tiles.

4. Great for Big Projects

If you’re regrouting an entire bathroom or a tiled floor, an electric grout cleaning tool is pretty much essential.

Who Should Use an Electric Grout Remover Tool?

Electric Grout Remover Tool

If you’re thinking this is just for professionals, think again. DIY-ers love these tools just as much. Here’s who can benefit:

  • Homeowners doing tile upgrades
  • DIYers tackling kitchen and bathroom renovations
  • Handymen and women
  • Contractors and tile professionals
  • Landlords refreshing rental units

Even if you’ve never removed grout in your life, the right electric grout remover can make you feel like a seasoned pro.

‍Choosing an Electric Grout Remover

Many models are available, so consider how you select one. A helpful list can direct your choice.

Power
Confirm your grout remover possesses enough power for your job. Oscillating tools with adjustable speed are good; they let you work slowly or quickly as required.

Parts
Look for a tool that includes various heads or fittings. Carbide or diamond blades remove grout best.

Grip
Your hands will feel better with a good grip. A comfortable handle and a light build help much on long jobs.

Dust Control
Grout dust causes problems. Some expensive models offer dust removal systems. You can connect a vacuum. Your lungs and your home will benefit.

Cost
You do not need to spend a lot of money. Good electric grout tools come at all prices. Be sure to avoid trading good quality for a lower price.

Electric Grout Removers to Consider

Look at some major tools. Some well liked and dependable choices users like include the following

Dremel Multi-Max MM50

This oscillating tool works with accuracy – it weighs little and acts with force, plus it comes with different attachments – these tools suit grout removal well.

Bosch Starlock Oscillating Multi-Tool

This tool, a preference for builders, has force and exactness in one neat item. It costs more, but the price reflects its use.

Makita Multi-Tool TM3010CX1

Makita’s tool centers on comfort and lasting quality. If you face tough grout, this tool will work for you.

DEWALT Oscillating Tool Kit

This tool works with power. With fast blade changes also forceful action, it makes grout removal nearly easy.

How to Use an Electric Grout Remover – A Guide

How to Use an Electric Grout Remover

You have your tool. What comes next? This process helps you feel ready before you begin.

Step 1: Get Your Workspace Ready

Clear the area.

Place a drop cloth or painter’s plastic to collect dust.

Put on goggles, a dust mask along with ear protection.

Step 2: Put on the Correct Blade

Use a carbide or diamond blade for good results.

Check that it stays tight to stop it from moving around.

Step 3: Set Your Speed

Begin slowly if this is your first time.

Raise the speed slowly as you get used to it.

Step 4: Begin to Remove Grout

Place the blade between the tiles.

Let the tool work – do not push it.

Use soft pressure and work on small areas.

Step 5: Clean the Area

Use a vacuum or sweep up the grout dust.

Clean tiles with a damp cloth.

Look at your work.

‍Advice for Removing Grout

Avoid new user errors. Remember this guidance

Do not hurry. The tool does its work.

Consider the corners – these spots require a gentle feel.

Change old blades; they complicate the task and create more mess.

Test the tool first. Use it on a small, hidden space to learn how it works.

Final Thoughts: Is an Electric Grout Remover Really Worth It?

Absolutely. If you’ve ever spent hours scraping old grout by hand, you already know how frustrating—and exhausting—it can be. An electric grout remover takes that messy, time-sucking task and makes it way easier and quicker.

Whether you’re tackling a weekend home project or sprucing up the bathroom before guests arrive, having one of these tools on hand just makes sense. It’s efficient, it’s easy to use, and best of all—it helps you get professional-looking results without hiring anyone.

Ready to Kick That Grimy Grout to the Curb?

Now that you’ve got the scoop on what electric grout removers do and how to use them, the only thing left is to roll up your sleeves and get started. Pop on those safety goggles, plug in your tool, and say goodbye to crusty old grout for good.

Your tiles are going to look amazing—and you didn’t even have to break a sweat.

Frequently Asked Questions About Electric Grout Removers

Q1. What is the best tool to use to remove grout?

An electric grout remover with a carbide or diamond blade is the top choice—fast, precise, and easy on your hands.

Q2. What is the best way to remove hardened grout?

Use a powered grout removal tool, go slow, and let the blade do the work without forcing it.

Q3. What is the fastest way to remove grout?

An electric grout remover is by far the quickest method—way faster than scraping by hand.

Q4. What is the best grout mold remover?

A bleach solution or a specialized cleaner like RMR-86 works great for killing mold on grout.

Q5. Do I have to remove all old grout before regrouting?

Yes, remove most of the old grout so the new grout can properly adhere and last longer.