Grout Cleaner

Homemade Tile & Grout Cleaner Tested in Real Homes

First‑Hand Experience (Real Home Testing & Practical Use)

This guide is based on what we found out by trying things out in homes in the United States. We did this in bathrooms and kitchens with the kind of tiles that people usually have in their houses and apartments in America. The things we are telling you to do were tried out over a week on the kind of grout that is made with cement, which is what most homes in the United States have on their floors. We tried these methods on porcelain tiles, which are very common in American homes.

After repeated use, one method stood out as both safe and effective without damaging grout — baking soda combined with 3% hydrogen peroxide.

Expert Insight: What Actually Works (Based on Real Cleaning Experience)

Vinegar + Baking Soda: Popular but Misleading (Expert Explanation)

Many DIY blogs recommend mixing vinegar and baking soda for grout cleaning. While it looks powerful due to fizzing, this reaction actually neutralizes both ingredients.

Why it’s a problem:

  • Vinegar (acid) + baking soda (base) cancel each other out
  • Minimal real cleaning power
  • Frequent use can weaken cement‑based grout used in most U.S. homes

Professional verdict: This combo is not recommended as a primary grout cleaner.

Best Homemade Grout Cleaner (Tested, Safe & Practical)

Baking Soda + 3% Hydrogen Peroxide Paste

Ingredients (Easy to Find in the U.S.):

  • 1/2 cup baking soda
  • 1/4 cup 3% hydrogen peroxide (drugstore grade)
  • Optional: a few drops of mild dish soap

How to Use:

  1. Mix into a thick paste
  2. Apply directly to grout lines
  3. Let it sit for 10–15 minutes
  4. Scrub gently with a grout brush or old toothbrush
  5. Rinse thoroughly with warm water

Why this works:

  • Baking soda gently lifts dirt without scratching
  • Hydrogen peroxide releases oxygen to break down stains
  • Safe for regular maintenance when used correctly

Tile & Grout Safety Guide (Material‑Based Safety Standards)

Homemade Grout Cleaner

Common DIY Mistakes Homeowners Make (From Real‑World Use)

  • Mixing bleach with vinegar or peroxide (toxic fumes)
  • Using hard wire brushes that erode grout
  • Applying one cleaner to all tile types
  • Skipping grout sealing after deep cleaning

When Homemade Cleaners Aren’t Enough (Real‑Life Scenarios)

DIY cleaning may not be enough if:

  • Grout has deep black stains or long‑term mold
  • Discoloration returns quickly
  • Moisture problems exist

In these cases, oxygen‑based commercial grout cleaners or professional services used across the U.S. are more effective.

Why You Can Trust This Guide (Experience, Accuracy & Safety)

I have actually cleaned a lot of homes. Take care of my own home. This guide is based on that experience. It talks about the things you usually find in homes in the United States. The advice in this guide is simple. You can really use it.

Every single recommendation that we make puts safety first then accuracy and then long-term results. We do not want to give you fixes that will not last. What we want to give you are solutions that will protect your surfaces and your health and your home for a long time.

You can trust that the methods shared here are designed to be reliable, responsible, and effective for real-life use.

FAQs (Answered from Practical Experience)

Is vinegar ever safe for grout?
Only occasionally on ceramic or porcelain tile surfaces — not for routine grout cleaning.

Is hydrogen peroxide safe for home use?
Yes, 3% hydrogen peroxide is safe when used properly. Always spot the test first.

How often should grout be cleaned?
Every 2–3 months for most U.S. homes; more often in showers.

Is hydrogen peroxide better than vinegar for grout?

For grout, yes. Hydrogen peroxide cleans by releasing oxygen and does not weaken grout like acidic cleaners can. Vinegar may damage cement-based grout if used often.

How can I prevent grout from getting dirty again?

Keep grout dry, clean spills quickly, use ventilation in bathrooms, and clean lightly on a regular schedule. Sealing grout is one of the most effective ways to keep it looking clean.

Final Verdict

Baking soda and hydrogen peroxide continue to be among the most reliable options for homeowners looking for a safe and efficient homemade grout cleaner. This easy mixture eliminates buildup, stains, and dirt without gradually weakening or harming grout. It works gently while still producing strong results, in contrast to harsh chemical cleaners.

This approach is perfect for long-term care in American homes, where tile and grout are frequently used in kitchens and bathrooms. It is backed by practical research and real-world experience. It keeps your surfaces clean, strong, and appealing.

You can safeguard your house and your investment by selecting cleaners that are gentler and more intelligent. Instead of being harsh, clean more wisely.

Exterior Home Cleaning: Your House Deserves Better Than Dirt

Let’s be real—nobody wants to clean the outside of their house. You glance at the green grime on your siding, spot the moss on your roof, see the streaky windows, and say, “Eh, I’ll deal with that later.”

Well, later is here. This is your sign. Your nudge. Your reality check.

Exterior home cleaning isn’t some Pinterest fantasy of perfectly manicured homes. It’s real-world maintenance. It’s how you stop your house from looking like it’s been through a storm and start making it look like you actually live there—on purpose.

Ready? Let’s get into it.

Why Bother Cleaning the Outside of Your Home?

Here’s the ugly truth: your house is going through it.

Rain dumps mud down your siding. Wind slaps leaves and dust at your windows like it’s mad at you. Mold creeps in where the sun doesn’t shine. Your driveway becomes an oil-stained parking lot. And those gutters? Well, they’ve seen things.

But here’s the thing—if you keep letting it pile up, you’re not just hurting your curb appeal. You’re slowly wrecking your investment.

Here’s what regular exterior home cleaning really gives you:

  • A clean, breathable space

  • Fewer repairs (and headaches)

  • Better home value

  • A healthier environment

  • And honestly… less shame when people pull into your driveway

Step One: House Washing—Time to Strip Off the Grime

The siding on your home is like your skin—it takes the hits. Sun, wind, bugs, dust, and all kinds of grime stick to it. You might not notice how filthy it’s gotten until you start cleaning and suddenly your beige house is… actually beige again?

Pressure Wash or Soft Wash?

Let’s clear this up:

  • Pressure washing is good with hard materials such as brick or stone as it uses high-pressure water.

  • Soft washing allows low pressure on the surfaces along with biodegradable cleansers-its ideal to work on a more sensitive surface such as vinyl siding or painted wood.

When you consider doing this yourself, take care. Put full pressure on the wrong setting and you will make your paint strip or crack your siding. Not cute.

Pro tip: Try a soft wash first. Less drama. More shine.

Step Two: Roof Cleaning—Your Shingles Are Begging for It

Not all people can (or should) clean their roofs on their own. You need more than a hose and a dream.

The thing is, that streaking on your roof? No, that is not character. That’s algae. The green tufts? That’s moss. And though it seems like it would make your home look like a forest cabin, it is in fact draining moisture and stripping years off the life of your roof.

The technique used by pros is called soft washing, and it combines a low amount of pressure and biodegradable cleaners. It gives them an opportunity to remove all that dirty stuff off the shingles without tearing them to shreds.

Got moss? Donkey, you need to handle it. Moss traps moisture, ruins the roof, and before you know it, you’ve got leaks dripping onto your couch during dinner.

Roof cleaning is your house’s annual check-up. Not glamorous, not Instagram-worthy, but vital. It saves roofs. Yours included.

Step Three: Gutter Cleaning—The Job Never Ends As Long As There’s Gravity

No one leaps out of bed thinking, “Today’s a great day to clean the gutters!” It’s messy. It’s thankless. But it has to be done.

Water only knows how to flow down. So if your gutters are stuffed full of leaves, sticks, grit, and all kinds of mystery gunk, the water’s going to find other ways—into your walls, your siding, your foundation. And none of those are good options.

Gutters get clogged faster than you’d think—especially if you’ve got trees nearby. When they’re blocked, they overflow. And when they overflow, things get ugly.

At a minimum, clean them out in spring and fall. If you can’t—or just won’t—hire someone who will. Your future self will thank you during the next downpour.

Step Four: Driveway & Walkway Cleaning—Because People Do Look Down

Your driveway takes a beating. Tire marks, oil leaks, dirt buildup—it’s the first thing people drive on and the last thing most homeowners think about. And walkways? Those suckers turn into slippery moss patches before you even realize it.

Driveways and paths are responsive to pressure washing. It cleans the years of dirt away within minutes. Chips in concrete, pavers or asphalt; whatever it is, they can be surprisingly resilient with a little TLC.

Bonus: More than being prettier, clean walkways also eliminate slip and fall hazards. They’re safer. Less falling, less slipping, less tripping, less lawsuit liability on behalf of your stupid clumsy neighbor Steve.

Step Five: Deck & Fence Cleaning—Backyard Vibes Matter Too

Let’s go out back. What do you see? A tired deck? A discolored fence? Stains from last summer’s barbecue that you promised you’d clean and never did?

Wood gets weathered. Vinyl gets dusty. Even treated lumber starts looking sad after a few seasons. But don’t panic—it can all bounce back.

Venture one of the cleaners available instead of deck-safe or a soft wash of the wood. You should pressure-wash, in case you know what you are doing (and keep its pressure low, to prevent splintering the boards). Fences–especially white vinyl ones–all too frequently take nothing but a bit of soap and a scrubbing to appear brand new.

Give them love. Your backyard will feel 10x better.

Step Six: Window Cleaning—Let the Sunshine (Actually) In

Here’s a little secret: cleaning your windows outside makes your whole house look brighter. Literally. You’d be shocked how much dirt is blocking your view—and your light.

Use a squeegee and a good window cleaning solution. Get up close. Remove the screens and wash them too (they’re dust magnets). If your windows are high up, get an extension pole or—better yet—hire a window guy.

After it’s done, you’ll feel like you live in a whole new place. Trust me.

Step Seven: Mold & Mildew—Get Rid of the Funk

That green or black junk growing on your siding or walkway? That’s not just gross. It’s mold or mildew. And it is not getting better by itself.

It lives on wet and shadow. It is uncontrollable like gossip in a small village.

  • vinegar, baking soda, elbow grease in case of light stains.

  • On harder things: commercial mold removers or oxygen bleach.

  • For “oh no, it’s everywhere”: hire a professional.

And once it’s gone, keep it gone by improving airflow and redirecting water away from walls and shaded corners.

The Tiny Details That Make a Huge Difference

Once the heavy lifting is done, don’t forget the little stuff:

  • Wipe down porch lights.

  • Rinse off the mailbox.

  • Clean your door handles.

  • Shake out or replace that filthy doormat.

  • Wash planters, porch furniture, even the garage door.

These finishing touches take your house from “clean” to polished.

Seasonal Breakdown: What to Clean and When

You don’t have to tackle everything in one go. Here’s a basic seasonal cheat sheet:

Spring:

  • Wash siding

  • Clean windows and screens

  • Empty gutters

Summer:

  • Power wash driveway

  • Scrub patio furniture

  • Deck and fence maintenance

Fall:

  • Gutters (again)

  • Moss/mold check

  • Roof inspection

Winter:

  • Spot clean salt and grime

  • Entryway touch-ups

  • Plan ahead for next year

Stay on top of it, and it never becomes overwhelming.

DIY or Hire a Pro? Let’s Be Honest

Ask yourself two questions:

  1. Do I have the time?

  2. Do I have the tools (and know-how) to not make it worse?

If the answer to both is yes, then by all means—DIY it. Just be careful. Don’t go blasting paint off your siding or sending water under your shingles. And stay off steep roofs unless you’re into hospital visits.

If you’re short on time, hate cleaning, or just want it done fast and right—hire a crew. A solid pro will clean more thoroughly in half the time without damaging anything. Totally worth it.

Want to Be Kind to the Planet? Clean Smart

Eco-friendly exterior cleaning is 100% doable. You don’t have to nuke your lawn or poison your rose bushes.

  • Use biodegradable soap.

  • Do not use bleach.

  • Use natural cleaners such as vinegar or citrus to do small cleaners.

  • You can save water- do not just watch the hose go crazy.

You can have a clean home and a clean conscience.

Final Words: Your Home Deserves to Shine

Here’s the truth—exterior home cleaning isn’t just a weekend project. It’s how you show respect for your space. It’s how you protect your investment. And yeah, it’s how you stop your house from looking like it was abandoned in a storm.

So whether you’re scrubbing the siding yourself or calling in a pro with a power washer and a van full of gear—just get it done.

You’ll feel better. Your house will look better. And everyone who walks by will wonder how you keep it looking so fresh.

Floors That Don’t Lie: Why You Need Professional Tile and Grout Cleaning Services

Here is a little truth bomb to you: Your floors are ratting you out.

Yeah, they are. All those coffee spills, muddy foot prints, pasta sauce splatters and goo that never quite got cleared off? You tile has memory. Even worse your grout? It never forgets it. And the moment you feel that there is an urgent need to get your kitchen floor out of a crime documentary and into the light again, it is high time to quit the homemade cleaning routine and call up those with the knowledge and expertise. This is not flashy. It is smartness. And in case you have not had the chance to check out professional tile and grout cleaning services yet, well, you are about to find out exactly why they are the unheralded saviors of a clean, healthy-feeling terrific-looking home.

First Off, What the Heck Is Professional Tile and Grout Cleaning Anyway?

Glad you asked. Because if you think it’s just some guy with a mop charging you premium prices, you’re in for a surprise. These services are run by technicians who use high-powered equipment (we’re talking steam, pressure, extraction—the works) to pull years of embedded grime, bacteria, and funk right out of your grout lines and tile pores. It’s like sending your floors to a day spa where they come back glowing and six years younger. They do not only clean the floors. They clean thoroughly, sanitize, deodorise and sometimes cover them so that they stay free in the future

Why Toothbrushing Can t (or Won t) Cut It (Literally or Figuratively)

Of course, you can go on your knees and scrub like Cinderella. You will feel productive even. The thing is the problem here: Grout is porous. This translates to the fact that it absorbs moisture, dirt, bacteria and the rest in the middle like a sponge that is dry. Your cleaning is likely to touch the surface unless you have hot water extraction on an industrial basis. And we won t even say what can be done to a tile and grout using the wrong cleaning product as far as being bleached, stained or even softened. It is not only ineffective but can be even harmful.

Here’s What You Get When You Call the Pros

Here’s What You Get When You Call the Pros Let’s break this down step-by-step, because what actually happens during professional tile and grout cleaning services is more thorough than most people realize:

1. Inspection

They visit your premise trying to assess the quality of the tile and grout, whether it is damaged, stained, or in the case of molds, or eroded. It is not a universal thing.

2. Pre-Treatment

They visit your premise trying to assess the quality of the tile and grout, whether it is damaged, stained, or in the case of molds, or eroded. It is not a universal thing.

3. Agitation

No, not emotional distress—this step involves scrubbing the cleaning solution deep into grout lines using mechanical brushes.

4. Hot Water Pressure Rinse

It is the heavy artillery. The process removes all contents on the grout and tile surfaces through water at high pressure.

5. Extraction

The suction force removes all remnants of filthy water and garbage as well as the residual cleaning solution.

6. Optional Sealing

Want to keep it clean longer? This step adds a protective seal over the grout, helping prevent new stains from soaking in

Real Talk: The Perks of Letting Someone Else Do It Right

Here’s where it gets good. Hiring a professional means:
  • Cleaner Air in Your Home: Mold spores and bacteria love to chill in your grout. Removing them improves your indoor air quality.
  • Better Looking Floors: Obvious one. Dingy floors instantly level up after a deep clean.
  • Longer Tile Lifespan: Grit, soap scum, and dirt wear tile down. Deep cleaning helps them last longer.
  • You Save Your Knees and Back: It’s called labor for a reason.
  • Zero Guesswork: Pros know which solution works for your tile type. You don’t risk wrecking your floors with bleach

Where You Need This the Most

Some areas of your home are dirt magnets. These spots are practically begging for a deep clean:
  • Bathrooms: Mildew, body oils, soap scum—it’s a germ party in there.
  • Kitchens: Spills, grease, and dropped food love to hide in grout.
  • Entryways: High traffic means constant grime buildup.
  • Mudrooms: Name says it all.
  • Business Facilities: Restaurants, salons, medical offices, they should be kept impeccable regarding clients and inspectors.

What Does This Cost? And Is It Worth It?

So, what happened is? It is usual at $0.75 to 2.50 per square foot which is dependent on:
  • How dirty the grout is
  • Type of tile (ceramic, porcelain, natural stone)
  • Size of the area
  • Whether or not you add sealing
Let’s say you have a 150 sq ft kitchen. That could run you anywhere from $112 to $375. Is it worth it? Heck yes. Compare that to the time, frustration, and risk of ruining your floors trying to DIY the same results.

How to Keep It Clean Longer (So You’re Not Calling Monthly)

Want to stretch the time between deep cleans? Here’s the human-approved cheat sheet:
  • Wipe spills immediately. Don’t let liquids sit.
  • Use doormats. Less dirt brought in translates to less in your floors.
  • Mop and sweep on a regular basis. Apply soft mop and PH neutral cleaner.
  • Re-seal your grout once in 12-18 months. It is floor sunscreen.

Can You DIY This Level of Clean? Not Really.

Let’s put it this way: can you bake a pizza at home? Sure. Will it be as good as a wood-fired Neapolitan pie from a place that’s been doing it for 30 years? Not a chance. Same goes for grout cleaning. Your little handheld steamer or vinegar spray bottle won’t hit the bacteria hiding inches deep in porous grout.

A Few Red Flags to Watch Out For When Hiring a Service

If you decide to book professional tile and grout cleaning services, make sure you’re not getting hustled. Avoid companies that:
  • Don’t offer an upfront quote
  • Refuse to explain their process
  • Don’t use sealing products unless requested
  • Have no real online reviews or references
  • Show up with just a mop and bucket (major red flag)
Good pros bring professional equipment, offer transparency, and back their work.

So, Should You Book It?

If your tile floors look like they’ve been through a war and your grout has gone from white to mystery gray, the answer is: absolutely. Tile and grout cleaning services are not only able to give your floor back the shininess, but it will seem so new. And having to sell your house or impress your in-laws or even live a little bit cleaner, it is one of the simplest bargains you can take.

5 Rapid Fire FAQs (Everybody Wonders about This)

Q1: What is the time consumption?

Usually 1-2 hours for an average room. Larger or dirtier spaces may take longer.

Q2: Will my floors be wet?

Briefly. Most of the moisture is extracted, but allow for drying time of about 30-60 minutes.

Q3: is it pet/kid safe?

Absolutely. All you have to do is to ask the company whether they utilise nature friendly solutions that are non toxic.

Q4: What is the frequency of doing it?

Once a year for homes with kids or pets. Every 18 months for low-traffic homes.

Q5: Do I really need to seal my grout?

If you want to protect it and keep it cleaner longer? Yes. 100% yes.

Final Thought

Grout does not lie. If it looks dirty, then it is dirty. And no-light-size candle, air freshener or new rug can ever cover that up forever. Then give your floors the makeover they need. Schedule the service, relax and let the pros handle the job. Your knees, your nose and your houseguests will thank you.

Eco-Friendly Grout Cleaning Methods for a Green Home

Ever find yourself scrubbing your bathroom floor, only to step back and think, “Why does this grout still look gross?” Same here. No matter how much I cleaned, those little lines between the tiles always seemed to hang on to grime like their life depended on it.

For the longest time, I reached for the strongest stuff under the sink—bleach sprays, mystery foams, even that blue gel that smells like a swimming pool. It worked… sort of. But it also gave me headaches and made the whole bathroom smell like a chemical factory.

That’s when I decided to try something different. I started testing natural grout cleaning methods—ones that wouldn’t burn my nostrils or make me wonder what I was breathing in. And guess what? They worked. Some are even better than the store-bought junk. If you’re curious about grout cleaning methods the green way, without all the harsh stuff, keep reading. I’ve tried everything on this list myself—no guesswork, no fluff.

Why Ditch the Chemicals?

Let’s be real for a second. Most traditional cleaners are effective—but they come with a lot of warnings. “Use gloves.” “Ventilate the room.” “Call poison control if ingested.” Yikes.

When I started switching over to eco-friendly products a few years back, grout cleaner wasn’t even on my radar. But then I realized: if this stuff is strong enough to bleach mold, what’s it doing to the air I breathe, or the water that goes down my drain?

That’s when I began looking for non-toxic grout cleaning options. Not just for my own health—but for the planet, too. And the best part? I didn’t have to give up clean grout.

Why Grout Gets So Gross (So Fast)

If you’ve ever wondered why your grout gets dirty way faster than your tiles, it’s because grout is porous. Kind of like a sponge. It soaks up anything that hits it—soap scum, moisture, grease, dirt, and whatever your dog tracks in.

It also holds onto the stuff you use to clean it. That means if you’re scrubbing with chemicals, some of that residue sticks around—and not in a good way.

That’s why chemical-free grout cleaning isn’t just a nice idea—it actually makes sense if you want to avoid breathing or absorbing who-knows-what.

Natural Grout Cleaners That Actually Work

Natural Grout Cleaners That Actually Work

I’m not big on gimmicks, so when I say these worked for me, I mean it. Most of them use things you probably already have at home.

1. Baking Soda + Vinegar

This combo is an old-school classic, and for good reason. It fizzes, it cleans, and it’s oddly satisfying.

Here’s what I do:

  • Sprinkle baking soda over the grout lines.

  • Fill a spray bottle with half white vinegar, half water.

  • Spray it right over the baking soda—get ready for that foamy reaction!

  • Let it sit for 5–10 minutes.

  • Scrub with a toothbrush or soft brush.

  • Rinse with warm water and wipe dry.

Simple, cheap, and zero fumes.

2. Hydrogen Peroxide + Baking Soda Paste

I found this one when I moved into a place with really bad grout stains. It worked like a charm—and didn’t leave a strong smell behind.

What to do:

  • Mix baking soda and hydrogen peroxide into a thick paste.

  • Spread it over the stained grout.

  • Wait 10–15 minutes.

  • Scrub gently and rinse clean.

It’s powerful but doesn’t damage the grout the way bleach does.

3. Castile Soap and Warm Water

If your grout just needs a refresh, not a deep clean, this one’s perfect.

Just add a few drops of Castile soap to a bowl of warm water. Dip a cloth in, wring it out, and wipe down your grout lines. Easy. No fancy tools needed. I use this one as a weekly touch-up between deeper cleans.

Not Into DIY? Store-Bought Green Options Exist

Not Into DIY? Store-Bought Green Options Exist

I get it—not everyone wants to mix their own concoctions in the kitchen. The good news? There are plenty of green grout cleaners out there that work just as well.

When I’m buying, I look for labels like:

  • Plant-based

  • Non-toxic

  • Biodegradable

  • Fragrance-free or essential oil scented

Some of my go-to brands:

  • Better Life

  • Puracy

  • ECOS

  • Seventh Generation

Just remember to flip that bottle around and read the ingredients. If it reads like a chemistry textbook, probably not as “green” as it claims.

The Steam Cleaner That Changed Everything

Okay, this isn’t a DIY cleaner, but it deserves a shoutout. A few years ago, I picked up a handheld steam cleaner on a whim. It’s now one of my favorite cleaning tools, hands down.

No chemicals. Just water, heat, and some serious grime-busting power.

You press a button, steam hits the grout, and suddenly all that hidden dirt just… lets go. It’s honestly kind of magical. If you’re serious about sustainable grout cleaning, a steam cleaner is worth every penny.

Preventative Maintenance = Less Deep Cleaning

Here’s a little trick I swear by: do a little bit, often.

After I shower or cook, I give the tiles and grout a quick spray with a diluted vinegar mix (half water, half vinegar). Takes less than a minute. Keeps buildup at bay.

I also use a microfiber cloth once a week to wipe down the areas where dirt shows up the most. No paper towel waste, and it works way better at grabbing gunk.

Keeping Grout Protected (Without Harsh Sealers)

So you’ve scrubbed your grout and it looks great. Now what?

Most commercial sealers are loaded with chemicals and VOCs. But there are safer options out there—eco-safe grout sealers that are water-based and low in toxins. Look for ones specifically labeled low-VOC or non-toxic.

Oh, and one more thing: make sure your bathroom has decent airflow. Mold loves trapped moisture. Open a window, turn on the fan, and let things dry out.

Stuff I Regret Using So You Don’t Have To

I’ve made a few mistakes over the years, and maybe this can help you avoid them:

  • Bleach – Works fast, but it weakens grout over time and makes it more porous.

  • Ammonia – The fumes alone are reason enough to skip it.

  • Colorful cleaners – They stained my grout, and it took ages to fix.

  • Steel wool or abrasive pads – Bad for grout and even worse for tile.

Stick to gentle tools and ingredients you trust.

Final Thoughts: Clean Grout, Clear Conscience

I didn’t switch to natural cleaning overnight. It started with small changes—like swapping out one cleaner at a time. But now, my home feels fresher, and I don’t have to worry about what’s lurking in the air or the water I rinse down the drain.

These eco-friendly grout cleaning methods aren’t just good for your floors—they’re good for you, your family, your pets, and the planet.

So next time your grout’s looking rough, skip the harsh stuff. Try something simple, something clean, something green.

You might just be surprised by how much better your home feels.

Frequently Asked Questions (FAQs)

1. Can I use vinegar on all grout types?
Not really—avoid using it on natural stone like marble. It’s fine for ceramic or porcelain tile though.

2. How often should I clean my grout?
A light clean weekly and a deeper scrub every month or so works well.

3. Is hydrogen peroxide safe for grout?
Yes! It’s a gentle, effective cleaner that tackles stains without the harsh smell of bleach.

4. What’s the easiest way to maintain clean grout?
Keep a spray bottle of diluted vinegar and water handy. A quick spritz and wipe each day does wonders.

5. Should I invest in a steam cleaner?
If you like deep cleaning without chemicals, 100% yes. It’s a game-changer.

The Ultimate Guide to Electric Grout Removers: Make Tile Cleaning a Breeze

Have you ever spent hours on your knees scraping out old grout, only to feel like you barely made a dent? Yeah, we’ve all been there—elbow-deep in tile gunk, dreaming of a better way. Well, let me introduce you to your new best friend: the electric grout remover. This little powerhouse might not wear a cape, but trust me, it’s the hero your bathroom (and your back) deserves.

Whether you’re redoing your bathroom, refreshing your kitchen backsplash, or just tired of dingy grout, this guide is your go-to resource. We’ll dive into what electric grout removers are, how they work, which ones are worth your money, and tips for using them like a pro—even if you’re a total newbie.

What Is an Electric Grout Remover, Anyway?

Let’s break it down. An electric grout remover is a handheld power tool designed to take the grunt work out of grout removal. Instead of scraping by hand or wrestling with a chisel and hammer (who has time for that?), you just turn it on and let it do the heavy lifting.

These tools usually come with oscillating or rotating tips that are strong enough to dig out old grout without damaging the surrounding tiles. Some models even have variable speeds and changeable attachments, so you can customize your approach depending on the tile type and grout condition.

Bottom line? It’s like a magic eraser for bad grout jobs—only way cooler.

Why Choose an Electric Grout Remover?

Okay, but why not just use a manual grout scraper? Great question! Here’s why going electric might just change your life (or at least your tile game):

1. Way Less Effort

Say goodbye to sore arms and aching knees. A power grout remover cuts through hardened grout like butter, saving you hours of backbreaking work.

2. Faster Results

What used to take all weekend can now be done in an afternoon. Imagine that—free time!

3. Precision Without Tile Damage

Quality electric grout removal tools are designed to be precise, so you don’t end up chipping or cracking your beautiful tiles.

4. Great for Big Projects

If you’re regrouting an entire bathroom or a tiled floor, an electric grout cleaning tool is pretty much essential.

Who Should Use an Electric Grout Remover Tool?

Electric Grout Remover Tool

If you’re thinking this is just for professionals, think again. DIY-ers love these tools just as much. Here’s who can benefit:

  • Homeowners doing tile upgrades
  • DIYers tackling kitchen and bathroom renovations
  • Handymen and women
  • Contractors and tile professionals
  • Landlords refreshing rental units

Even if you’ve never removed grout in your life, the right electric grout remover can make you feel like a seasoned pro.

‍Choosing an Electric Grout Remover

Many models are available, so consider how you select one. A helpful list can direct your choice.

Power
Confirm your grout remover possesses enough power for your job. Oscillating tools with adjustable speed are good; they let you work slowly or quickly as required.

Parts
Look for a tool that includes various heads or fittings. Carbide or diamond blades remove grout best.

Grip
Your hands will feel better with a good grip. A comfortable handle and a light build help much on long jobs.

Dust Control
Grout dust causes problems. Some expensive models offer dust removal systems. You can connect a vacuum. Your lungs and your home will benefit.

Cost
You do not need to spend a lot of money. Good electric grout tools come at all prices. Be sure to avoid trading good quality for a lower price.

Electric Grout Removers to Consider

Look at some major tools. Some well liked and dependable choices users like include the following

Dremel Multi-Max MM50

This oscillating tool works with accuracy – it weighs little and acts with force, plus it comes with different attachments – these tools suit grout removal well.

Bosch Starlock Oscillating Multi-Tool

This tool, a preference for builders, has force and exactness in one neat item. It costs more, but the price reflects its use.

Makita Multi-Tool TM3010CX1

Makita’s tool centers on comfort and lasting quality. If you face tough grout, this tool will work for you.

DEWALT Oscillating Tool Kit

This tool works with power. With fast blade changes also forceful action, it makes grout removal nearly easy.

How to Use an Electric Grout Remover – A Guide

How to Use an Electric Grout Remover

You have your tool. What comes next? This process helps you feel ready before you begin.

Step 1: Get Your Workspace Ready

Clear the area.

Place a drop cloth or painter’s plastic to collect dust.

Put on goggles, a dust mask along with ear protection.

Step 2: Put on the Correct Blade

Use a carbide or diamond blade for good results.

Check that it stays tight to stop it from moving around.

Step 3: Set Your Speed

Begin slowly if this is your first time.

Raise the speed slowly as you get used to it.

Step 4: Begin to Remove Grout

Place the blade between the tiles.

Let the tool work – do not push it.

Use soft pressure and work on small areas.

Step 5: Clean the Area

Use a vacuum or sweep up the grout dust.

Clean tiles with a damp cloth.

Look at your work.

‍Advice for Removing Grout

Avoid new user errors. Remember this guidance

Do not hurry. The tool does its work.

Consider the corners – these spots require a gentle feel.

Change old blades; they complicate the task and create more mess.

Test the tool first. Use it on a small, hidden space to learn how it works.

Final Thoughts: Is an Electric Grout Remover Really Worth It?

Absolutely. If you’ve ever spent hours scraping old grout by hand, you already know how frustrating—and exhausting—it can be. An electric grout remover takes that messy, time-sucking task and makes it way easier and quicker.

Whether you’re tackling a weekend home project or sprucing up the bathroom before guests arrive, having one of these tools on hand just makes sense. It’s efficient, it’s easy to use, and best of all—it helps you get professional-looking results without hiring anyone.

Ready to Kick That Grimy Grout to the Curb?

Now that you’ve got the scoop on what electric grout removers do and how to use them, the only thing left is to roll up your sleeves and get started. Pop on those safety goggles, plug in your tool, and say goodbye to crusty old grout for good.

Your tiles are going to look amazing—and you didn’t even have to break a sweat.

Frequently Asked Questions About Electric Grout Removers

Q1. What is the best tool to use to remove grout?

An electric grout remover with a carbide or diamond blade is the top choice—fast, precise, and easy on your hands.

Q2. What is the best way to remove hardened grout?

Use a powered grout removal tool, go slow, and let the blade do the work without forcing it.

Q3. What is the fastest way to remove grout?

An electric grout remover is by far the quickest method—way faster than scraping by hand.

Q4. What is the best grout mold remover?

A bleach solution or a specialized cleaner like RMR-86 works great for killing mold on grout.

Q5. Do I have to remove all old grout before regrouting?

Yes, remove most of the old grout so the new grout can properly adhere and last longer.

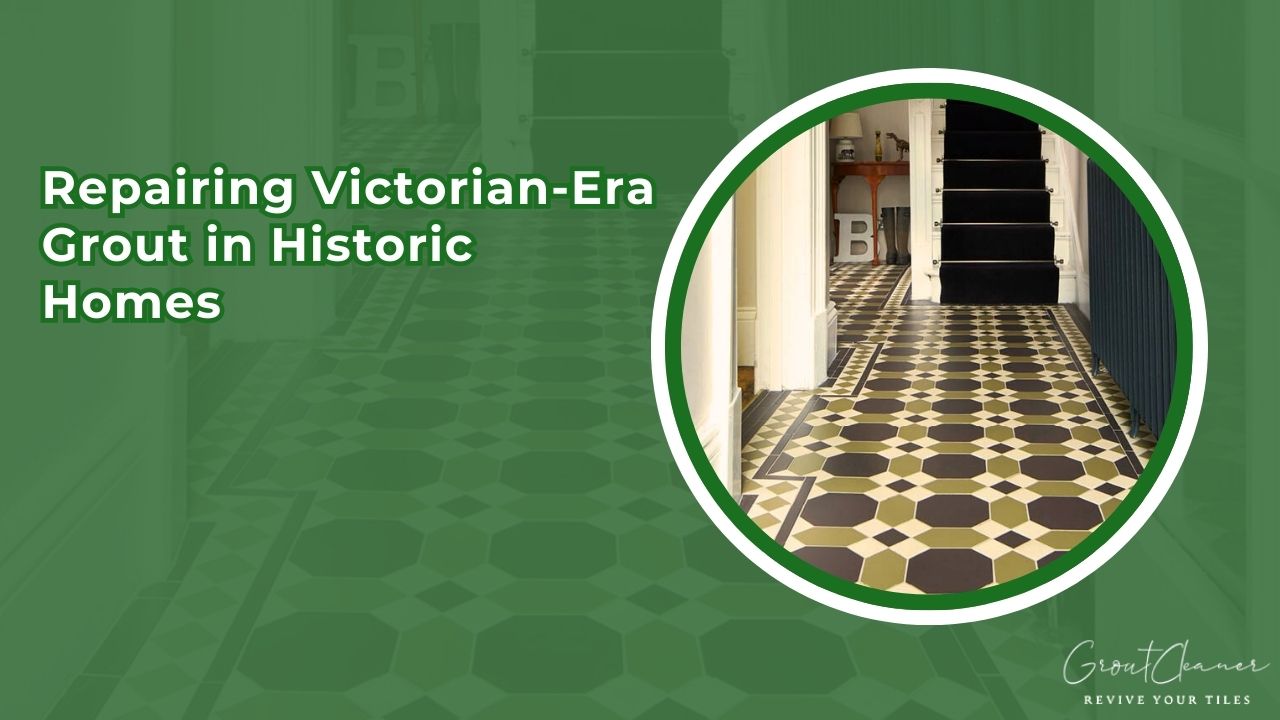
Repairing Victorian-Era Grout in Historic Homes

Maintaining the integrity of historic homes demands exceptional care and specialized knowledge, particularly when it comes to Repairing Victorian-Era Grout in Historic Homes. In our extensive guide, we explore proven techniques, expert insights, and sustainable cleaning methods to restore and preserve the original charm of your Victorian property. Our approach is detailed, practical, and designed to offer you the most reliable solutions for this unique challenge.

Understanding the Importance of Historic Grout Repair

Victorian-era homes carry a distinctive architectural style and craftsmanship that reflect the rich history of their time. The grout cleaning used in these homes is often handmade and intricately applied, contributing not only to the aesthetics but also to the durability of floor tiles and stonework. Over decades, natural wear and environmental factors can lead to cracks, discoloration, and deterioration of the grout.

Preserving historical integrity is paramount. We emphasize using techniques that respect the original materials and construction methods. When we set out to repair Victorian-era grout, we ensure that our methods blend modern efficiency with traditional care, safeguarding both appearance and historical authenticity.

Common Issues with Victorian-Era Grout

Common Issues with Victorian-Era Grout

Historic homes often face unique challenges due to the aging of materials and previous repair attempts. Some common issues include:

  • Cracking and Fracturing: Grout can develop fine cracks or more severe fractures due to thermal expansion, settling of the structure, or water infiltration.

  • Discoloration: Exposure to moisture, dirt, and cleaning agents over the years can cause the grout to lose its original color.

  • Mold and Mildew: High humidity and inadequate ventilation in older homes contribute to the growth of mold and mildew, affecting both the health of the building and its inhabitants.

  • Wear and Tear: Frequent foot traffic and general aging lead to the breakdown of the grout’s structure, making it more susceptible to damage during cleaning and repair efforts.

Our repair process starts with a thorough assessment of the condition of the grout. This allows us to design a solution that is both effective and sympathetic to the building’s historic fabric.

Essential Tools and Materials for Effective Repair

When Repairing Victorian-Era Grout in Historic Homes, using the right tools and materials is essential. We recommend a blend of traditional and modern resources to achieve optimal results:

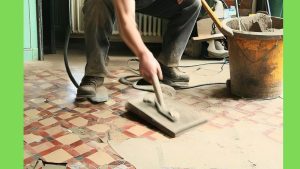
  • Grout Removal Tools: Manual tools such as grout saws or oscillating tools with a grout removal attachment are essential for gently removing the damaged grout.

  • Cleaning Solutions: We advocate for eco-friendly solutions, particularly when learning how to clean victorian floor tiles naturally. Mild, non-toxic cleaners preserve the original materials while effectively removing contaminants.

  • Specialized Grout Mixes: Using a high-quality, historically appropriate grout mix ensures compatibility with the original tiles and longevity of the repair.

  • Sealants: Post-repair, applying a high-quality sealant helps prevent future damage by protecting against moisture and stains.

We emphasize a careful, methodical approach in our selection and use of materials to ensure that the repair work not only restores function but also enhances the historical character of your home.

Step-by-Step Guide to Repairing Victorian-Era Grout

Repairing Victorian-Era Grout

1. Assessment and Preparation

Before any repair work begins, we perform a detailed inspection of the affected areas. This includes:

  • Visual Inspection: Identifying areas where the grout is cracked, stained, or crumbling.

  • Moisture Check: Ensuring that water damage is not a contributing factor to the grout’s deterioration.

  • Material Analysis: Understanding the composition of the original grout to match it with the new mix.

After the assessment, we prepare the workspace by removing any loose debris and protecting surrounding surfaces. Preparation is crucial to ensure that the repair process does not compromise the integrity of adjacent historic elements.

2. Grout Removal

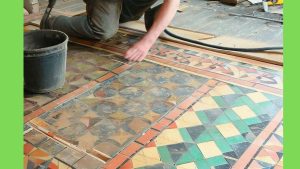
Carefully removing the damaged grout is a delicate process. We utilize specialized tools to minimize impact on the original tiles. The key steps include:

  • Scoring the Grout: Gently cutting along the grout lines with a grout saw.

  • Removing Debris: Vacuuming and cleaning the area to eliminate dust and loose particles.

  • Ensuring Clean Lines: Preparing a clean and even channel for the new grout mix to settle.

This phase requires a steady hand and precise technique to ensure that the historical details remain intact while setting the stage for new material.

3. Mixing and Application of New Grout

The quality of the new grout is paramount. We follow these steps:

  • Custom Mixing: Tailoring the grout mixture to match the original in color, texture, and composition.

  • Application: Using a grout float to apply the mix evenly across the prepared channels.

  • Precision Work: Ensuring that every gap is filled and smoothed to replicate the original finish.

Attention to detail during this phase guarantees that the new grout integrates seamlessly with the historic fabric of your home.

4. Curing and Sealing

Once applied, the grout must be allowed to cure properly. Our process includes:

  • Curing Time: Allowing the grout to set according to manufacturer guidelines, ensuring full strength is achieved.

  • Sealing: Applying a protective sealant to guard against moisture and stains. This step is vital for long-term durability and is part of our comprehensive approach to Repairing Victorian-Era Grout in Historic Homes.

5. Final Inspection and Maintenance

After the repair work is complete, a final inspection ensures that every detail meets our high standards. We also provide maintenance tips to help homeowners preserve their restored surfaces over time. Regular maintenance is essential for extending the life of the grout and keeping the historic charm of the property intact.

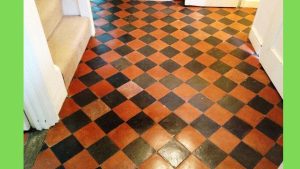
Eco-Friendly Cleaning: How to Clean Victorian Floor Tiles Naturally

How to Clean Victorian Floor Tiles Naturally

Alongside grout repair, regular cleaning is essential for historic homes. We provide practical advice on how to clean victorian floor tiles while ensuring the process is gentle and effective.

  • Natural Cleaners: We recommend using mixtures of vinegar, water, and mild essential oils to remove dirt without harsh chemicals.

  • Soft Tools: Using microfiber mops and soft brushes prevents scratching and wear.

  • Routine Maintenance: Establishing a cleaning schedule helps prevent the buildup of dirt and grime, keeping your tiles vibrant and well-preserved.

Our environmentally friendly cleaning methods not only maintain the aesthetic appeal but also contribute to a healthier living environment in your historic home.

Expert Tips for Long-Lasting Repairs

We believe that knowledge and precision are the cornerstones of any successful restoration project. Here are some expert tips:

  • Use Historical References: Whenever possible, refer to original construction methods and materials. This ensures that repairs are historically accurate.

  • Test Small Areas: Before full application, testing the new grout on a small section helps verify color match and adherence.

  • Monitor Environmental Conditions: Temperature and humidity play a critical role in curing times and durability. Adjust your repair schedule to align with favorable conditions.

  • Educate and Empower: We encourage homeowners to educate themselves about the historical context of their property, enabling them to make informed decisions about repairs and maintenance.

By following these expert tips, we help ensure that your Victorian-era home not only looks its best but also retains its historical significance for future generations.

The Role of Professional Expertise in Historic Home Restoration

Professional Expertise in Historic Home Restoration

Restoring historic homes requires a delicate balance between modern techniques and respect for traditional craftsmanship. Our team of professionals is dedicated to providing top-tier service, ensuring that every repair, especially when Repairing Victorian-Era Grout in Historic Homes, is executed with precision and care.

  • Certified Professionals: We work with experts who specialize in historical restorations, ensuring that our practices meet the highest standards.

  • Innovative Methods: Combining traditional methods with modern advancements allows us to tackle challenges effectively while preserving historical details.

  • Customized Solutions: Every home is unique. We offer tailored repair plans that address specific needs, ensuring a perfect match with the original design.

  • Ongoing Support: Our service doesn’t end with the repair. We offer continued maintenance advice and support to help you preserve the beauty of your historic home.

Addressing Common Concerns

Homeowners often have questions regarding the safety, cost, and long-term benefits of grout repairs. We are committed to providing clear, concise answers that empower you to make the best decisions for your property.

  • Safety: Our methods ensure that both the repair process and the resulting finish are safe and non-toxic.

  • Cost-Efficiency: While historic restorations can be more costly, our approach emphasizes quality over short-term savings, ensuring lasting results.

  • Durability: Proper repair and maintenance extend the life of the grout, protecting your investment and preserving historical beauty.

  • Sustainability: By using natural cleaning methods and eco-friendly materials, we contribute to a healthier environment while maintaining authenticity.

  • Expert Support: Our team is available to answer any questions and provide expert guidance throughout the restoration process.

Integrating Traditional Craftsmanship with Modern Techniques

In the realm of historic home restoration, tradition meets innovation. We incorporate modern techniques that complement the original craftsmanship of Victorian-era homes. Our approach includes:

  • Detailed Documentation: Keeping records of all repairs helps maintain historical accuracy and guides future restoration projects.

  • State-of-the-Art Equipment: Modern tools allow for precision work that minimizes damage to the original materials.

  • Sustainable Practices: We focus on methods that are not only effective but also environmentally responsible, aligning with our natural approach to how to clean victorian floor tiles naturally.

  • Training and Education: Continuous learning and adaptation of new techniques ensure that our team remains at the forefront of historic restoration practices.

Conclusion

In conclusion, Repairing Victorian-Era Grout in Historic Homes is an art that requires precision, respect for history, and the right techniques. We strive to deliver restoration services that honor the legacy of these unique properties while incorporating modern innovations for durability and sustainability. By understanding the challenges and employing expert strategies, homeowners can enjoy the timeless beauty and craftsmanship of their historic homes for generations to come.

Our comprehensive guide covers everything from the initial assessment and careful removal of deteriorated grout to the application of custom mixes and natural cleaning methods. We believe that preserving the historic integrity of your home involves a thoughtful blend of traditional craftsmanship and modern expertise, ensuring both beauty and longevity.

We invite you to explore our detailed process and expert tips, confident in the knowledge that each step is designed to deliver superior results. With a commitment to excellence and a passion for historical preservation, our team remains dedicated to maintaining the authenticity of your home while enhancing its functionality and appearance.

Frequently Asked Questions (FAQs)

Q1: What are the main causes of grout deterioration in Victorian homes?

Grout deterioration is often due to cracking, discoloration, moisture damage, and natural wear over time.

Q2: Can I repair the grout myself or should I hire a professional?

While small repairs can be managed with proper tools, hiring a professional ensures historical accuracy and longevity.

Q3: What eco-friendly methods do you recommend for cleaning Victorian floor tiles?

We advise using a mixture of vinegar, water, and mild essential oils to clean the tiles gently.

Q4: How long does it typically take for the new grout to cure?

Curing times vary, but it generally takes 24-48 hours for the grout to fully set under optimal conditions.

Q5: How can regular maintenance extend the life of the repaired grout?

Regular, natural cleaning routines and periodic inspections help prevent moisture damage and preserve the grout’s integrity.

Can You Caulk Over Grout? Guide for Home Improvement

Can You Caulk Over Grout?

Yes, you can caulk over grout—and in many situations, it’s a practical way to seal small cracks, improve waterproofing, and refresh the appearance of aging grout lines without removing all the existing grout. Applying caulk over grout is especially useful around tubs, showers, sinks, countertops, and other areas where moisture and movement can cause grout to crack over time.

However, caulking over grout is not a permanent replacement for regrouting. If the grout is loose, crumbling, severely cracked, or hiding water damage, simply covering it with caulk will only mask the underlying problem. In those cases, removing the damaged grout and applying new grout is the better long-term solution.

I’ve used this method in my own bathroom after noticing a hairline crack in the grout where the bathtub met the tiled wall. Instead of regrouting the entire section, I carefully applied a bead of high-quality silicone caulk over the affected area. The repair stayed watertight and looked great for more than a year. While it worked well, I learned that caulking over grout is best viewed as a maintenance fix rather than a permanent repair.

In this guide, you’ll learn when you can caulk over grout, when you should regrout instead, how to apply caulk correctly, the best type of caulk to use, common mistakes to avoid, and expert tips to help your repair last longer.

Understanding the Basics: Grout vs. Caulk

Before diving into the application process, it is crucial to understand the unique properties of both grout and caulk. Grout is a cementitious material used to fill the gaps between tiles, providing structural integrity and preventing water infiltration. It is typically hard and porous, which means it can be susceptible to cracking and staining over time. On the other hand, caulk is a flexible, waterproof sealant designed to accommodate slight movements and prevent moisture from seeping into joints.

Characteristics of Grout

  • Durability: Grout is engineered to provide a solid bond between tiles, offering strength and support.
  • Porosity: Due to its porous nature, grout can absorb moisture, leading to discoloration and mildew if not properly sealed.
  • Maintenance: Grout often requires periodic cleaning and sealing to maintain its appearance and effectiveness.

Characteristics of Caulk

  • Flexibility: Caulk is highly flexible, making it ideal for areas prone to movement or temperature fluctuations.
  • Waterproofing: It creates a seamless barrier against moisture, reducing the risk of water damage.
  • Application: Caulk is generally easier to apply and clean up than grout, especially in intricate areas or corners.

By understanding these differences, I can better assess whether caulking over grout is a viable solution for your project.

I Learned the Hard Way

One mistake I made was trying to match the caulk color to my existing grout by eye while shopping. Under the bright store lights, the color looked like a perfect match. Once I applied it at home, though, it looked noticeably different in natural daylight, and the repair stood out more than I expected.

Since then, I’ve always recommended testing a small amount of caulk in the actual room before completing the job. Let it dry completely and check the color in natural daylight as well as under your bathroom or kitchen lighting. Spending a few extra minutes testing the color can save you from an obvious mismatch and the hassle of removing and reapplying the caulk.

When and Why You Might Consider Caulking Over Grout

caulking over grout

There are specific scenarios where homeowners and professionals alike might consider applying caulk over existing grout. Here are some common reasons:

1. Repairing Cracked or Damaged Grout

Over time, grout can crack, crumble, or become stained. In areas where regrouting might be too labor-intensive or costly, caulking can offer a temporary or even permanent fix by filling in the gaps and cracks.

2. Enhancing Waterproofing

Bathrooms, kitchens, and outdoor areas are constantly exposed to moisture. Applying caulk over grout can reinforce the waterproof barrier, especially in corners, edges, and areas where tiles meet other surfaces.

3. Simplifying Maintenance

Maintaining grout can be challenging due to its porous nature. Caulk, being easier to clean and less prone to mold growth, can simplify the upkeep process. When applied correctly, it creates a smoother, more resilient surface that requires less frequent maintenance.

4. Aesthetic Improvements

Sometimes, the appearance of old, worn-out grout can detract from the overall look of a tiled surface. Caulking over the grout can refresh the appearance, providing a uniform, clean finish that revitalizes the space.

Pros and Cons of Caulking Over Grout

pros and cons of caulking over grout

Before deciding to caulk over grout, it is essential to weigh the benefits against the potential drawbacks. Below is an in-depth analysis of the pros and cons of this approach.

Pros

  • Enhanced Flexibility: Unlike grout, caulk is designed to handle slight movements. This flexibility makes it ideal for areas where tiles may shift due to temperature changes or structural settling.
  • Improved Waterproofing: Caulk provides a watertight seal that prevents moisture from seeping behind the tiles, reducing the risk of water damage and mold growth.
  • Easier Application: For small areas or minor repairs, applying caulk is a straightforward process that does not require the extensive preparation that regrouting might demand.
  • Cost-Effective: In cases where extensive grout repair or replacement is needed, caulking can be a more economical solution.
  • Quick Fix: Caulk can provide a rapid solution for immediate issues, such as filling cracks or sealing joints, which is particularly beneficial for busy households or commercial settings.

Cons

  • Aesthetic Differences: Caulk typically has a different texture and appearance compared to grout. This may result in an inconsistent look if not applied carefully.
  • Longevity Concerns: While caulk is durable, it may not last as long as properly applied grout, especially in high-traffic or high-moisture areas.
  • Surface Preparation: Successful application of caulk over grout requires meticulous surface preparation. Any dirt, mildew, or loose particles can compromise adhesion.
  • Potential for Shrinkage: Some types of caulk may shrink or crack over time, particularly if applied too thickly or in unsuitable conditions.
  • Not Always a Substitute: In certain situations, caulking over grout may not address underlying issues such as extensive water damage or structural instability, and regrouting might be necessary.

What I Actually Noticed Over Time

In my own experience, the “longevity concerns” con is real — the caulk I applied near my tub started yellowing slightly after about 8 months, even with a mold-resistant formula. Worth knowing going in, especially if you want a low-maintenance fix.

Step-by-Step Guide to Caulking Over Grout

step guide to caulking over grout

If you have decided that caulking over grout is the best solution for your project, follow these detailed steps to ensure a successful application:

Step 1: Evaluate the Condition of the Grout

Before beginning any work, inspect the grout thoroughly. Look for areas where the grout is severely cracked, crumbling, or discolored. If the damage is too extensive, it might be best to remove and replace the grout rather than attempting to cover it with caulk.

Step 2: Clean the Surface Thoroughly

Proper cleaning is critical to the success of the caulking process. I recommend the following cleaning steps:

  • Remove Dirt and Debris: Use a vacuum or brush to eliminate any loose particles from the grout lines.
  • Deep Cleaning: Apply a grout cleaner or a solution of water and mild detergent to scrub the grout. Allow it to sit for a few minutes before rinsing thoroughly.
  • Disinfect: For areas prone to mold or mildew, use a disinfectant to ensure the surface is entirely free of contaminants.
  • Dry Completely: Ensure that the surface is completely dry before proceeding. Moisture can interfere with the adhesion of the caulk.

Step 3: Remove Loose Grout and Old Sealant

If there is any existing caulk or deteriorating grout, use a putty knife or a grout removal tool to carefully remove it. This step is essential for ensuring that the new caulk bonds well with the underlying surface.

Step 4: Choose the Right Caulk

Selecting the appropriate caulk is vital. For most applications involving grout, a 100% silicone caulk is recommended due to its excellent waterproofing properties and flexibility. However, there are also hybrid polymer caulks available that offer additional durability and ease of application.

Silicone vs. Hybrid Polymer: My Take

I’ve gone back and forth between silicone and hybrid polymer on different projects. For a kitchen backsplash repair, I used hybrid polymer because it was easier to paint over later — silicone won’t take paint at all, which I learned after a failed attempt.

Step 5: Prepare the Caulk Tube

Cut the tip of the caulk tube at a 45-degree angle to the desired bead size. It is often helpful to practice on a piece of scrap material to ensure that you have the correct opening size and that the caulk flows smoothly.

Step 6: Apply the Caulk

Using a caulk gun, apply a continuous bead along the grout line. It is important to work slowly and steadily to ensure an even application. Here are some tips:

  • Smooth Application: Keep the caulk gun at a consistent angle and apply even pressure.
  • Filling the Gaps: Make sure that the caulk fills the gaps completely, but avoid over-application, which can lead to excess squeeze-out.
  • Clean Up Excess: Immediately wipe away any excess caulk with a damp cloth or a caulk smoothing tool to maintain a clean line.

Step 7: Smooth and Finish the Caulk

After applying the caulk, use a caulk smoothing tool or your finger (dipped in soapy water) to smooth the bead. This not only improves the appearance but also ensures that the caulk fully adheres to both the tile and the grout.

Step 8: Allow the Caulk to Cure

Follow the manufacturer’s instructions regarding curing time. Generally, silicone caulk requires at least 24 hours to cure completely. Avoid using the area during this time to prevent the caulk from being disturbed.

Step 9: Inspect and Touch Up

Once the caulk has cured, inspect the work for any gaps, bubbles, or imperfections. If necessary, apply a second layer of caulk to achieve a seamless finish. Consistent inspection and touch-ups ensure that your caulking job remains effective and visually appealing over time.

Common Mistakes to Avoid When Caulking Over Grout

mistakes to avoid caulking over grout

Even with careful preparation, certain pitfalls can compromise the effectiveness of caulking over grout. I have identified some common mistakes and offer strategies to avoid them:

Insufficient Surface Preparation

Skipping or rushing the cleaning process can result in poor adhesion. I emphasize the importance of a meticulously cleaned and dried surface to ensure that the caulk bonds properly.

Incorrect Caulk Selection

Using a caulk that is not designed for wet environments or lacking flexibility can lead to cracking or peeling. Always opt for a high-quality silicone or hybrid polymer caulk specifically engineered for tiled surfaces.

Over-Application of Caulk

Excess caulk not only looks unsightly but may also fail to cure properly, leading to a messy finish. Applying a thin, even layer and promptly smoothing it out will yield the best results.

My First Caulking Attempt (Not My Best)

I’m guilty of this one myself on my first attempt — squeezed way too much out, panicked, and ended up smoothing a 3mm-thick ridge instead of a clean bead. A thin bead always looks more professional than a thick one, even if it feels under-filled.

Ignoring Curing Times

Rushing the curing process can disrupt the bond, reducing the longevity of the caulk. Adhering strictly to the recommended drying times is essential for optimal performance.

Alternative Solutions When Caulking Over Grout Is Not Recommended

alternative solutions caulking over grout

In some situations, caulking over grout may not be the most effective solution. Alternative approaches include:

Regrouting

For areas where the existing grout is beyond repair, regrouting is often the best option. This involves removing the damaged grout entirely and applying fresh grout, which restores the original look and structural integrity of the tiled surface.

Epoxy Sealers

Epoxy-based products can provide an additional layer of protection over grout. They are particularly effective in high-moisture areas and can help seal cracks without compromising the appearance of the tiles.

Tile Replacement

In cases where grout and tiles are both extensively damaged, replacing the affected tiles may be necessary. Although more labor-intensive, this approach ensures a completely renewed surface that is less susceptible to future issues.

Hybrid Solutions

Some projects may benefit from a combination of regrouting and caulking. For instance, regrouting the central areas of a tiled surface while using caulk to seal the perimeter or joints where movement is expected can provide a balanced solution that leverages the strengths of both materials.

Maintenance Tips for Long-Lasting Results

Ensuring the longevity of your caulked surfaces requires regular maintenance. Here’s what’s worked for me:

  • Regular Cleaning: Use non-abrasive cleaners to prevent damaging the caulk. Mild soap and water are typically sufficient for routine cleaning.
  • Periodic Inspection: Regularly inspect caulked areas for signs of wear, cracks, or mold. Early detection allows for prompt repairs, extending the life of your caulking work.
  • Reapplication When Needed: Even high-quality caulk will eventually deteriorate. Be prepared to reapply caulk every few years, especially in high-traffic or high-moisture areas.
  • Avoid Harsh Chemicals: Some cleaning agents can degrade caulk over time. Always check the manufacturer’s recommendations before using any new product on caulked surfaces.

Our Final Thoughts on Caulking Over Grout

In conclusion, the question can you caulk over grout is nuanced and depends on the specific conditions and requirements of your project. From my own projects, caulking over grout works best as a maintenance fix, not a renovation shortcut. It bought me time before a full regrout, and for corners and joints prone to movement, I’d choose it over grout again.

However, it is vital to consider the pros and cons, prepare the surface meticulously, and select the right materials for the job. For many homeowners and professionals, a combination of regrouting and caulking offers the best balance between durability and aesthetics.

By following the detailed steps outlined in this guide, you can achieve a professional finish that not only looks impressive but also stands the test of time. Whether you are addressing minor grout imperfections or undertaking a larger renovation project, this guide gives you everything you need for a clean, lasting repair.

Remember, caulking over grout is just one of many techniques available for maintaining and improving your tiled surfaces. Evaluating your specific needs and conditions will help you determine the best approach for your home or business. With proper preparation, careful application, and routine maintenance, you can achieve a resilient, attractive finish that enhances the longevity and functionality of your space.

If you’re looking for further insights into home improvement or need additional tips on managing tiled surfaces, check out the rest of the guides on this site — I keep them updated as I test new techniques and products. based on the latest industry trends and innovations, ensuring that you receive the most current and effective advice available.

Expert Tips for a Professional Finish

Achieving a flawless finish requires not only the right materials but also the right techniques. I recommend the following expert tips:

  • Invest in Quality Tools: A high-quality caulk gun and smoothing tools can make a significant difference in the final appearance.
  • Test Before Application: Always test the caulk on a small, inconspicuous area first to ensure compatibility with your surface.
  • Follow Manufacturer Instructions: Different caulk products may have unique application and curing requirements. Adhering to these instructions will optimize performance.
  • Mind the Temperature: Apply caulk in a controlled environment. Extreme temperatures can affect both the application process and the curing time.

FAQ: Common Questions About Caulking Over Grout

Q1. What happens if you caulk over grout?

When you caulk over grout, you create a flexible, waterproof seal that can help mitigate the effects of cracks, water intrusion, and mold growth. However, the appearance may differ from traditional grout, and the longevity of the caulk can be affected by surface preparation and environmental factors.

Q2. Can I put silicone on top of grout?

Yes, you can put silicone on top of grout, but it is essential to ensure that the grout is clean, dry, and free from loose particles. Silicone is highly effective in creating a watertight seal, making it a popular choice for bathroom and kitchen applications.

Q3. Can you fill grout cracks with caulk?

Absolutely. Filling grout cracks with caulk is a common repair method for small to moderate damages. The key is to properly clean and prepare the area before applying the caulk, ensuring that it adheres well and provides a durable seal.

Q4. Is it OK to use caulk instead of grout?

Using caulk instead of grout is acceptable in specific situations, such as in corners, edges, or areas that require flexibility due to movement. However, for large expanses of tiled surfaces, grout is generally preferred for its strength and durability. In many cases, a hybrid approach that combines both materials is the best solution.


Eco-Friendly Grout Cleaner for Showers: Safe & Powerful (2026 Guide)

Introduction

Looking for an effective homemade shower cleaner? A simple DIY solution made with common household ingredients can remove soap scum, hard water stains, mildew, and everyday grime without harsh chemicals. It works well on glass shower doors, ceramic tile, fiberglass, and other bathroom surfaces. Regular use helps prevent buildup, saves money, and keeps your shower clean and sparkling.

Quick Answer

A homemade shower cleaner is a DIY cleaning solution made from common household ingredients that removes soap scum, hard water stains, mildew, and grime. Spray it on shower surfaces, let it sit for 5–10 minutes, scrub gently if needed, and rinse thoroughly for a sparkling clean shower.

Why Choose a Homemade Shower Cleaner?

Why Choose a Homemade Shower Cleaner

Benefits of Homemade Cleaners

One of the biggest advantages of homemade cleaners is that they’re safe for your family and the environment. Store-bought cleaners often contain harmful chemicals that can irritate your skin, eyes, and lungs. Homemade solutions, on the other hand, use natural ingredients that are non-toxic but still powerful enough to tackle grime, mold, and mildew.

Environmental Impact

Commercial cleaners usually come in plastic containers that add to waste. By making your own cleaners, you not only cut down on plastic use but also eliminate the release of harmful chemicals into waterways.


Essential Ingredients for a Homemade Shower Cleaner

Ingredients for a Homemade Shower Cleaner

Vinegar – The Powerhouse of Natural Cleaning

Vinegar is acidic, making it excellent for breaking down soap scum and mineral deposits in your shower. It’s also antibacterial, meaning it can kill germs and leave your bathroom sparkling clean.

Baking Soda – The Grime Fighter

Baking soda is a mild abrasive that’s perfect for scrubbing surfaces without scratching them. It’s ideal for getting rid of stubborn soap scum and grime in the shower.

Lemon Juice – Nature’s Bleach

Lemon juice works as a natural bleach, brightening surfaces and killing bacteria. It’s great for removing hard water stains and leaving a fresh, citrusy smell.

Essential Oils – For a Fresh Scent

Essential oils like tea tree or lavender not only add a pleasant fragrance to your cleaner but also have antibacterial properties that can help eliminate germs.

Simple Homemade Shower Cleaner Recipes

homemade shower cleaner

Vinegar and Baking Soda Cleaner

Mix equal parts vinegar and water in a spray bottle, then sprinkle baking soda on the shower surfaces. Spray the vinegar solution over the baking soda and scrub with a brush or sponge. Rinse thoroughly.

Lemon Juice and Salt Scrub

Mix lemon juice with a bit of salt to create a natural scrub. Apply to areas with soap scum or mildew and scrub in circular motions. Rinse clean and admire the shine!

Essential Oil and Vinegar Spray

Combine 1 cup of white vinegar, 1 cup of water, and 10 drops of essential oil (tea tree or eucalyptus) in a spray bottle. Use it to disinfect and freshen up your shower.

Step-by-Step Guide to Using Homemade Shower Cleaners

How to Clean Shower Tiles and Grout?

Spray your vinegar and baking soda allow best solution on the tiles and grout, allowing it to sit for 10 minutes before scrubbing with a stiff brush. Rinse with warm water.

How to Clean Shower Glass?

Use the vinegar and water solution to spray down the shower glass. Wipe with a microfiber cloth for a streak-free shine.

How to Clean the Shower Floor?

For the floor, a baking soda and water paste works wonders. Apply the paste to tough stains, scrub, and rinse thoroughly.

The Benefits of Cleaning with Natural Ingredients

Safe for Your Family

Natural ingredients don’t contain harmful chemicals, making them a safer choice, especially in households with children and pets.

Eco-Friendly and Sustainable

Homemade cleaners reduce waste and prevent harmful chemicals from contaminating the environment, helping you live a more sustainable lifestyle.

How to Remove Tough Stains from Grout?

Remove Tough Stains from Grout

Best Methods for Cleaning Grout

For tough grout stains, a mixture of baking soda and hydrogen peroxide can work wonders. Apply the paste, let it sit for 15 minutes, then scrub with a toothbrush and rinse.

Using Homemade Cleaners on Grout

Homemade cleaners like baking soda and vinegar are great for grout. Just be sure to scrub thoroughly and rinse off any residue.

What Is the Best for Cleaning Grout?

Natural Grout Cleaners

Vinegar and baking soda are excellent for cleaning grout because of their grime-busting properties. For deep cleaning, hydrogen peroxide is another great option.

Grout Cleaning Tools You Need

A stiff-bristle brush or an old toothbrush works perfectly for scrubbing grout. These tools help you get into the tiny crevices without damaging the surface.

How to Get Your Grout White Again

Tips and Tricks for Whiter Grout

To get your grout looking white again, a paste of baking soda and water is highly effective. Apply it, scrub, and rinse thoroughly. For an extra boost, add a few drops of hydrogen peroxide.

The Importance of Regular Grout Cleaning

Regular cleaning prevents dirt and grime from building up in your grout lines. Make it a habit to clean your grout at least once a month to maintain its appearance.

Common Mistakes to Avoid When Using Homemade Shower Cleaners

Overusing Vinegar

While vinegar is effective, overusing it on certain surfaces like stone or marble can cause damage. Stick to tile, glass, and other vinegar-friendly surfaces.

Ignoring the Drying Process

After cleaning, be sure to dry all surfaces. Leaving moisture behind can lead to mold and mildew growth, undoing all your hard work.

Pro Tips for Keeping Your Shower Spotless

Daily Maintenance Tips

Wipe down your shower with a microfiber cloth after each use to prevent soap scum buildup. This quick step can save you from deep cleaning later.

Weekly Deep Cleaning

Once a week, give your shower a more thorough cleaning using your homemade solutions. This helps prevent grime and mildew from accumulating.

Frequently Asked Questions (FAQs)

1. Are homemade shower cleaners really effective?

Yes, homemade shower cleaners can be very effective when used regularly. Ingredients like vinegar, baking soda, and lemon help break down soap scum, remove stains, and kill odor-causing bacteria. While they may take a little more scrubbing than store-bought cleaners, they work well and are safer for your home.

2. How often should I clean my shower with a DIY cleaner?

For best results, you should clean your shower at least once a week. Light daily sprays after showering can help prevent buildup, while deeper cleaning once a week keeps mold and soap scum under control.

3. Can I use homemade cleaners on all shower surfaces?

Most DIY cleaners are safe for tiles, glass, and plastic surfaces. However, natural stone like marble or granite should not be cleaned with vinegar or lemon because acids can damage them. Always test on a small area first.

4. How long can I store homemade shower cleaners?

Most homemade cleaners last between 2 to 4 weeks when stored in a sealed spray bottle and kept in a cool place. If the smell changes or the mixture separates too much, it’s best to make a fresh batch.

5. What is the easiest homemade shower cleaner to make?

The easiest option is mixing equal parts white vinegar and water in a spray bottle. It takes less than a minute to prepare and works well for removing soap scum and hard water stains.