

By Jack Martin Grout & Tile Cleaning Specialist, 10+ years testing grout cleaning methods, 500+ products personally tried.
Key Takeaways
- Baking soda and vinegar is the most balanced homemade grout cleaner, handling roughly 80% of everyday grime.
- For mold and gray discoloration, hydrogen peroxide outperforms vinegar — use one or the other, never mixed together in the same container.
- Kitchen grease needs dish soap, not vinegar — vinegar alone won't break down cooking splatter.
- Oxygen bleach soaks handle years-old, neglected stains without weakening grout the way chlorine bleach can.
- Avoid straight vinegar and oxygen bleach on natural stone tile; stick to a baking soda-only paste near stone surfaces.
- Let any paste sit for the full recommended time (10–30 minutes depending on the recipe) — rinsing early is the most common mistake that wastes effort.
Introduction
I've mixed, tested, and scrubbed with more homemade grout cleaner recipes than I can count over the past decade, and the question I get asked more than any other is simple: do these DIY pastes actually work, or is that just something people repeat on Pinterest? Short answer yes, a proper homemade grout cleaner works, but only if you use the right combination for the problem in front of you and give it enough time to do the job. I've run store-bought grout cleaners that cost $12 a bottle side by side against a paste I mixed from ingredients already sitting in my kitchen cabinet, and more often than not, the homemade version held its own. Sometimes it won outright. This guide walks through every recipe I actually use, when to reach for each one, which grout types they're safe on, and the mistakes that waste your time. No miracle claims just what gets grimy grout lines clean using stuff you probably already own.

Why DIY Grout Paste Actually Works
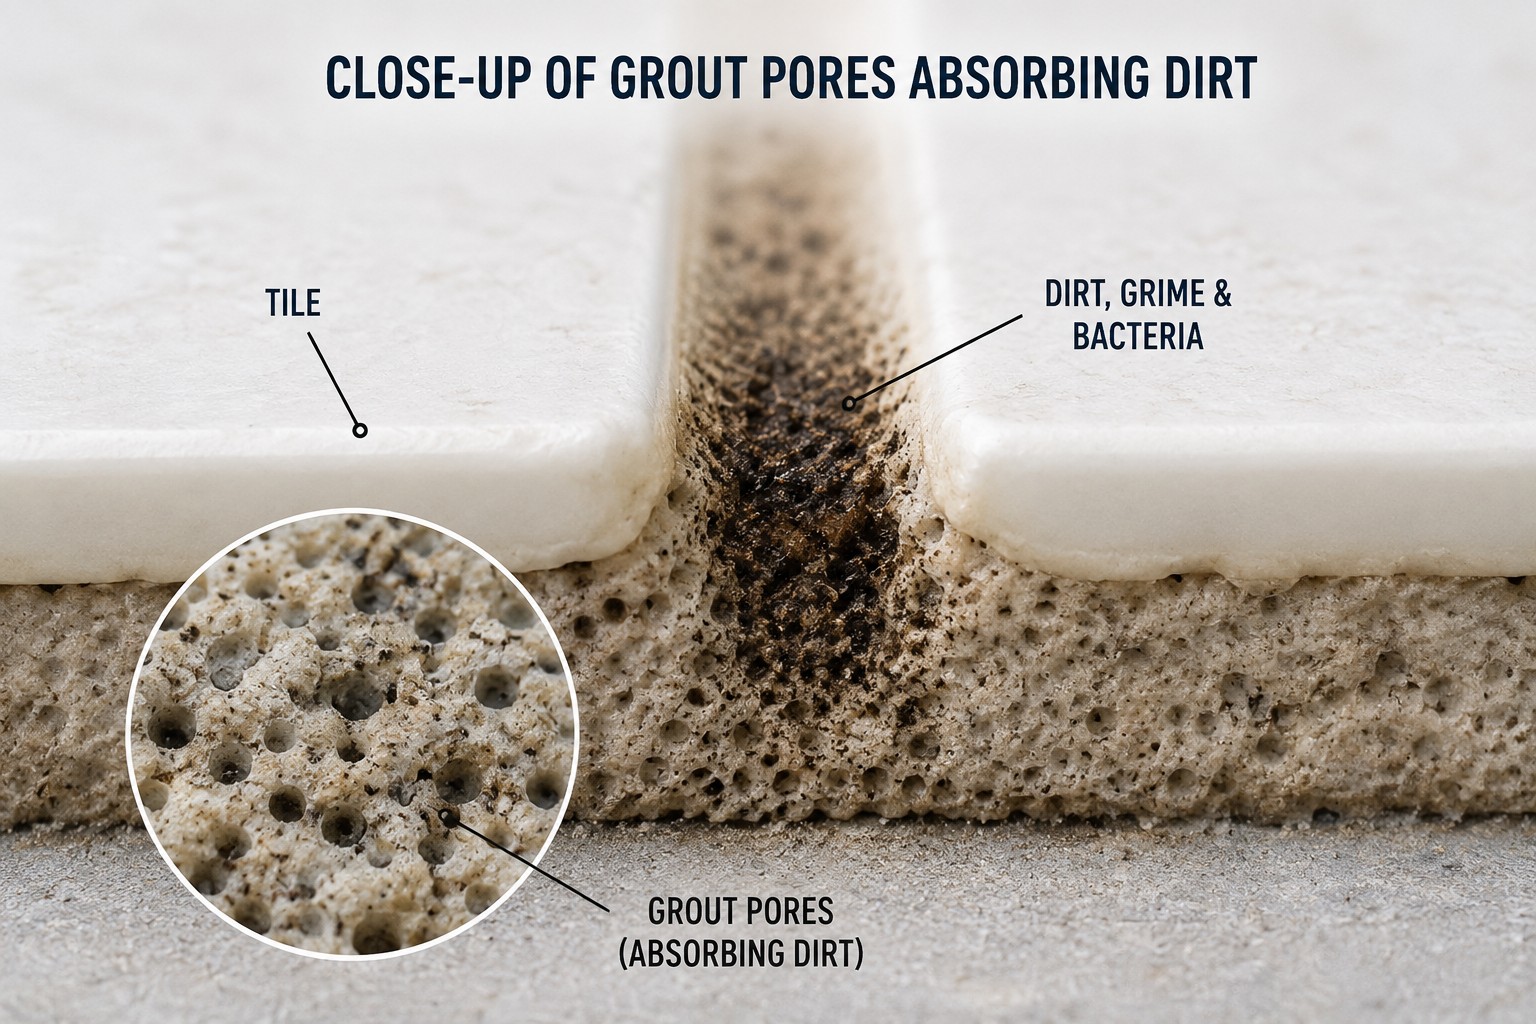
Grout is porous. That's the entire problem in one sentence. It soaks up spills, soap scum, body oils, and moisture like a sponge, and once dirt settles into those pores, a quick wipe with a paper towel isn't going to touch it. A good homemade grout cleaner attacks that embedded dirt in a few distinct ways, and understanding the mechanism actually helps you pick the right recipe instead of guessing:
- Baking soda is a mild abrasive and a natural alkali. It physically scrubs away grime while neutralizing acidic stains from things like coffee, wine, and hard water minerals.
- White vinegar is acidic and dissolves mineral deposits, soap scum, and light mold. When it hits baking soda, the fizzing reaction agitates and lifts loosened dirt out of the grout's pores.
- Hydrogen peroxide is a mild bleaching agent. It brightens grout and kills mold spores without the fumes or grout-damaging strength of chlorine bleach.
- Dish soap cuts through grease, which shows up constantly in kitchen grout near the stove and around cutting boards.
- Oxygen bleach (sodium percarbonate) breaks down into hydrogen peroxide and washing soda in water, giving you a stronger whitening punch for old, set-in stains without the surface damage chlorine bleach can cause.
None of these ingredients are as aggressive as commercial bleach-based cleaners, and that's actually an advantage. Bleach can weaken grout over time and isn't safe on every surface. Homemade recipes are gentler, cheaper, and in most cases just as effective for regular maintenance and moderate staining. Where they fall short is grout that's been neglected for years, has deep mold penetration, or has never been sealed. For that level of buildup, a stronger commercial cleaner or a professional steam clean as a first pass, followed by a homemade routine for upkeep, is the realistic path.
How I Test Every DIY Recipe on This List
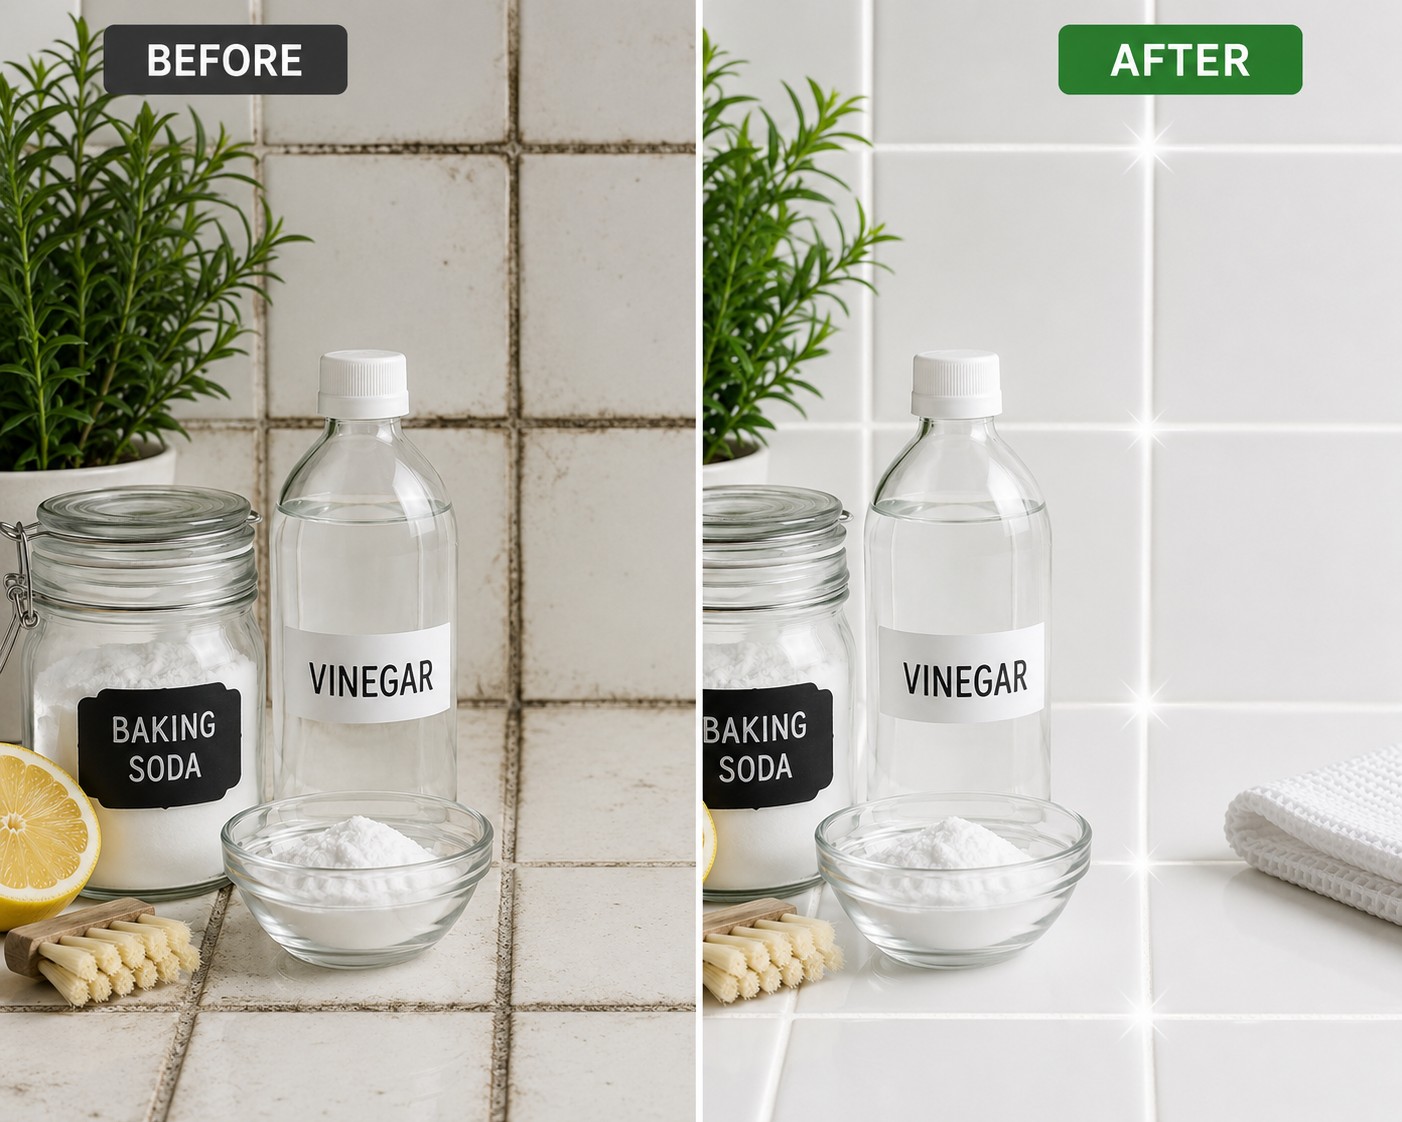
Every recipe in this guide has been run on real grout in my own bathroom and kitchen, plus a handful of test tiles I keep specifically for side-by-side comparisons same stain, same dwell time, different formula, photographed before and after under the same lighting. I track dwell time, scrub effort, and whether the result held up a week later, not just how it looked immediately after rinsing. That last part matters more than most guides let on, because a lot of pastes look great right after rinsing and then the grime creeps back within days because the pores weren't actually cleared out. The recipes that made this list are the ones that held up over repeat testing, not just a single good photo.
Homemade Grout Cleaner Recipe 1: Baking Soda and Vinegar Paste (Best All-Around)
This is my go-to homemade grout cleaner and the one I recommend to almost everyone starting out. It's cheap, fast, and handles the majority of everyday grime, and it's the formula I'd point to first if you only try one homemade grout cleaner from this guide.
What you'll need:
- ½ cup baking soda
- 2–3 tablespoons water
- White vinegar in a spray bottle
- A stiff-bristled grout brush or old toothbrush
- Microfiber cloth
Steps:
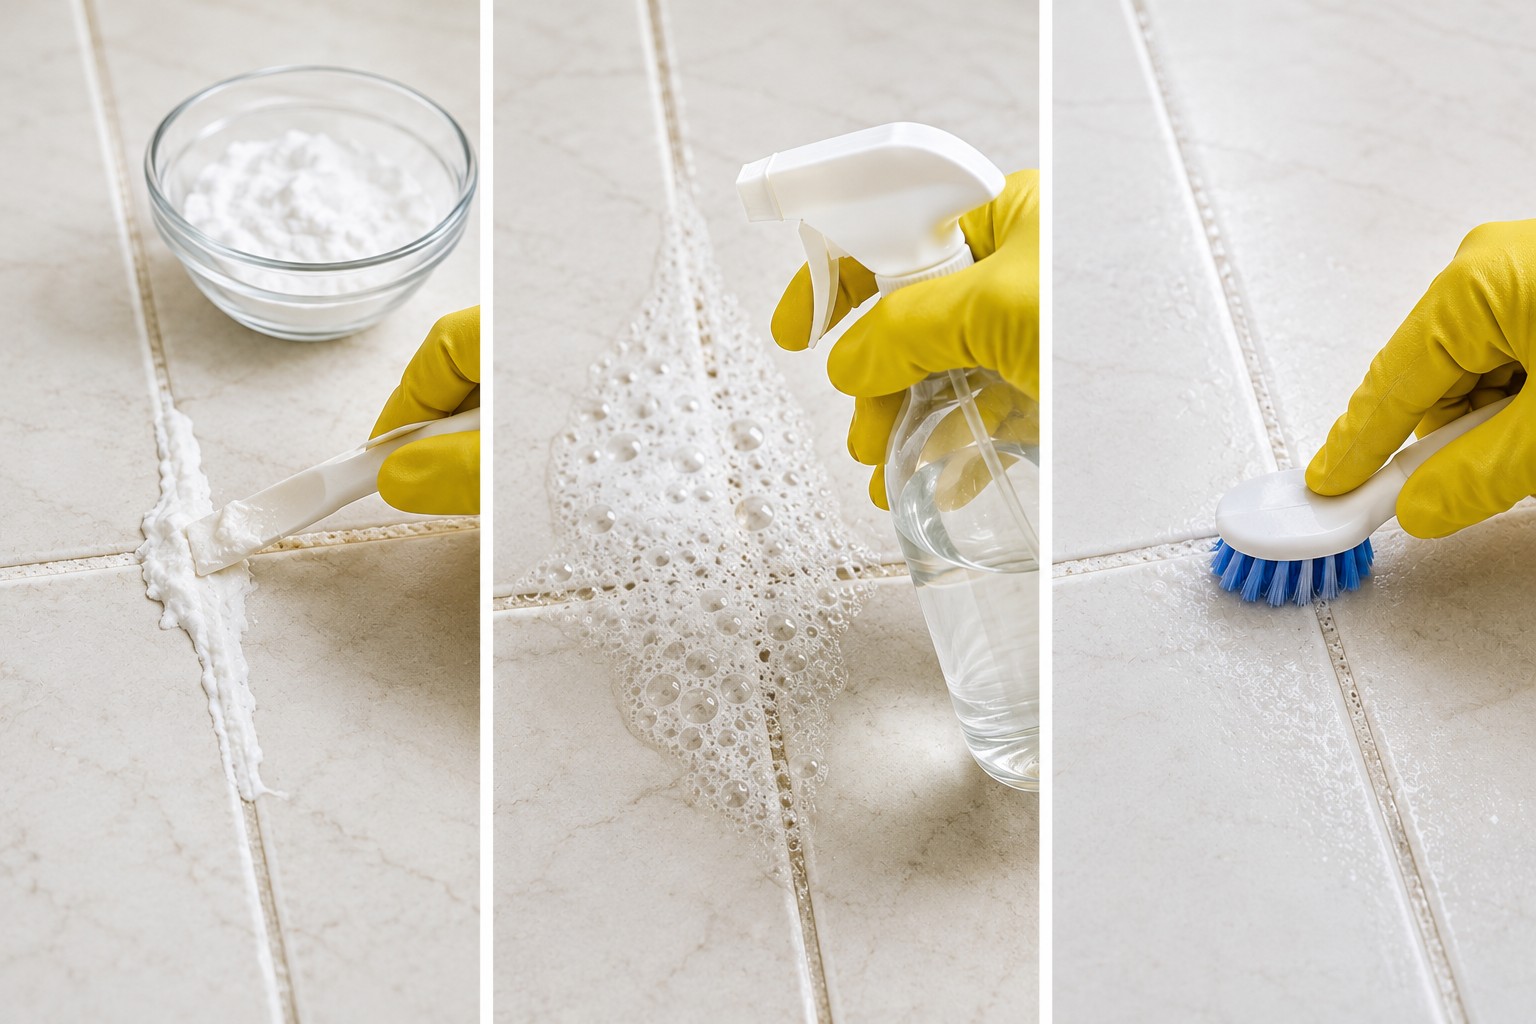
- Mix the baking soda with water until it forms a thick, spreadable paste similar to toothpaste consistency.
- Apply the paste directly onto the grout lines using an old toothbrush or your finger (gloves recommended).
- Spray white vinegar generously over the paste. It will foam up immediately that's the reaction doing the work.
- Let it sit for 10–15 minutes. Don't let it dry out completely; mist with a little more vinegar if needed.
- Scrub in small circular motions with the brush, focusing on discolored spots.
- Rinse thoroughly with warm water and wipe dry with a microfiber cloth.
This method works especially well as a natural grout cleaner paste for weekly or biweekly maintenance, and it's gentle enough to use on colored grout without fading it.
Baking Soda and Hydrogen Peroxide Paste (Best for Mold & Discoloration)
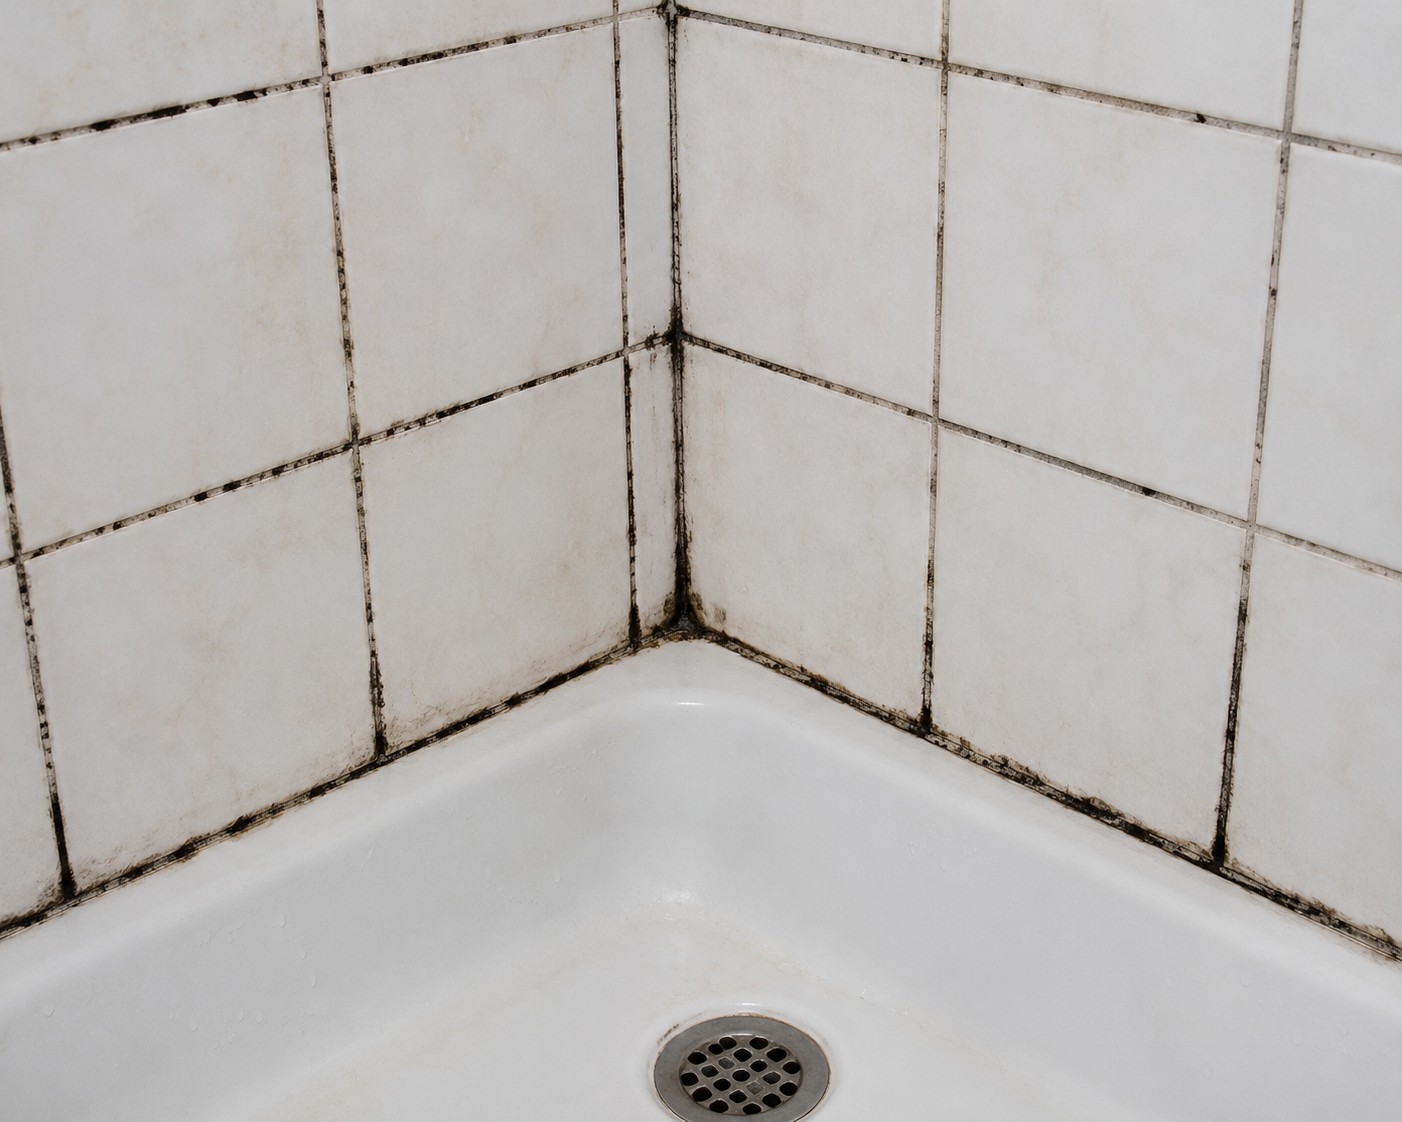
This is the recipe I switch to when grout starts turning gray or black from mold and mildew common in shower stalls and around tubs. Hydrogen Peroxide has mild bleaching properties without the harshness of chlorine bleach.
What you'll need:
- ½ cup baking soda
- ¼ cup hydrogen peroxide (3% solution, the kind sold at any pharmacy)
- 1 teaspoon dish soap (optional, for extra grease-cutting power)
Steps:
- Combine the baking soda and hydrogen peroxide in a bowl to form a paste. Add dish soap if the area also has grease buildup.
- Spread the paste over moldy or discolored grout lines.
- Let it sit for 15–20 minutes longer than the vinegar method, since this recipe relies more on chemical action than fizzing agitation.
- Scrub thoroughly, applying extra pressure to stained spots.
- Rinse well and ventilate the room while it dries.
"Baking soda and vinegar is fine for weekly upkeep, but on grout that's gone dark gray, I've never seen it beat a hydrogen peroxide paste left on for a full 15 minutes. The difference showed up in the before-after photos every single time." Jack Martin
A quick safety note: never mix hydrogen peroxide with vinegar directly in the same container. Separately, both are safe cleaning agents, but combined they can form peracetic acid, which is irritating to skin, eyes, and lungs. Use one recipe or the other, not both together.
Vinegar Spray Method (Best for Quick Maintenance)
Sometimes you don't need a full paste treatment you just need to knock down soap scum and light grime before it builds up. This is my low-effort, high-frequency option.
What you'll need:
- Equal parts white vinegar and water in a spray bottle
- Soft brush or sponge
Steps:
- Spray the vinegar-water solution directly onto grout lines.
- Let it sit for 5 minutes.
- Wipe or lightly scrub with a soft brush.
- Rinse and dry.
This won't tackle deep stains, but as a vinegar grout cleaner used weekly, it keeps grime from ever reaching the point where you need a heavier paste treatment. Think of it as prevention rather than restoration. One caution: avoid using straight vinegar on natural stone tile (marble, travertine, limestone) since the acidity can etch the stone surface. It's safe on ceramic and porcelain grout lines, which cover the vast majority of homes.
Dish Soap and Baking Soda Paste (Best for Kitchen Grease)
Kitchen grout especially the stretch in front of the stove has a different problem than bathroom grout, and that's where most generic DIY advice falls short. It's not mold and soap scum, it's baked-on grease and cooking splatter. Vinegar alone doesn't cut grease well, so this is the recipe I reach for near the stovetop.
What you'll need:
- 3 tablespoons baking soda
- 1 tablespoon dish soap (a degreasing formula works best)
- Warm water, just enough to form a paste
Steps:
- Mix the baking soda and dish soap, adding warm water a little at a time until you get a spreadable paste.
- Apply directly to greasy grout lines and let it sit for 10 minutes the soap needs time to break the grease bond.
- Scrub with a stiff brush, working in small sections.
- Rinse with warm water; grease residue rinses more easily with warm water than cold.
This recipe won't do much for mold or mineral staining — it's purpose-built for grease, and it's the one I recommend when someone tells me their kitchen grout "just looks dingy" rather than discolored.
Oxygen Bleach Soak (Best for Old, Set-In Stains)
For grout that's been neglected for a long stretch think a rental you just moved into, or a floor nobody's deep-cleaned in years the paste recipes above sometimes aren't enough on their own. Oxygen bleach (sold as powdered stain removers with sodium percarbonate as the active ingredient) gives you more whitening power than baking soda and vinegar, without the grout-weakening risk of chlorine bleach.
What you'll need:
- ¼ cup oxygen bleach powder
- 1–2 cups warm water
- Stiff grout brush
Steps:
- Dissolve the oxygen bleach powder in warm water according to the package ratio.
- Pour or sponge the solution directly onto the grout lines, saturating them fully.
- Let it sit for 20–30 minutes. Oxygen bleach works slower than vinegar or peroxide, so don't rush this step.
- Scrub thoroughly and rinse well.
- For severe cases, repeat the next day rather than trying to force results in one session.
This is the closest a homemade grout cleaner gets to matching a commercial deep-clean product, and it's my recommendation before you spend money on a professional steam clean try this first, since it solves a meaningful share of "years of neglect" cases on its own.
Comparison Table: Which Homemade Grout Cleaner Should You Use?
| Method | Best For | Time Needed | Difficulty | Effectiveness on Heavy Stains |
|---|---|---|---|---|
| Baking Soda + Vinegar Paste | Everyday grime, general cleaning | 15–20 min | Easy | Moderate–High |
| Baking Soda + Hydrogen Peroxide | Mold, mildew, gray/black discoloration | 20–25 min | Easy | High |
| Vinegar Spray Only | Light maintenance, soap scum prevention | 5–10 min | Very Easy | Low |
| Dish Soap + Baking Soda | Kitchen grease and cooking splatter | 10–15 min | Easy | Moderate |
| Oxygen Bleach Soak | Old, set-in, years-neglected stains | 20–30 min | Easy–Moderate | Very High |
| Commercial Bleach Cleaner (for reference) | Severe, years-old staining | 10–15 min | Easy | Very High (damages grout over time) |
If you're not sure where to start: begin with the baking soda and vinegar paste. It's the most balanced option and handles roughly 80% of the grout problems I see in typical homes. Reach for the oxygen bleach soak only when that doesn't get you where you need to be.
Does Grout Type Change Which Homemade Grout Cleaner You Should Use?
Yes, and this is a detail a lot of homemade grout cleaner guides skip over. Not every homemade grout cleaner recipe is safe on every surface:
- Cement-based grout (sanded and unsanded) the type in the vast majority of homes handles all five recipes above without issue.
- Natural stone tile (marble, travertine, limestone, slate) avoid straight vinegar and oxygen bleach directly on the stone surface, since the acidity and abrasion risk can etch or dull the finish. Stick to the baking soda paste alone, applied carefully to the grout lines and kept off the stone itself.
- Colored or dark grout hydrogen peroxide and oxygen bleach are both safe and won't cause the blotchy fading that chlorine bleach sometimes produces on colored grout.
- Epoxy grout much more stain-resistant to begin with, and can handle any of these recipes, though you'll rarely need anything beyond the vinegar spray for maintenance since epoxy doesn't absorb stains the way cement grout does.
Common DIY Grout Cleaning Mistakes That Waste Your Effort
I've made most of these mistakes myself over the years, so consider this the shortcut version of learning them the hard way:
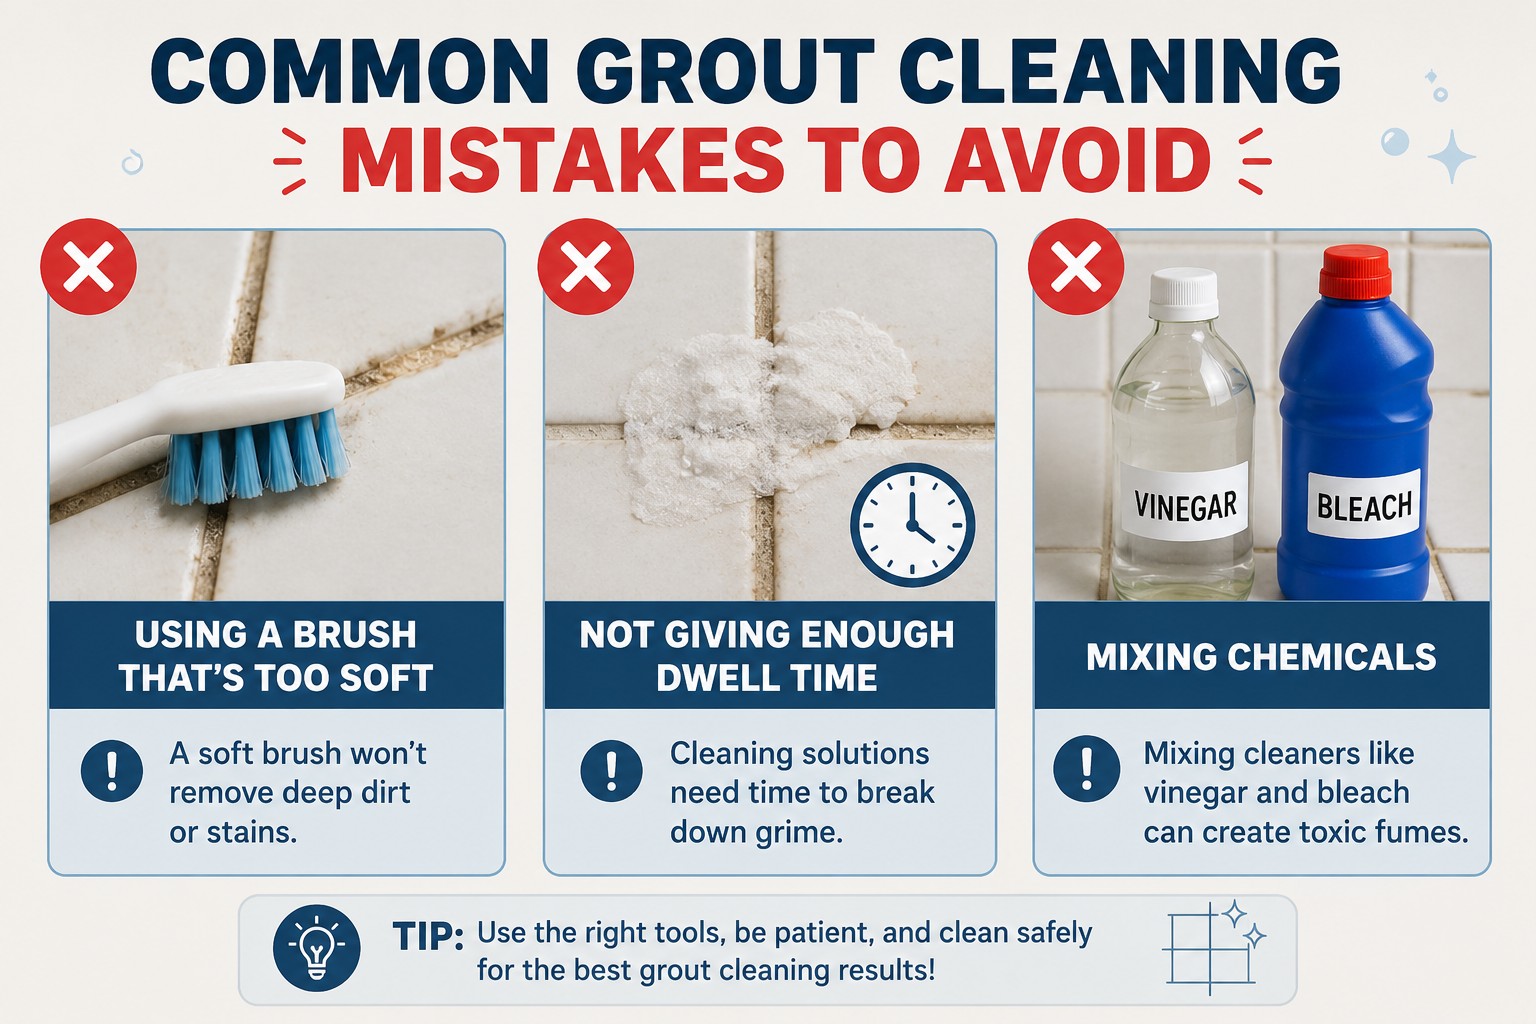
- Not letting the paste sit long enough. Rinsing after 2–3 minutes barely gives the ingredients time to break down dirt. Give it the full 10–30 minutes depending on the recipe.
- Scrubbing before the reaction finishes. With baking soda and vinegar, wait for the fizzing to calm down before you start scrubbing that reaction is doing real work.
- Using a brush that's too soft. A dish sponge won't cut it on grout lines. Get a dedicated grout brush or a firm toothbrush.
- Skipping the rinse. Leftover residue attracts more dirt faster, undoing the cleaning you just did.
- Mixing hydrogen peroxide and vinegar together. As mentioned above, keep these separate.
- Using vinegar or oxygen bleach on natural stone. Test in an inconspicuous spot first, or skip straight to the baking-soda-only method.
- Expecting one treatment to fix years of neglect. Heavily stained grout sometimes needs two or three rounds, spaced a few days apart, especially if mold has penetrated deep into the pores.
Tools That Make These Recipes More Effective
The recipe matters, but so does what you're scrubbing with. A few tool notes from years of testing:
- Stiff nylon grout brush the single best upgrade over a toothbrush. The bristles are firmer and the handle angle puts more pressure directly into the grout line.
- Electric spin brush worth it if you're cleaning a full bathroom floor or shower; cuts scrubbing time significantly on large areas, though a toothbrush still wins for tight corners and edges.
- Spray bottle with a fine mist setting controls how much vinegar hits the paste so it doesn't run off the grout line and onto the tile face.
- Microfiber cloth pulls up residue better than paper towels and won't leave lint behind in the grout texture.
How to Maintain Grout After Using a Homemade Grout Cleaner
Getting your grout clean is only half the job keeping it that way is where most people drop the ball. A few habits make a real difference:
- Wipe down tiled surfaces after showers or cooking to prevent soap scum and grease from settling.
- Do a quick vinegar spray wipe-down weekly in high-moisture areas like showers.
- Reapply grout sealer once a year. Sealed grout resists staining dramatically better than unsealed grout, which means less scrubbing for you long-term.
- Use a bath mat or rug at entry points to reduce dirt tracked onto tiled floors.
- Run the bathroom exhaust fan during and after showers moisture control does more to prevent mold regrowth than any cleaner applied after the fact.
If your grout was sealed properly and you keep up with light weekly maintenance, you may only need a full deep-clean treatment two or three times a year instead of constantly fighting stains.
When to Skip DIY and Call a Professional
I'm a big believer in homemade grout cleaner for the majority of cases, but I'll say plainly where it stops being the right call. If grout has visible black mold penetrating deep into the material rather than sitting on the surface, if it's crumbling or cracked, or if you've run the oxygen bleach soak twice with no real improvement, that's the point to bring in a professional steam cleaning service or consider re-grouting the affected section. Pushing harder with home remedies past that point usually just means more scrubbing for a result that a $150 professional visit would fix in an afternoon.
Final Thoughts on Homemade Grout Cleaner
Homemade grout cleaners aren't a gimmick they're genuinely effective when you use the right recipe for the right problem and give the ingredients time to work. I keep all five of these recipes in rotation depending on what I'm dealing with: baking soda and vinegar for general cleaning, hydrogen peroxide for mold and discoloration, a quick vinegar spray for weekly upkeep, dish soap and baking soda for kitchen grease, and an oxygen bleach soak for the stuff that's been neglected for years. Start with whichever recipe matches the mess in front of you right now, and build a light maintenance habit around it. Your grout and your wallet will thank you.
Frequently Asked Questions About Homemade Grout Cleaner
What is the best homemade grout cleaner?
For most households, a baking soda and vinegar paste is your best bet — it's cheap, safe on cement-based grout, and handles roughly 80% of everyday staining. For mold and gray discoloration, swap in hydrogen peroxide instead; it performs noticeably better on that type of staining.
Is baking soda and vinegar safe on all grout types?
Yes, for cement-based grout (the most common type in homes), this combination is safe. Avoid straight vinegar on natural stone tiles since the acidity can etch the surface — stick to a baking soda paste alone in those cases.
How often should I clean grout with DIY methods?
Once a month is enough for most households. High-moisture areas like shower grout may need it every two to three weeks, especially without a sealant.
Can DIY methods remove years of built-up grout stains?
They can help significantly, especially an oxygen bleach soak, but severe, long-neglected staining sometimes needs multiple rounds or a stronger commercial product as a first pass, followed by regular upkeep afterward.
Does hydrogen peroxide discolor grout?
No, it's safe on both white and colored grout at the concentrations used here. It brightens rather than discolors, unlike chlorine bleach, which can sometimes cause uneven fading on colored grout.
What's the fastest option for a quick clean before guests arrive?
A vinegar spray is fastest — spray, wait 5 minutes, wipe. It won't fix deep stains but works well for surface-level freshening.
Is DIY grout cleaning as effective as store-bought products?
For everyday grime and moderate staining, yes — in my side-by-side testing, the baking soda and vinegar paste held up as well as several $10–$15 commercial sprays. Store-bought products still have an edge on years-old, deeply set stains.
Is it safe to use these recipes near natural stone accents?
Use a baking soda-only paste on any grout adjacent to natural stone, and keep vinegar, hydrogen peroxide, and oxygen bleach off the stone surface itself. A small test patch in a hidden area is always worth the extra minute.
How long does a mixed paste last once made?
Mix only what you need for one session. Baking soda paste dries out and loses effectiveness within a few hours, and combining it with vinegar or peroxide starts a reaction that's spent within minutes of mixing.