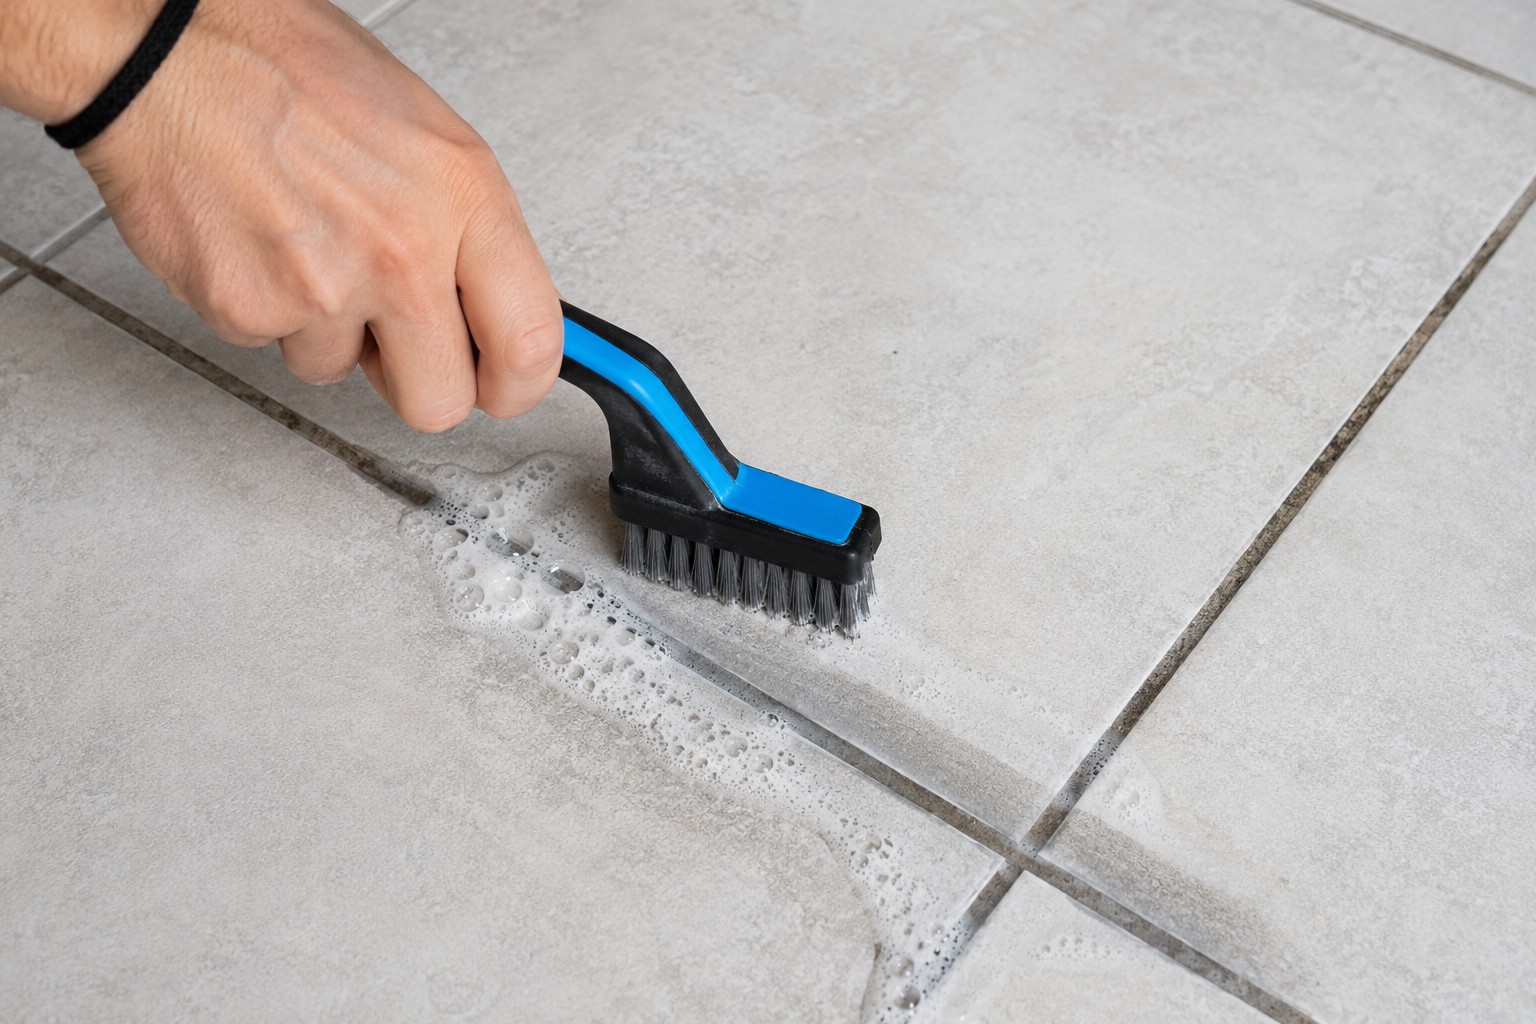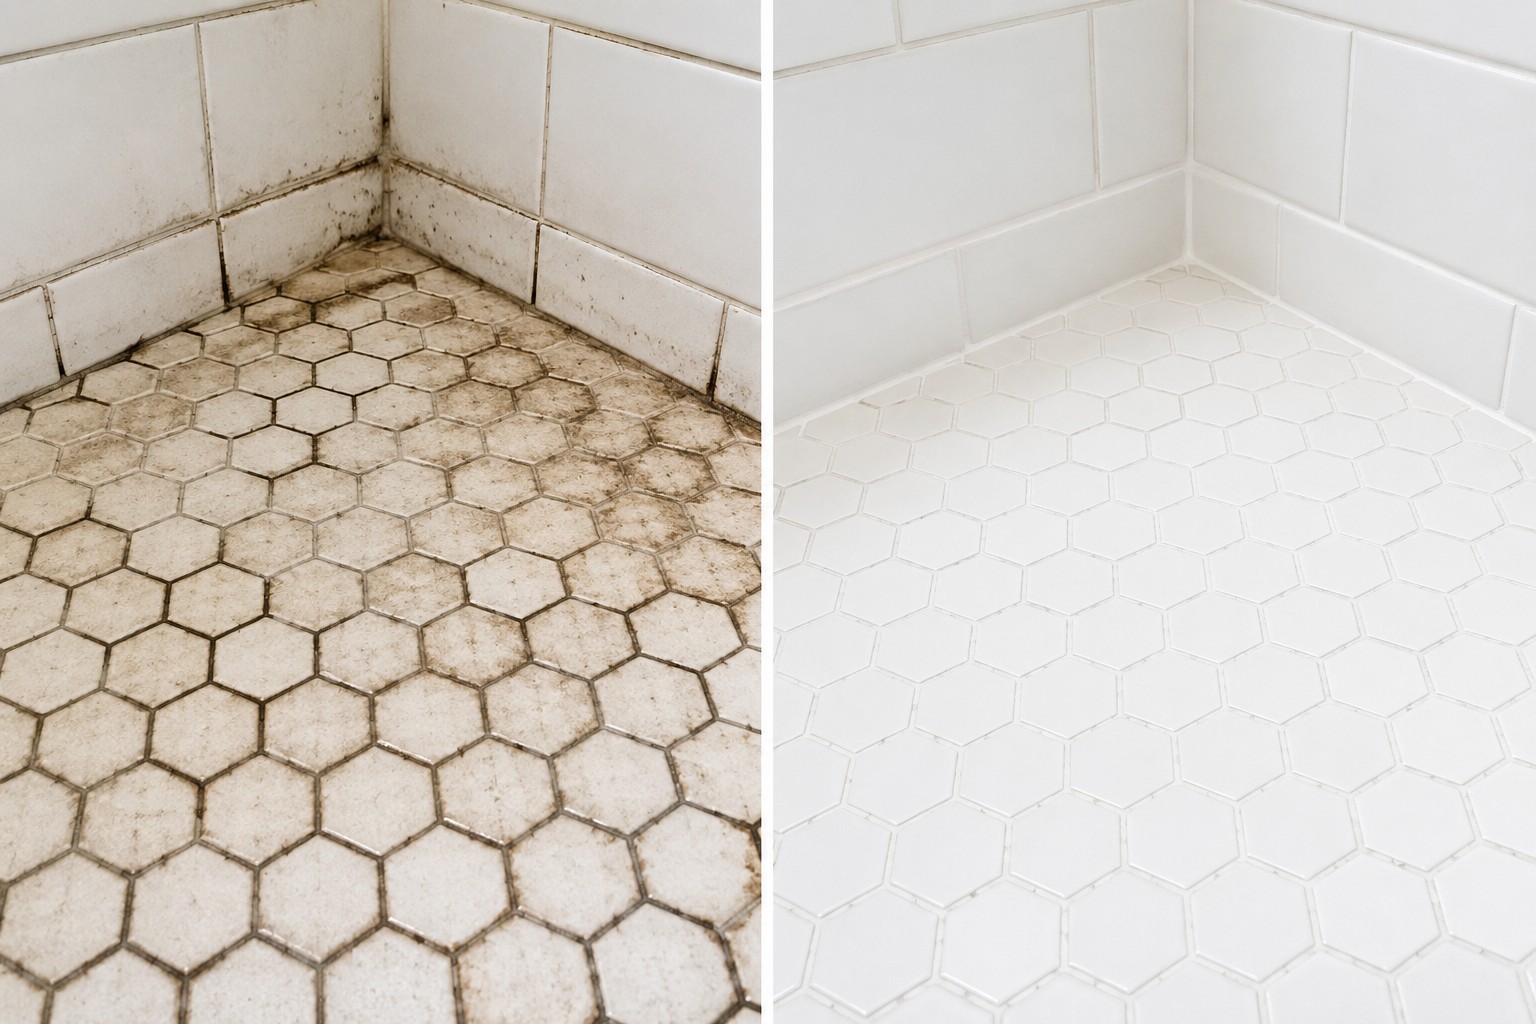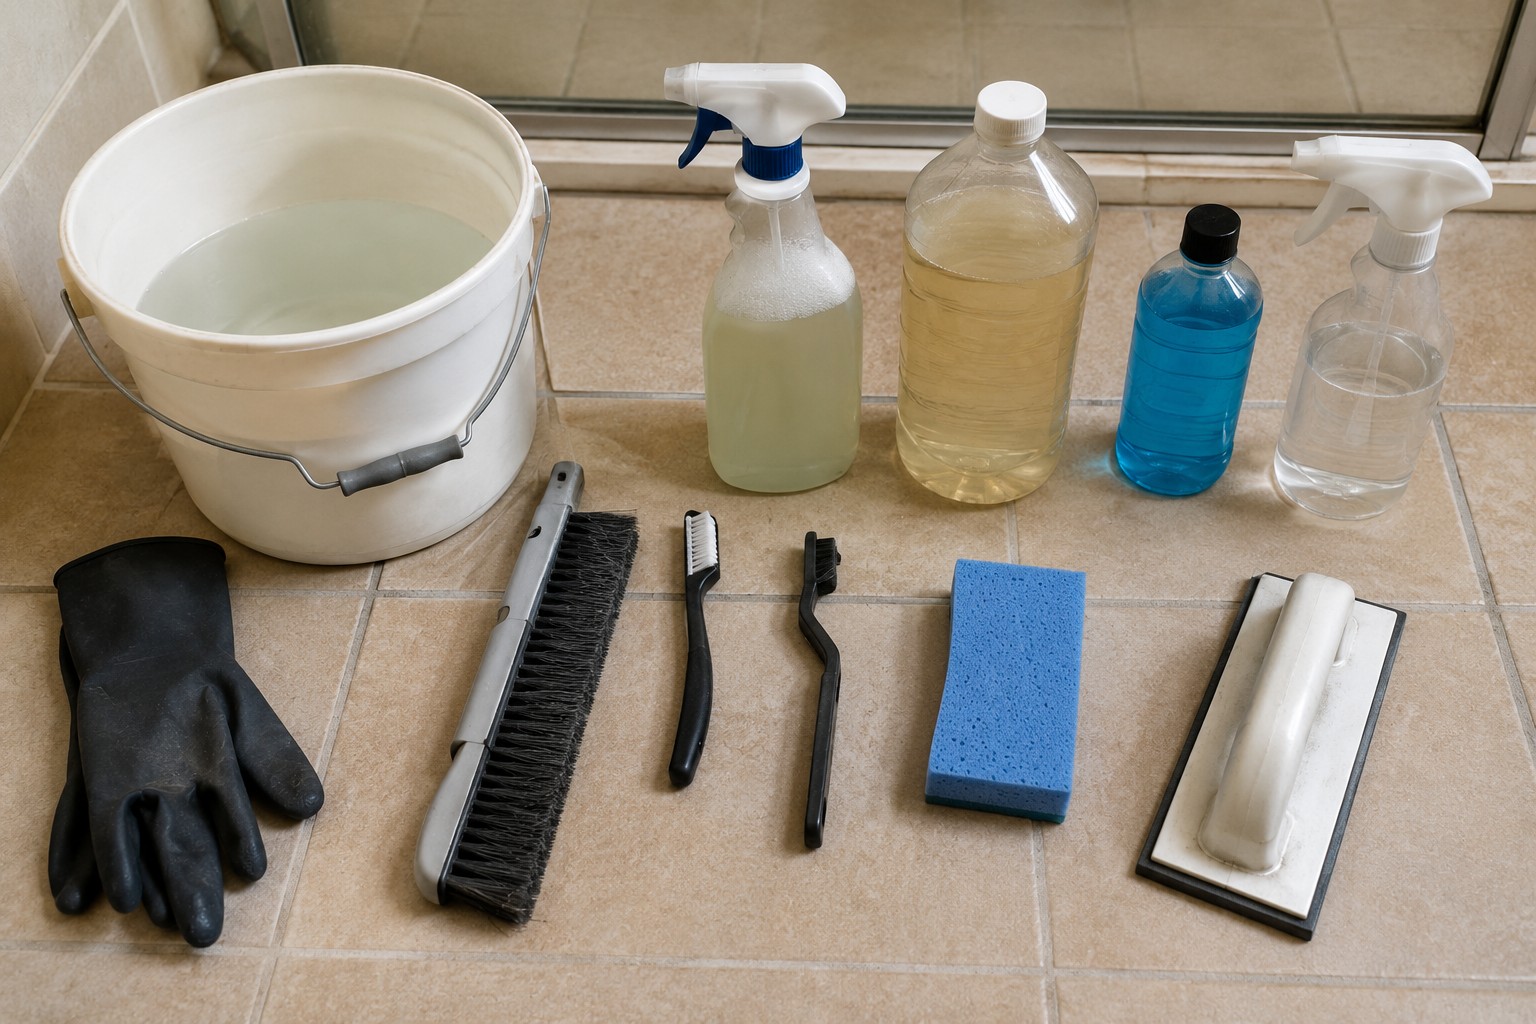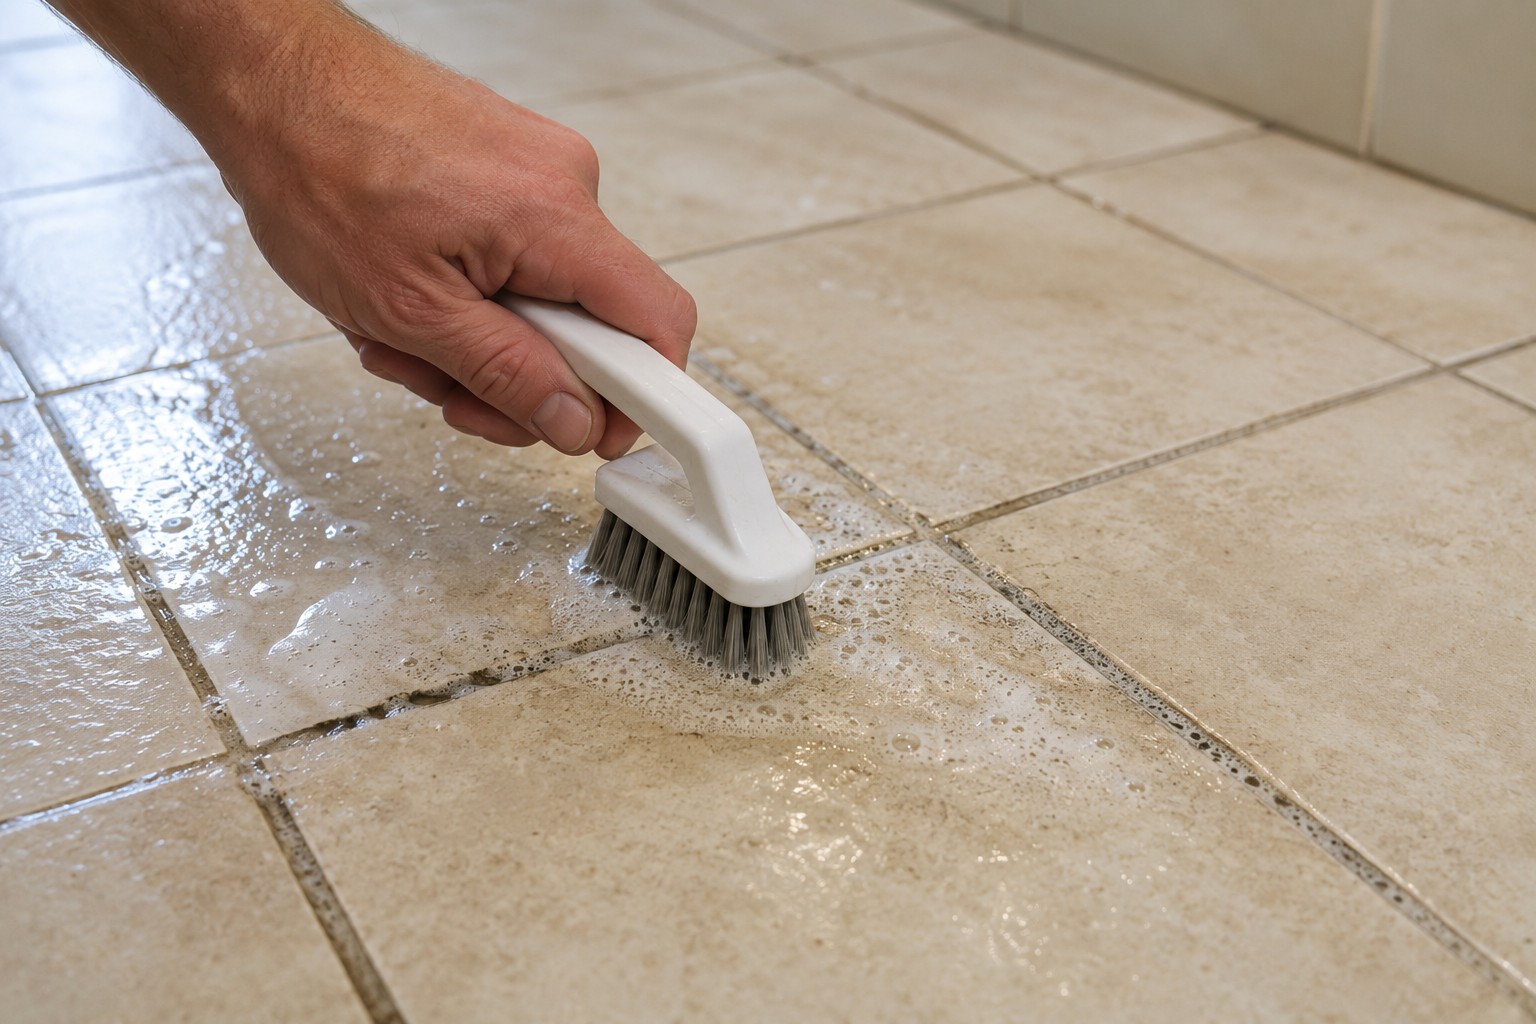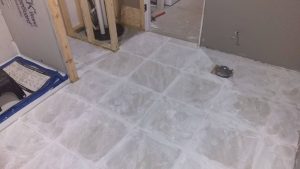
Grout Cleaner

Outdoor Grout: The Ultimate Guide to Enhancing Your Exterior Spaces

Outdoor spaces deserve the same level of quality and durability as indoor areas. In this comprehensive guide, we delve into everything you need to know about outdoor grout—from understanding its importance and benefits to exploring the various types available on the market. Whether you are renovating your patio, deck, or walkway, choosing the right exterior grout is crucial for both longevity and aesthetic appeal. We also discuss outdoor tile grout, epoxy grout for exterior use, and outdoor grout for stone to help you make an informed decision that suits your specific project needs.

Introduction to Outdoor Grout

When designing an outdoor area, the materials you choose play a pivotal role in the overall success of the project. Outdoor grout is not simply a filler; it is a binding agent that not only holds tiles together but also contributes significantly to the structural integrity and visual impact of your outdoor surfaces. Its unique composition is formulated to withstand the challenges posed by weather fluctuations, heavy foot traffic, and environmental pollutants.

Understanding the Role of Outdoor Grout

Outdoor grout acts as the final touch in a tiling project. It fills the gaps between tiles, ensuring they are securely set and preventing water from seeping into sub-layers. This not only reinforces the durability of your outdoor surfaces but also reduces the risk of mold and mildew buildup—a common concern in exterior installations. With the right outdoor tile grout, you can achieve a seamless look that enhances the overall design while providing long-lasting performance.

Benefits of Using Outdoor Grout

Benefits of Using Outdoor Grout

Choosing the appropriate grout for exterior applications offers multiple benefits that extend beyond mere aesthetics. Below are some key advantages of using specialized outdoor grout:

Enhanced Durability and Longevity

Outdoor environments are subject to extreme weather conditions including UV exposure, rain, and temperature fluctuations. Outdoor grout is designed to resist cracking, fading, and deterioration. Whether you choose a traditional formulation or opt for epoxy grout for exterior use, the right product will significantly extend the lifespan of your tiled surfaces.

Aesthetic Appeal

The visual aspect of outdoor spaces is just as important as functionality. High-quality exterior grout not only binds tiles effectively but also enhances their appearance. It can be tinted to match or contrast with your tiles, adding a decorative element to your design while highlighting the intricate details of your stone or ceramic tiles.

Maintenance Advantages

With proper installation and routine maintenance, outdoor grout can remain pristine for years. It creates a barrier against moisture and contaminants, simplifying cleaning routines and reducing the need for frequent repairs. This is particularly beneficial when working with outdoor grout for stone, where maintaining the natural beauty of the material is essential.

Exploring Types of Outdoor Grout
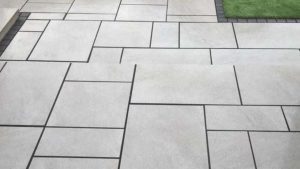
Types of Outdoor Grout

There are several types of grout available for outdoor applications. Each type is tailored to meet specific demands and performance criteria. Understanding the differences can help you select the most suitable option for your project.

Exterior Grout vs. Indoor Grout

The key difference between exterior grout and indoor grout lies in their formulation. Outdoor grout is engineered to endure harsh environmental conditions. It typically contains additives that improve water resistance, UV stability, and freeze-thaw durability. In contrast, indoor grout may not have these properties, making it less effective in outdoor applications.

Outdoor Tile Grout

Specifically formulated for tiled surfaces, outdoor tile grout is designed to adhere to various tile materials including porcelain, ceramic, and natural stone. Its composition allows for excellent bonding while providing flexibility to accommodate slight movements in the substrate caused by temperature changes.

Epoxy Grout for Exterior Use

For projects that demand superior strength and chemical resistance, epoxy grout for exterior use is an ideal choice. Its unique formulation not only provides exceptional durability but also resists staining and harsh chemicals. Although more expensive than cement-based grouts, epoxy grout’s longevity and low maintenance requirements make it a cost-effective option over time.

Outdoor Grout for Stone

Natural stone surfaces require a grout that complements their inherent beauty and strength. Outdoor grout for stone is specially formulated to work with porous and non-porous stones, ensuring that the grout does not detract from the stone’s texture while providing the necessary structural support.

Selecting the Right Outdoor Grout for Your Project

Choosing the ideal grout involves a careful evaluation of several factors. Our recommendations are based on extensive experience and thorough market research.

Project Scope and Environmental Considerations

  • Climate: Assess the typical weather conditions in your area. Regions with severe winters or intense sunlight may benefit from grouts with enhanced freeze-thaw resistance and UV stability.
  • Usage: Consider the level of foot traffic and exposure. High-traffic areas such as patios or pool decks require a grout that can endure constant wear and tear.

Compatibility with Surface Materials

Different surface materials interact uniquely with grout. For example, if you are installing tiles on a natural stone surface, opt for outdoor grout for stone to ensure that the grout complements the stone’s texture and color. For ceramic or porcelain tiles, outdoor tile grout with the right bonding agents will ensure optimal adhesion and durability.

Aesthetic and Functional Priorities

  • Color Matching: The right grout color should harmonize with your tiles. Many products allow tinting, so you can achieve a seamless integration or a striking contrast.
  • Ease of Maintenance: Consider products that offer long-term protection against stains and moisture accumulation. Epoxy-based grouts are particularly renowned for their resistance to grime and chemicals.

Preparation and Installation of Outdoor Grout
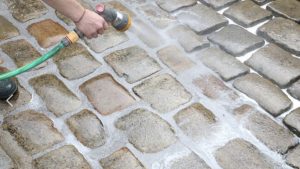
Installation of Outdoor Grout

A successful installation begins with meticulous preparation. We follow industry best practices to ensure that your outdoor grout delivers exceptional performance.

Surface Preparation

Proper surface preparation is critical. This involves:

  • Cleaning: Ensure that all surfaces are free of dust, dirt, and previous residues.
  • Leveling: Verify that the substrate is level and free of cracks to prevent future grout failures.
  • Moisture Control: Allow any freshly laid surfaces to cure completely before applying grout, as residual moisture can compromise adhesion.

Grout Application Techniques

  • Mixing: Follow manufacturer instructions precisely when mixing the grout to achieve the right consistency.
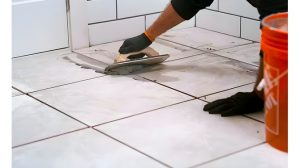
  • Application: Use a rubber float to apply the grout evenly, pressing it firmly into the joints. Work in small sections to prevent the grout from drying out prematurely.
  • Finishing: Once the grout is applied, use a damp sponge to remove excess material from the tile surfaces, taking care not to disturb the grout lines.

Curing and Sealing

Allow the grout to cure as recommended by the manufacturer. In many cases, sealing the grout after curing adds an extra layer of protection against moisture and staining—an important step for epoxy grout for exterior use and other formulations.

Maintenance and Cleaning of Outdoor Grout

Maintenance and Cleaning of Outdoor Grout

Routine maintenance is essential to preserve the beauty and functionality of your outdoor surfaces. We recommend regular cleaning practices and preventive measures to extend the life of your grout.

Regular Cleaning Tips

  • Gentle Cleaning Agents: Use mild cleaning solutions that do not degrade the grout. Avoid harsh chemicals that can cause discoloration or weakening.
  • Pressure Washing: For larger areas, a low-pressure wash can remove accumulated dirt without damaging the grout joints.
  • Sealing: Periodically resealing your grout can protect against moisture ingress and staining, especially in areas with heavy exposure to the elements.

Dealing with Stains and Discoloration

  • Spot Treatment: Address spills and stains promptly with appropriate cleaners.
  • Deep Cleaning: Schedule periodic deep-cleaning sessions to remove embedded dirt and mildew. Specialized grout cleaners can rejuvenate even the most stubborn discolorations.

Common Issues and Troubleshooting Tips

Despite the best installation practices, outdoor grout may encounter issues over time. Below, we outline common challenges and effective troubleshooting strategies.

Cracking and Peeling

Cracking is often the result of substrate movement or improper mixing. Ensure that the surface is adequately prepared and that the grout is mixed to the recommended consistency. If cracking occurs, repair small areas immediately to prevent water infiltration.

Water Damage and Efflorescence

Excess moisture can lead to efflorescence—white, powdery deposits that appear on grout lines. To combat this, ensure that surfaces are properly sealed and that water drainage is optimized. In severe cases, professional cleaning may be necessary to restore the grout’s appearance.

Repair and Replacement

Minor damage can usually be repaired by removing the affected grout and reapplying a fresh layer. For larger areas or extensive deterioration, consider a full replacement to ensure long-term durability.

Innovative Solutions in Outdoor Grout Technology

Innovative Solutions in Outdoor Grout Technology

The evolution of grout technology continues to push the boundaries of performance and aesthetics. Here are some innovative solutions that are reshaping outdoor grout applications:

Advanced Formulations

Modern outdoor tile grout products feature advanced additives that enhance flexibility, bonding strength, and resistance to environmental stresses. These innovations make it possible to achieve a flawless finish even in the most challenging outdoor conditions.

Eco-Friendly Options

Sustainability is becoming a priority in construction materials. Eco-friendly grouts that reduce volatile organic compounds (VOCs) are gaining popularity. These products offer the same level of performance as traditional formulations while minimizing environmental impact.

Future Trends

Emerging trends in grout technology include self-healing formulations and enhanced color retention. As manufacturers continue to innovate, we can expect even more durable and versatile exterior grout products that cater to diverse architectural styles and functional requirements.

Conclusion

In conclusion, selecting the right outdoor grout is essential for achieving durable, visually appealing, and low-maintenance exterior spaces. With a variety of products available—from exterior grout to epoxy grout for exterior use and specialized outdoor grout for stone—the key is to evaluate your project’s unique needs and environmental conditions. We are committed to providing expert guidance that ensures your outdoor surfaces are both functional and beautiful. By following best practices for preparation, installation, and maintenance, you can enjoy the benefits of a resilient, attractive outdoor space for years to come.

Frequently Asked Questions (FAQs)

Q1. What is the best type of outdoor grout for stone?

For natural stone surfaces, we recommend using specialized outdoor grout for stone that is designed to complement the stone’s texture and offer superior adhesion and moisture resistance.

Q2. How often should outdoor grout be maintained?

Regular maintenance is key. We suggest inspecting your grout annually for signs of wear and resealing every 1-2 years, depending on environmental exposure and usage intensity.

Q3. Can outdoor grout be used on wooden surfaces?

While outdoor grout is primarily designed for tile and stone applications, certain formulations can be adapted for use with wood. However, it is essential to consult with a specialist to ensure compatibility and proper installation.

Q4. What are the main differences between epoxy grout and traditional grout for exterior use?

Epoxy grout for exterior use offers enhanced chemical resistance, superior durability, and a lower risk of staining compared to traditional cement-based grouts. Its fast-curing properties and high strength make it ideal for high-traffic and moisture-prone areas.

Q5. How do we prevent mold and mildew in outdoor grout applications?

Preventive measures include ensuring proper sealing of the grout, regular cleaning, and using products specifically designed to resist microbial growth. Adequate drainage and minimizing water retention around the tiled surface are also crucial.

Guide to Choosing the Perfect Grout for Glass Tiles

Jack Martin, grout and tile cleaning specialist

By Jack Martin — Grout & Tile Cleaning Specialist, 10+ years testing grout methods, 500+ products personally tested.

Quick Answer

For almost every glass tile job, I reach for unsanded epoxy grout (MAPEI Keracolor U or Litokol Starlike are my go-tos) — it's non-abrasive, waterproof, and never needs sealing. Save sanded grout for joints wider than 1/8" and only after the tile manufacturer confirms it's scratch-safe. For iridescent or art-glass mosaics, a translucent grout with glass microbeads lets the tile's own color do the talking instead of a hard grout line.

Grout for glass tile is not a place to grab whatever bag is left over from your last ceramic job. I've installed and re-grouted enough glass backsplashes, showers, and mosaic accent walls to know the grout decides whether the finished wall looks expensive or looks like a mistake. Pick the wrong product and you get scratches, dull haze, or grout that stains within a year. This guide walks through exactly how I pick grout for glass tile on every job, joint by joint, so the install looks sharp and stays that way.

Why Glass Tile Needs Its Own Grout Rules

Glass tile behaves nothing like ceramic or porcelain once grout enters the picture. Glass is non-porous, glossy, and softer on the surface than most people expect, which means it scratches easily and shows every flaw in the joint work. A grout built for glass has to stay low-abrasion, resist chemical dulling, and seal tight enough to keep moisture from working its way behind the tile. If you're still getting familiar with grout basics before narrowing down to a glass-specific product, my guide to grout types and their advantages covers that groundwork first.

Standard cement grout meant for ceramic doesn't account for any of that softness. I've watched sanded cement leave faint scuff marks across an entire glass mosaic wall simply because the installer treated it like any other tile job. Getting the grout choice right on day one saves a tear-out later.

What the Right Grout Actually Does for You

Using the correct grout for glass tile changes three things at once: the tile keeps its shine instead of dulling, the joints resist mold and staining instead of collecting grime, and cleanup turns into a five-minute wipe-down instead of a scrubbing session. That's the entire payoff — better looks, less upkeep, longer life out of the installation.

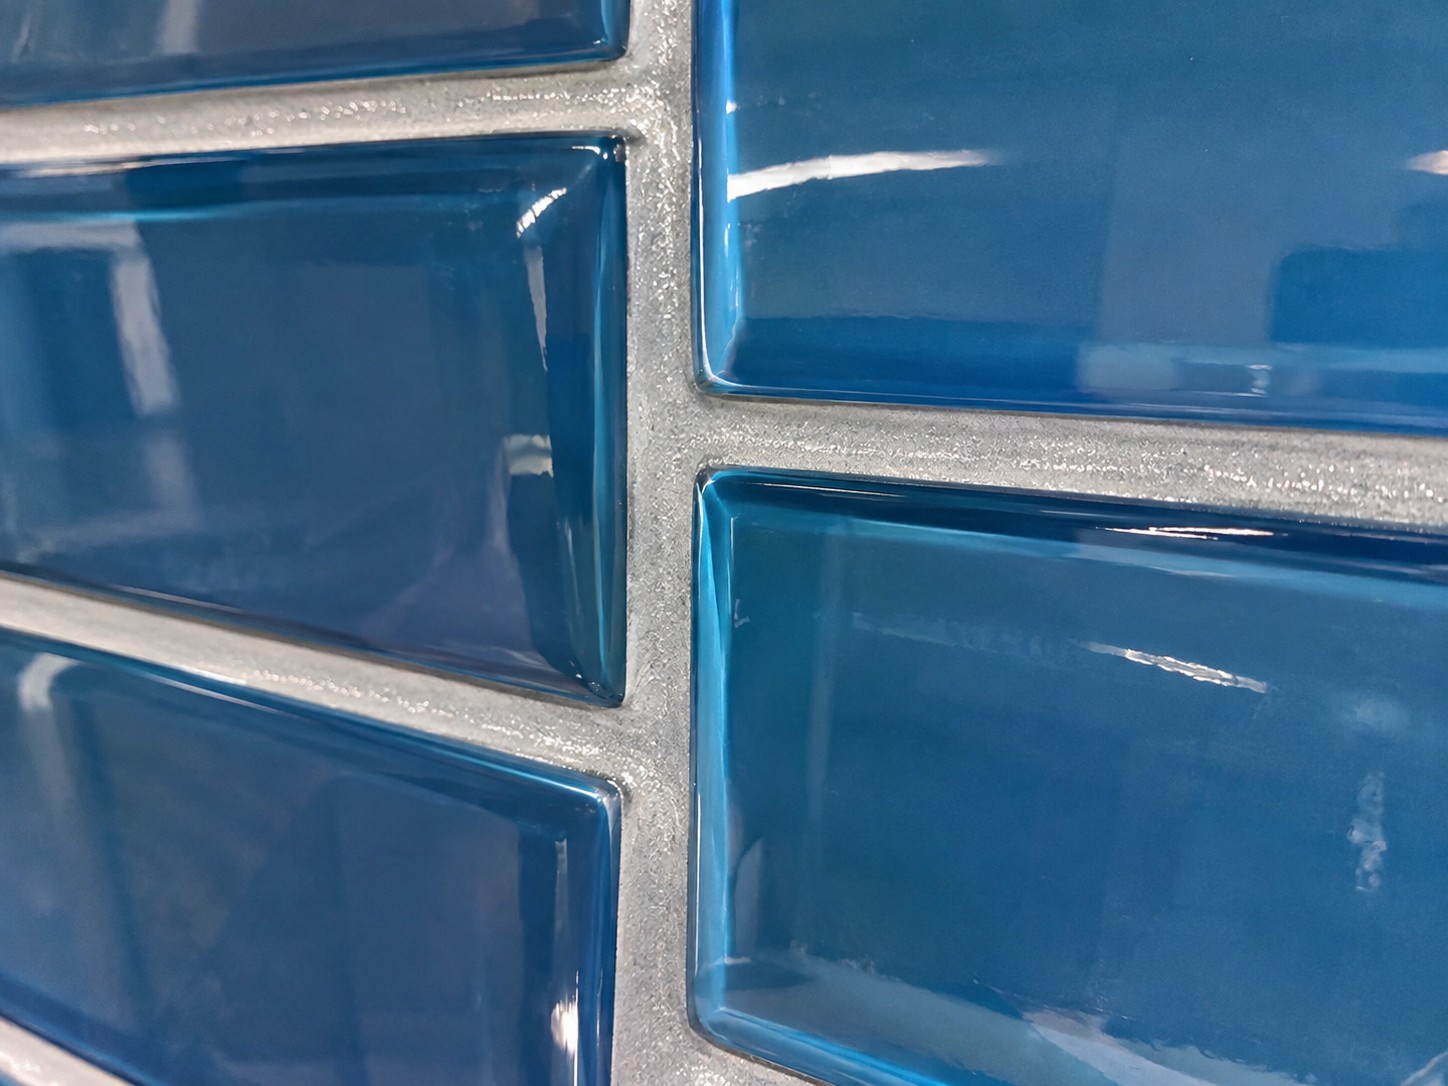
close-up of epoxy grout for glass tile between glossy blue glass subway tiles
Epoxy grout holds its color and shine even in wet, high-splash areas.

Types of Grout for Glass Tile

There are three grout families worth knowing, and choosing between them answers the question I get asked constantly: what type of grout for glass tile should I actually buy?

Epoxy: My Go-To Choice for Glass Installs

Epoxy is my default for nearly every glass tile job — backsplashes, tub surrounds, full shower walls. It's built from resin and hardener rather than cement, which makes it essentially waterproof straight out of the bucket. It resists staining from oil, wine, and hard water, and once cured it never needs sealing. MAPEI Keracolor U (unsanded) and Litokol Starlike are the two brands I reach for most, and both have a solid track record on glossy glass without scratching. The trade-off is that epoxy sets faster than cement-based grout, so I mix small batches and clean as I go instead of grouting a whole wall before wiping down.

Sanded Grout: Proceed With Caution

Sanded grout for glass tile is where I tell people to slow down. The sand particles that give this grout its strength on wider joints can act like fine sandpaper against a glossy glass surface, leaving scratches that won't buff out. I only use sanded grout on glass when the manufacturer explicitly rates it safe, or when joints run wider than 1/8" and need the extra structural bite sand provides. Even then, I grout a small test panel first and check for scratching before touching the full wall — a five-minute step that has saved more than one job.

Unsanded Grout: The Safer Default

Unsanded grout for glass tile is the safer default for most installs, and it's what I hand-pick whenever joints stay under 1/8". Without sand in the mix, there's nothing to drag across the glass face during application or cleanup, so the surface comes out smooth and scratch-free. Cement-based unsanded grout is the budget option here — it costs less than epoxy but needs sealing and can pick up staining over a few years, which is why I still lean epoxy for anything that sees regular moisture.

Clear Grout: Letting the Tile Lead

Clear grout for glass tile is a newer product I've started recommending for iridescent or art-glass mosaics, where any visible grout line competes with the tile's own color. Instead of filling joints with solid pigment, clear grout cures translucent, letting light pass through and blend with the glass. Premium lines like Litokol's Starlike Crystal mix in tiny glass microbeads that catch and reflect light rather than just disappearing — a step up from a plain clear resin. It's not a fit for every job; on an uneven or dark substrate it can look inconsistent. But on the right mosaic sheet, it makes the wall read as one continuous surface instead of a grid.

Grout for Mosaic Glass Sheets

Mosaic sheets bring tight joints, dozens of small tiles, and mesh backing that traps residue if you're not careful with cleanup. For grout for glass mosaic tile, I default to unsanded epoxy nearly every time — the narrow 1/16" to 1/8" joints typical on mosaic sheets fall right into unsanded territory, and stain resistance matters more here since mosaic backsplashes usually sit right in the splash zone above a sink or stove.

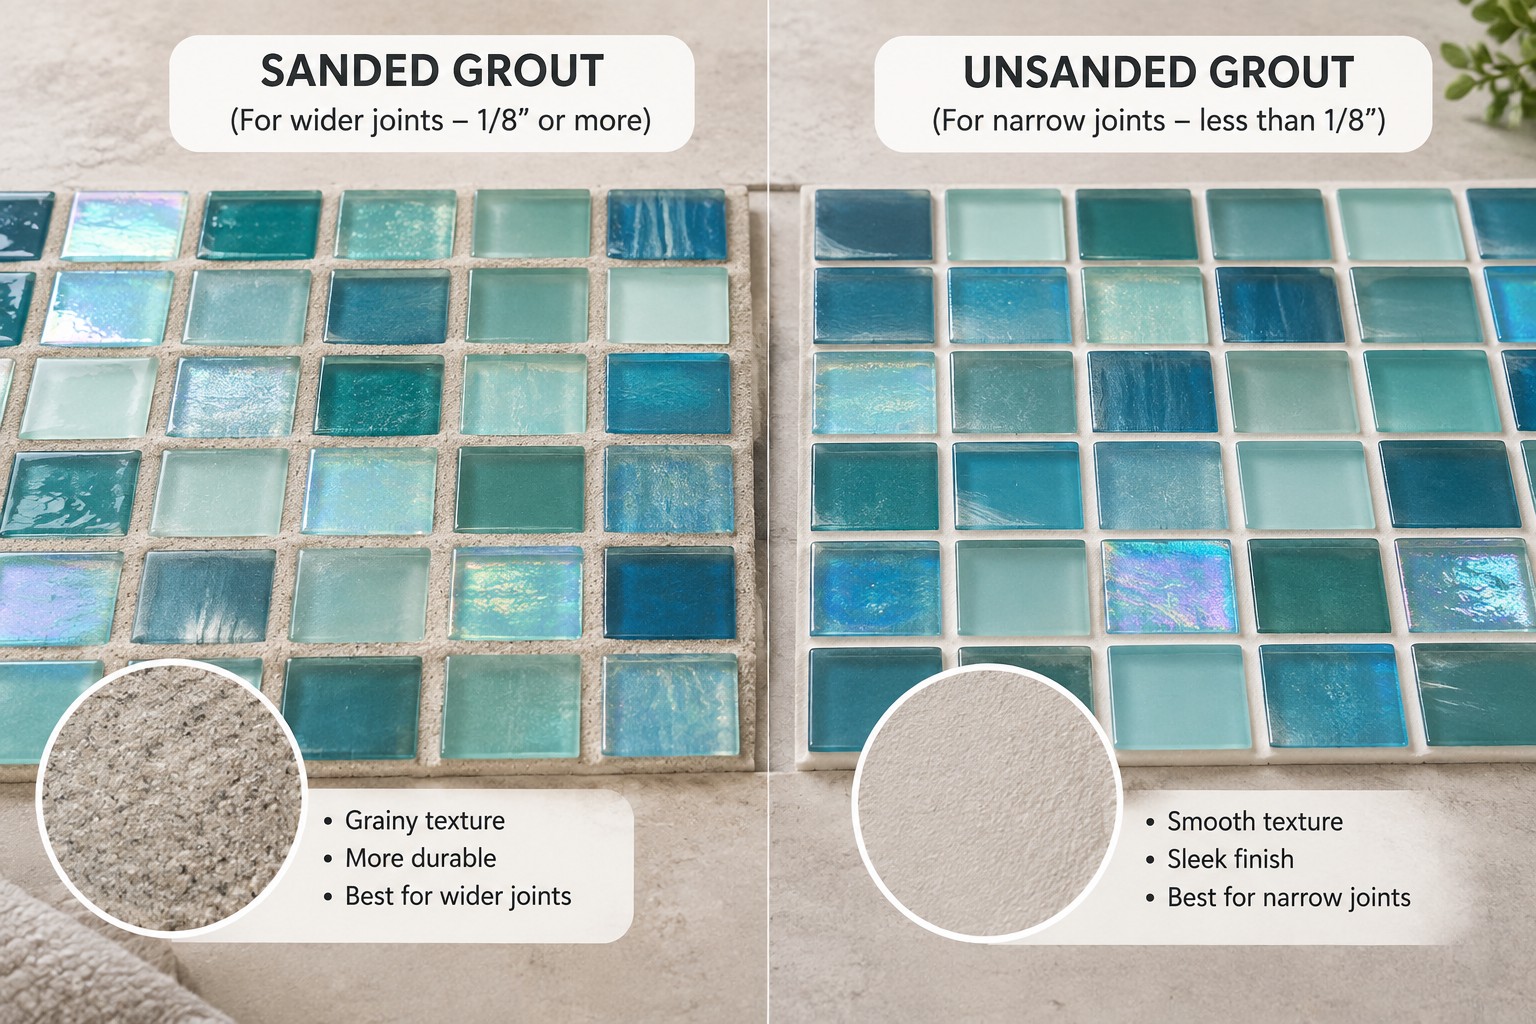
comparison of sanded and unsanded grout texture next to glass mosaic tile samples
Sanded (left) vs. unsanded (right) — texture makes the difference on glass.

How to Choose the Best Grout for Glass Tiles

A handful of practical factors decide this for me on every single job.

Joint Width

Narrow joints under 1/8" call for unsanded or epoxy grout every time. Wider joints may tolerate sanded grout, but only after the tile manufacturer confirms it's rated safe for that specific glass.

Where the Tile Is Going

A kitchen backsplash takes on grease and heat, while a shower wall stays under constant moisture. Epoxy handles both better than cement-based grout because it doesn't absorb whatever lands on it.

Light and Reflection

Glass bounces light differently than ceramic, so any unevenness in the grout line becomes more obvious once the wall is finished. I always cure a small test batch on a spare tile before committing to the full installation.

Field tip: When manufacturer instructions stay silent on glass compatibility, I default to epoxy. It's the safest all-around choice, and I've never had a callback from using it.

Installing Glass Tile Grout: Step by Step

  1. Prep the surface. Clean, dry, and dust-free before you mix anything. Budgeting the job first? My grout cleaning cost calculator can help estimate materials.
  2. Mix carefully. For epoxy, follow the resin-to-hardener ratio exactly — it won't cure correctly otherwise.
  3. Float at an angle. I hold the float at roughly 45° and work diagonally across the joints so I don't drag grout back out of the gaps.
  4. Clean early and often. Wipe excess with a damp sponge every few minutes, especially with epoxy, which hazes fast if left to sit.
  5. Let it cure fully. Resist running water over fresh grout before the manufacturer's cure time is up.
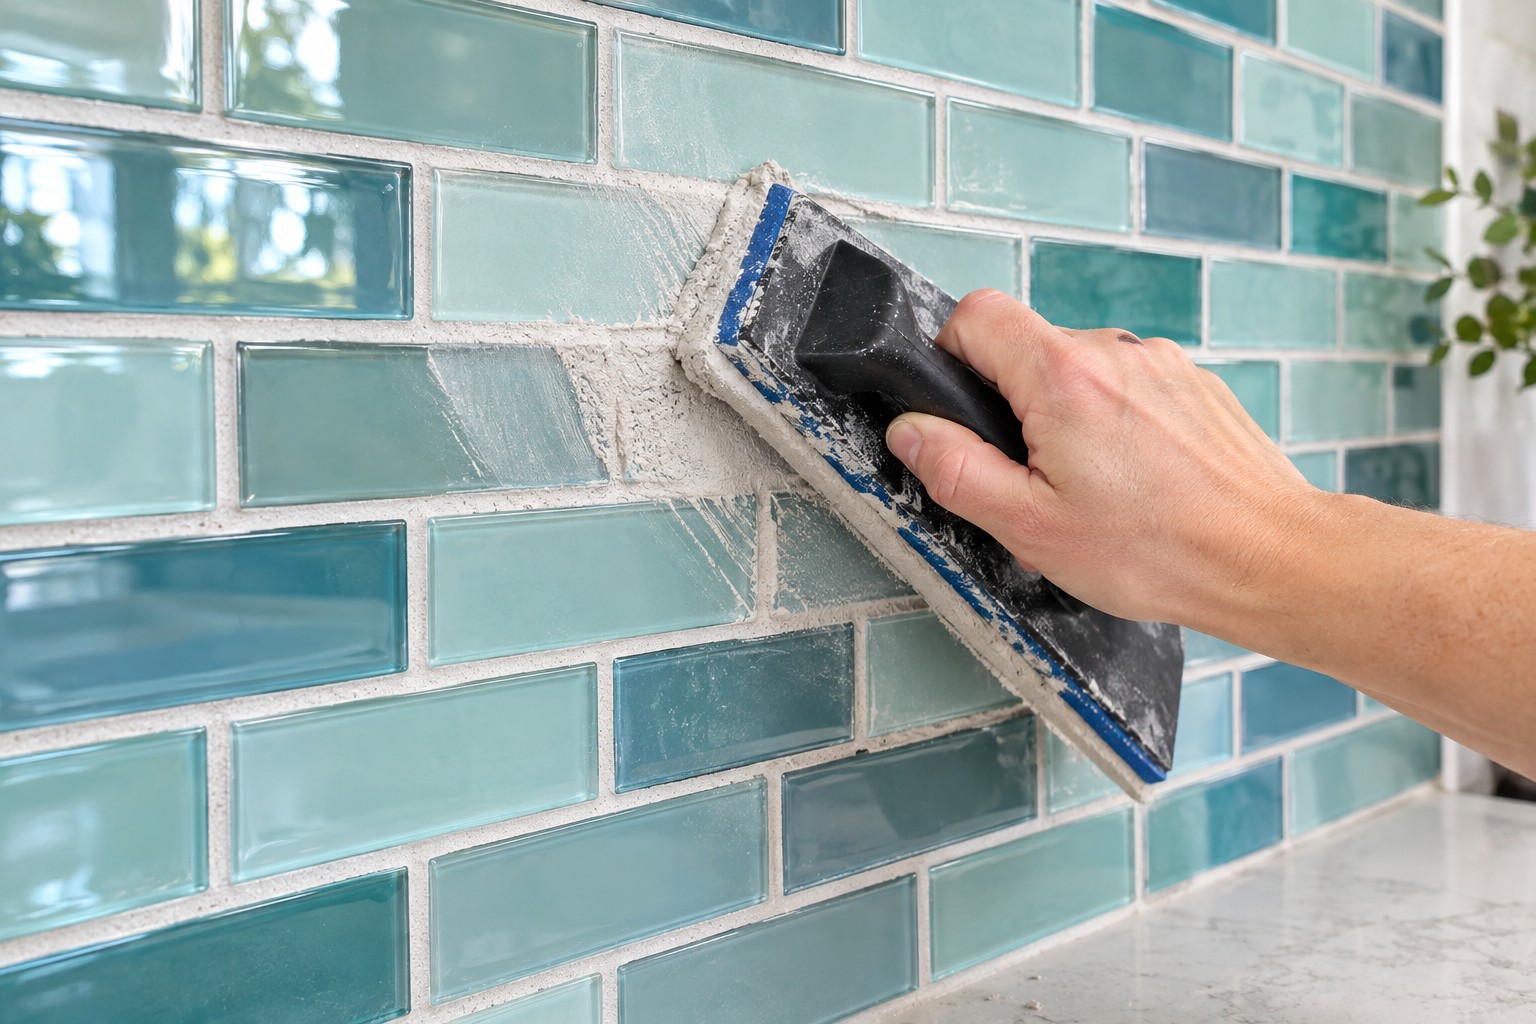
hand applying grout float at 45 degree angle on glass subway tile backsplash
A 45° float angle presses grout into the joint without dragging it back out.

Comparison Table: Grout Types for Glass Tile

Every grout type below trades off differently between scratch safety, moisture resistance, and price — here's how I rate them after using each one on real glass tile installs.

Grout TypeBest ForProsConsMy Rating
Epoxy (unsanded)Backsplashes, showers, mosaicsStain-proof, waterproof, no sealing neededPricier, shorter working time9.5/10
Unsanded cementJoints under 1/8" on low-moisture wallsBudget-friendly, easy to work withNeeds sealing, can stain over time7/10
Sanded cementJoints 1/8"+ (manufacturer-rated glass only)Strong hold on wider jointsCan scratch glass; needs a test panel first4/10
Clear / translucent (glass-bead)Iridescent or art-glass mosaicsLets tile color show through, catches lightPremium price, limited brand options8.5/10

In short: unsanded epoxy is the safest all-around pick for glass tile, sanded cement is the one to approach with caution, and clear grout is a design call reserved for mosaics where you want the glass to lead.

Common Mistakes to Avoid With Glass Tile Grout

Most glass tile grout failures I get called out to fix trace back to one of these same five mistakes.

  • Grabbing sanded grout by default. It's the most common mistake I see — sanded is fine on ceramic, but it's a scratch risk on glass unless the manufacturer says otherwise.
  • Grouting a full wall in one pass with epoxy. Epoxy sets faster than cement-based grout, and a full wall left too long before wiping causes a stubborn haze.
  • Skipping the test panel. Color, texture, and scratch behavior all look different on a spare tile than they do once cured across an entire wall.
  • Sealing epoxy grout out of habit. Epoxy doesn't need sealer — it's already non-porous — and adding one just wastes product and can leave a cloudy film.
  • Using acidic cleaners on cement-based grout. Vinegar and other acidic solutions wear down cement grout over time, even though they seem gentle.

Maintenance and Cleaning of Glass Tile Grout

Even the best grout needs upkeep to keep glass tile looking new. I clean glass tile grout with a pH-neutral cleaner and a soft cloth — nothing abrasive, ever, since a scouring pad will dull glass faster than almost anything else in the house. If you'd rather mix something at home, my baking soda grout cleaner recipe works fine on cement-based grout around glass tile, though I skip it on epoxy since epoxy doesn't need that kind of scrubbing in the first place. For glass tile in a shower, my steam cleaning guide for shower grout is a good low-chemical option too. If you went with cement grout instead of epoxy, plan on resealing every couple of years — my grout sealer roundup breaks down which sealers hold up best.

When to Call a Pro

Call in a professional installer when the job involves large-format glass panels, a curved or non-standard substrate, or any wall where a failed grout job means retiling an expensive glass mosaic from scratch. I still recommend DIY-ing straightforward glass subway tile backsplashes with narrow joints — the margin for error is small but manageable. Where I draw the line personally is on steam showers and heated floors under glass tile, since substrate movement there needs an installer who can match grout flexibility to the assembly.

Grout Color and Design for Glass Tile

Color decisions change the entire feel of a glass tile installation, which is why how to pick grout color for glass tile is worth slowing down for. A grout shade close to your tile color blends individual pieces together, which works especially well on small-format glass mosaics. A contrasting grout color highlights the pattern and layout instead — I use this most often on subway and herringbone glass installs. My process stays simple either way: cure a small test batch next to the actual tile under the room's real lighting before ordering a full bag, since glass reflects light so differently from ceramic that a shade which looks right on a swatch card can shift once it's on the wall.

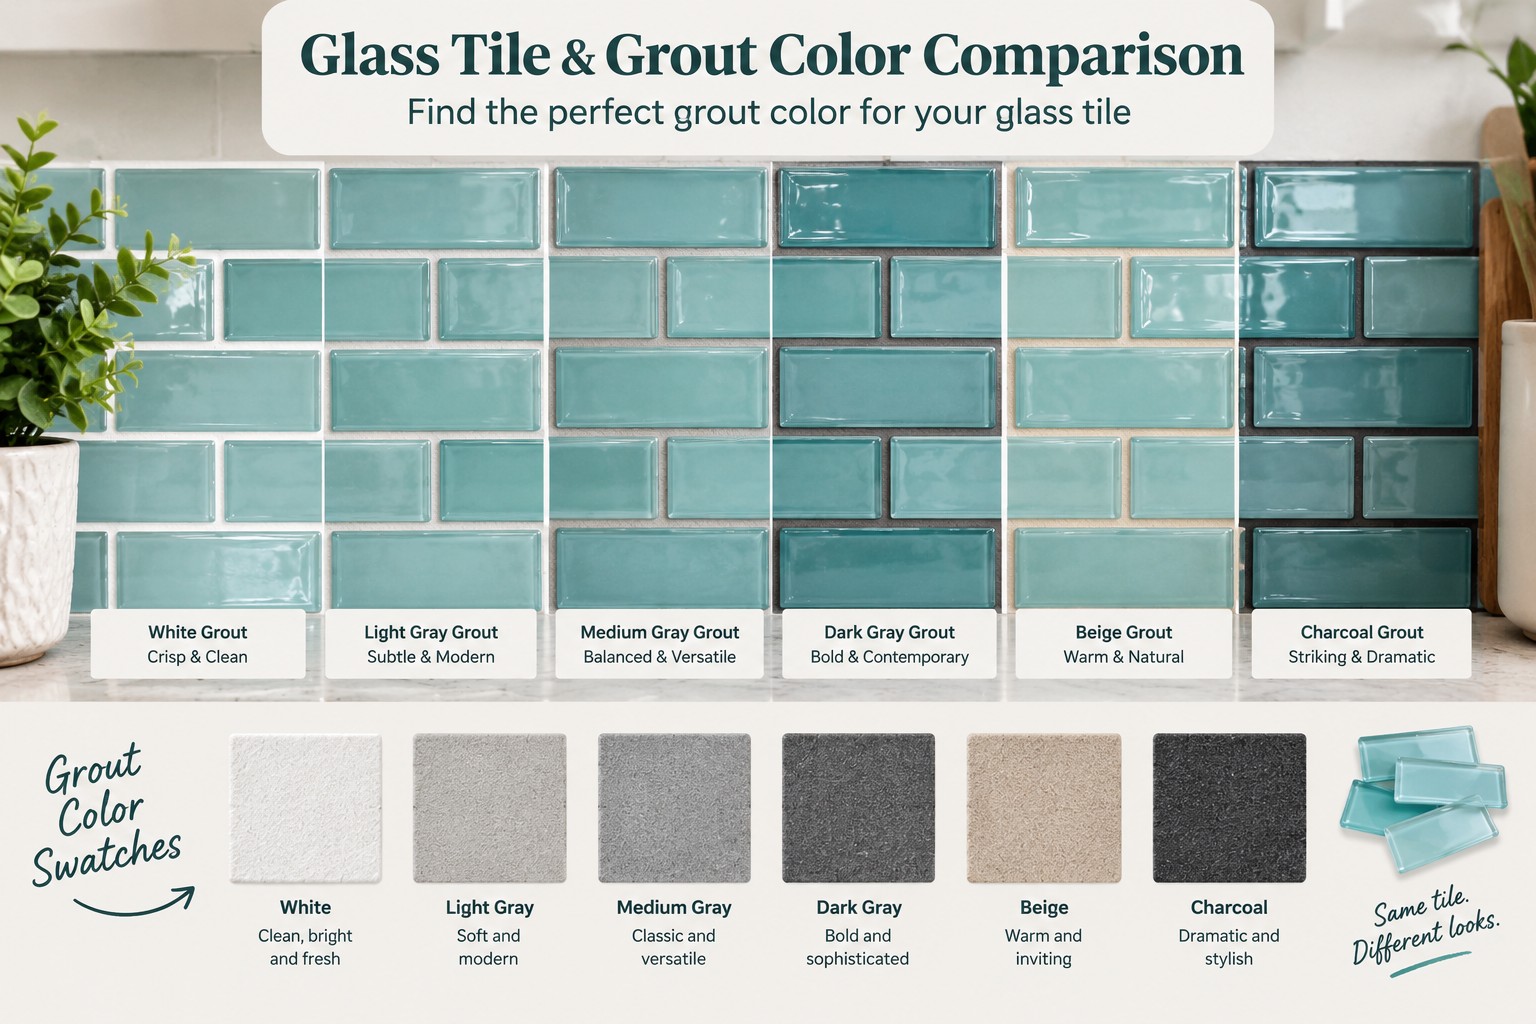
grout color swatches compared against glass subway tile for matching and contrast options
Testing grout color against the actual tile prevents surprises after curing.

What Size Grout Line for Glass Subway Tile

For standard 3x6 glass subway tile, I run 1/16" grout lines by default — tight enough to keep the classic subway look, wide enough to absorb minor dimensional variance in the tile. If the tile has visibly uneven edges or a handmade, rippled finish, I bump that up to 1/8" to avoid fighting lippage during install.

Final Thoughts

Choosing grout for glass tile comes down to matching the product to the job: epoxy for most wet or high-traffic areas, unsanded cement for tight budgets on low-moisture walls, and clear or colored grout depending on the design effect you're after. Get the type, joint size, and color right, and a glass tile installation looks sharp for years with almost no maintenance headaches. For a broader look at grout cleaning across tile types, check my tile grout cleaner guide.

Frequently Asked Questions

What type of grout for glass tile works best overall?

Unsanded epoxy grout is what I recommend for the vast majority of glass tile installations. It won't scratch the glass surface during application, it's completely non-porous so it resists oil, grease, and hard water stains, and it never needs sealing the way cement-based grout does. MAPEI Keracolor U and Litokol Starlike have both held up well on glossy glass in my own installs, with no scratching or discoloration even years later. The only time I'd steer away from epoxy is on a very tight budget for a low-moisture wall, where quality unsanded cement grout can still get the job done.

Can I use sanded grout for glass tile mosaics?

Generally, no — not unless the tile manufacturer has explicitly rated it safe for that specific glass product. The sand particles are abrasive enough to leave fine scratches on a glossy or polished glass surface during both the float application and later grout haze cleanup. If you have a textured or matte-finish glass mosaic that the manufacturer confirms is compatible, I still grout a small test panel first and check closely for scratching before committing to the full wall.

Is clear grout for glass tile a good idea?

It can be a great choice, but it's a design decision more than a default one. Clear or translucent grout works especially well on iridescent or hand-cut art-glass mosaics where you want the tile's own color to take center stage instead of competing with a visible grout line. Where it falls short is on uneven or dark substrates, since you're essentially seeing through to whatever sits underneath — so I only recommend it when you control a consistent, light-colored backing.

How do I choose grout color for glass tile?

Start by deciding between a seamless look or a defined, patterned look. A grout shade that closely matches your tile blends individual pieces into one continuous surface, which works beautifully on small-format or monochrome glass mosaics. A contrasting color makes each tile pop and gives layouts like subway or herringbone more structure. Whichever direction you pick, cure a small test batch next to the actual tile under real room lighting before ordering a full bag.

What size grout line should I use for glass subway tile?

I run 1/16" grout lines on standard 3x6 glass subway tile by default. That's tight enough to keep the classic subway look while still absorbing minor dimensional variance between individual tiles. If the tile has a handmade or rippled finish with visibly uneven edges, I bump the joint up to 1/8" so I'm not fighting lippage during installation.

Does glass tile grout need to be sealed?

Epoxy grout never needs sealing — it's non-porous straight out of the bucket, which is one of the main reasons I recommend it for glass tile. Cement-based grout, sanded or unsanded, does need sealing, typically resealed every couple of years depending on how much moisture and traffic the area sees.

Can I clean glass tile grout with vinegar?

Occasionally, on stubborn spots, but I don't make it a habit. Vinegar's acidity can wear down cement-based grout over time even though it feels like a mild, natural cleaner. A pH-neutral cleaner and soft cloth is what I use for regular upkeep, saving vinegar for the rare tough stain on cement grout only — never on natural stone accents nearby.

How long does epoxy grout take to cure on glass tile?

Most epoxy grouts reach a light-use cure within 24 hours and a full cure around 7 days, though I always check the specific product's data sheet since working and cure times vary by brand. I avoid running water over the joints or exposing them to heavy moisture until that full cure window has passed, even if the surface looks and feels set sooner.

Grout Cleaner Brush: What Actually Works (Tested by a Pro)

The grout cleaner brush is one matched to your tile type and grime level — a standard stiff-nylon brush for routine upkeep, a grout cleaner drill brush for large or heavily soiled floors, and a softer-bristle brush for natural stone. In my 10+ years of testing, matching the brush to the surface matters more than any single “best” product.

grout cleaner brush cleaning tile grout linesI’ve been cleaning tile and grout professionally for over 10 years, and if you asked me to name the one tool that makes or breaks a cleaning job, it’s the grout cleaner brush. Not the cleaning solution, not the sealer — the brush. I’ve personally gone through more than 40 different brushes on my own bathroom, kitchen, and client jobs, from cheap plastic ones that fell apart in a week to drill attachments that saved me hours on big floor jobs. Here’s everything I’ve learned, hands-on, about picking the right one and using it properly.

Think of grout lines like the cracks in a sidewalk — dirt doesn’t just sit on top, it settles in and builds a home there. A flat sponge glides right over that crack without ever disturbing what’s living inside it. A grout cleaner brush is the only tool actually shaped to get down into that crack and clean it out.

What Is a Grout Cleaner Brush and Why You Need One

A grout cleaner brush is a brush built specifically to fit into the narrow, recessed lines between tiles and scrub out dirt, mold, and soap scum that a sponge or cloth can’t reach. Because grout sits below the tile surface and is more porous, it traps grime differently than tile does, and this tool exists to close that gap. Regular household brushes just aren’t shaped for the job. A toothbrush works for a day or two, then the bristles splay out and stop reaching the bottom of the grout line. A proper grout brush cleaner is built with stiffer, denser bristles arranged specifically to reach into that joint instead of skimming across the top of it. In my own before-and-after jobs, I’ve found that grout left unsealed and unbrushed for more than a year picks up visibly darker staining in the joints closest to shower drains and sink basins — the two spots that stay damp the longest. That’s not a coincidence; it’s simply where moisture sits.

Here’s why I tell every client to keep one under the sink:

  • Grout absorbs moisture and dirt faster than tile does, so it becomes a breeding ground for mold and bacteria if it’s not brushed out regularly.
  • Buildup that’s left alone doesn’t just look bad — it slowly breaks down the grout itself, which means a costlier re-grouting job down the road.
  • A clean grout line genuinely changes how a whole room looks. I’ve had clients tell me their bathroom “looks renovated” after nothing more than a proper grout scrub.
grout cleaning comparison

Types of Tile Grout Cleaner Brushes (And Which One I’d Actually Buy)

Different jobs need different brushes — a manual brush for weekly upkeep, a drill brush for large or neglected floors, and a softer brush for natural stone. Here’s how I choose between them for a real job.

Standard Grout Brush

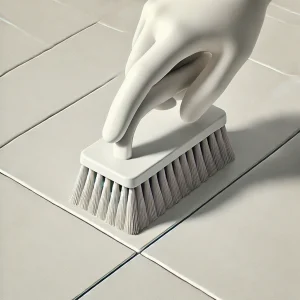
This is the classic dual-headed or single-headed manual brush with stiff nylon bristles. It’s what I reach for on routine maintenance — a quick weekly scrub in the shower or kitchen backsplash. It’s affordable, it lasts a long time if rinsed out properly, and in my experience it’s genuinely all that roughly 8 out of 10 homes need.

Grout Cleaner Drill Brush

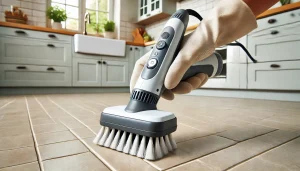
This one changed how I work on big floor jobs. A grout cleaner drill brush attaches to a standard power drill and spins at high speed, cutting a twenty-minute manual scrub down to under five minutes on the same area. If you’ve got a large kitchen or hallway floor with grout that hasn’t been cleaned in years, this is the tool that gets it done without wrecking your knees and wrists. My one caution: on natural stone tile, a drill brush spinning too fast with the wrong bristle can dull or scratch the surface, so always test a small hidden spot first.

Heavy-Duty Grout Brush

Built with reinforced, extra-stiff bristles, this is what I bring to commercial jobs or homes where the grout hasn’t seen a brush in years. It’s overkill for weekly maintenance, but for a deep, one-time restoration clean, it earns its place in the kit. [Image: Grout Brush Types — standard, drill attachment, and heavy-duty side by side]

Long-Handle Grout Brush

For floor grout specifically, bending over for twenty minutes gets old fast. A long-handle version lets you scrub standing up, which matters more than people expect once you’re doing a full kitchen or hallway floor.

Grout Brush for Shower and Wet Areas

Showers deal with constant moisture, soap scum, and mildew, so a brush designed for wet environments — usually with moisture-resistant bristles and a rust-proof head — holds up noticeably longer than a standard one meant for drier areas. In my testing, a standard brush used daily in a shower started losing bristle stiffness within about six to eight weeks, while a moisture-resistant one held up for several months longer.

Grout Cleaner Brush Comparison Table

Here’s a quick side-by-side of every type I’ve covered, so you can match one to your situation at a glance:

Brush Type Best For Bristle Type Effort Level My Rating
Standard Grout Brush Weekly maintenance Medium-stiff nylon Manual Best for Most Homes
Grout Cleaner Drill Brush Large floors, heavy buildup Stiff nylon (swap heads) Powered Best Time-Saver
Heavy-Duty Grout Brush Years of neglect, commercial use Extra-stiff, reinforced Manual Best for Deep Restoration
Long-Handle Grout Brush Floor grout, avoiding bending Medium-stiff nylon Manual Best for Comfort
Shower/Wet-Area Brush Bathrooms, soap scum, mildew Moisture-resistant nylon Manual Best for Humid Spaces

If you only buy one, get a standard grout cleaner brush. If your floors haven’t been touched in years, add a grout cleaner drill brush to the cart — it’s the upgrade that saves the most time.

How to Pick the Right Grout Cleaner and Brush for Your Home

Match the brush to your tile material first, then to how dirty the grout actually is — that order matters more than price or brand. If you have porcelain or ceramic tile, you can go with stiffer bristles without worry, since these materials handle abrasion well. If you have natural stone like marble, travertine, or slate, use a softer nylon brush. I scratched a client’s marble shower years ago with a bristle that was too aggressive, and it’s a mistake I never made twice. For grime level, think about how long it’s been since the grout was last cleaned. Weekly upkeep only needs a standard manual brush. Anything that’s gone six months or more without attention usually needs a heavy-duty brush or a grout cleaner drill brush to break through the buildup efficiently. Comfort matters more than people think, too. An ergonomic handle with a non-slip grip makes a real difference once you’re twenty minutes into scrubbing a full bathroom floor. Cleaning tools and grout cleaning solution laid out before a job

My Step-by-Step Grout Cleaning Process

Clear debris, apply a cleaner, scrub in sections, rinse fully, then reseal — that five-step order is what I follow on every single job, residential or commercial.
  1. Clear loose debris. I always vacuum or dry-sweep the floor before applying any liquid, because skipping this step just turns dry dirt into a muddy paste that’s harder to remove.
  2. Apply a cleaning solution and let it sit. For routine cleaning, a baking soda and water paste works well. For tougher, older stains, I’ll use a dedicated grout cleaner product and let it dwell for five to ten minutes so it has time to break the grime down before scrubbing starts.
  3. Scrub in small sections using a circular motion. If I’m using a grout cleaner drill brush, I let the tool’s speed do the work and just guide it along the line rather than pressing down hard, which can actually reduce its effectiveness and wear out the bristles faster.
  4. Rinse thoroughly and dry the area completely. This step gets skipped more than any other, and it’s a mistake — leftover moisture sitting in the grout is exactly what invites mold back within days.
  5. Reseal periodically. I reseal grout in high-traffic areas about once a year. A sealed grout line resists staining dramatically better than bare grout, which means less scrubbing needed next time.

Mistakes I See All the Time

The biggest mistake is mismatching bristle stiffness to tile material, followed closely by skipping the sealer — both shorten how long a clean actually lasts.
  • Scrubbing too aggressively, too often. Grout is softer than the tile around it, and daily hard scrubbing wears it down faster than dirt ever would on its own.
  • Using a stiff brush or a fast drill attachment on natural stone. This is the single most common damage I run into on stone tile jobs.
  • Skipping the sealer after a deep clean. Unsealed grout re-stains almost immediately, which makes the whole cleaning effort short-lived.
  • Letting stains sit for days before addressing them. A fresh spill wipes away in seconds. The same stain a week later can take real elbow grease and repeated scrubbing to shift.
Jack Martin Quick Tip: If you want a shortcut to test any brush before you buy it, run your thumb across the bristles. If they spring back instantly, they’ll hold up. If they stay bent even for a second, they’ll be limp within a month of real use. Grout brush in use during a cleaning

Final Thoughts

After a decade of testing brushes on everything from cheap apartment bathrooms to marble-floored kitchens, my honest take is this: a standard grout cleaner brush covers most households just fine, and a grout cleaner drill brush is worth the investment the moment you’re dealing with a large floor or grout that’s gone untouched for a long time. Match the bristle stiffness to your tile, don’t skip the sealer, and clean before stains have a chance to set — that combination will keep your grout looking new far longer than any single product ever will.

Frequently Asked Questions

Not always. It works great on porcelain and ceramic, but on natural stone like marble or travertine, a fast-spinning drill brush can scratch or dull the surface, so I’d stick to a manual brush with softer bristles there, or test a hidden spot first.

Yes, and I treat this as a non-negotiable last step on every job. It’s the difference between grout staying clean for months and grout that stains again within a couple of weeks.

A grout cleaner brush is shaped and sized specifically to fit into the narrow recessed grout line, while a regular scrub brush is flat and mainly designed for wider, open surfaces. The narrow bristle head is what lets it actually reach into the joint instead of just brushing the top of it.

Yes — a baking soda and water paste applied with a stiff-bristled brush handles most routine grout cleaning without needing a store-bought product, and it’s what I use for regular maintenance between deeper cleans.

With regular rinsing after each use, a standard manual brush typically holds its shape for four to six months before the bristles start to soften. Drill brush heads tend to wear faster on heavy floor jobs and often need replacing every two to three months of frequent use.

You can, but sparingly. Vinegar works well on light, everyday grime, but it can gradually wear down grout sealer with repeated use, so I only reach for it occasionally rather than as a weekly routine.

No Content

Epoxy Grout for Showers: Upgrade Your Bathroom Deserves

In today’s evolving home improvement landscape, epoxy grout for showers stands out as a game-changing solution for homeowners and designers alike. We are committed to providing an in-depth look at epoxy grout, detailing its advantages, installation process, and maintenance tips to ensure a lasting, pristine shower finish that surpasses traditional options.

Defining Epoxy Grout

Epoxy grout is a high-performance, polymer-based grout formulated to resist moisture, stains, and chemicals. Unlike traditional cement-based grouts, epoxy variants consist of a two-part system that chemically cures to form a seamless, robust finish. This modern grouting solution is specifically designed for high-moisture areas, making it an ideal choice for showers, spas, and bathrooms.

Advantages of Using Epoxy Grout in Showers

We have found that the adoption of epoxy grout in shower installations offers numerous benefits. These include unparalleled water and stain resistance, improved durability, and easier maintenance.

As we dive deeper, it becomes clear that epoxy grout’s superior performance transforms shower environments into spaces that are both aesthetically pleasing and functionally superior.

Key Benefits of Epoxy Grout in Shower Installations

Benefits of Epoxy Grout in Shower

Superior Water and Stain Resistance

Epoxy grout’s chemical composition is engineered to resist water penetration. This feature helps prevent water damage and unsightly staining often plaguing traditional grouts. The non-porous nature of epoxy grout means spills and splatters can be wiped away effortlessly, keeping your shower area looking new for years.

Enhanced Durability and Longevity

One of the primary reasons we recommend epoxy grout is its exceptional durability. Its resistance to cracking, chipping, and abrasion makes it an ideal choice for high-traffic shower areas. Homeowners who opt for epoxy grout enjoy a long-lasting finish that maintains its integrity even under constant exposure to moisture and heavy usage.

Simplified Cleaning and Maintenance

Epoxy grout’s slick, non-absorbent surface prevents the buildup of dirt and grime, making it significantly easier to clean compared to cement-based grouts. Routine cleaning is simplified to a quick wipe-down with mild cleaning agents, saving both time and effort. The low-maintenance aspect of epoxy grout is one of its strongest selling points, particularly in busy households.

Inhibition of Mold and Mildew Growth

Due to its non-porous nature, epoxy grout does not provide a hospitable environment for mold and mildew growth. In high-moisture settings such as showers, this feature is critical for maintaining a healthy and hygienic space. We emphasize that by choosing epoxy grout, you are investing in a cleaner and safer bathroom environment.

Epoxy Grout vs. Traditional Cement-Based Grout

Epoxy Grout vs. Traditional Cement-Based Grout

Fundamental Differences

When comparing epoxy grout to traditional cement-based options, the differences become immediately apparent. Traditional grouts are generally porous, allowing water and contaminants to seep in, which can lead to discoloration and decay over time.

In contrast, epoxy grout is designed to form a continuous, impermeable barrier that resists water absorption and chemical damage.

Pros and Cons Comparison

  • Epoxy Grout Pros:
    • Exceptional Durability: Resists cracks and abrasions.
    • Waterproof: Ideal for wet environments.
    • Easy Maintenance: Simple to clean and maintain.
    • Stain Resistant: Retains color and appearance over time.
  • Traditional Grout Cons:
    • Porous: Prone to water absorption and staining.
    • Susceptible to Cracking: More likely to develop cracks and discoloration.
    • Time-Consuming Cleaning: Requires regular sealing and maintenance.

We have observed that the long-term benefits of epoxy grout far outweigh the initial investment compared to traditional grouting solutions.

Selecting the Perfect Epoxy Grout for Your Shower

Color and Design Options

Epoxy grout is available in a diverse palette of colors and finishes that allow you to complement any shower design. Whether your style leans towards modern minimalism or classic elegance, you can choose a color that enhances the overall aesthetics of your bathroom. Our extensive range of color options ensures that every installation reflects your unique taste and design vision.

Tile Compatibility and Performance

Compatibility is essential when selecting the right grout for your tiles. Epoxy grout adheres well to a wide variety of surfaces, including ceramic, porcelain, and natural stone. Its chemical formulation bonds seamlessly with tile surfaces, ensuring a durable and cohesive finish. We recommend consulting with tile manufacturers to ensure optimal performance and compatibility with your specific tiles.

Considerations for High-Moisture Environments

For shower installations, the grouting material must withstand continuous exposure to water and humidity. Epoxy grout excels in high-moisture environments due to its water-resistant properties. In addition to water resistance, the chemical composition of epoxy grout protects against common bathroom challenges such as soap scum, mildew, and mold growth, ensuring a consistently clean and appealing finish.

Installation Guide: How to Apply Epoxy Grout in Your Shower

How to Apply Epoxy Grout in Your Shower

Required Tools and Materials

Before beginning your grouting project, we suggest gathering the following tools and materials:

  • Epoxy grout kit (resin and hardener)
  • Mixing paddle and bucket
  • Rubber grout float
  • Sponge and clean water
  • Protective gloves and eyewear
  • Masking tape

Preparing Your Shower Area

Proper preparation is crucial for achieving a flawless finish. Start by ensuring that the tile surfaces are clean, free from dust, and dry. Use masking tape to protect the edges of the tiles and adjacent surfaces from accidental smearing. This preparation phase is vital to ensure that the epoxy grout adheres correctly and sets evenly.

Step-by-Step Grouting Process

  1. Mixing the Epoxy Components: Follow the manufacturer’s instructions to combine the resin and hardener in the recommended proportions. Mix thoroughly until the solution achieves a uniform consistency.
  2. Application: Use a rubber grout float to apply the epoxy grout into the joints, ensuring complete filling and eliminating any gaps.
  3. Removal of Excess Grout: Work the grout into the joints at a consistent angle and remove the excess from the tile surface immediately to avoid staining.
  4. Cleaning: With a damp sponge, carefully clean the tile surface. Rinse frequently to avoid spreading the grout residue.
  5. Final Touches: Allow the grout to settle for the recommended curing period before applying any finishing sealants if necessary.

Curing Time and Sealing Best Practices

The curing time for epoxy grout is typically shorter than that of traditional grout, but it is essential to follow the manufacturer’s guidelines. Proper curing ensures maximum strength and adhesion. Although most epoxy grouts are self-sealing, in certain applications, an additional sealant can further enhance durability and stain resistance.

Caring for Epoxy Grout in Showers

Caring for Epoxy Grout in Showers

Cleaning Tips and Tricks

Maintaining the pristine condition of your epoxy grout is simple. We advise the following cleaning tips:

  • Regular Wipe-Down: Use a soft cloth or sponge with mild detergent to clean the grout lines.
  • Avoid Abrasive Cleaners: Steer clear of harsh chemicals or abrasive cleaning tools that might compromise the integrity of the grout.
  • Prompt Stain Removal: Tackle any spills or stains immediately to prevent long-term discoloration.

Maintenance Do’s and Don’ts

  • Do:
    • Clean regularly with non-abrasive tools.
    • Follow manufacturer instructions for any specialized cleaning products.
  • Don’t:
    • Use high-acid cleaners or bleach solutions.
    • Delay cleaning to the point where buildup occurs, as this may impact the grout’s performance.

Avoiding Common Pitfalls with Epoxy Grout

Mistakes During Application

Errors during application can affect both the appearance and performance of epoxy grout. Common pitfalls include improper mixing, uneven application, and failure to remove excess grout promptly. We recommend a cautious approach—measure components accurately, apply evenly, and ensure that all surfaces are clean during the process.

Maintenance Errors to Watch For

While epoxy grout is low maintenance, neglect can lead to reduced performance. Avoid using harsh chemicals and never let soap scum or dirt accumulate. Routine cleaning and inspection will keep your shower looking fresh and prevent the early onset of any issues.

Final Thoughts and Recommendations

Epoxy grout offers a superior alternative to traditional cement-based grouts, especially in shower installations where moisture resistance, durability, and ease of maintenance are paramount. We believe that investing in high-quality epoxy grout not only enhances the aesthetics of your shower but also provides a long-lasting, hygienic solution that meets the demands of modern living.

The benefits—ranging from simplified cleaning and excellent water resistance to the inhibition of mold and mildew growth—make epoxy grout the preferred choice for homeowners and professionals alike. For those seeking a modern shower upgrade, adopting epoxy grout is a step towards a more resilient, attractive, and low-maintenance bathroom space.

If you are planning a renovation or designing a new shower, we encourage you to explore the versatility and performance of epoxy grout. Its broad range of color options and compatibility with different tile types means that you can achieve a customized look without compromising on functionality.

In summary, epoxy grout for showers is an innovative solution that redefines bathroom standards. By carefully selecting the right product, following proper installation techniques, and committing to routine maintenance, you can enjoy a shower that remains vibrant and pristine over time. This advanced grouting solution is more than just a material choice—it’s an investment in the quality, safety, and beauty of your home.

Frequently Asked Questions (FAQs)

Q1. Is Epoxy Grout Prone to Slipperiness?

Epoxy grout itself does not typically contribute to slipperiness. However, the overall safety of a shower also depends on the tile surface and proper cleaning practices. We suggest choosing textured tiles for added grip.

Q2. Can It Be Applied Over Existing Grout?

Epoxy grout can sometimes be applied over existing grout if the surface is sound and properly prepared. We recommend thorough cleaning and removal of any deteriorated grout to ensure the new epoxy adheres correctly.

Q3. What Is the Expected Lifespan of Epoxy Grout?

With proper installation and regular maintenance, epoxy grout can last significantly longer than traditional grouts. In most cases, you can expect it to remain in excellent condition for many years, providing a durable solution for high-moisture areas.

Q4. Does Epoxy Grout Require Sealing?

Most epoxy grouts are self-sealing; however, depending on the product and installation environment, an additional sealant may further protect against stains and water intrusion. We always advise following manufacturer recommendations.

Q5. Can Epoxy Grout be Used on All Types of Tiles?

Yes, epoxy grout works exceptionally well with various tile types, including porcelain, ceramic, and natural stone. Its strong adhesion and chemical resistance make it a versatile option for many bathroom designs.

Grout Cleaning Machine: Guide to Sparkling Tile Grout

In today’s fast-paced world, maintaining pristine surfaces is more than just a chore—it’s a testament to our commitment to excellence and hygiene. Grout cleaning machines have revolutionized how we approach cleaning tiled surfaces, ensuring that even the most stubborn dirt and grime are efficiently eradicated. In this comprehensive guide, we explore every facet of these innovative devices, from their operation and benefits to expert recommendations and professional insights.

Understanding the Importance of a Grout Cleaning Machine

Tile surfaces add elegance to any home or commercial space, but their grout lines often become a magnet for dirt, mold, and mildew. Grout cleaning machines are designed specifically to tackle these challenges. Unlike traditional cleaning methods, these devices are engineered to penetrate deep into the porous grout, delivering a powerful clean that manual scrubbing simply cannot match.

Why Invest in a Grout Cleaning Machine?

  • Enhanced Efficiency: A quality grout cleaning machine drastically reduces cleaning time.
  • Consistent Results: Delivers uniform cleaning, ensuring that every inch of grout is thoroughly treated.
  • Deep Cleaning Capability: Utilizes advanced technology to remove embedded dirt, stains, and even bacteria.
  • Long-Term Maintenance: Helps extend the life of your tile surfaces and grout, reducing future maintenance costs.

How Does a Grout Cleaning Machine Work?

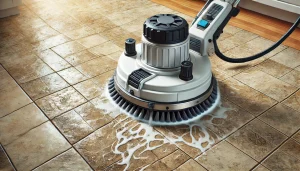
how does a grout cleaning machine work

The working principle behind a grout cleaning machine is both innovative and highly effective. These devices typically combine high-pressure water jets, rotating brushes, and powerful suction to dislodge and remove grime. Here’s a closer look at the process:

  1. Pre-Treatment: The grout is first treated with a cleaning solution that breaks down dirt and organic material.
  2. Mechanical Action: The machine’s rotating brushes gently scrub the grout lines while high-pressure jets force the cleaning solution deep into the pores.
  3. Suction and Extraction: The system then extracts the loosened dirt and solution, leaving behind a clean, residue-free surface.
  4. Rinse Cycle: A final rinse ensures that no cleaning agents remain, preserving the integrity of your grout.

This multi-step process not only cleans the surface but also sanitizes it, eliminating harmful microbes that can compromise indoor air quality.

What is the Best Device to Clean Grout?

When it comes to identifying the best device to grout cleaner, the answer lies in understanding your specific cleaning needs. We have evaluated a range of grout cleaning machines and discovered that models offering adjustable pressure settings, ergonomic design, and multifunctionality tend to deliver the best performance. Our recommendations are based on thorough testing and feedback from industry professionals:

  • Multi-Functionality: Devices that combine scrubbing, pressure washing, and vacuum extraction provide superior cleaning results.
  • Ease of Use: Ergonomic designs with intuitive controls are essential for effective cleaning.
  • Durability: A robust build ensures longevity and sustained performance even with frequent use.
  • Customization: Machines that allow adjustments for different grout types and surface areas can adapt to both residential and commercial environments.

Do Grout Cleaning Machines Work?

do grout cleaning machines work

The efficiency of grout cleaning machines is not just a matter of convenience; it’s backed by science and engineering. Do grout cleaning machines work? Absolutely—they are designed to tackle the toughest grime and are widely used by professionals in the cleaning industry. Here’s why they stand out:

  • Targeted Cleaning: The combination of mechanical scrubbing and high-pressure water targets deeply embedded dirt that is impossible to remove with manual cleaning.
  • Time-Saving: What might take hours of labor with traditional methods can be accomplished in a fraction of the time.
  • Versatility: These machines can handle various surfaces, including ceramic, porcelain, and natural stone, without causing damage.

Independent tests have confirmed that using a grout cleaning machine can reduce cleaning time by up to 70%, while also providing a more hygienic and lasting result.

What Do Professionals Use to Clean Grout?

In the professional cleaning industry, experts rely on specialized grout cleaning machines as part of their arsenal. What do professionals use to clean grout? The answer lies in equipment that is both powerful and gentle enough to protect delicate surfaces. Here’s an overview of the tools and techniques professionals swear by:

  • High-Pressure Extractors: These devices not only scrub but also extract water and grime simultaneously, minimizing the risk of re-depositing dirt.
  • Rotary Brush Systems: Equipped with adjustable bristles, these systems are effective in reaching tight spaces between tiles.
  • Eco-Friendly Cleaning Solutions: Professionals often pair their machines with environmentally friendly solutions that safely break down dirt while preserving the tile’s finish.
  • Portable and Compact Designs: Ease of transport and use in various settings, from large commercial areas to small residential spaces, makes modern grout cleaning machines highly versatile.

Professionals also prioritize regular maintenance and calibration of their machines to ensure peak performance. This approach not only ensures the best possible cleaning outcome but also extends the lifespan of the equipment.

Choosing the Right Grout Cleaning Machine for Your Needs

grout cleaning machine tips

Selecting the perfect grout cleaning machine involves considering several critical factors. Below, we outline the key features that you should evaluate when making your decision:

1. Power and Pressure Settings

A machine with adjustable pressure settings allows you to tailor the cleaning process to your specific grout type and level of contamination. High-pressure settings are ideal for deep cleaning, while lower pressures may be more suitable for delicate surfaces.

2. Brush Design and Material

The quality of the brushes used in the machine is vital. Look for models with durable, non-abrasive brushes that can efficiently remove grime without damaging the grout or tiles. Soft yet effective bristles ensure that the cleaning process is both thorough and gentle.

3. Suction and Extraction Capability

Effective extraction is crucial to remove all the cleaning solution and dirt. Machines with powerful suction capabilities ensure that no residue is left behind, which is essential for preventing mold and mildew.

4. Portability and Ease of Use

Consider the weight and design of the machine. Ergonomic designs and lightweight models make it easier to maneuver the device, especially in tight spaces. Features such as cordless operation and compact design can also enhance usability.

5. Durability and Warranty

Investing in a high-quality grout cleaning machine means looking for models that come with robust warranties and are built to withstand regular use. Durable materials and reliable construction ensure that your machine remains a long-term asset.

Maintenance and Safety Tips for Your Grout Cleaning Machine

right grout cleaning machine

To get the most out of your investment, regular maintenance and proper usage are crucial. Here are some practical tips to ensure longevity and optimal performance:

  • Regular Cleaning: After each use, clean the brushes, nozzles, and other components to prevent clogging.
  • Check for Wear: Periodically inspect parts for signs of wear and tear. Replace components as necessary to maintain efficiency.
  • Follow Manufacturer Guidelines: Always adhere to the maintenance schedule and operational instructions provided by the manufacturer.
  • Use Proper Cleaning Solutions: Avoid harsh chemicals that may damage the machine or the grout. Opt for solutions recommended by the manufacturer.
  • Safety First: Always wear protective gear, such as gloves and goggles, when operating the machine. Ensure that the area is well-ventilated and free of hazards.

Cost and Value: Is It Worth the Investment?

Investing in a grout cleaning machine can seem daunting initially, but the long-term benefits often outweigh the costs. When considering the price, think about the reduction in cleaning time, the improved quality of results, and the extended lifespan of your tiles and grout. Many users find that the efficiency and thorough cleaning provided by these machines lead to lower overall maintenance expenses, making them a valuable addition to any cleaning routine.

Conclusion

In summary, investing in a top-of-the-line grout cleaning machine is a wise decision for anyone serious about maintaining the cleanliness and longevity of their tiled surfaces. These machines offer unparalleled efficiency, consistency, and deep cleaning capabilities that traditional methods simply cannot match. By understanding the technology, selecting the right device, and adhering to proper maintenance practices, you can achieve professional-grade results in your own space. We are committed to providing expert advice and comprehensive insights that empower you to make informed decisions, ensuring your home or business remains pristine and welcoming.

Frequently Asked Questions (FAQs)

Q1. What is the best device to clean grout?

The best device to clean grout combines high-pressure water jets, rotary brushes, and powerful suction. Our top recommendations feature adjustable settings for different surfaces and are built with durability and ease of use in mind.

Q2. Do grout cleaning machines work?

Yes, grout cleaning machines work exceptionally well. They use a combination of mechanical action and high-pressure water to remove deep-seated grime and stains, offering a faster and more effective cleaning solution than traditional methods.
Q3. What do professionals use to clean grout?

Professionals typically use advanced grout cleaning machines that include high-pressure extractors, rotary brush systems, and eco-friendly cleaning solutions. These tools are designed for efficiency, ensuring thorough cleaning while protecting delicate surfaces.

Q4. Can I use a grout cleaning machine on all types of tiles?

Most high-quality grout cleaning machines are designed to work on a variety of tile types, including ceramic, porcelain, and natural stone. However, it is important to check the manufacturer’s guidelines to ensure compatibility with your specific surfaces.

Q5. How often should I clean my grout?

For optimal results, it is recommended to clean grout at least twice a year. In high-traffic areas or spaces prone to moisture, more frequent cleaning may be necessary to prevent buildup and maintain hygiene.

Are Grout Pens Effective? Pros, Cons, and Alternatives

In our continuous quest for a pristine home environment, we have explored a range of cleaning solutions that simplify maintenance while delivering professional results. Grout pens have emerged as one of the most innovative tools in the cleaning arsenal, promising a quick fix for stained or worn grout. In this comprehensive review, we share our in-depth analysis and personal opinion on their effectiveness, delving into the pros and cons, and offering reliable alternatives that can help you achieve immaculate grout lines.

Understanding the Grout Pen

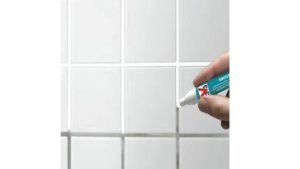
Grout pens, sometimes known as grout paint pens, are designed to renew the appearance of tiled surfaces by restoring the color of old, stained, or discolored grout. Their ease of application and convenience have made them popular among homeowners and professionals alike. Whether you opt for a black grout pen or a white grout pen, these tools are tailored to blend seamlessly with the tile design, giving your floors and walls a refreshed look.

What is a Grout Pen?

A grout pen is essentially a small, pen-like applicator filled with specially formulated grout colorant. This colorant is engineered to seep into the porous grout lines, covering stains, discoloration, and signs of wear. Its precision design allows for targeted application, ensuring that the color is applied evenly without affecting the tiles themselves.

How Do Grout Pens Work?

The application process of a grout pen is straightforward:

  • Preparation: The grout surface must be thoroughly cleaned to remove dirt, soap scum, and mildew.
  • Application: With a steady hand, the colorant is applied directly to the grout lines. The design of the pen allows for precise targeting of problem areas.
  • Absorption and Drying: The colorant penetrates the porous surface of the grout. As it dries, it adheres to the material, providing a refreshed look.
  • Finishing Touches: Once dry, a top coat or sealant is often recommended to lock in the new color and offer added protection against future stains.

This simple yet innovative process makes the grout pen a highly attractive solution for those looking to update their tile aesthetics without the need for labor-intensive grout replacement.

Pros of Using a Grout Pen

Pros of Using a Grout Pen

Our experience with grout pens has revealed several advantages that contribute to their popularity. Here are some of the standout benefits:

1. Ease of Use and Convenience

Grout pens are designed with user-friendliness in mind. Their pen-like design allows for precise application, making it easy to target stubborn stains or worn areas without the mess associated with traditional grout cleaning methods. We appreciate how this tool can be quickly picked up and applied with minimal training.

2. Cost-Effective Solution

Replacing grout entirely can be a time-consuming and expensive process. Grout pens offer an affordable alternative that revitalizes the appearance of your tiled surfaces at a fraction of the cost. By extending the life of existing grout, homeowners can avoid the expense of a full renovation.

3. Versatility in Application

Whether your tile is modern or classic, grout pens are available in various colors including black grout pen and white grout pen options, ensuring compatibility with a wide range of décor styles. Additionally, the grout paint pen formulation is designed to resist fading, making it a durable solution for high-traffic areas.

4. Quick Results

One of the most significant advantages we observed is the immediate visual improvement after using a grout pen. The before and after transformation—often referred to as grout pen before and after—is both dramatic and satisfying, offering instant gratification without prolonged downtime.

5. Minimal Disruption

The application of a grout pen does not require extensive preparation or cleanup. This minimal disruption makes it an attractive option for busy households and commercial spaces where downtime must be minimized.

Cons of Using a Grout Pen

Cons of Using a Grout Pen

Despite their numerous benefits, grout pens are not without limitations. Our comprehensive evaluation has highlighted several drawbacks that users should consider before investing in this solution.

1. Surface Preparation is Critical

For a grout pen to work effectively, the grout lines must be thoroughly cleaned and free from contaminants. Any residual dirt or mildew can prevent the colorant from properly adhering to the grout. This means that additional cleaning steps may be required prior to application, increasing the overall time and effort needed.

2. Durability Concerns

While many users enjoy the immediate transformation provided by a grout pen, questions remain about its long-term durability. Over time, wear and tear, coupled with regular cleaning, can cause the applied color to fade. Some users may find that the grout pen needs to be reapplied periodically to maintain the desired appearance.

3. Limited Effectiveness on Deep-Seated Stains

Grout pens are best suited for surface-level discoloration. For grout that has deeply embedded stains or structural damage, a pen may not be sufficient. In these cases, more intensive cleaning or even grout replacement might be necessary.

4. Color Matching Challenges

Although grout pens come in a variety of colors, achieving a perfect match with existing grout can be challenging. Differences in aging, wear, and previous cleaning treatments may result in slight color variations. This is particularly important for homeowners who are keen on a flawless finish.

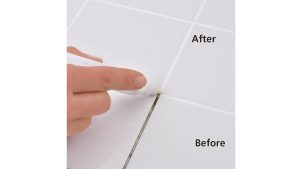
Grout Pen Before and After: A Visual Transformation

Grout Pen Before and After

We have seen numerous examples where the use of a grout pen has completely revitalized a room. When examining grout pen before and after results, the improvement is evident:

  • Before: Grout lines that once appeared dingy, stained, and mismatched with the tile.
  • After: A uniform, clean appearance that rejuvenates the overall aesthetic of the space.

These transformations underscore the potential of a well-applied grout pen to breathe new life into tired tile work. However, as with any cosmetic solution, the longevity of the effect depends on proper application and regular maintenance.

Recommended Product

Grout Pen for Quick Grout Touch-Ups

A convenient option for refreshing faded or discolored grout lines and giving tiled surfaces a cleaner, more uniform look.

As an Amazon Associate I earn from qualifying purchases, at no extra cost to you.

Check Price on Amazon →

Comparing Grout Pens: Black vs. White

The market offers a range of grout pen options to suit different design aesthetics. Two popular choices are the black grout pen and the white grout pen.

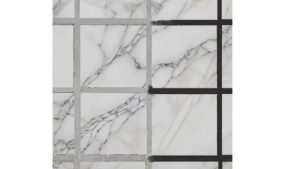
Black Grout Pen

The black grout pen is especially popular in contemporary and industrial designs. It offers:

  • Contrast: Provides a striking contrast that can highlight modern tile patterns.
  • Stain Concealment: Darker grout tends to hide minor stains better than lighter colors.
  • Modern Appeal: Often used in minimalist and edgy interiors to create a bold visual statement.

White Grout Pen

In contrast, the white grout pen is favored in traditional and bright, airy spaces:

  • Seamless Look: White grout complements light-colored tiles, offering a seamless and clean appearance.
  • Reflective Quality: Helps enhance the brightness of a room, making spaces feel larger and more open.
  • Classic Aesthetic: Ideal for classic kitchens and bathrooms where a timeless look is desired.

Our experience suggests that the choice between a black or white grout pen should be dictated by your overall interior design and personal preferences.

Alternatives to Grout Pens

Alternatives to Grout Pens

While grout pens offer a convenient solution, they may not be the best option for every scenario. Here, we outline some alternatives that have proven effective in our professional opinion:

1. Traditional Grout Cleaning and Sealing

For deeper stains or structurally compromised grout, traditional cleaning methods combined with sealing may offer a more durable solution. This process involves:

  • Deep Cleaning: Using specialized cleaning agents to remove embedded stains.
  • Sealing: Applying a high-quality grout sealer that protects against future staining and wear.

This method can provide long-term protection and may be preferable for heavily used areas.

2. Steam Cleaning

Steam cleaning is a chemical-free alternative that effectively sanitizes and brightens grout lines. The high temperature of the steam breaks down grime and disinfects surfaces without damaging the grout. This method is particularly beneficial for households with young children or pets.

3. Grout Replacement

In cases where the grout is extensively damaged or discolored, full grout replacement might be the most effective solution. Although more labor-intensive, replacing the grout can restore both the appearance and functionality of tiled surfaces, offering a long-term solution that surpasses the cosmetic benefits of a grout pen.

4. Specialized Grout Colorants

Beyond grout pens, specialized grout colorants applied with brushes or rollers can also revitalize grout lines. These products often come in larger quantities, making them suitable for extensive projects or commercial spaces. They provide a uniform finish and may include advanced formulations that resist fading and wear over time.

Expert Tips for Using Grout Pens Effectively

To ensure the best possible outcome when using a grout pen, we recommend adhering to the following expert tips:

  • Thorough Cleaning: Prioritize cleaning the grout lines with a dedicated grout cleaner. This step is crucial for ensuring proper adhesion of the colorant.
  • Test on a Small Area: Before applying the pen to the entire surface, test it on a small, inconspicuous area to ensure the color matches your expectations.
  • Multiple Coats: Depending on the extent of discoloration, consider applying multiple thin coats rather than one thick layer. Allow each coat to dry completely before applying the next.
  • Regular Maintenance: Maintain the refreshed appearance by periodically cleaning and resealing the grout. This will help extend the lifespan of the colorant.
  • Avoid Harsh Chemicals: When cleaning, avoid harsh chemicals that can degrade the colorant. Instead, opt for gentle, pH-balanced cleaners that protect both the grout and the applied finish.

Conclusion

In conclusion, we believe that grout pens offer a simple, cost-effective, and visually impressive method for refreshing tiled surfaces. Their ease of use and immediate results make them an attractive option for homeowners looking to enhance the overall appearance of their spaces without undergoing extensive renovations. However, for areas with deeply ingrained stains or structural damage, traditional cleaning methods, steam cleaning, or even grout replacement might provide a more durable solution.

Ultimately, whether you choose the convenience of a grout pen or opt for more comprehensive alternatives, maintaining clean grout is essential for a vibrant, hygienic, and welcoming home environment. We encourage you to assess your specific needs, experiment with the various methods available, and select the approach that best aligns with your design goals and lifestyle.

Frequently Asked Questions

Q1. Do grout pens really work?

Yes, they work well for superficial stains and improving appearance, though deeper stains or damage may require additional methods.

Q2. What can I use instead of a grout pen?

Alternatives include traditional grout cleaning and sealing, steam cleaning, grout replacement, and specialized grout colorants applied with a brush or roller.

Q3. Is grout cleaning worth it?

Absolutely. Regular grout cleaning enhances appearance and hygiene, preventing mold, mildew, and bacteria buildup.

Q4. How long does a grout pen last?

Typically, a grout pen lasts between 6 to 12 months, depending on traffic, cleaning frequency, and environmental conditions.

How To Clean Natural Stone Tile And Grout

Natural stone tiles add elegance and durability to any home, but they require special care to maintain their beauty. One of the biggest challenges homeowners face is how to clean stone tiles and their grout without causing damage. The porous nature of grout allows dirt, stains, and moisture to seep in, making it difficult to clean. Using the wrong cleaning products or techniques can lead to discoloration, etching, or even structural damage.

In this guide, we will explore “how to clean natural stone tile and grout” while ensuring longevity and protection for your natural stone surfaces.

Understanding Natural Stone and Grout

Natural Stone and Grout

Why Natural Stone Needs Special Care

Unlike ceramic or porcelain tiles, natural stone is delicate and can be easily damaged by acidic or abrasive cleaning products. Stones like marble, travertine, limestone, and granite have unique characteristics, requiring specific care methods.

How Grout Absorbs Dirt and Stains

Grout is porous and prone to trapping dirt, moisture, and bacteria, leading to discoloration and mold growth. The problem worsens in high-traffic areas, kitchens, and bathrooms where spills and humidity are common.

Different Types of Natural Stone Tiles

  • Marble – Soft, luxurious, but prone to etching and stains.
  • Travertine – Porous with natural holes that require sealing.
  • Limestone – Delicate, requiring pH-neutral cleaners.
  • Granite – Harder and more resistant, but still needs proper care.

Safe Cleaning Methods for Grout Between Natural Stone Tiles

Cleaning Methods for Grout Between Natural Stone Tiles

Routine Cleaning for Everyday Maintenance

For daily maintenance, use a pH-neutral cleaner designed for natural stone. Follow these steps:

  • Sweep or vacuum the floor to remove dust and debris.
  • Mix a mild stone-safe cleaner with warm water.
  • Use a soft-bristle brush or a microfiber mop to clean the surface.
  • Wipe off excess moisture with a dry, lint-free cloth.

Deep Cleaning for Stubborn Stains

For deeper cleaning, you can use the following methods:

DIY Cleaning Solutions

  • Baking Soda and Water Paste – Apply a thick paste of baking soda and water to grout lines, let it sit for 10-15 minutes, then scrub gently with a soft-bristle brush.
  • Hydrogen Peroxide – For light-colored stones like granite, use hydrogen peroxide to remove stains without causing etching.
  • Steam Cleaning – A safe, eco-friendly option that lifts dirt and grime without chemicals.

How to Apply and Scrub Without Damage

  • Always use a soft brush or a sponge to prevent scratches.
  • Work in small sections to avoid letting cleaning solutions dry on the surface.
  • Rinse thoroughly with clean water and dry immediately.

What to Avoid When Cleaning Grout & Natural Stone Tiles

Cleaning Grout & Natural Stone Tiles

To prevent damage, avoid these cleaning mistakes:

  • Harsh Chemicals – Bleach, ammonia, vinegar, and lemon juice can degrade stone surfaces and grout over time.
  • Abrasive Tools – Steel wool, hard-bristle brushes, and scouring pads can scratch natural stone.
  • High-Pressure Washers – Excessive water pressure can weaken grout and loosen tiles.

How to Protect Grout and Natural Stone Tiles

Sealing for Long-Term Protection

Applying a high-quality sealer is essential for preserving grout and natural stone. Here’s how:

  1. Choose a penetrating sealer designed for your specific stone type.
  2. Clean the surface thoroughly before application.
  3. Apply with a soft cloth or sponge, ensuring full coverage.
  4. Allow the sealer to absorb for 15-20 minutes, then wipe off excess.
  5. Reapply every 6-12 months, depending on foot traffic and usage.

Preventative Tips for Maintaining Clean Stone Floors

  • Clean spills immediately to prevent staining.
  • Use rugs or mats in high-traffic areas to reduce dirt accumulation.
  • Wipe down surfaces with a damp cloth daily to prevent grime buildup.
  • Avoid dragging heavy furniture across stone tiles to prevent scratches.

FAQs

Q1. How to clean grout between natural stone tiles?

The best way to clean grout is by using a pH-neutral cleaner and a soft-bristle brush. If deeper cleaning is needed, a baking soda paste or steam cleaning can be effective.

Q2. What is the best cleaner for natural stone grout?

A pH-balanced stone-safe cleaner is the best option. Avoid acidic or harsh chemicals, as they can damage both grout and stone.

Q3. How do you clean grout off natural stone?

Use a damp microfiber cloth with a mild cleaner. For tougher stains, a soft brush with baking soda paste works well. Never use harsh scrubbing tools.

Q4. What is the easiest and fastest way to clean grout?

The quickest method is steam cleaning, which removes dirt without scrubbing. For a quick DIY fix, a baking soda and water paste applied for 10 minutes before scrubbing can do wonders.

Conclusion

Keeping natural stone tiles and grout clean requires a combination of daily maintenance, safe deep-cleaning methods, and proper sealing. By avoiding harsh chemicals and using pH-neutral cleaners, you can maintain the beauty and longevity of your stone floors. If grout becomes excessively dirty or stained, consider professional cleaning services to restore your flooring to its original shine. With the right approach, your natural stone tiles will remain stunning and durable for years to come.

Why Does Grout Turn Yellow? Causes & Solutions

Grout plays a crucial role in keeping tiles in place and enhancing the aesthetic of a space. However, over time, many homeowners notice their grout turning yellow, making the entire area look unclean and aged. This discoloration can be frustrating, but understanding the causes and solutions can help prevent and restore your grout to its original color.

In this guide, we will discuss why grout turns yellow, how to prevent it, and the best cleaning solutions to restore its white appearance.

Why Does Grout Turn Yellow? Common Causes

Why Does Grout Turn Yellow

1. Hard Water Stains

Hard water contains high levels of minerals like calcium, magnesium, and iron. When water evaporates, these minerals get left behind, creating stubborn stains that cause grout to turn yellow. This is particularly common in bathrooms and kitchens where water is frequently used.

2. Soap Scum Buildup

Soap, shampoo, and body wash leave behind residues that accumulate on grout lines. Over time, these residues mix with hard water minerals and dirt, leading to yellow discoloration.

3. Harsh Cleaning Products

Using strong chemicals like bleach or ammonia-based cleaners may initially seem effective, but they can weaken and damage grout. This makes grout more porous, allowing dirt and stains to settle more easily, causing yellowing.

4. Mildew and Mold Growth

Bathrooms and kitchens have high humidity, which creates the perfect environment for mold and mildew growth. As mildew develops, it can cause grout to discolor and turn yellow.

5. Poor Cleaning Habits

Irregular cleaning routines allow dirt, dust, and moisture to build up on grout. Over time, this accumulation can lead to yellowing and make it more challenging to clean.

6. Grout Type

Some grout materials, like epoxy grout, are more prone to yellowing due to their chemical composition. Additionally, light-colored grout tends to show stains more visibly than darker grout.

7. Residue from Aerosol Sprays

Hairsprays, air fresheners, and other aerosol products can leave behind a sticky film that gradually causes yellow stains on grout.

How to Prevent Grout from Turning Yellow

How to Prevent Grout from Turning Yellow

1. Regular Cleaning

Keeping grout clean is the best way to prevent yellowing. Use a mild cleaner, such as a mixture of baking soda and water, and scrub grout at least once a week to remove dirt and soap scum.

2. Use a Grout Sealer

Applying a grout sealer helps protect grout from absorbing water, dirt, and stains. Seal grout every 6–12 months to maintain its cleanliness.

3. Address Hard Water Issues

If hard water is a problem in your home, consider installing a water softener or using a hard water removal product to reduce mineral deposits.

4. Choose the Right Cleaning Products

Avoid harsh chemicals like bleach and ammonia, as they can break down grout over time. Instead, use pH-balanced cleaners specifically designed for grout.

5. Improve Ventilation

Proper ventilation helps reduce humidity, preventing mildew and mold growth. Use an exhaust fan in the bathroom or open windows after showering.

6. Wipe Down Surfaces After Use

After using the shower or sink, wipe down tiles and grout with a dry towel to remove excess moisture and soap residue.

How to Get Grout White Again: Best Cleaning Methods

How to Get Grout White Again

If your grout has already turned yellow, don’t worry! Here are some effective ways to restore its original color.

1. Baking Soda & Hydrogen Peroxide Paste

Ingredients:

Method:

  1. Mix the ingredients to form a paste.
  2. Apply it to the grout and let it sit for 10–15 minutes.
  3. Scrub with a brush and rinse with warm water.

2. Vinegar & Baking Soda Solution

Ingredients:

  • 1/2 cup white vinegar
  • 1/2 cup baking soda

Method:

  1. Sprinkle baking soda on the grout.
  2. Spray vinegar over it and let it bubble for 5 minutes.
  3. Scrub the grout lines and rinse with water.

3. Oxygen Bleach Cleaner

Oxygen bleach is a safer alternative to chlorine bleach. Mix it with warm water, apply it to the grout, and scrub after 10 minutes.

4. Steam Cleaning

A steam cleaner is an excellent chemical-free method for deep cleaning grout. The high heat loosens dirt and kills bacteria.

5. Professional Cleaning Services

If your grout is severely stained, hiring a professional grout cleaning service can restore it to a like-new condition.

Additional Tips for Maintaining Clean Grout

1. Avoid Colored Soaps and Shampoos

Colored soaps and shampoos can leave residues that stain grout. Opt for clear or white soap to minimize discoloration.

2. Use a Squeegee After Showers

Using a squeegee to remove excess water from tiles and grout after showering can help prevent hard water stains and soap scum buildup.

3. DIY Natural Grout Cleaner

A homemade grout cleaner using equal parts of lemon juice and baking soda can be an effective and natural alternative to chemical cleaners.

4. Deep Clean Monthly

Even with regular cleaning, deep cleaning grout once a month using a stronger cleaner or steam cleaning method can help prevent long-term staining.

5. Replace Old Grout

If grout is severely stained and cannot be restored, consider re-grouting your tiles. Removing old, discolored grout and replacing it with fresh grout can dramatically improve the appearance of your space.

Final Thoughts

Yellowing grout can be frustrating, but it’s entirely preventable and fixable. By understanding the causes and using the right cleaning and maintenance techniques, you can keep your grout looking fresh and clean for years to come.

Regular cleaning, proper ventilation, and sealing grout are key to preventing yellow stains. If discoloration occurs, effective cleaning solutions like baking soda, vinegar, and hydrogen peroxide can help restore the grout’s original color.

By following these steps, you can ensure your grout remains spotless and enhances the beauty of your tiled surfaces.

Frequently Asked Questions (FAQs)

Q1. Why is the grout in my shower turning yellow?

Shower grout usually turns yellow because of soap scum, hard-water minerals, body oils, mildew, or moisture buildup. In some cases, aging grout or exposure to cleaning chemicals can also cause discoloration. Regular cleaning, proper ventilation, and keeping the grout dry can help prevent yellow stains.

Q2. Does too much water change grout color?

Yes. Excess water during grout application can weaken its structure, making it more porous and susceptible to stains, including yellowing.

Q3. What do professionals use to clean grout?

Professionals often use high-quality grout cleaners, oxygen bleach, steam cleaning, and specialized grout-sealing products to restore and protect grout.

Q4. How do you get grout white again?

You can restore white grout using baking soda and hydrogen peroxide, vinegar and baking soda, oxygen bleach, steam cleaning, or professional grout cleaning services.

The Science Behind Grout: What Makes It Strong and Durable?

Published: February 25, 2025

Jack Martin, grout and tile cleaning specialist

By Jack Martin — Grout & Tile Cleaning Specialist, 10+ years testing grout cleaning methods, 500+ products personally tried.

Quick Answer: Grout gets its strength from cement hydration — the chemical reaction between cement and water that forms calcium silicate hydrate (C-S-H), the crystal structure that binds everything together. Sand adds compressive strength and controls shrinkage in wider joints, while polymer additives like latex or acrylic improve flexibility and water resistance. The water-to-cement ratio and curing conditions matter just as much as the ingredients themselves — too much water or a rushed cure weakens grout no matter how good the mix is.

I've mixed more bags of grout than I can count, and the ones that failed early almost never failed because of a bad product — they failed because of how they were mixed, applied, or cured. Grout looks like a simple paste you smear between tiles, but underneath that simplicity is a real chemical process, and understanding it is the difference between grout that holds up for fifteen years and grout that's cracking within eighteen months. This guide breaks down exactly what makes grout strong, what weakens it, and what I actually do differently on jobs where I want the grout to last.

What Is Grout Made Of?

At its core, grout is a mixture of cement, sand, and water, though most modern formulas add polymers and other additives to improve performance. Its job is to fill the gaps between tiles, lock the whole installation together, and keep moisture, dirt, and staining agents from working their way underneath the tile. Not all grout is built the same way, and picking the wrong type for a job is one of the most common reasons I see grout fail early.

Manufacturers also mix in coloring pigments, and on some formulas, anti-microbial agents that slow mold and mildew growth in damp areas like showers. None of these extras change the basic chemistry underneath — the cement is still what does the structural work — but they do affect how the grout looks and behaves day to day. A lot of homeowners assume grout and mortar are the same thing because they're both cement-based, but they serve completely different jobs. Mortar bonds the tile to the substrate underneath it; grout only fills and seals the joints between tiles once the mortar has already cured. Mixing the two up, or trying to use one in place of the other, is a mistake I still see on occasion, and it never ends well structurally.

Grout Types Compared

How the three main grout types stack up against each other

Type Made Of Strength Best For
Cementitious Portland cement, sand, additives Moderate — needs sealing Standard residential/commercial tile
epoxy grout Resin and hardener Very high, stain-resistant Kitchens, showers, industrial floors
Urethane Pre-mixed, flexible polymer blend High flexibility, crack-resistant High-moisture areas, no sealing needed

Cementitious grout is what most homeowners have in their bathrooms and kitchens — it's affordable and easy to work with, but it needs sealing to hold up against moisture and staining. Epoxy grout costs more, but in my testing it's the toughest option by a wide margin — I've used it in commercial kitchen installs where cement-based grout simply wouldn't survive the grease and chemical exposure. Urethane grout is the newer option on this list, and it's become my go-to recommendation for anyone who wants strong, flexible grout without the sealing maintenance.

cementitious, epoxy, and urethane grout samples side by side showing texture differences

Cementitious, epoxy, and urethane grout side by side — texture and finish differ noticeably by type.

The Chemistry Behind Grout Strength

Grout doesn't get hard just because it dries out — it gets hard through a chemical reaction called hydration. When water hits cement, it reacts with calcium silicates inside the cement to form calcium silicate hydrate, usually shortened to C-S-H gel. That gel is what actually binds the sand and cement particles into a solid mass. The slower and more complete this reaction is, the denser and stronger the finished grout becomes.

This is why rushing a grout job almost always backfires. I've seen plenty of grout that looked perfectly fine the day it was installed, only to start crumbling months later because the hydration process never had the time or moisture it needed to finish properly.

cement hydration process forming calcium silicate hydrate gel that binds grout particles

Hydration is a chemical reaction, not simple drying — rushing it leaves grout weaker long-term.

Why Sand Matters More Than People Think

Sand isn't just filler. In sanded grout — which is used for joints wider than about 1/8-inch grout lines — sand plays a structural role. It reduces shrinkage as the grout cures, improves compressive strength, and helps prevent the fine cracking that shows up in wide joints filled with unsanded product. Unsanded grout, on the other hand, is reserved for narrow joints and delicate surfaces like glass tile, where sand particles would scratch the tile edges during application.

Using the wrong one for the joint width is a mistake I still see on plenty of DIY jobs — sanded grout in a hairline glass tile joint, or unsanded grout packed into a wide floor joint where it just isn't strong enough to hold up.

Polymer Additives and Flexibility

Most grout sold today isn't pure cement and sand anymore — it includes polymer additives like latex or acrylic. These additives improve adhesion to the tile, boost water resistance, and — this is the part that matters most in my experience — give the grout enough flexibility to handle the tiny expansion and contraction that happens as temperatures shift throughout the year. Rigid, polymer-free grout has nowhere to go when the substrate moves slightly, so it cracks. Polymer-modified grout flexes instead, which is a big part of why modern grout tends to outlast older formulations.

The Water-to-Cement Ratio Problem

This is the single most common mixing mistake I run into. Adding too much water makes grout easier to spread, but it also creates excess voids inside the cured grout and dilutes the hydration reaction, leaving you with a weaker, more porous result. Too little water goes the other direction — the mix becomes difficult to work with and never fully hydrates either, since there isn't enough water present for the reaction to complete. The right ratio isn't about what feels easiest to apply; it's about following the manufacturer's mixing instructions closely, even when a slightly wetter mix would be more convenient to work with.

Curing Time and Conditions

Grout needs time to reach its full strength, and the conditions during that window matter as much as the mix itself.

  • Humidity: Higher humidity slows drying and actually helps the grout hydrate more completely.
  • Temperature: Extreme heat or cold can cause grout to dry too fast or stay too soft, both of which weaken the final result.
  • Sealing timing: Sealing too early traps moisture inside before curing finishes; sealing too late leaves grout exposed to staining it didn't need to face.

I always tell people to resist walking on freshly grouted floors or running water over fresh shower grout for at least the manufacturer's stated cure window — usually 48 to 72 hours. Cutting that short is one of the fastest ways to undo an otherwise solid mix.

freshly grouted tile floor left undisturbed during the 48 to 72 hour curing window

Giving grout its full cure window before foot traffic or water exposure protects the strength it's still building.

What Wears Grout Down Over Time

Even a strong, properly cured grout job doesn't stay strong forever without some help. Three things drive most of the long-term wear I see:

  • Environmental exposure — repeated moisture contact, temperature swings, and harsh cleaning chemicals all chip away at grout's integrity over time.
  • Installation quality — inconsistent application, air pockets, and mixing errors show up as weak spots years down the line, not immediately.
  • Maintenance habits — skipping sealing, using acidic cleaners, and ignoring small cracks until they spread all shorten grout's working life.

Of the three, environmental exposure is the one most homeowners underestimate. A shower gets soaked with water almost daily, and if that grout isn't sealed or isn't a moisture-resistant type to begin with, it's absorbing a small amount of water every single time — which gradually breaks down its structure from the inside, long before any cracking shows up on the surface. Temperature swings work more slowly but just as steadily; every expansion and contraction cycle puts tiny amounts of stress on the grout, and over years, that stress finds the weakest points in the mix and turns them into visible cracks.

Installation quality is the sneaky one, because a poorly mixed or poorly applied grout job can look completely fine for the first year or two. Air pockets left behind during application don't cause problems immediately, but they become the exact spots where cracks start once the grout faces real stress from foot traffic or moisture. This is part of why I always tell people that a grout job's real test isn't how it looks the week it's installed — it's how it looks five years later.

How I Make Grout Stronger on Every Job

These are the practices I actually follow when I want grout to hold up for the long haul:

  • Follow the manufacturer's water-to-cement ratio exactly rather than eyeballing it
  • Add a polymer-modified formula when flexibility matters, especially over larger tile or subfloors that shift slightly
  • Seal cementitious grout once it's fully cured, and reseal on a regular schedule
  • Give grout its full cure time before exposing it to water or heavy foot traffic
  • Switch to epoxy or urethane grout in kitchens, showers, and other high-moisture, high-traffic areas

Mistakes That Quietly Weaken Grout

Most grout failures I've been called in to look at trace back to one of these mistakes, and almost none of them are obvious the day the work is finished — they show up months or years later as cracking, crumbling, or staining that won't lift no matter how hard you scrub.

  • Mixing by feel instead of by measurement — a "looks about right" water ratio is where most weak grout starts
  • Grouting over dusty or damp tile — poor surface prep undermines adhesion no matter how good the mix is
  • Walking on grout before the cure window ends — this interrupts hydration before it's finished
  • Skipping sealer on cementitious grout — leaves it exposed to staining and moisture absorption from day one
  • Using harsh acidic cleaners on a regular basis — these slowly break down cured grout's surface over months of use

Frequently Asked Questions

What makes grout stronger?

Grout strength comes from a combination of cement content, the sand-to-cement ratio, the water-to-cement ratio, and proper curing conditions. Polymer additives and correct mixing technique push that strength even further.

Why do some contractors skip sealing grout?

Epoxy and urethane grouts don't require sealing at all, and some contractors treat sealing cementitious grout as an optional extra step. I don't recommend skipping it — sealing meaningfully extends how long cement-based grout resists moisture and staining.

What is the toughest type of grout?

Epoxy grout is the toughest option available, with strong resistance to stains, chemicals, and moisture, which is why it shows up so often in commercial kitchens and industrial settings.

What can I add to grout to make it stronger?

Latex or acrylic polymer additives, the correct sand-to-cement ratio, and full, unrushed hydration all improve grout strength. For the highest durability ceiling, an epoxy-based grout is the strongest option overall.

How long does grout take to fully cure?

Grout is typically dry to the touch within 24 hours, but it doesn't reach full strength until it fully hydrates, which usually takes 48 to 72 hours depending on humidity and temperature. I always wait out the manufacturer's full cure window before sealing or exposing grout to water.

Does grout color affect its strength?

No — coloring pigments are added for appearance and don't change the underlying cement chemistry that gives grout its strength. Strength comes from the cement-to-sand-to-water ratio and curing process, not the color.

Final Thoughts

Grout strength isn't random, and it isn't just about buying a premium bag off the shelf. It comes down to chemistry — hydration, sand ratio, polymer content, water ratio, and curing conditions all working together. Get those right, and grout holds up for well over a decade. Rush any one of them, and even the best grout on the market will crack or crumble ahead of schedule. Whether you're working with cementitious, epoxy, or urethane grout, the fundamentals I've covered here are what separate a grout job that lasts from one that needs redoing in a year or two.

Easy Ways to Remove Grout Stains & Keep Tiles Spotless

Grout stains can be a frustrating eyesore, making even the cleanest tiles look dirty and aged. Over time, grout absorbs dirt, mold, mildew, and spills, resulting in unsightly discoloration. However, with the right cleaning methods, you can remove grout stains and restore your grout to its original brightness. Follow this comprehensive guide to learn how to remove grout stains effectively and prevent future staining.

Why Does Grout Get Stained?

Grout is porous, which makes it susceptible to absorbing moisture, dirt, and spills. Here are some of the most common causes of grout stains:

Mold and Mildew

High-humidity areas like bathrooms encourage the growth of mold and mildew, leading to black or green stains. If left untreated, mold can spread and become a health hazard.

Dirt and Debris

Foot traffic brings in dirt that settles into the grout lines, especially in high-traffic areas like kitchens and hallways. Over time, the accumulation of debris makes grout appear dark and dingy.

Spills and Stains

Liquids such as coffee, wine, and oil can penetrate grout, causing deep discoloration. Because grout is absorbent, these stains can be challenging to remove if not addressed immediately.

Soap Scum

Residue from cleaning products, especially those containing soap, can build up on grout, attracting more dirt and making it look grimy over time.

Step-by-Step Guide to Remove Grout Stains

Guide to Remove Grout Stains

Step 1: Gather Your Cleaning Supplies

Before you start, make sure you have the necessary supplies:

  • Baking soda
  • Hydrogen peroxide
  • White vinegar
  • Dish soap
  • A toothbrush or grout brush
  • A spray bottle
  • Warm water
  • A microfiber cloth or sponge
  • A steam cleaner (optional for deep cleaning)

Step 2: Start with a Simple Cleaning Solution

For mild stains, you can use a basic cleaning solution:

  1. Mix warm water with a few drops of dish soap.
  2. Dip a grout brush or toothbrush into the solution.
  3. Scrub the grout lines thoroughly.
  4. Wipe with a damp cloth to remove residue.

If stains persist, move on to more powerful methods to remove grout stains effectively.

Step 3: Use Baking Soda and Vinegar

Baking soda and vinegar create a natural yet effective cleaning reaction:

  1. Sprinkle baking soda over the grout lines.
  2. Fill a spray bottle with equal parts white vinegar and water and spray over the baking soda.
  3. Let the mixture fizz and sit for about 5-10 minutes.
  4. Scrub the grout with a brush and rinse with warm water.

Step 4: Hydrogen Peroxide for Stubborn Stains

For deep stains, hydrogen peroxide is an excellent alternative:

  1. Mix hydrogen peroxide and baking soda into a paste.
  2. Apply the paste to the grout and let it sit for 15 minutes.
  3. Scrub with a grout brush, then rinse with warm water.

Step 5: Try a Steam Cleaner for Deep Cleaning

If stains are still visible, a steam cleaner can break through deep grime and remove grout stains effectively:

  1. Use a high-pressure steam cleaner with a small nozzle attachment.
  2. Move it along the grout lines to loosen dirt.
  3. Wipe clean with a microfiber cloth.

Step 6: Seal the Grout to Prevent Future Stains

Once your grout is clean, apply a grout sealer to protect it from future staining:

  1. Ensure the grout is completely dry.
  2. Use a grout sealer applicator or a small brush.
  3. Apply a thin, even layer of sealer and let it dry for 24 hours.
  4. Repeat every 6-12 months for long-lasting protection.

Alternative Methods to Remove Grout Stains

Methods to Remove Grout Stains

If DIY methods aren’t effective, you can try professional-grade solutions:

Oxygen Bleach

Oxygen bleach is a safer alternative to chlorine bleach and is effective for tough stains:

  1. Mix oxygen bleach with warm water according to the manufacturer’s instructions.
  2. Pour over grout lines and let it sit for 15 minutes.
  3. Scrub and rinse with clean water.

Commercial Grout Cleaners

There are many commercial grout cleaners available. Look for ones labeled as safe for tiles and effective for tough stains.

Hydrogen Peroxide and Dish Soap

For an alternative deep-cleaning solution:

  1. Mix 1/2 cup hydrogen peroxide with 1 tablespoon dish soap and 1 cup baking soda.
  2. Apply to grout and let it sit for 10-15 minutes.
  3. Scrub and rinse thoroughly.

Hydrochloric Acid-Based Cleaners

Use hydrochloric acid-based cleaners only as a last resort to remove grout stains. Follow safety precautions, including gloves and proper ventilation.

Preventing Grout Stains in the Future

Wipe Spills Immediately

To prevent absorption, clean up spills as soon as they happen.

Use a Squeegee in Bathrooms

Minimize mold growth by using a squeegee after showers to remove excess moisture.

Sweep and Mop Floors Regularly

Regular cleaning removes dirt before it settles into the grout.

Avoid Harsh Chemical Cleaners

Some chemical cleaners can damage grout over time. Opt for gentle, pH-neutral cleaners.

Reapply Grout Sealer

To maintain protection, reapply grout sealer every 6-12 months, depending on usage.

Use Door Mats

Placing doormats at entrances can reduce the amount of dirt tracked onto floors.

Ventilate High-Humidity Areas

Good airflow can prevent moisture buildup, reducing the risk of mold and mildew.

Additional Tips for Grout Maintenance

Tips for Grout Maintenance

DIY Grout Whitening Paste

If your grout is discolored but not deeply stained, a whitening paste can refresh it:

  • Mix 1/2 cup baking soda, 1/4 cup hydrogen peroxide, and 1 teaspoon dish soap into a paste.
  • Apply the paste with a toothbrush and let it sit for 10 minutes.
  • Scrub and rinse with warm water.

Using Essential Oils for Cleaning

Adding essential oils to your cleaning solutions can provide antimicrobial benefits and a pleasant scent:

  • Tea tree oil helps prevent mold and mildew.
  • Lemon oil adds a fresh, clean smell and breaks down grime.
  • Eucalyptus oil has natural antibacterial properties.

Professional Grout Cleaning Services

If you’re dealing with severe grout stains that DIY methods can’t fix, hiring a professional grout cleaning service may be the best option. Professionals use advanced cleaning solutions and tools like high-powered steam cleaners and industrial-strength cleaning agents to remove grout stains and restore your grout to its original color.

Repairing Damaged Grout

Over time, grout can crack and deteriorate. If you notice missing or crumbling grout, it’s best to repair it before it leads to more significant issues. Here’s how:

  1. Remove the damaged grout using a grout removal tool.
  2. Vacuum away any dust or debris.
  3. Mix new grout according to the manufacturer’s instructions.
  4. Apply the new grout with a rubber float, pressing it into the joints.
  5. Wipe away excess grout with a damp sponge and let it cure according to the instructions.

Final Thoughts

Grout stains may seem difficult to tackle, but with the right approach, you can remove grout stains and maintain clean grout lines. By using effective cleaning techniques and taking preventive measures, you can keep your grout looking fresh for years to come. If DIY methods don’t work, consider professional cleaning services for a deep clean. Regular maintenance and sealing are key to long-term grout preservation.

Frequently Asked Questions (FAQs)

Q1. What is the best homemade cleaner for grout stains?

A mixture of baking soda and hydrogen peroxide is one of the most effective homemade grout cleaners. It lifts stains while being safe for tiles.

Q2. Can bleach damage grout?

Yes, prolonged use of bleach can weaken and erode grout. It should be used sparingly and diluted with water.

Q3. How often should I clean my grout?

For best results, grout should be cleaned at least once a month and sealed every 6-12 months to prevent staining.

Q4. Does steam cleaning damage grout?

No, steam cleaning is a safe and effective method for deep cleaning grout. However, excessive moisture can weaken grout if not dried properly afterward.

By following these steps, you can keep your grout clean and stain-free for years to come.