Grout Cleaner

Non Shrink Grout: 8 Essential Insights for Unmatched Stability

Non shrink grout is a high-performance material engineered to maintain its volume and strength, even under intense loads. From anchoring industrial machinery to stabilizing structural elements, its unmatched resilience makes it the go-to choice for professionals seeking precise alignment and durable support.

In this comprehensive guide, we cover everything you need to know: what non-shrink grout is, its applications, curing times, best practices, and expert tips to ensure your projects stand the test of time.

1. Understanding Non-Shrink Grout

Understanding Non-Shrink Grout

At its core, non-shrink grout is either cementitious or epoxy-based, formulated to counteract the natural shrinkage that occurs during hydration. Standard cement grout can shrink by up to 0.1%, potentially creating gaps that compromise load transfer and stability. non shrink grout incorporates expansive additives—such as calcium sulfoaluminate or hydrated lime—that generate a slight expansion as the mixture sets, ensuring a snug, gap-free bond.

Key features include rapid strength gain, high compressive capacity (often exceeding 5,000 psi within a day), and excellent dimensional stability. Professionals often choose between cementitious variants for general structural work and epoxy formulations when chemical resistance or superior adhesion is paramount.

2. Core Benefits and Professional Uses

non shrink grout shines in scenarios demanding precision and resilience. Here are the primary advantages and typical applications:

  • Dimensional Stability: Delivers zero or slight positive expansion, guaranteeing 100% contact area under loads.
  • High Load-Bearing: Supports heavy machinery, turbines, compressors, and presses without settling.
  • Rapid Strength Development: Reaches near-design strengths (often 4,000–6,000 psi) within 24–48 hours, minimizing downtime.

Common Applications:

  1. Machinery Bases: Ensures level foundations for industrial equipment, preventing misalignment and vibration-induced wear.
  2. Structural Rehabilitation: Fills voids beneath bridge bearings, precast panels, and concrete plinths.
  3. Anchor Bolt Grouting: Locks anchor bolts in place in wind turbine foundations, marine docks, and offshore platforms.

By selecting the right formulation, you can eliminate costly maintenance, reduce operational interruptions, and extend equipment life.

3. How Long Does Non-Shrink Grout Take to Cure?

How Long Does Non-Shrink Grout Take to Cure

Curing time depends on temperature, humidity, mix ratio, and product formulation. Typical benchmarks at 70°F (21°C) and 50% relative humidity include:

  • Initial Set: 1–2 hours.
  • Final Set: 6–12 hours.
  • Full Cure: 24–72 hours, achieving full compressive strength.

Factors Influencing Cure Time:

  • Temperature: Lower temperatures slow hydration; below 50°F, consider using heated enclosures or accelerators.
  • Water Content: Excess water weakens the mix and delays strength gain.
  • Additives: Accelerators can shave hours off set times; retarders maintain workability in hot weather.

Pro Tip: Use curing blankets or insulated forms in colder climates to maintain the ideal hydration environment and prevent freeze-thaw damage.

4. Step-by-Step Application Guide

Achieving optimal performance with non-shrink grout hinges on precise preparation and placement. Follow these steps:

1. Surface Preparation

  • Remove dust, oil, grease, and loose particles.
  • Roughen smooth concrete surfaces to enhance mechanical bond.
  • Saturate the substrate with water, then remove excess to achieve a saturated surface dry (SSD) condition.

2. Formwork Construction

  • Build sturdy, leak-proof forms using plywood, metal, or plastic.
  • Ensure forms can withstand grout pressure without bulging.

3. Mixing

  • Follow manufacturer’s water-to-powder ratio precisely.
  • Use a high-torque mixer at low speed (400–600 rpm) for 3–5 minutes.
  • Achieve a lump-free, flowable consistency—similar to pancake batter for cementitious; epoxy grouts require mixing of resin and hardener before adding fillers.

4. Placement

  • Pour grout continuously from one side to avoid cold joints and air entrapment.
  • For deep fills, use tremie pipes or grout pumps.
  • Lightly vibrate or tap formwork to consolidate the mixture and release trapped air.

5. Finishing and Curing

  • Strike off excess grout to the desired level.
  • Maintain moist curing for at least 24 hours; use wet burlap, curing compounds, or plastic sheeting.
  • Protect from premature loading until the grout reaches minimum specified strength.

Expert Insight: Always perform a trial batch under actual site conditions to dial in water content, mixing time, and flow characteristics.

5. Common Challenges and Solutions

Despite its advantages, non-shrink grout can pose issues if not handled correctly. Here are frequent problems and fixes:

  • Cracking: Often due to overmixing, excessive water, or rapid drying.
    • Solution: Reduce mix water, ensure uniform mixing, and maintain moist curing.
  • Bond Failure: Caused by inadequate surface prep or cold, dry substrates.
    • Solution: Clean and pre-wet surfaces, apply bonding agents if recommended.
  • Cold Joints: Visible seams when multiple pours do not bond.
    • Solution: Plan pours to be continuous, or use grout pumps for uninterrupted flow.
  • Segregation: Coarse aggregate settling leads to inconsistent texture.
    • Solution: Adjust mix consistency and avoid over-vibration.

6. Pro-Level Tips for Flawless Results

Pro Level Tips non shrink grout

  1. Temperature Control: Ideal range between 50°F and 80°F; avoid extremes.
  2. Consistent Mixing: Use calibrated water dispensers and timers for repeatable batches.
  3. Quality Verification: Test small samples for flow, expansion, and early strength before full-scale pour.
  4. Tool Selection: High-quality grout pumps, paddles, and form vibrators reduce manual labor and enhance uniformity.
  5. Documentation: Record mix ratios, environmental conditions, and test results for future reference and troubleshooting.

“Successful grouting is 90% preparation and 10% placement.” — Senior Field Engineer

7. External Resource

For detailed standards and best practices, consult the American Concrete Institute’s ACI 351.1R-99 guide on grouting and the Cementitious Materials Alliance technical publications.

8. Environmental Considerations and Sustainability Aspects

As the construction industry increasingly emphasizes sustainability, non-shrink grout formulations have also evolved to meet eco-conscious standards. Many modern grouts are now blended with recycled materials such as fly ash or slag, which not only reduce the carbon footprint but also enhance durability and resistance to chemical attack. Low-VOC (volatile organic compound) epoxy grouts are also available, making them suitable for use in enclosed or sensitive environments without compromising indoor air quality. Proper disposal of leftover grout and responsible water usage during cleanup are also essential practices to minimize environmental impact. When selecting a non-shrink grout, look for products that are GREENGUARD-certified or meet LEED (Leadership in Energy and Environmental Design) criteria to align with green building initiatives.

Conclusion

non shrink grout is an indispensable solution for professionals seeking durability, precision, and rapid strength gain in demanding projects. By understanding its properties, following meticulous prep and placement procedures, and leveraging expert tips, you can achieve enduring performance and avoid costly rework. Incorporate these insights into your next project and experience the confidence that comes with using top-tier non-shrink grout.

 Frequently Asked Questions (FAQ’S)

Q1: What is non shrink grout and how does it differ from regular grout?

Non-shrink grout includes expansive agents that offset shrinkage during curing, maintaining volume and ensuring 100% contact. Regular grout can shrink up to 0.1%, risking gaps and reduced load transfer.

Q2: What is non shrink grout used for?

It’s ideal for heavy machinery bases, structural repairs, anchor bolt installations, and anywhere dimensional stability under load is critical.

Q3: How long does non shrink grout take to cure fully?

At 70°F and 50% humidity, initial set occurs within 1–2 hours, final set by 6–12 hours, and full cure in 24–72 hours, reaching design compressive strength.

Q4: Can non shrink grout be used outdoors?

Yes. Cementitious non-shrink grouts are formulated to withstand freeze-thaw cycles if properly cured. For submerged or chemical-exposed environments, epoxy-based grouts are recommended.

Q5: How should I prepare the substrate before grouting?

Remove contaminants, achieve a saturated surface dry condition, and roughen smooth areas to enhance bonding. Pre-wetting is critical to prevent premature water withdrawal from the grout.

Q6: What safety measures are necessary during application?

Wear gloves, eye protection, and a dust mask. Avoid skin contact; wash any spills immediately. Ensure adequate ventilation when working with epoxy grouts.


Can you use silicone sealant over grout?

When embarking on a bathroom or kitchen renovation, one of the most common questions we encounter is: can you use silicone sealant over grout? Grout joints age, crack, discolor, or accumulate mold and mildew over time, leaving tiled surfaces looking tired and in need of repair. Many homeowners and DIY enthusiasts wonder if applying a bead of silicone sealant directly over existing grout is a viable shortcut to rejuvenate tiled areas. Based on our professional experience, the answer is yes—provided the application is done correctly and under the right circumstances. In this comprehensive, friendly, and easy-to-understand guide, we’ll share step-by-step instructions, expert tips, and real-world case studies to help you achieve a durable, waterproof, and aesthetically pleasing finish that outperforms traditional grout in spades.

Understanding the Basics: Why Silicone Over Grout?

the Basics Why Silicone Over Grout

Before diving into the how-to, let’s explore why choosing silicone can enhance the performance and longevity of your grout joints.

  1. Enhanced Flexibility
    Traditional cement-based grout cures to a rigid finish that can crack under tile movement, thermal expansion, or building settling. Silicone sealant, by contrast, remains flexible for years, accommodating slight shifts without splitting or losing adhesion. In areas subjected to frequent temperature and moisture changes—showers, tubs, and kitchen backsplashes—this flexibility is a game-changer.

  2. Superior Water Resistance
    Grout is porous and can absorb moisture, leading to staining or mold growth beneath the surface. Silicone, however, is inherently impermeable to water. When applied correctly, it forms a watertight barrier that prevents seepage into substrate layers, protecting walls, floors, and adjacent structures.

  3. Improved Mold and Mildew Resistance
    Many modern silicone sealants include anti-microbial or mildew-resistant additives. These formulations inhibit fungal growth, keeping sealant joints cleaner and more sanitary—an especially important feature for family bathrooms and high-traffic kitchens.

  4. Aesthetic Renewal and Color Matching
    Grout can yellow or discolor over time. Silicone sealants are available in a wide palette of colors—matching common grout shades or providing contrast accents. You can even choose clear silicone for a discreet seal that lets tile colors shine through.

  5. Time and Cost Savings
    Removing and regrouting an entire tile area can be labor-intensive and messy. Applying silicone over sound grout takes a fraction of the time, requires fewer specialized tools, and minimizes disruption—ideal for quick weekend projects or rental property touch-ups.

When Not to Use Silicone Over Grout

Although silicone over grout offers many benefits, there are scenarios where it’s not recommended:

  • Severely Damaged Grout: If grout is crumbling, deeply cracked, or missing in places, remove and regrout before sealing. Silicone cannot structurally repair large voids.

  • Wide Joints Without Backer Rod: Joints wider than ¼ inch need a foam backer rod inserted first. Without a backer rod, silicone can adhere to three sides and stress-cure, leading to premature failure.

  • Epoxy or Specialty Grouts: Epoxy grouts are non-porous and chemically incompatible with standard silicone formulations. Use a manufacturer-recommended sealant instead.

  • High-Traffic Floors with Abrasive Wear: In areas like entryways where foot traffic and dirt abrasion are extreme, silicone edges may degrade faster. Traditional grout topped with a high-quality sealer might be more durable.

Anatomy of Silicone Sealant: Key Features to Look For

Anatomy of Silicone Sealant

When shopping for the right product, keep an eye on these specifications:

  1. Base Chemistry

    • Acetoxy Cure: Strong initial odor; superior adhesion to non-porous surfaces. Not suitable for natural stone due to potential staining.

    • Neutral (Oxime or Alkoxy) Cure: Low odor, non-corrosive and stone-safe. Preferred for bathrooms and kitchens.

  2. Additives and Performance Claims

    • Mildew-Resistant: Contains biocides to inhibit fungal growth.

    • High UV Resistance: For exterior or sunlit areas to prevent yellowing.

    • Paintable Hybrid: Silicone-polymer blends that allow painting over sealant—rare but useful when matching wall paints.

  3. Compliance and Certifications

    • ASTM C920 Rating: Indicates suitability for expansion and contraction cycles.

    • VOC Content: Low- or zero-VOC formulations for indoor air quality.

  4. Color Options and Transparency

    • Choose colors that match or complement existing grout.

    • Use clear sealant only if grout is already in pristine condition and tile edges are uniform.

In-Depth Preparation: The Foundation of Success

Proper surface preparation can’t be overstated—it’s the difference between a seal that lasts five years versus one that fails in five months.

1. Comprehensive Cleaning

  • Mechanical Scrubbing: Use a stiff nylon brush or grout-specific scrub brush to remove embedded dirt, soap scum, and mildew.

  • Specialty Cleaners: Apply a pH-neutral tile cleaner or a mild bleach solution (1:10 bleach to water) for stubborn mold. Rinse thoroughly with clean water.

2. Removing Loose or Damaged Grout

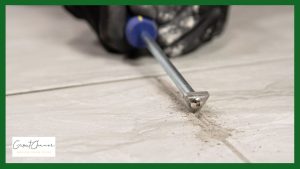
  • Grout Saw or Rotary Tool: Undercut and remove any loose or cracked grout to a depth of at least 1/8 inch to ensure silicone can bond to solid material.

  • Vacuum Debris: After sawing, vacuum the joint to remove dust, chips, and moisture.

3. Surface Drying

  • Air Dry vs. Heat Gun: Allow joints to air dry for 24–48 hours in humid climates. For faster results in dry environments, a low-heat setting on a heat gun can help—but keep it moving to avoid tile damage.

4. Masking for Precision

  • High-Quality Painter’s Tape: Apply tape along both edges of the grout line, leaving a 2–3 mm gap for the silicone bead.

  • Test Placement: Press tile edges lightly to confirm tape adhesion; remove and reapply if paint or stone sealers resist adhesion.

Step-by-Step Application Guide

Step 1: Select and Prepare the Sealant Tube

  • Nozzle Cutting: Snip the nozzle at a 45° angle. Cut just enough to match the joint width—typically 2–3 mm for standard grout lines.

  • Puncture the Seal: Use a long nail or the built-in puncture tool on your caulk gun to pierce the inner seal.

Step 2: Load and Test the Caulk Gun

  • Consistent Pressure: Squeeze the trigger until a small bead emerges. Practice on scrap material to ensure smooth flow and control.

Step 3: Applying the Silicone

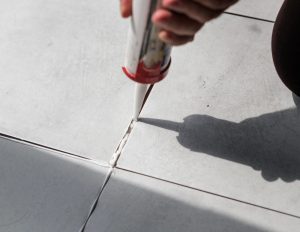
  • Steady Movement: Hold the gun at a 45° angle, pushing the nozzle forward while pulling the gun backward. Aim for an even, continuous bead.

  • Overlap Technique: For long runs, slightly overlap each new bead with the previous one by 2–3 cm to maintain continuity.

Step 4: Tooling the Bead

  • Timing Is Crucial: Tool the sealant within 5–10 minutes of application, before surface skin forms.

  • Tooling Methods:

    • Finger with Soapy Water: Dip your finger in a mild dish soap solution and glide along the bead for a smooth finish.

    • Silicone Finishing Tool: Provides a uniform shape; available in convex or concave profiles for different joint geometries.

Step 5: Tape Removal and Cleanup

  • Peel Immediately: Remove painter’s tape at a 45° angle while the sealant is still wet for crisp edges.

  • Wipe Excess: Use a damp cloth or baby wipe to remove stray smudges. Avoid solvent-based cleaners that may attack the sealant.

Step 6: Curing and Final Inspection

  • Light Use Timing: Wait at least 24 hours before exposing joints to splashes.

  • Full Cure: Allow 48–72 hours for complete chemical cure, especially in cool or humid environments.

  • Quality Check: Inspect for pinholes, voids, or adhesion gaps. Touch up immediately if any are found.

Advanced Tips and Professional Tricks

  1. Backer Rod Installation for Wide Gaps
    For joints over ¼ inch wide, insert a closed-cell foam backer rod before sealing. This controls bead depth, prevents three-sided adhesion, and reduces silicone consumption.

  2. Temperature and Humidity Control
    Ideal application conditions are between 40°F and 95°F with relative humidity below 70%. Avoid extreme temperatures and direct sun during cure.

  3. Edge Sealing vs. Joint Sealing

    • Edge Sealing: Where tile meets fixtures or countertops, use a slightly larger nozzle cut for a more generous bead.

    • Joint Sealing: For grout lines, use a finer bead for subtle blending.

  4. Preventing Staining on Porous Stone
    When working with marble, travertine, or limestone, apply a thin layer of masking fluid along the joint edges. Peel off after tooling to protect stone surfaces.

  5. Color Matching and Recoloring
    For grout discoloration issues, consider using a grout refresher pen before applying clear silicone. This evens out color variation underneath the sealant.

Case Studies: Real-World Applications

Case Study 1: Residential Shower Remodel

Our team was tasked with refreshing a 12-year-old master bathroom shower. Original grout was cracked and stained. We:

  1. Removed loose grout to a 1/8-inch depth.

  2. Cleaned joints with a bleach solution, rinsed, and dried for 48 hours under dehumidified conditions.

  3. Applied clear, mildew-resistant neutral-cure silicone, tooling with a concave finishing tool.

Result: A crisp, seamless finish that remained mold-free and watertight for over five years before any touch-up was needed.

Case Study 2: Commercial Kitchen Backsplash

A local café wanted to quickly update its tile backsplash without downtime. We:

  1. Masked adjacent painted walls and stainless-steel countertops.

  2. Used colored silicone sealant matching the original grout tone.

  3. Completed the job in just two hours, allowing the café to reopen by lunchtime.

Outcome: The café reported no water seepage or discoloration after two busy years of daily cleaning and high humidity.

Maintenance and Longevity Strategies

  • Weekly Wipe-Downs: Use a pH-neutral cleaner or mild dish soap to gently clean sealed joints.

  • Annual Inspection: Check for any shrinkage or adhesion loss. Plan a touch-up or reapplication within the same week to prevent moisture intrusion.

  • Adequate Ventilation: Install or use existing exhaust fans in bathrooms and kitchens to reduce humidity peaks that can stress sealant bonds.

  • Avoid Harsh Chemicals: Steer clear of acidic cleaners (vinegar, ammonia) that may degrade silicone over time.

Frequently Asked Questions (FAQ’S)

Q1. Can You Paint Over Silicone Sealant?

Most silicones resist paint adhesion. If painting is essential, use a silicone-compatible primer or choose a paintable hybrid sealant designed for this purpose.

Q2. Is Clear Silicone as Durable as Colored?

Yes—clear and colored neutral-cure silicones share the same base chemistry. Colored options simply include pigments without sacrificing performance.

Q3.How Long Should Silicone Last Over Grout?

With proper prep and maintenance, expect 5–10 years of service in interior, low-to-moderate traffic applications.

Q4. Can I Use Silicone Over Painted Walls Where Tiles Meet Drywall?

Yes, but only if the paint is fully cured and clean. Test adhesion in a hidden spot first to avoid peeling.

Q5. What’s the Difference Between Silicone and Acrylic Caulk?

Acrylic caulk is paintable but less flexible and water-resistant. Silicone excels in wet areas and expansion joints, while acrylic is suited for dry, interior trim.

Environmental and Safety Considerations

  • Low-VOC Formulas: Select silicone sealants labeled “Low VOC” or “Zero VOC” to minimize indoor air pollution.

  • Proper Disposal: Cured silicone is inert; uncured tubes and residue should be disposed of per local hazardous-waste guidelines.

  • Personal Protective Equipment: Always wear nitrile gloves and eye protection when tooling and cleaning uncured sealant.

Final Thoughts

In our extensive professional experience, using silicone sealant over grout is an efficient, cost-effective method to breathe new life into tiled spaces. When you follow rigorous preparation steps, select the right product, and adhere to proper application techniques, you’ll achieve a seal that is flexible, watertight, and visually appealing for years to come. Whether you’re a seasoned DIYer or hiring a pro, this approach minimizes downtime, reduces mess, and delivers a crisp finish that protects your home investment.

How to Choose the Best Grout Removal Blade

Why a Quality Grout Removal Blade Matters

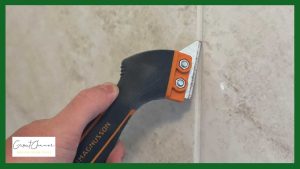
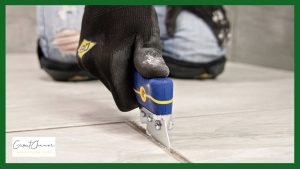
Removing grout can be a tedious, time-consuming task—especially if you’re wrestling with hardened, discolored joints between tiles. That’s why choosing the right grout removal blade from the get-go makes all the difference. Not only does a high-quality blade speed up the process, but it also minimizes tile damage, dust, and fatigue. Whether you’re a DIY homeowner or a seasoned tiler, investing in the proper blade pays dividends in precision, efficiency, and end-result beauty.

Quality Grout Removal Blade

Understanding Grout and Its Composition

Types of Grout

  • Sanded Grout: Mixed with fine sand; ideal for wider joints (1/8″–½”).

  • Unsanded Grout: No sand, smoother finish; best for narrow joints (<1/8″).

  • Epoxy Grout: Exceptionally durable and stain-resistant, but harder to remove.

How Grout Bonds with Tile

Grout seeps into tiny gaps and cures into a hard matrix, creating strong adhesion. Over time, wear and moisture cause cracking and discoloration, necessitating removal and replacement.

Types of Grout Removal Blades

Types of Grout Removal Blades

Carbide-Tipped Blades

  • Pros: Aggressive cutting, long life.

  • Cons: Can be overkill for delicate tiles.

Diamond-Grit Blades

  • Pros: Smooth action, excellent for harder grouts.

  • Cons: Pricier upfront.

Multi-Purpose Blades

  • Pros: Versatile; handle grout, mortar, and light tile removal.

  • Cons: Sacrifice some specialized performance.

Key Features to Look for in a Grout Removal Blade

  • Blade Material & Durability: Carbide vs. diamond grit—choose based on grout hardness.

  • Teeth Count & Shape: Higher tooth count equals smoother cuts; unique shapes resist clogging.

  • Tool Compatibility: Ensure blade fits your oscillating tool or rotary cutter snugly.

Power Tools vs. Manual Tools: Pros and Cons

Power Tools vs. Manual Tools Pros and Cons

Oscillating Multi-Tools

  • Pros: Precise, low-vibration; ideal for small areas.

  • Cons: Slower on really tough grout.

Rotary Tools

  • Pros: High RPM for quick removal.

  • Cons: More dust; higher risk of tile nicking.

Manual Grout Saws

  • Pros: Zero power needed; ultimate control.

  • Cons: Labor-intensive; slower progress.

Step-by-Step Guide: Using a Grout Removal Blade Safely

  1. Prep & Protection: Wear safety goggles, dust mask, and gloves; tape surrounding tiles.

  2. Blade Installation & Settings: Secure blade per tool instructions; start at low speed to gauge feed.

  3. Proper Cutting Technique: Move steadily along grout lines—avoid tilting blade into tile.

  4. Clean-Up & Disposal: Vacuum debris; inspect lines before installing new grout.

Common Mistakes and How to Avoid Them

  • Applying Too Much Pressure: Let the blade do the work—excess force causes chatter and chip-outs.
  • Wrong Blade Choice: Match blade type to grout composition to preserve blade life.

  • Ignoring Safety Precautions: Always use protective gear to prevent inhalation of silica dust and eye injuries.

Maintenance Tips to Extend Blade Life

  • Cleaning After Use: Brush away grout particles; wipe with a soft cloth.

  • Storage Recommendations: Store dry in original packaging or blade case.

  • When to Replace: If cutting slows or edges appear rounded, swap in a fresh blade.

Comparing Top Brands of Grout Removal Blades

Comparing Top Brands of Grout Removal Blades

When choosing a grout removal blade, brand reputation, material quality, and intended use all play a role. Below are three popular options and what sets each apart:

  • Brand A (Carbide-Tipped Series)
    • Ideal for: General DIY and light-to-medium grout lines
    • Strengths: Aggressive cutting action, long lifespan on standard sanded grout
    • Considerations: May wear faster on epoxy grout; best paired with an oscillating multi-tool

  • Brand B (Diamond-Grit Pro Line)
    • Ideal for: Professional renovators tackling hard or epoxy grouts
    • Strengths: Smooth, even cutting; excels on dense, cured grout; minimal vibration
    • Considerations: Higher upfront cost but lower replacement frequency

  • Brand C (Hybrid Alloy Multi-Purpose)
    • Ideal for: Users who need versatility across grout, mortar, and occasional tile trimming
    • Strengths: Balanced performance; good edge retention; handles varied materials
    • Considerations: Doesn’t match the specialized speed of pure carbide or diamond blades

By focusing on your project’s scope—whether a weekend bathroom touch-up or full-scale kitchen overhaul—you can select the blade that offers the best blend of performance, durability, and value.

Cost Analysis: Is a Premium Blade Worth It?

  • Initial Investment vs. Long-Term Savings: Higher-end blades cost more but last longer, reducing replacement frequency.

  • DIY vs. Professional Grade: For occasional home use, mid-range carbide blades suffice. Pro tile installers benefit from diamond grit for heavy daily use.

Environmental and Health Considerations

  • Dust Control & Respiratory Protection: Use a HEPA-filter vacuum attachment to capture silica dust.

  • Eco-Friendly Blade Materials: Seek brands that use recycled carbide or responsibly sourced diamonds.

Expert Tips from a Professional Tiler

  • Insider Tricks for Clean Cuts: Score grout in two perpendicular passes for faster removal.

  • Time-Saving Shortcuts: Pre-soak grout lines with a grout-softening gel 10 minutes before cutting.

Advanced Techniques: When to Call in the Pros

  • Large-Scale Renovations: Pro crews use specialized dust-extraction systems and high-capacity oscillating tools.

  • Specialty Grout Types: Epoxy and urethane grouts often require professional gear for efficient removal.

Conclusion: Achieving Pristine Tile Surfaces with the Right Blade

Selecting and using the right grout removal blade is the cornerstone of any successful tiling renovation. From understanding grout types to wielding an oscillating tool like a pro, these insights help you work smarter—not harder. By integrating the right blade, observing safety best practices, and leveraging expert tips, you’ll achieve beautifully clean grout lines, elevate your tile’s aesthetic, and protect your investment for years to come.

Frequently Asked Questions (FAQs)

Q1. What blade do you use to remove grout?

Typically, a carbide-tipped oscillating blade or diamond-grit blade offers the best mix of speed and durability for most grout types.

Q2. What is the best tool to use to remove grout?

An oscillating multi-tool paired with a grout removal blade is widely considered the most versatile and user-friendly option.

Q3. What is the best way to remove grout?

Combine a grout-softening gel with an oscillating tool at low speed; maintain steady pressure and keep the blade flush with the grout line.

Q4. Can a grout removal blade cut tile?

Yes—a grout removal blade can nick or cut tile if misused. Always keep the blade aligned with the grout line and avoid side-loading.

Q5. Does removing grout damage tiles?

When done correctly—with the right blade, proper speed, and protective measures—tile damage is minimal to none.

Q6. What safety precautions should I take when removing grout?

Wear eye protection, a dust mask (preferably NIOSH-approved), and use dust-extraction attachments on your tool to limit silica dust exposure.

Tile Adhesive and Grout: 10 Proven Strategies for Flawless Tiling

Tile adhesive and grout are essential components for achieving durable, attractive tile installations in both residential and commercial settings. This comprehensive guide explores types, application techniques, professional tips, and eco-friendly options to ensure flawless results.
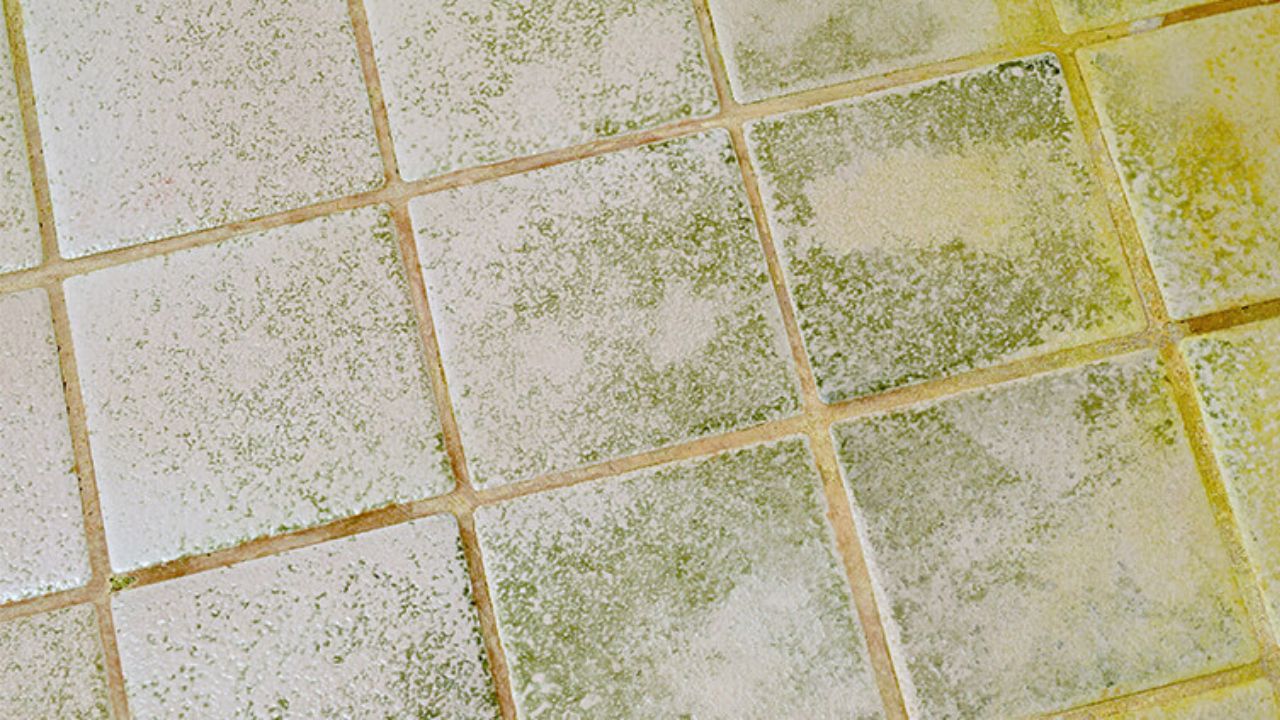
Understanding Tile Adhesive: Types and Applications

When it comes to installing tiles—whether porcelain, ceramic, or natural stone—the right choice of tile adhesive can make or break the project. Adhesive selection impacts bond strength, curing time, flexibility, and resistance to moisture. In this section, we delve into the three primary tile adhesive categories: cement-based adhesives, epoxy adhesives, and acrylic adhesives.
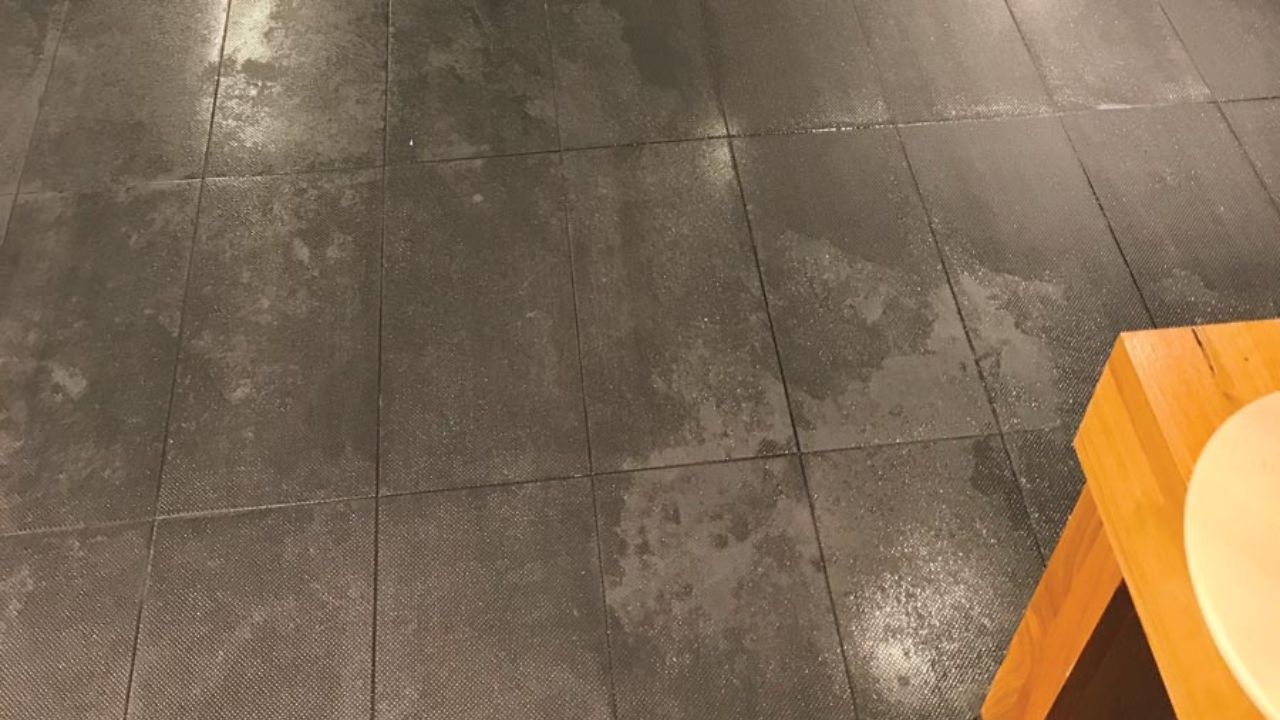
Cement-Based Adhesives

Cement-based tile adhesive remains the industry standard for general installations, particularly in dry interior settings and on standard subfloors. Cement adhesives, often sold as thinset mortar, consist of a blend of Portland cement, graded sand, and additives such as latex or polymers, which improve bond strength and flexibility. These mortars can be mixed on-site by adding water to the powdered product until a smooth consistency is achieved.
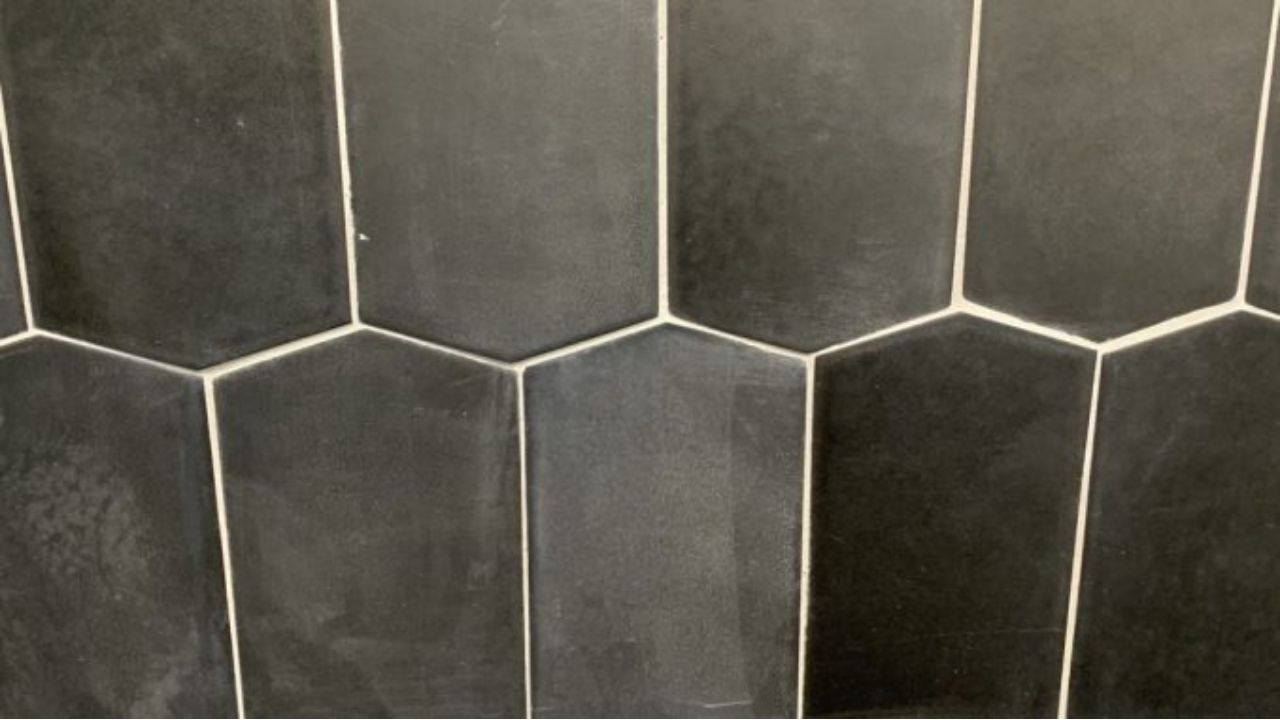
Pros:

  • Excellent bond strength for a variety of tile types, including floor tile adhesive and grout installations

  • Cost-effective and widely available at home improvement centers

  • Versatile: can be modified with additives for faster setting or improved flexibility

Cons:

  • Longer cure time compared to epoxy; not ideal when rapid turnaround is needed

  • Less flexible, making it susceptible to cracking under substrate movement

Cement-based adhesives excel when paired with stable substrates like cement backer board or cured concrete. For floors, choose a medium-bed or large-format tile mortar if working with tiles larger than 12×12 inches to prevent sagging or slippage.

Epoxy Adhesives

Epoxy tile adhesive is a two-part system composed of resin and hardener that forms a chemically resistant bond after curing. Due to its waterproof and stain-resistant qualities, epoxy is ideal for moisture-prone areas such as showers, swimming pools, and commercial kitchens. When mixed, the epoxy adhesive remains workable for a limited window (pot life), typically between 15 and 45 minutes, after which it hardens.

Pros:

  • Outstanding adhesion to nonporous substrates like glass or metal, as well as natural stone, where cement mortars may struggle

  • Superior chemical resistance, making it suitable for laboratories or industrial flooring

  • Waterproof qualities ensure minimal moisture penetration beneath tiles

Cons:

  • Expensive relative to cement-based options, often costing up to three times more per unit

  • Short working time can be challenging for beginners; requires precise mixing and rapid application

  • Difficult cleanup: once cured, epoxy residues must be chiseled away

For kitchens or areas exposed to harsh chemicals, epoxy adhesives paired with epoxy grout form a virtually impervious barrier. General contractors often reserve epoxy adhesives for specific zones rather than entire installations due to cost considerations.

Acrylic Adhesives

Acrylic tile adhesive—also called premixed or mastic adhesive—is a ready-to-use paste that contains acrylic polymers to boost flexibility and adhesion. No on-site mixing is required; simply open the container and spread directly. Acrylic adhesives cure through evaporation of moisture and are popular for small bathroom walls or backsplashes.

Pros:

  • Convenient: no mixing, less chance of batch inconsistencies

  • Fast-setting: some formulas allow tile setting within hours, speeding up project timelines

  • Highly flexible for minor substrate movement, reducing tile cracks

Cons:

  • Not recommended for wet areas like floors or showers: prolonged moisture can weaken the bond

  • Shelf life is limited once opened—requires careful storage to prevent skin formation on the surface

  • Lower bond strength compared to cement mortar; unsuitable for heavy or large-format tiles

Acrylic adhesives shine in vertical tile installations such as kitchen backsplashes or accent walls. However, they’re not suited for areas expecting constant water exposure or heavy foot traffic.

Exploring Tile Grout: Varieties and Uses

Exploring Tile Grout

Grout plays a dual role: it fills the gaps between tiles for aesthetic uniformity and structural stability, and it prevents water ingress beneath the tile bed. Selecting the right type of tile grout and color—such as tile adhesive and grout grey for a contemporary finish—ensures the longevity and beauty of your tiling project.

Sanded vs Unsanded Grout

Whether you choose sanded or unsanded grout hinges primarily on joint width. For joints 1/8 inch or wider, sanded grout is recommended. It contains fine sand particles that add strength and prevent shrinkage during curing.

  • Sanded Grout (1/8″–1/2″): Best for floor tile grout joints where movement or weight distribution is a factor. The sand reduces shrinkage cracks and helps the grout fill larger gaps.

  • Unsanded Grout (<1/8″): Ideal for narrow wall tile grout joints to avoid scratching delicate tile surfaces. It provides a smooth finish for mosaic tiles and polished stone.

When mixing, follow manufacturer guidelines precisely—adding too much water can reduce strength, while too little might lead to inconsistent workability.

Epoxy Grout

Epoxy grout differs from cementitious grouts in that it’s a two-component system: resin and hardener. Once combined, epoxy grout cures into a dense, impermeable substance.

Advantages:

  • Ultimate Stain Resistance: Epoxy grout resists oil, grease, and harsh cleaners, making it popular in commercial kitchens and healthcare facilities.

  • Mold and Mildew Resistance: Its nonabsorbent nature inhibits microbial growth in damp areas like showers.

  • Minimal Color Fade: Epoxy grout retains color vibrancy far longer than cement-based products.

Considerations:

  • Challenging Application: Epoxy can cure in minutes; excess haze on tile surfaces may be difficult to remove without scratching.

  • Higher Cost: Significantly pricier than traditional grout, making it a selective choice rather than a default.

Despite the added cost, epoxy grout’s performance in high-moisture and heavy-use areas often justifies the investment.

Grout Color Options Including Grey Grout

Grout color substantially impacts the visual outcome of a tiled surface. Neutral shades like beige or white produce a classic look, but grey grout—particularly tile adhesive and grout grey—offers several benefits:

  1. Concealed Dirt: Medium- to dark-grey hues hide stains better than white grout, reducing maintenance frequency.

  2. Modern Aesthetic: Grey grout accentuates tile outlines without stark contrast, ideal for contemporary designs.

  3. Versatility: Works well with both light and dark tile palettes, such as white subway tiles or charcoal porcelain.

When selecting a grout pigment, consider tile color, room lighting, and the level of foot traffic. Many brands offer custom pigments to match or contrast with the tile. To view extensive color samples, check out the Tile Council of North America’s Grout Color Guide for inspiration and technical details (external link).

Preparing the Surface for Installation

Before spreading tile adhesive and grout, substrate preparation is non-negotiable. Without proper cleaning, leveling, and priming, tiles may loosen, get uneven, or develop cracks over time. Here’s how to ensure your surface is tile-ready.

Surface Cleaning and Priming

  1. Remove Contaminants: Sweep or vacuum to clear debris, then scrub with a mild detergent solution to eliminate grease, oil, or old adhesive residues.

  2. Check Moisture Content: Use a moisture meter for wood subfloors and concrete slabs; moisture above manufacturer-specified limits can impede curing and cause bond failure.

  3. Apply Primer/Sealer: On porous substrates like concrete or cement board, a primer improves adhesion and prevents rapid moisture loss from the thinset mortar. For wooden decks or tongue-and-groove planks, consider a cement backer board or tile-ready membrane to create a stable, non-flexing surface.

  4. Cure Time: Let primers dry fully—typically 24 to 48 hours—before proceeding. Avoid rushing this step; inadequate drying may lead to bubbling or delamination of tile.

Ensuring Level Substrate

  1. Identify High and Low Spots: Use a straightedge or 6-foot level to locate uneven areas. Small dips can be smoothed with floor patching compound, while peaks may require grinding or chipping away.

  2. Self-Leveling Underlayment: For larger irregularities, pour a self-leveling compound over the clean surface. These formulations spread out and harden to create a perfectly flat plane.

  3. Backer Board Installation: On floors prone to movement—like plywood subfloors—attach cement backer board with appropriate screws and joint tape. This offers a stable, rigid platform for tile and prevents flex-induced cracking.

  4. Expansion Joints: In rooms larger than 200 square feet or where floor heating is installed, plan expansion joints as per ANSI standards to accommodate slight shifts in the substrate.

Following these steps minimizes tile lippage (uneven edges) and ensures a long-lasting installation that won’t fail under everyday stresses.

Application Techniques for Tile Adhesive
Techniques for Tile Adhesive

Proper application of tile adhesive is pivotal to achieve a uniform, crack-free installation. Below we outline the critical steps—from mixing to troweling—to guarantee a reliable bond between tile and substrate.

Mixing Adhesive Correctly

  1. Measure Precisely: Follow manufacturer ratios, typically displayed on packaging, for water-to-powder (for cement-based) or resin-to-hardener (for epoxy). Using a digital scale or measuring buckets improves consistency.

  2. Use Clean Water and Tools: Contaminated water can alter the pH and reduce bond strength. Always mix in a clean bucket with a stirring paddle attached to a low-RPM drill.

  3. Achieve Desired Consistency: For cement-based thinset, aim for a smooth, peanut butter–like texture—thick enough to hold ridges from the trowel but not so stiff that it crumbles. For epoxy adhesives, combine parts A and B thoroughly, scraping sides and bottom of container to eliminate unmixed resin pockets.

  4. Monitor Pot Life: Epoxy adhesives may have a working time of 15–30 minutes at 70°F (21°C). Ambient temperature and humidity can accelerate curing; plan tile placement accordingly to avoid waste.

Troweling Methods

  1. Choose the Right Trowel: Trowel notch size depends on tile size and substrate type. As a rule of thumb:

    • For 12×12″ Tiles (Standard Ceramic): 1/4″ x 1/4″ square-notched trowel

    • For Large-Format Tiles (Over 12×12″): 1/2″ x 1/2″ square-notched or 1/2″ x 1/2″ u-notched trowel

    • For Wall Tiles (Small-Format): 3/16″ x 5/32″ square-notched trowel

  2. Apply with Consistency: Spread the adhesive at a 45-degree angle to the direction of trowel movement, ensuring uniform ridge height. Avoid applying too much; excess thinset can cause uneven tiles and increase grout line thickness.

  3. Back-Buttering for Large or Heavy Tiles: For tiles larger than 15×15 inches or natural stones with back-adhesion grooves, dab a thin coat of adhesive on the tile’s backside (back-buttering) to eliminate voids beneath the tile and strengthen the bond.

  4. Check Coverage: After laying a few tiles, remove one to verify at least 80–90% full contact (for interior walls) or 95% for floors or wet areas. Inadequate coverage can lead to hollow spots that trap moisture or allow tile edges to chip.

Following these troweling guidelines ensures tiles have full contact area with the adhesive, minimizing movement and preventing future cracking.

Best Practices for Grouting Tile

Grout does more than fill gaps; it seals joints, contributes to structural integrity, and affects the overall look of your tile project. Below are methods to apply grout evenly, clean up excess, and seal for maximum durability.

Applying Grout Evenly

  1. Mix to a Smooth Paste: Whether using cementitious or epoxy grout, achieve a lump-free, creamy consistency. Let the grout slake (for cement grout) per manufacturer recommendations—usually 5–10 minutes—then remix without adding extra water.

  2. Work in Small Sections: Divide the area into manageable segments (e.g., 4×4-foot squares). Apply grout across joints at a 45° angle using a rubber grout float. Holding the float at a slight angle helps push grout into joints completely.

  3. Remove Excess in Time: Once joints are filled and a thin film forms, scrape diagonally across tiles to remove most of the surplus grout. Timing is critical: waiting too long makes removal difficult, while too soon can cause grout to be pulled from joints.

  4. Tool Grout Joints if Needed: For concave or rounded joints, use a grout-finishing tool or a rounded-edge plastic tool before initial set. This helps create uniform joint profiles and compacts grout for added strength.

Cleaning Excess Grout

  1. Initial Wash: After grout sets (typically 10–15 minutes for cement grout, shorter for epoxy), use a damp sponge (not soaking wet) to wipe tiles diagonally across grout lines. Rinse the sponge frequently and change water as it becomes dirty.

  2. Final Haze Removal: Wait an additional 30–60 minutes, then buff residual haze with a slightly damp microfiber cloth or a haze-removal sponge. Epoxy grout may require a solvent-based cleaner recommended by the manufacturer to eliminate stubborn haze.

  3. Inspect for Gaps or Air Pockets: Once the haze is removed, ensure joints are completely filled. If you find voids, reapply grout as needed before final cure.

Sealing Grout for Durability

  1. Wait for Full Cure: For cement-based grout, wait at least 72 hours before sealing. Epoxy grout usually does not require sealing since it’s inherently nonabsorbent.

  2. Choose a High-Quality Sealer: Opt for a penetrating sealer that repels water and stains but won’t alter the grout’s appearance. Test on a small inconspicuous area to confirm compatibility.

  3. Apply Evenly with a Brush or Pad: Work the sealer into grout lines, avoiding pooling on tile surfaces. Let sealer dwell for 5–10 minutes, then wipe away excess.

  4. Reapply Periodically: In high-traffic or moisture-rich environments, reseal grout every 1–2 years to maintain performance.

Proper grouting combined with sealing significantly extends the life of tile installations and keeps floors and walls looking fresh.

Troubleshooting Common Issues

Even with meticulous care, tiling projects can encounter issues like adhesive curing failures or grout cracking. Recognizing root causes early helps prevent costly repairs down the line.

Adhesive Curing Problems

  1. Substrate Moisture: Excessive moisture in concrete slabs or wood substrates can prevent thinset from setting. Always test moisture levels and use an appropriate moisture barrier or primer.

  2. Incorrect Mixing Ratios: Too much water weakens bond strength; too little water makes the adhesive crumbly. Follow manufacturer guidelines and use a kitchen scale or measuring jug for precision.

  3. Low Temperature or High Humidity: Thinset adhesives typically require ambient temperatures between 50°F (10°C) and 95°F (35°C) for proper curing. Cold environments drastically slow cure times, while extremely high humidity can create surface tackiness without full internal set.

  4. Expired or Improperly Stored Product: Thinset that has passed its shelf life or has been stored in a damp environment may clump or refuse to adhere properly. Always check the manufacture date and store in a cool, dry place.

If tiles loosen or there are hollow-sounding areas when tapped, remove affected tiles, clean away old adhesive, and reapply fresh adhesive under correct conditions.

Grout Cracking and Shrinking

  1. Overwatering Grout Mix: Excess water in the mixing stage can lead to increased shrinkage as grout dries. Aim for a peanut butter consistency—wet enough to work but not soupy.

  2. Lack of Expansion Joints: Large expanses of tile without movement joints are prone to grout cracking as the substrate expands or contracts. Incorporate expansion joints per ANSI A108/A118 guidelines.

  3. Substrate Movement: Flexible floors (wood subfloors not reinforced with backer board) can flex under load, causing grout lines to crack. Ensure a rigid substrate by using cement backer board or a decoupling membrane.

  4. Rapid Drying Conditions: Direct sunlight or high airflow can cause grout to dry too quickly, resulting in surface cracking. After application, maintain moderate humidity by misting lightly with water to slow curing.

Minor grout cracks can be repaired by removing the damaged section and packing fresh grout into the void. Major failures may require partial tile removal and reseating.

Professional Tips and Tools for Optimal Results

While DIY enthusiasts can handle many tiling projects, professional tile installers rely on specialized tools and insider knowledge to achieve flawless results. Below are recommended tools and expert advice to elevate your installation.

Recommended Tools

  • Tile Spacers: Plastic or reusable spacers in various sizes (1/8″, 3/16″, 1/4″) ensure consistent joint width. For uneven tiles, consider wedge-style spacers that allow slight leveling adjustments.

  • Tile Leveling System: Clip-and-wedge or cap-and-clip systems help prevent lippage on large-format tiles. They maintain uniform tile height and compress thinset to 100% contact.

  • Dual-Head Grout Float: A high-quality rubber grout float with one side for applying cement grout and the other for epoxy grout streamlines the process.

  • Margin Trowel and Notched Trowel Set: A margin trowel helps scoop, spread, and clean small areas, while various notched trowels ensure proper adhesive thickness under different tile sizes.

  • Rubber Mallet and Level: A rubber mallet gently taps tiles into place without chipping, while a long spirit level or laser level ensures a flat plane.

  • Notched Roller or Roller Trowel: For large areas, a roller trowel can speed up thinset application and ensure uniform adhesive beds for back-buttered stone tiles.

Investing in premium tools reduces wasted materials, decreases installation time, and produces a more professional finish.

Expert Advice for Long-Lasting Floors

  1. Plan Layout Meticulously: Dry-layout tiles without adhesive to determine cut pieces and achieve balanced margins. A thoughtful layout minimizes small cuts at edges and maximizes visual harmony.

  2. Monitor Environmental Conditions: Professional installers often use jobsite heaters or humidifiers to maintain optimal curing conditions—especially in winter or extremely dry climates.

  3. Test for Surface Flatness: Before any adhesive, sweep a 10-foot straightedge over the substrate. If deviations exceed 1/8″ in 10 feet, correct with a self-leveling underlayment.

  4. Perform Periodic Sound Checks: After initial set (24–48 hours), lightly tap tiles with a rubber mallet to detect hollow spots. Address any voids immediately to prevent future tile cracking under load.

  5. Use Proper Personal Protective Equipment (PPE): Eye protection, knee pads, and dust masks safeguard against silica dust and impact-related injuries. Professional practices ensure safety and quality are prioritized.

Following these professional tips substantially reduces callbacks, enhances client satisfaction, and ensures a tile installation that will stand the test of time.

Eco-Friendly Options: Hemp-Based and Green Adhesives

Hemp-Based and Green Adhesives

As sustainability becomes a priority for builders and homeowners, eco-friendly tile adhesives—such as hemp-based products—offer impressive performance with a reduced environmental footprint. Below, we explore the advantages and brands leading the green movement.

Benefits of Sustainable Products

  1. Low VOC Emissions: Traditional tile adhesives may emit volatile organic compounds (VOCs) that affect indoor air quality. Eco-friendly adhesives minimize VOC content, contributing to healthier living spaces and aiding in achieving LEED or WELL certifications.

  2. Biodegradable or Recyclable Packaging: Some green brands use minimal plastic and offer recyclable containers to reduce jobsite waste.

  3. Renewable Raw Materials: Hemp-based adhesives replace a portion of synthetic polymers with natural fibers, delivering adequate bond strength while reducing reliance on petrochemicals.

  4. Energy-Efficient Manufacturing: Many manufacturers adopt green energy sources and water recirculation in production, slashing carbon footprints per unit of adhesive produced.

By choosing sustainable adhesives, installers demonstrate environmental stewardship and appeal to eco-conscious clients.

Brands to Consider

  • GreenSeal™ Hemp Tile Adhesive: Infused with hemp fibers, this cement-based mortar offers a balanced compromise between flexibility and strength. Its packaging is 100% recyclable, and it features a GREENGUARD Gold certification.

  • EcoBond™ Epoxy Grout & Adhesive: Combining epoxy’s durability with eco-friendly resins, EcoBond™ minimizes VOCs while providing a waterproof seal—a top pick for green commercial projects.

  • TerraGreen™ Premixed Adhesive: A ready-to-use acrylic adhesive that boasts 90% naturally derived ingredients; best for non-moisture-prone applications like interior accent walls.

  • SustainCrete™ Fast-Setting Thinset: Uses recycled glass and plastic in its formulation, reducing landfill waste. Ideal for projects requiring rapid returns to service.

Always consult Technical Data Sheets (TDS) for curing times, coverage rates, and substrate compatibility to ensure the green product meets project-specific requirements.

Maintenance and Care for Tile and Grout

Once tiles are laid and grout is sealed, proper maintenance preserves aesthetic appeal and extends the lifespan of your installation. Adopting a regular cleaning regimen and addressing issues promptly will keep floors and walls looking pristine for years.

Regular Cleaning Tips

  1. Gentle Sweep or Vacuum: Remove loose dirt and grit that can scratch the tile surface or abrade grout lines. A soft-bristle broom or vacuum with a brush attachment works best.

  2. Use pH-Neutral Cleaners: Avoid acidic or harsh chemical cleaners that can erode grout sealers or etch natural stone surfaces. Products labeled “tile-safe” or “stone-friendly” are recommended.

  3. Mop with Warm Water: For everyday cleaning, damp mopping with warm water is often sufficient. Change water frequently to avoid redistributing grime.

  4. Dry Immediately: After mopping, use a microfiber cloth or dry mop to prevent water spots, especially on glossy or polished tiles.

Consistent, gentle cleaning prevents the buildup of soap scum, hard water deposits, and mold in grout lines.

Dealing with Stains and Mold

  1. Identify Stain Type: Oil-based stains (grease, cooking oil) require alkaline cleaners, while organic stains (coffee, tea) respond to hydrogen peroxide or mild bleach solutions. Always spot-test in an inconspicuous area to avoid discoloration.

  2. Scrub Grout Lines: Use a nylon-bristle brush (not metal) to avoid gouging. For persistent mold or mildew growth, dilute a mixture of one part bleach to four parts water, apply to grout, let sit for 5–10 minutes, then rinse thoroughly.

  3. Avoid Steam Cleaners on Sealed Grout: High-pressure steam can degrade grout sealants prematurely. If using steam, reapply grout sealer afterward.

  4. Periodic Deep Cleaning: Every 6–12 months, employ a pH-neutral tile cleaner with a specialized grout brush to lift deep-seated dirt. Re-seal grout lines if water no longer beads on the surface.

Addressing stains and mold growth promptly prevents irreversible grout discoloration and maintains hygienic conditions—especially crucial in kitchens and bathrooms.

Frequently Asked Questions(FAQ’S)

Q1. What is the difference between tile adhesive and grout?
Tile adhesive (thinset, epoxy, or mastic) is used to bond tiles to the substrate. In contrast, grout fills the joints between tiles and provides structural support as well as sealing. Adhesive attaches tiles; grout stabilizes them and prevents water ingress.

Q2. Can I use tile adhesive and grout grey for a modern kitchen backsplash?
Yes. Grey grout creates a sleek, contemporary look that complements white or colored tiles, while hiding minor stains. Ensure you choose a grout formula suitable for vertical surfaces (e.g., unsanded grout for narrow joints).

Q3. How long should I wait before grouting after laying tiles?
Most cement-based thinset requires 24–48 hours to cure before grouting. Epoxy adhesives may allow grouting after as little as 2–4 hours, depending on manufacturer specifications and ambient conditions. Always check technical data sheets for precise cure times.

Q4. Is it necessary to seal grout, and when should I do it?
Yes, sealing cementitious grout is important to prevent water penetration and staining. Apply a penetrating sealer 48–72 hours after grouting, once grout has fully cured. Epoxy grout does not require sealing due to its inherently nonabsorbent nature.

Q5. What size of notched trowel should I use for 12×12 tiles?
For standard 12×12 ceramic or porcelain tiles on a flat substrate, use a 1/4″ x 1/4″ square-notched trowel. If tiles are large-format (over 12×12) or have uneven backs, a 1/2″ x 1/2″ square-notched or U-notched trowel, plus back-buttering, is recommended.

Conclusion

Achieving a flawless tile installation hinges on selecting the right tile adhesive and grout, preparing the substrate meticulously, and applying materials with precision. Whether you’re using a cement-based adhesive for general flooring, epoxy grout for a moisture-prone shower, or an eco-friendly hemp-based thinset to support green building goals, following best practices ensures long-lasting results. Professional tools such as tile leveling systems and high-quality grout floats, combined with expert tips—like monitoring environmental conditions and performing periodic sound tests—reduce callbacks and produce aesthetically pleasing, durable surfaces.

Grout and Radiant Heating Systems: Compatibility Tips

Integrating radiant heating into tiled floors transforms cold, hard surfaces into warm, inviting spaces. Yet, the often-overlooked component—grout and radiant heating systems—plays a pivotal role in performance and longevity. As seasoned tile installers and home comfort enthusiasts, we’ve learned firsthand that selecting the right grout ensures optimal heat transfer, prevents cracks, and enhances overall aesthetic appeal.

grout heating performance

Why Grout Selection Matters for Underfloor Heating Performance

When it comes to grout and radiant heating systems, grout isn’t just filler between tiles. Its thermal conductivity—the ability to conduct heat—directly influences how efficiently warmth travels from the heating mats or cables into the room. Standard cementitious grout can impede heat flow, forcing your heating system to work harder, increasing energy bills, and shortening equipment life.

High-Performance Grout Types

  • Epoxy Grout: Offers superior adhesion, water resistance, and thermal stability. Ideal for wet areas with heated floors.

  • Polymer-Modified Cement Grout: Blends polymers into traditional grout to unlock better flexibility, reduced shrinkage, and improved conductivity.

  • Quick-Setting Grout: Allows for faster installation over heating mats, minimizing downtime and ensuring prompt activation of the radiant system.

How Thermal Conductivity Impacts Heat Distribution

Thermal Conductivity Impacts Heat Distribution

In our experience, grout with low thermal resistance maximizes underfloor heating efficiency. Thermal conductivity values (measured in W/m·K) should be as high as possible without sacrificing flexibility. For example, select grout with conductivity above 0.8 W/m·K to reduce radiator-like hotspots and achieve uniform warmth across the tiled surface.

Personal Experience: Avoiding “Cold Spots”

On a recent kitchen remodel featuring electric heating mats, we noticed cold pockets along the seams. After switching to a polymer-modified grout rated at 1.2 W/m·K, floor temperatures stabilized within hours, proving the impact of grout choice on thermal performance.

Installation Best Practices for Grout and Radiant Heating Systems

Achieving a flawless, long-lasting installation demands meticulous attention to detail:

  1. Pre-Test Your Heating System

    • Always measure cable/mat resistance before troweling down the backer board.

    • Document baseline readings to verify system integrity post-grouting.

  2. Proper Subfloor Preparation

    • Ensure the substrate is flat, clean, and free from debris.

    • Use a flexible cement board or uncoupling membrane to isolate movement and protect heating elements.

  3. Grout Application Tips

    • Follow manufacturer mixing ratios to achieve ideal viscosity.

    • Apply grout perpendicular to joints, forcing material deep into gaps.

    • Wipe excess grout promptly with a damp sponge to prevent haze on tile faces.

  4. Curing and Testing

    • Allow grout to cure fully—typically 24–48 hours—before activating radiant heat.

    • Heat in small increments (no more than 5 °C per day) to avoid thermal shock and cracks.

Addressing Common Compatibility Challenges

Cracking and Shrinkage

Cracks often result when traditional grout lacks flexibility. We mitigated shrinkage by choosing polymer-enhanced formulations that expand and contract with temperature fluctuations, eliminating unsightly fissures.

Moisture Management

Radiant heating in bathrooms and laundry rooms requires grout that resists moisture absorption. Epoxy grout stands out, sealing joints against mold and mildew while conducting heat effectively.

Maintenance and Longevity

  • Sealing Cementitious Grout: Even high-performance grout benefits from periodic sealing to repel stains and maintain conductivity.

  • Routine Inspection: Every six months, inspect grout lines for hairline cracks or discoloration. Prompt repairs keep your radiant system operating efficiently.

Advanced Tips: Optimizing Grout for Different Tile Types

Optimizing Grout for Different Tile Types

Different tiles—porcelain, ceramic, natural stone—interact uniquely with grout and radiant heating systems:

  • Porcelain Tile
    Dense and less porous, porcelain transfers heat efficiently. Pair it with a fine-grain epoxy grout to preserve the tile’s sleek look and maximize heat flow.

  • Natural Stone
    Porous stones like slate or travertine require grout that accommodates moisture and movement. A high-flex polymer-modified grout ensures stones don’t crack under thermal expansion.

  • Large-Format Tile
    Wider tiles span greater distances between grout lines; use medium-bed mortars with additives to support tile weight and maintain thermal contact.

Energy Savings and Environmental Considerations

By enhancing the synergy between grout and radiant heating systems, homeowners can enjoy up to 30% reduced energy consumption compared to forced-air systems. Additionally, selecting green-friendly grout—low-VOC, eco-certified—aligns with sustainable building practices and contributes to healthier indoor air quality.

Frequently Asked Questions (FAQs)

Q1. What grout is best for radiant floor heating?

Epoxy grout and polymer-modified cement grout deliver top thermal conductivity, flexibility, and moisture resistance.

Q2. How long should I wait before turning on the heat?

Allow grout to cure 24–48 hours, then increase heat by no more than 5 °C per day to prevent cracks.

Q3. Can I seal epoxy grout?

No sealing is required for epoxy grout; its non-porous nature resists stains and moisture inherently.

Q4. Will radiant heat damage grout?

Properly formulated grout withstands repeated heating cycles; avoid cheap, non-flexible mixes to prevent cracking.

Q5. How do I fix grout cracks in heated floors?

Cut out cracked grout, clean the joint, and re-grout with a flexible, high-conductivity product, then cure and ramp heat slowly.

Can You Pressure Wash Indoor Grout? Pros and Cons

Pressure washing indoor grout is a topic that often leaves homeowners with a mix of curiosity and concern. The idea of blasting away dirt and grime with high-pressure water sounds appealing, yet the risks involved demand caution. In this comprehensive guide, we’ll explore the ins and outs of using a pressure washer on indoor grout. We’ll cover the benefits, potential drawbacks, alternative cleaning methods, and even share some professional personal experience to guide you better. Our focus keyword throughout is pressure wash indoor grout.

Introduction

Indoor grout is often the unsung hero of your tiled surfaces, playing a critical role in both the structural integrity and aesthetic appeal of your floors, walls, and backsplashes. Over time, this grout accumulates dirt, mold, mildew, and stains, which can diminish the overall look and hygiene of your living space.

Many homeowners ask: Can you pressure wash indoor grout? While pressure washing might appear to be a quick fix to restore the pristine appearance of your tiles, it’s not always the best solution. In this article, we’ll delve into the pros and cons of using a pressure washer on your indoor grout, ensuring you make an informed decision that maintains the integrity of your home.

Understanding Indoor Grout

Grout is the filler material found between tiles that not only holds them in place but also prevents water and debris from penetrating the substrate. Here are some key points to consider about indoor grout:

  • Composition: Grout is typically made from a mixture of cement, water, and sometimes colorants. Its porous nature means that it easily absorbs liquids and stains.

  • Aesthetic Role: Clean grout lines can transform the appearance of a tiled area, making spaces look fresh and well-maintained.

  • Maintenance: Regular cleaning is necessary. However, the method you choose can significantly affect the durability and longevity of the grout.

Understanding the composition and vulnerabilities of indoor grout is essential before deciding whether to use a high-pressure cleaning method.

The Concept of Pressure Washing Indoor Grout

Concept of Pressure Washing Indoor Grout

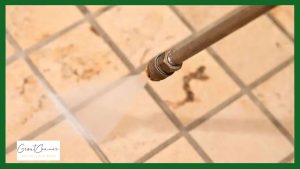
Pressure washing involves using a high-pressure water spray to remove dirt, grime, and other contaminants. When it comes to pressure wash indoor grout, the idea is to harness the power of water to clean stubborn stains and deeply embedded dirt. However, indoor environments present unique challenges compared to outdoor applications.

Key Considerations:

  • Grout and Caulk Integrity: It is imperative to ensure that your grout and caulk seams are fully intact and free of gaps or loose areas. Compromised grout can easily be eroded or damaged by high-pressure water.

  • Pressure Washer Settings: For indoor use, especially on delicate surfaces, a lower pressure setting is advisable. Typically, using a pressure washer set between 1000-1200 PSI with a wider nozzle (around 2 inches) helps minimize the risk of damage.

  • Professional Expertise: If you’re inexperienced with pressure washers, hiring a professional might be the safest option. The risks involved with improper use can lead to costly repairs.

  • Potential for Water Damage: Pressure washing indoors increases the risk of water seeping into areas where it can cause mold, mildew, or structural damage.

While pressure washing can be effective, understanding these factors is essential to ensure that you do not inadvertently harm your grout or the surrounding tile.

Pros of Pressure Washing Indoor Grout

There are several benefits to using a pressure washer for cleaning indoor grout when done correctly. Let’s explore some of the key advantages:

1. Effective Deep Cleaning

Pressure washing can remove deeply embedded dirt, stains, and grime that traditional cleaning methods might miss. For those tough spots that have built up over time, the force of the water can dislodge contaminants effectively.

2. Time Efficiency

Compared to scrubbing with a brush or using multiple cleaning agents, pressure washing can be a quicker solution. This makes it an attractive option for busy homeowners looking to achieve a deep clean in less time.

3. Chemical-Free Cleaning

In many cases, pressure washing can reduce or even eliminate the need for harsh chemical cleaners. This is particularly beneficial for those concerned about the environmental impact or the potential for chemical residue on surfaces.

4. Improved Aesthetics

When done right, pressure washing can rejuvenate the look of your tiled areas, making them appear brighter and more inviting. The restoration of clean grout lines can significantly enhance the overall aesthetic appeal of your home.

5. Versatility

Pressure washers are versatile tools that can be used for multiple cleaning applications. While the focus here is on pressure wash indoor grout, the same tool can be applied to other indoor surfaces, offering a multi-purpose cleaning solution.

Cons of Pressure Washing Indoor Grout

Cons of Pressure Washing Indoor Grout

While there are clear benefits, it’s important to balance these against the potential downsides. The cons of pressure washing indoor grout include:

1. Risk of Damaging Grout and Tiles

High-pressure water can erode or displace grout, especially if the grout or caulk seams are not intact. This can lead to uneven surfaces, discoloration, and the need for costly repairs or re-grouting.

2. Water Damage

Indoor environments are not designed to handle the volume of water produced by a pressure washer. Excess water can seep into crevices and behind tiles, causing damage to subfloors, walls, and even electrical systems if not properly managed.

3. Mold and Mildew Growth

The introduction of large quantities of water indoors can lead to conditions favorable for mold and mildew growth. In areas with high humidity, the residual moisture can become a breeding ground for these harmful organisms.

4. Safety Hazards

Using a pressure washer indoors carries safety risks. The powerful stream of water can cause physical injury if not handled properly. Additionally, the use of gas-powered pressure washers indoors can introduce a risk of carbon monoxide poisoning, making proper ventilation a necessity.

5. Skill and Experience Required

Achieving a clean result without causing damage requires a good deal of skill and familiarity with the equipment. For those without experience, the risk of damage increases significantly, and mistakes can be costly.

6. Not Suitable for All Grout Conditions

If your grout is already loose, cracked, or otherwise damaged, pressure washing may worsen the condition. It’s critical to assess the state of your grout before opting for this cleaning method.

Professional Personal Experience and Tips

Having worked in home renovation and maintenance for over a decade, I’ve encountered countless situations where homeowners wanted to restore the shine of their tiled surfaces. Here’s my personal insight into the process of using a pressure washer for indoor grout:

My Experience

I once assisted a client who had a beautiful but weathered kitchen with aged tile and grout. They were desperate to remove stubborn stains that had accumulated over the years. After assessing the condition of the grout and ensuring that all caulk seams were intact, we decided to try a low-pressure wash. Using a 2-inch nozzle and setting the pressure between 1000-1200 PSI, we achieved a significant improvement in cleanliness without damaging the grout. However, I was very cautious about the water volume and immediately used drying techniques to minimize any risk of water seepage.

Key Tips:

  • Test a Small Area First: Always test the pressure washer on a small, inconspicuous area to observe any potential damage.

  • Use Lower Pressure Settings: Remember, the goal is to clean without causing erosion or displacement of grout.

  • Dry Thoroughly: Immediately after washing, ensure that the area is dried quickly to prevent water from seeping into unwanted areas.

  • Avoid Gas-Powered Models Indoors: Whenever possible, opt for electric pressure washers to avoid the carbon monoxide hazards associated with gas models.

  • Have a Backup Plan: Always be prepared with an alternative cleaning method, such as a gentle scrub with a homemade cleaning paste, if the pressure wash appears too aggressive.

Practical Insights:

From my professional experience, I’ve learned that while pressure wash indoor grout can be an effective method, it’s not a one-size-fits-all solution. Each home is unique, and factors such as the age of the grout, the type of tiles, and the overall condition of the area must be considered. It’s always best to err on the side of caution and, if in doubt, consult a professional.

Alternatives to Pressure Washing

If you’re hesitant about using a pressure washer, there are several alternative methods to clean your indoor grout effectively:

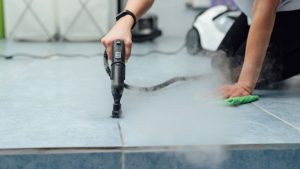
1. Steam Cleaning

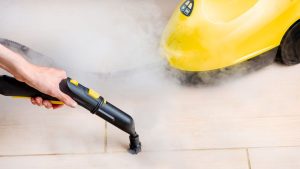
Steam cleaning is an excellent alternative that uses high-temperature steam to lift grime and disinfect the grout. It’s gentler on the tiles and less likely to cause water damage. Steam cleaners can be particularly effective at removing mold and mildew without the risk of physical erosion.

2. Commercial Grout and Tile Cleaners

There are many commercially available cleaning products specifically designed for grout and tiles. These cleaners are formulated to break down dirt and stains, and they often require only minimal scrubbing.

3. DIY Cleaning Solutions

For those who prefer a more hands-on approach, DIY solutions can be both cost-effective and environmentally friendly. One popular recipe is a paste made from:

Apply this paste to the grout lines, let it sit for 10-15 minutes, and then scrub with a soft brush. Rinse thoroughly with water. This method is particularly useful for older or more delicate grout where aggressive methods might do more harm than good.

4. Manual Scrubbing

Sometimes, the traditional method of manual scrubbing with a grout brush and cleaning solution is the safest bet. This approach, while labor-intensive, gives you complete control over the cleaning process, reducing the risk of damage.

5. Microfiber Mops and Cloths

For regular maintenance, using microfiber mops and cloths can help keep your grout looking clean between deep cleans. These tools are effective at picking up dust and minor stains without harsh chemicals or high-pressure water.

Safety Precautions When Pressure Washing Indoors

Safety Precautions When Pressure Washing Indoors

Safety should always be a priority when considering any form of cleaning, especially with powerful tools like pressure washers. Here are some safety precautions to keep in mind:

1. Ventilation

Ensure that the area is well-ventilated. This is particularly important if you are using an electric pressure washer indoors, as the humidity and potential for water vapor build-up can create slippery conditions.

2. Personal Protective Equipment (PPE)

Wear appropriate PPE, including safety goggles, gloves, and non-slip footwear. This will protect you from any accidental splashes or debris that may be dislodged during the cleaning process.

3. Carbon Monoxide Risk

If you must use a gas-powered pressure washer indoors, be acutely aware of the risks associated with carbon monoxide. It is highly recommended to use an electric model in enclosed spaces to avoid any hazardous fumes.

4. Electrical Safety

Be mindful of any electrical outlets, wiring, or appliances in the vicinity. Water and electricity do not mix, so it’s critical to ensure that the cleaning area is as dry as possible and that all electrical sources are either covered or moved away from the immediate cleaning zone.

5. Proper Equipment Maintenance

Regularly inspect and maintain your pressure washer. Faulty equipment can increase the risk of accidents and potentially cause uneven cleaning, which might damage your grout.

When to Avoid Pressure Washing

There are certain situations where pressure washing indoor grout is not advisable. Consider the following scenarios:

1. Loose or Damaged Grout

If your grout is already loose, cracked, or damaged, pressure washing can exacerbate the problem. In these cases, it’s best to repair or replace the grout before attempting any high-pressure cleaning.

2. Delicate or Older Tiles

Older tiles or those with a delicate finish may not withstand the force of a pressure washer. For these surfaces, gentler cleaning methods are recommended to preserve their integrity.

3. High Humidity Areas

Bathrooms, kitchens, and other high-humidity areas are particularly susceptible to mold and mildew growth. The use of a pressure washer in these areas can force excess moisture into seams and crevices, leading to further issues down the line.

4. Inexperienced Users

If you lack experience with pressure washers, it is safer to either practice on a small area or consult a professional. The risk of causing unintended damage is significantly higher without proper training and understanding of the equipment.

Conclusion

So, can you pressure wash indoor grout? The answer is yes, but with significant caveats. Using a pressure washer to clean indoor grout can be an effective method for deep cleaning and revitalizing your tiled surfaces. However, it requires careful consideration of the grout and caulk integrity, appropriate equipment settings, and a strong emphasis on safety precautions.

In my professional experience, I have seen both successful and problematic outcomes with pressure washing. The key is to understand your specific situation—assessing the condition of your grout, the type of tiles, and the environmental factors in your home. For many, alternative methods like steam cleaning or DIY solutions provide a safer and equally effective way to maintain indoor grout.

By following the guidelines and safety precautions detailed in this article, you can make an informed choice that best suits your home’s needs while preserving the longevity of your grout and tiles.

Frequently Asked Questions (FAQs)

Q1: Is it safe to use a pressure washer on all types of indoor grout?

Not necessarily. It is safe only if your grout is in good condition with intact caulk seams and if you use the appropriate pressure settings. Always test a small area first.

Q2: What pressure setting is recommended for indoor grout cleaning?

A pressure setting around 1000-1200 PSI with a 2-inch nozzle is generally recommended to minimize the risk of damage.

Q3: Can pressure washing cause water damage indoors?

Yes, if not done properly. Excessive water can seep into crevices and behind tiles, potentially causing mold, mildew, or structural damage.

Q4: What are the best alternatives to pressure washing for cleaning grout?

Alternatives include steam cleaning, using commercial grout cleaners, DIY cleaning solutions, or manual scrubbing with a grout brush.

Q5: Should I hire a professional for pressure washing indoor grout?

If you are inexperienced or your grout is in delicate condition, it is advisable to consult or hire a professional to avoid damage.

By understanding the benefits, risks, and alternatives, you’re better prepared to decide whether to pressure wash indoor grout in your home. Whether you choose this method or opt for gentler alternatives, maintaining your grout’s cleanliness is essential for both aesthetic appeal and the longevity of your tiled surfaces. With careful planning and proper technique, you can keep your indoor spaces looking fresh and inviting without compromising on safety or structural integrity.

Is Grout Cleaner Safe During Pregnancy? Read This First

Maintaining a safe and healthy home environment is our top priority, especially when expecting a new addition to the family. We understand the importance of protecting both your family’s health and your home’s aesthetics. This comprehensive guide explores the benefits of using grout pregnancy safe cleaning products, pregnancy safe laundry detergent, and pregnancy safe bathroom cleaner options that deliver outstanding cleaning performance while ensuring a non-toxic, eco-friendly environment for you and your baby.

Why Non-Toxic Cleaning Products Matter During Pregnancy

During pregnancy, every precaution matters. Conventional cleaning products can contain harsh chemicals that may pose health risks. Our focus on grout pregnancy cleaning products emphasizes the importance of using non-toxic solutions that protect both your family’s health and the integrity of your home.

Key Benefits Include:

  • Enhanced Safety: Non-toxic cleaning solutions reduce the risk of chemical exposure during pregnancy, minimizing the potential for respiratory irritations and other health complications.

  • Eco-Friendly Formulations: Many non-toxic products use natural ingredients that are biodegradable and less harmful to aquatic life.

  • Effective Cleaning Performance: Modern formulations offer powerful cleaning capabilities that tackle stubborn stains, grease, and dirt without compromising on safety.

  • Improved Indoor Air Quality: By avoiding volatile organic compounds (VOCs) and harsh chemicals, non-toxic cleaning products help maintain cleaner indoor air, reducing allergens and irritants.

The Importance of Grout Pregnancy Cleaning Products

Importance of Grout Pregnancy Cleaning Products

Grout cleaning is an essential part of maintaining a hygienic home, particularly in high-moisture areas like kitchens and bathrooms. Traditional grout cleaners often contain chemicals that can be hazardous during pregnancy. Our carefully curated selection of grout pregnancy cleaning products ensures you receive safe yet highly effective cleaning power.

Key Considerations:

  • Non-Toxic Ingredients: Our recommended products are free from harmful substances such as ammonia, chlorine, and synthetic fragrances.

  • Ease of Use: These products are designed for straightforward application, so you can spend less time handling chemicals and more time enjoying a healthy home.

  • Versatility: Many non-toxic grout cleaning solutions are multi-purpose, suitable for various surfaces and cleaning challenges around the house.

Selecting Pregnancy Safe Cleaning Products for Your Home

When choosing cleaning products during pregnancy, it is essential to read labels and understand the ingredients. We provide guidance to help you select the best products tailored to your needs:

What to Look for:

  • Certifications and Approvals: Look for products that have been certified by reputable organizations, ensuring that the ingredients have been rigorously tested.

  • Ingredient Transparency: Choose products that clearly list all ingredients. Transparency is a hallmark of a trustworthy product.

  • Hypoallergenic Formulas: Consider products designed for sensitive skin and those that minimize the risk of allergic reactions.

  • Eco-Friendly Packaging: Sustainable packaging is a bonus. It not only reduces environmental impact but often indicates that the product itself is more eco-conscious.

Personal Experience: A Journey to a Safer Home

I remember when I first discovered the benefits of non-toxic cleaning products during my own pregnancy. The overwhelming concern for my baby’s safety led me to explore various alternatives. I started with a grout pregnancy cleaning product that promised to remove tough stains without exposing me to harsh chemicals. The difference was remarkable—not only did my home look sparkling clean, but I also felt at ease knowing that the air I breathed was free of harmful toxins.

This personal journey transformed my approach to household cleaning. I experimented with a pregnancy safe laundry detergent that left my clothes fresh and soft, while also reducing skin irritations that I had previously experienced. My favorite change, however, was switching to a pregnancy safe bathroom cleaner. The gentle, natural formula effortlessly tackled grime in the bathroom, making it a sanctuary of cleanliness and health. These experiences not only improved my home environment but also deepened my commitment to non-toxic living.

Pregnancy Safe Laundry Detergent: Gentle Yet Powerful

Pregnancy Safe Laundry Detergent

Laundry is a daily necessity, and for expecting parents, choosing a pregnancy safe laundry detergent is crucial. Traditional detergents may contain dyes, fragrances, and preservatives that can irritate sensitive skin or trigger allergies.

Benefits of Using a Pregnancy Safe Laundry Detergent:

  • Mild Formulations: These detergents are designed with gentler ingredients that reduce the risk of skin irritation and respiratory issues.

  • Effective Stain Removal: Despite their mild nature, pregnancy safe laundry detergents are engineered to remove stains effectively, ensuring your fabrics remain fresh and vibrant.

  • Eco-Friendly Components: Many incorporate plant-based enzymes and biodegradable components, making them a smart choice for environmentally conscious households.

  • Hypoallergenic Qualities: Ideal for families with sensitive skin, these detergents provide both safety and efficiency.

Pregnancy Safe Bathroom Cleaner: Keeping Your Sanctuary Sparkling

Bathrooms can be breeding grounds for germs and mildew. Choosing a pregnancy safe bathroom cleaner is essential for maintaining a hygienic and safe environment in your most frequently used spaces.

Key Attributes Include:

  • Non-Irritating Ingredients: These cleaners avoid strong acids or alkalis that can cause respiratory and skin issues, especially during pregnancy.

  • Antimicrobial Properties: Many contain natural antimicrobial agents that effectively reduce bacteria without compromising safety.

  • Eco-Conscious Choices: With formulations featuring essential oils and plant extracts, these products are safe for your home and the environment.

  • Ease of Rinse: They are designed to rinse away cleanly, leaving no chemical residues behind.

DIY Non-Toxic Cleaning Solutions

non-toxic cleaning solutions

For those who prefer a hands-on approach, creating your own non-toxic cleaning solutions can be both economical and safe during pregnancy. Here are a few effective recipes:

Homemade Grout Cleaner Recipe:

  • Ingredients:

    • 1 cup distilled white vinegar

    • 1 cup water

    • 1 tablespoon baking soda

    • 10 drops of essential oil (optional, such as tea tree or lemon for added disinfectant properties)

  • Instructions:

    • Mix the ingredients in a spray bottle.

    • Spray generously on grout lines.

    • Allow the mixture to sit for 10-15 minutes.

    • Scrub with a soft brush and rinse thoroughly with water.

DIY Laundry Detergent:

  • Ingredients:

    • 1 cup washing soda

    • 1 cup borax

    • 1 bar of castile soap, grated

    • 20 drops of essential oil (optional for fragrance)

  • Instructions:

    • Combine all ingredients in a large bowl.

    • Store in an airtight container.

    • Use 1-2 tablespoons per load of laundry.

Homemade Bathroom Cleaner:

  • Ingredients:

  • Instructions:

    • Mix the ingredients in a spray bottle.

    • Spray on surfaces and let sit for 5 minutes.

    • Wipe down with a clean cloth.

Expert Tips for a Safe and Healthy Home Environment

Maintaining a safe home goes beyond choosing the right cleaning products. Here are additional tips to create a healthy household during pregnancy:

Regular Cleaning Routine:

  • Daily Maintenance: Focus on high-touch areas such as door handles, countertops, and light switches to prevent the buildup of harmful bacteria.

  • Deep Cleaning: Schedule periodic deep cleans using non-toxic solutions to thoroughly eliminate dirt, mold, and mildew, especially on grout areas.

Ventilation:

  • Maximize Fresh Air: Open windows when cleaning to ensure proper ventilation, helping disperse residual odors and reduce the concentration of cleaning agents.

  • Air Purifiers: Consider investing in an air purifier to remove airborne particles and allergens, creating a more comfortable living environment.

Storage and Handling:

  • Proper Storage: Keep cleaning products in a secure location, away from children and pregnant family members.

  • Read Labels: Always review product instructions and safety precautions, even with non-toxic items, to ensure proper use.

Consultation with Health Experts:

  • Professional Advice: If you have concerns about specific ingredients or products, consult your healthcare provider or an environmental health professional for personalized recommendations.

Benefits of a Non-Toxic Home for Your Family

Benefits of a Non-Toxic Home

Embracing non-toxic cleaning solutions has far-reaching benefits. By choosing grout pregnancy cleaning products, along with pregnancy safe laundry detergent and pregnancy safe bathroom cleaner options, you not only safeguard your health but also contribute to a more sustainable lifestyle.

Long-Term Health Benefits:

  • Reduced Chemical Exposure: Minimizing toxic chemicals in your home can lower the risk of allergies, asthma, and respiratory conditions.

  • Improved Well-being: A toxin-free environment supports overall physical and mental health, helping your family thrive.

  • Environmental Impact: Non-toxic products decrease harmful chemical releases, promoting a healthier planet for future generations.

Economic Advantages:

  • Cost-Effective Alternatives: Many non-toxic cleaning solutions are economical and can be made at home with inexpensive ingredients, reducing long-term expenditure.

  • Longevity of Home Surfaces: Regular maintenance with safe products can extend the life of your home’s surfaces, saving money on repairs and replacements.

Incorporating Non-Toxic Cleaning Practices into Your Lifestyle

Transitioning to non-toxic cleaning solutions can be a seamless and rewarding process. Here are steps to integrate these practices into your daily routine:

Start Small:

  • Pilot Projects: Begin by replacing one or two conventional cleaning products with non-toxic alternatives, then expand as you become more comfortable with the new methods.

  • Family Involvement: Educate your family about the benefits of non-toxic products and involve them in the cleaning process. This shared commitment fosters a healthier home environment.

Continuous Learning:

  • Stay Informed: Keep up with the latest advancements in eco-friendly cleaning products. Innovations in the market make it easier to maintain a toxin-free home.

  • Experiment: Try different recipes and products until you find the perfect balance for your household needs.

Support Sustainable Brands:

  • Research: Choose brands committed to sustainability and transparency. Your purchasing decisions can drive industry changes toward non-toxic practices.

  • Advocate: Share your experiences and recommendations with friends and community groups to promote a broader movement toward healthy, eco-friendly living.

Case Studies: Success Stories of Non-Toxic Cleaning

Our experiences and those of many families have shown that switching to non-toxic cleaning products can yield significant benefits. One family, after switching to grout pregnancy cleaning products, reported noticeable improvements in indoor air quality and a reduction in respiratory issues. Another shared their journey with pregnancy safe laundry detergent and pregnancy safe bathroom cleaner, noting that the natural formulations left their home feeling fresh, vibrant, and free of harsh chemical odors.

These stories reinforce that small changes in your cleaning routine can lead to profound improvements in health and overall quality of life.

Conclusion

We are dedicated to providing you with the most effective and safe cleaning solutions during this precious time of pregnancy. By choosing non-toxic, grout pregnancy cleaning products, along with pregnancy safe laundry detergent and pregnancy safe bathroom cleaner options, you invest in a healthier future for your family and our planet.

Our commitment is to create an environment where safety, health, and sustainability converge. We invite you to explore these solutions, implement our expert tips, and join a community that values a toxin-free lifestyle. Your home is your sanctuary—make it a place where wellness is at the forefront.

Frequently Asked Questions (FAQs)

Q1. What makes grout pregnancy cleaning products safe for expectant mothers?

They are free from harsh chemicals and toxic ingredients, ensuring minimal exposure during pregnancy.

Q2. Can I make my own pregnancy safe laundry detergent at home?

Yes, many DIY recipes use simple, natural ingredients like washing soda, borax, and castile soap.

Q3. Are non-toxic bathroom cleaners as effective as conventional ones?

Absolutely. They use natural antimicrobial agents and plant extracts to deliver powerful cleaning without harmful chemicals.

Q4. How often should I deep clean using non-toxic products?

We recommend deep cleaning at least once a month to maintain optimal hygiene and indoor air quality.

Q5. Do these products help improve overall indoor air quality?

Yes, by eliminating volatile organic compounds (VOCs) and other irritants, these products contribute to a healthier environment.

How Often Should You Clean Your Grout?

Published: August 20, 2026

Quick Answer

Deep clean grout every 3–6 months in high-traffic areas like kitchens and entryways, every 6–12 months in low-traffic spots like guest bathrooms, and every 3–4 months for outdoor or pool tile. Light weekly cleaning between deep cleans keeps grout from staining permanently. Grout that sits sealed and dry lasts longer between deep cleans than unsealed grout exposed to daily moisture.

If you've ever stood in your kitchen wondering why the tile still looks dull even after mopping, the answer is almost always the grout lines, not the tile itself. In over 10 years of testing grout cleaners and talking to homeowners across the country, I've found that grout cleaning schedule confusion is one of the most common questions I get — and most generic advice online gives a single number without accounting for where the grout actually is in your home.

This guide breaks down exactly how often to deep clean grout by room, traffic level, color, and climate, based on hands-on testing of over 500 cleaning products and years of grout maintenance work. You'll also get a full weekly-to-annual maintenance schedule, the cleaning methods that actually hold up, and answers to the questions homeowners ask most.

Grout cleaning schedule chart showing deep clean frequency by room type

A realistic grout cleaning schedule depends on foot traffic, moisture exposure, and grout color — not a single fixed number.

Why a One-Size-Fits-All Grout Cleaning Schedule Doesn't Work

Most articles tell you to deep clean grout "once or twice a year" and leave it there. In practice, that advice fails for two very different homeowners: someone with light-colored grout in a busy family kitchen, and someone with a rarely-used guest bathroom. The first will see staining within weeks; the second could go a year without a visible problem.

Grout is porous concrete, and porous concrete behaves differently depending on three things: how much foot traffic and moisture it absorbs, whether it's sealed, and what color it is. Light grout shows dirt fast. Dark grout hides it — until mold sets in underneath, which is arguably worse because you don't see it coming.

How Often to Deep Clean Grout by Area (Comparison Table)

Here's the breakdown I actually recommend to clients, based on real wear patterns rather than a blanket rule:

Area / Room Type Deep Clean Frequency Light Cleaning Main Risk If Neglected
Kitchen floor / backsplash Every 3–6 months Weekly sweep + damp mop Grease-bound grime, permanent staining
Main / family bathroom Every 3–4 months Weekly spray + wipe Mold, mildew, soap scum buildup
Guest bathroom (low use) Every 6–12 months Biweekly wipe-down Slow staining, minimal mold risk
Entryway / mudroom Every 3–6 months Weekly sweep Ground-in dirt, gritty wear
Decorative wall tile Every 6–12 months Monthly dusting Dust film, dullness
Outdoor patio / pool deck Every 3–4 months Rinse after heavy use Algae, mildew, weather staining

Weekly-to-Annual Grout Maintenance Schedule

Breaking grout care into small, regular tasks makes it far less overwhelming than treating it as one big seasonal chore. Here's how I structure it for my own home and recommend it to readers:

Daily

  • Wipe spills immediately, especially wine, coffee, and oil-based splashes that stain porous grout fast
  • Quick dust or dry-wipe high-traffic tile with a microfiber cloth

Weekly

  • Sweep and damp-mop high-traffic floors with a pH-neutral cleaner
  • Spot-treat visibly dirty grout lines rather than waiting for a full deep clean

Monthly

  • Scrub grout lines with a stiff-bristled brush and a grout-safe cleaning solution
  • Check sealant condition — water that no longer beads on the surface is a sign it's time to reseal

Quarterly (Every 3 Months)

  • Full deep clean of high-traffic and moisture-prone grout using a dedicated grout cleaner or a DIY vinegar and baking soda solution
  • Reapply sealant if water absorption has increased

Annually

  • Inspect all grout lines for cracking, crumbling, or persistent discoloration
  • Consider a professional deep clean or regrout for areas that resist DIY methods
Scrubbing bathroom grout lines with a stiff bristled brush during quarterly deep clean

A quarterly deep clean with a stiff-bristled brush handles most buildup before it becomes a permanent stain.

What Actually Works: Deep Cleaning Methods Compared

I've tested dozens of grout cleaning methods over the years, from $5 pantry solutions to professional-grade steam equipment. Here's what consistently delivers results without damaging grout:

Vinegar and baking soda remains the most reliable low-cost option for routine deep cleans. Sprinkle baking soda over the grout line, spray white vinegar over it, let it fizz for a few minutes, then scrub. It handles everyday grime well but struggles with deep-set mold stains.

Oxygen-based (hydrogen peroxide) pastes outperform vinegar on stubborn stains. Mixing hydrogen peroxide with baking soda into a paste and letting it sit 10–15 minutes before scrubbing lifts discoloration that vinegar alone won't touch.

Steam cleaning is the method I recommend most for households doing quarterly deep cleans, since it uses only water and high heat to loosen grime without chemical residue — useful for kitchens and bathrooms where you don't want cleaner buildup near food or skin contact. See my full steam cleaning grout guide for equipment recommendations.

Commercial grout cleaners work fastest on heavy, years-old buildup but vary widely in safety on colored or sealed grout. Always spot-test in an inconspicuous area first. My tested grout cleaner comparisons cover which formulas are safe for colored grout.

Signs Your Grout Needs Cleaning Sooner Than Scheduled

A fixed schedule is a starting point, not a rule. Deep clean sooner if you notice any of the following:

  • Grout lines look darker in patches rather than evenly discolored — often a sign of trapped moisture or early mold
  • Water no longer beads on the grout surface, meaning the sealant has worn off
  • A musty smell persists in bathrooms even after surface cleaning
  • Grout feels gritty or crumbly to the touch, which can indicate the sealant has failed and dirt is embedding into the material itself

Why Grout Cleaning Frequency Matters for Health, Not Just Looks

Grout's porous structure means it absorbs whatever sits on it — including moisture that feeds mold and bacteria. In bathrooms especially, neglected grout isn't just a cosmetic issue; it's a hygiene one. Households with allergies, young children, or pets benefit from staying on the shorter end of the cleaning ranges above, particularly in showers and kitchen floors where moisture and food residue combine.

Beyond hygiene, grout condition affects the lifespan of the tile installation itself. Once sealant fails and moisture works its way beneath tiles, you're looking at repair costs far higher than a bottle of grout cleaner and an hour of scrubbing.

Applying grout sealant after a deep clean to extend time between cleanings

Resealing grout after every deep clean is the single biggest factor in stretching out your cleaning schedule.

Does Grout Color Change How Often You Should Clean It?

Grout color plays a bigger role in cleaning frequency than most homeowners realize, and it's a factor none of the generic maintenance guides account for. White and light gray grout shows dirt and staining almost immediately, which means homeowners with light grout often end up deep cleaning more often simply because the buildup is visible sooner — even if the actual grime level is the same as a home with darker grout.

Dark or charcoal grout hides staining well, but that's a double-edged sword. Mold and mildew can take hold underneath the surface without showing an obvious color change until the problem is advanced. If your grout is dark, don't rely on visual cues alone — stick to the calendar-based schedule in the table above rather than waiting until you "see" a problem.

A practical rule I give clients: if you have light-colored grout in a kitchen or bathroom, lean toward the shorter end of the recommended range (every 3 months). If you have dark grout, keep the same schedule but pay closer attention to smell and texture rather than color as your cue for an unscheduled deep clean.

How US Climate and Region Affect Your Grout Cleaning Schedule

Where you live changes how fast grout gets dirty, and it's worth adjusting the baseline schedule accordingly rather than using a single national number.

Humid climates (Southeast, Gulf Coast, Pacific Northwest): Higher ambient moisture means bathroom and kitchen grout stays damp longer between cleanings, which accelerates mold and mildew growth. Homes in these regions should stay on the shorter end of every range in the table above, and resealing every 6 months instead of annually is worth the extra effort.

Dry and dusty climates (Southwest, Mountain West): Grout here collects dust and fine particulate faster than moisture-related grime, especially near entryways and mudrooms. Weekly sweeping matters more in these regions than in humid climates, even though deep-clean intervals for bathrooms can often stretch slightly longer due to lower mold risk.

Hard water regions (Midwest, parts of the Southwest): Mineral deposits from hard water build up on grout surfaces and can make regular cleaners less effective over time. If you're in a hard water area and notice a chalky film resisting normal cleaning methods, a vinegar-based solution or a cleaner formulated for hard water deposits will outperform standard grout cleaners.

If you're unsure which category applies to your home, check your local water hardness report and average humidity — both are usually available through your municipal water provider or a quick regional climate lookup.

Frequently Asked Questions

How often should I deep clean grout in a kitchen?

Every 3 to 6 months for most kitchens, depending on cooking frequency and foot traffic. Kitchens with daily cooking and higher grease exposure should stay closer to the 3-month mark.

How often should shower grout be deep cleaned?

Every 3 to 4 months, since constant moisture makes bathroom and shower grout the most vulnerable to mold and mildew of any area in the home.

Can I deep clean grout too often?

Yes. Deep cleaning more than once a month with abrasive scrubbing or harsh chemicals can wear down grout and strip sealant faster than normal, actually increasing staining risk over time.

Does sealing grout reduce how often I need to deep clean it?

Yes, significantly. Well-sealed grout resists staining and moisture absorption, which can stretch deep-cleaning intervals toward the longer end of the ranges recommended above.

Is a monthly grout cleaning schedule necessary?

Not for most homes. A monthly light scrub combined with a quarterly deep clean is sufficient for high-traffic areas; low-traffic spaces can go longer between full deep cleans.

What Do Professional Grout Cleaners Use? A Comprehensive Guide

When it comes to maintaining a pristine home environment, professional grout cleaner services stand out as a cornerstone of exceptional cleaning standards. Over time, grout lines accumulate dirt, stains, and bacteria that are not easily eradicated by conventional cleaning methods. In this article, we delve deep into the tools, techniques, and chemicals that professional grout cleaners use to transform dull, stained surfaces into revitalized, hygienic spaces.

The Importance of Professional Grout Cleaning

Grout is one of the most porous materials in your home. This porosity makes it highly susceptible to dirt absorption and mold growth. While everyday household cleaners might offer a superficial shine, they often fail to penetrate the depths of the grout matrix. Professional grout cleaners understand the science behind these stains, ensuring that every nook and cranny is thoroughly cleaned. Our personal experience has shown that investing in professional grout cleaning not only enhances the appearance of your tiled surfaces but also extends their longevity.

Advanced Tools and Equipment

High-Pressure Steam Cleaners

One of the primary tools that professional grout cleaners rely on is the high-pressure steam cleaner. Steam cleaning offers a chemical-free solution that effectively loosens and dissolves dirt, grime, and stubborn stains. The high temperature and pressure enable the steam to penetrate deep into the grout, killing bacteria and eliminating allergens. This method is particularly beneficial for households with children and pets, ensuring a safe and eco-friendly cleaning process.

Rotary Scrubbers

For deeply embedded stains, rotary scrubbers are indispensable. These machines feature rotating brushes that agitate the surface of the grout, breaking up entrenched grime. When used in tandem with a cleaning solution, rotary scrubbers can dramatically reduce the amount of time required to restore grout to its original condition. Professionals often use these scrubbers in commercial cleaning services, where efficiency and thoroughness are paramount.

Ultrasonic Cleaning Devices

In recent years, ultrasonic cleaning technology has emerged as a game-changer in the cleaning industry. Ultrasonic devices emit high-frequency sound waves that generate microbubbles, which collapse upon contact with the grout surface. This phenomenon, known as cavitation, effectively dislodges dirt and contaminants. As a professional grout cleaner, utilizing ultrasonic technology ensures that even the most impervious areas are reached without causing damage to the tiles.

Specialized Cleaning Chemicals

specialized grout cleaning chemicals

Acid-Based Cleaners

Acid-based cleaners are a staple in the professional grout cleaning industry. These potent chemicals are designed to break down mineral deposits, lime scale, and other stubborn residues. While these cleaners are highly effective, they must be handled with care. Professional grout cleaners are trained to apply these solutions in a controlled manner to avoid any damage to the surrounding tiles. Diluted to the appropriate concentration, acid-based cleaners can rejuvenate even the most tired grout.

Enzymatic Cleaners

For those seeking an environmentally friendly alternative, enzymatic cleaners offer a powerful solution. These cleaners work by breaking down organic matter at the molecular level. Professional grout cleaners appreciate the dual benefits of these products: they are safe for indoor use and leave behind a fresh, pleasant scent. Enzymatic cleaners are particularly effective in kitchens and bathrooms, where grease and food particles are common culprits of grout discoloration.

Alkaline Cleaners

Alkaline cleaners serve as another effective option for deep cleaning grout. They work by neutralizing acidic stains and dissolving organic materials that have accumulated over time. In many instances, professional grout cleaners employ a combination of both acid-based and alkaline cleaners to address a wide range of stains and contaminants. The right balance of these solutions ensures optimal cleaning performance without compromising the integrity of the grout.

Techniques for Effective Grout Cleaning

techniques for effective grout cleaning

Pre-Treatment and Stain Analysis

Before any cleaning begins, a comprehensive pre-treatment analysis is conducted. This step is essential to understand the type and extent of staining present on the grout. Professional grout cleaners perform a careful inspection to identify areas with significant buildup, ensuring that the appropriate cleaning agents and tools are selected for the job. This preparatory phase is crucial, as it sets the stage for a successful cleaning outcome.

Application of Cleaning Solutions

Once the analysis is complete, the chosen cleaning solution is applied generously to the affected areas. Depending on the stain’s severity, the solution might be left to sit for several minutes to allow for deep penetration into the porous surface of the grout. This dwell time is critical, as it ensures that even the toughest stains are adequately broken down. In our personal experience, patience during this phase significantly enhances the overall effectiveness of the cleaning process.

Mechanical Agitation

After the cleaning solution has had time to work, mechanical agitation is employed to lift and remove the loosened dirt. Tools such as rotary scrubbers and brushes are commonly used at this stage. The combination of chemical action and mechanical force guarantees that the grout is free of both superficial and deep-seated contaminants. Professional grout cleaners pay close attention to the delicate balance of pressure and movement, ensuring that the grout is not damaged in the process.

Rinsing and Drying

The final step in the cleaning process involves thorough rinsing and drying. Any residual cleaning agents are removed using high-pressure water, ensuring that no chemical traces are left behind. Proper drying is essential to prevent new mold growth and to give the grout a fresh, clean appearance. In professional settings, air blowers or specialized drying equipment may be used to expedite this process, particularly in larger or commercial spaces.

Cost Considerations of Professional Grout Cleaning

professional grout cleaning cost

Pricing Factors

The cost of having grout professionally cleaned can vary significantly based on several factors. These include the size of the area to be cleaned, the severity of the stains, the type of cleaning method used, and geographic location. Typically, professional grout cleaning services are priced competitively, ensuring that homeowners receive value for money. Our personal experience has shown that while the initial investment might seem higher than DIY alternatives, the long-term benefits in terms of durability and cleanliness justify the expense.

Comparing DIY vs. Professional Services

Many homeowners initially consider a DIY approach to grout cleaning. However, the results can often be inconsistent and may even lead to damage if not done correctly. Professional grout cleaners bring expertise, specialized equipment, and high-grade cleaning solutions that ensure a superior finish. When comparing costs, it is important to factor in not only the immediate expense but also the potential for future repairs and replacements due to improper cleaning methods. Our team firmly believes that professional cleaning is an investment that pays off over time.

Environmental and Health Benefits

environmental and health benefits

Reducing Allergens and Bacteria

A clean home is a healthy home. Professional grout cleaning is not just about aesthetics; it also plays a significant role in reducing allergens and bacteria that accumulate in dirty grout. By using advanced cleaning methods and effective solutions, professionals help create a safer environment for everyone. This is particularly important in households with children, elderly individuals, or those with respiratory issues.

Eco-Friendly Cleaning Options

With increasing awareness about environmental sustainability, many professional grout cleaners now offer eco-friendly services. The use of enzymatic and non-toxic cleaning agents has gained popularity, ensuring that while the grout is thoroughly cleaned, the impact on the environment is minimized. This approach reflects a growing trend in the cleaning industry towards more sustainable practices, aligning with broader efforts to reduce chemical usage and promote green living.

Case Studies and Personal Experiences

Residential Renovation Success Stories

We have had the pleasure of witnessing firsthand the transformation that professional grout cleaning can bring to residential properties. In one notable case, a historic home with decades-old grout lines was restored to its original glory after a meticulous cleaning process. The homeowner was amazed at the dramatic improvement, noting that the tiles looked as good as new. These success stories are a testament to the power of using the right tools and techniques.

Commercial Projects and High-Traffic Areas

In commercial settings, the stakes are even higher. High-traffic areas such as hotel lobbies, restaurants, and office spaces require regular maintenance to uphold hygiene standards. Our personal experience in handling large-scale projects has shown that professional cleaning not only improves the visual appeal but also contributes to a healthier environment by reducing bacterial load. The investment in professional services is well justified by the enhanced safety and longevity of the surfaces.

Frequently Asked Questions (FAQs)

Q1. How to clean grout without damaging it?

Use warm water + mild dish soap and a soft brush to gently scrub grout, then wipe clean.
For stains, apply baking soda paste with a little vinegar, scrub lightly, and rinse—avoid harsh chemicals or hard brushes.

Q2. How much does it cost to have grout professionally cleaned?

The cost varies based on several factors including the size of the area, severity of staining, and location. Generally, professional grout cleaning services are competitively priced and offer value over time when compared to the potential costs of damage from DIY cleaning.

Q3. What do professionals use to remove grout?

When it comes to removing or repairing grout, professionals often use tools like grout saws, oscillating tools, and specialized removal systems. These tools allow for precision work, ensuring that only the damaged grout is removed without harming the surrounding tiles.

Q4. Is professional grout cleaning worth it?

Absolutely. While DIY methods can sometimes yield acceptable results, the expertise, equipment, and high-grade chemicals used by professional grout cleaners provide a superior outcome. Professional cleaning not only rejuvenates your surfaces but also helps in maintaining a healthier environment by reducing allergens and bacteria.

Conclusion

In summary, professional grout cleaning is an essential service for anyone looking to maintain a beautiful, hygienic home or commercial space. The specialized equipment, innovative techniques, and advanced cleaning solutions that professionals use ensure that every inch of grout is thoroughly cleaned, offering both aesthetic and health benefits. Our extensive experience in this field reinforces that investing in professional services is not merely a luxury—it is a necessary step toward preserving the integrity and longevity of your tiled surfaces.

A Comprehensive Guide to Removing Dried Grout from Textured Tiles

Published: March 11, 2025

When it comes to removing dried grout from textured tiles, we understand the challenge that homeowners and professionals face every day. In our extensive experience, achieving a flawless tile surface is not just about aesthetics—it’s about ensuring longevity and proper maintenance of your tiles. In this guide, we outline a step-by-step approach that makes removing dried grout from textured tiles both effective and safe. We will also cover how to get dried grout off tile without compromising the integrity of your tile surface.

Understanding the Challenge of Dried Grout on Textured Tiles

Textured tiles add a unique visual appeal to any space, but they can also trap dried grout in their contours. Dried grout that has not been properly removed can lead to a discolored, uneven appearance and may even compromise the longevity of your tiles. It is essential to address this issue promptly and with the correct techniques. The inherent grooves and ridges of textured tiles make cleaning more complex than standard flat surfaces. Our approach is designed to simplify this process while ensuring no damage is done to your tiles.

Why Dried Grout Needs Special Attention

Dried Grout Needs Special Attention

When grout dries on textured surfaces, it becomes incredibly stubborn. Dried grout can settle into the crevices and rough surfaces, making it resistant to ordinary cleaning agents. We have discovered that the key to effective removal lies in softening the grout first, thereby reducing the risk of scratching or damaging the tile surface. It’s important to note that our techniques are tested and proven by professionals who work on a daily basis with various tile finishes.

Preparation: Choosing the Right Solution

Before you start the process of removing dried grout from textured tiles, it is crucial to choose the correct solution. Our experience shows that natural solutions are both effective and safe for most tile surfaces. Here are some of our preferred methods:

  • Sugar Water: A 50/50 mixture of water and sugar can gently soften the grout without harsh chemicals. The sugar works as a mild abrasive and helps in breaking down the grout’s bonds.
  • Vinegar: Applying straight vinegar or a 1:1 vinegar-to-water solution is another highly effective method. The acidic nature of vinegar helps to dissolve the dried grout, making it easier to remove.
  • Lemon Juice: Fresh lemon juice, applied directly, offers a natural way to cut through the grout. Its acidity works similarly to vinegar, but with a pleasant natural scent.

By choosing one of these natural solutions, we ensure that our method remains both effective and environmentally friendly. The next step is to prepare the tile surface by ensuring it is clean and free from loose debris.

Step-by-Step Process to Remove Dried Grout

Remove Dried Grout

1. Soaking the Grout

Preparing the Solution:
Begin by mixing your chosen solution—be it sugar water, vinegar, or lemon juice—in a spray bottle or bowl. For example, if using vinegar, mix it with an equal amount of water to create a balanced solution that is strong enough to soften the grout but gentle on your tiles.

Application:
Generously apply the solution directly onto the dried grout. It is important that the solution seeps into the grout lines. We recommend letting the solution sit for 10-20 minutes to allow it to penetrate deeply. This step is crucial for removing dried grout from textured tiles as it softens the dried materials, making the next steps more efficient.

2. Removing the Softened Grout

After the soaking period, the grout will begin to loosen, allowing you to remove it with the proper tools.

Tools to Consider:

  • Grout Saw: This is an essential tool for removing dried grout from textured tiles. Its precision allows you to carefully scrape away grout without damaging the tile.
  • Grout Scraper: A scraper with a plastic handle provides control and minimizes the risk of scratching your tile surface.
  • Razor Blade Scraper: For more stubborn spots, a 6-8 inch razor blade scraper can be used cautiously.
  • Oscillating Multi-tool: With the appropriate grout removal attachment, this tool can make the process faster and more efficient when used correctly.

Method:

  • Work in small sections to ensure control and precision.
  • Use the scraper or saw to gently remove the grout. The key here is to apply steady, gentle pressure. Avoid using excessive force as it may lead to tile damage.
  • If needed, reapply the solution and let it sit for an additional 10 minutes on particularly stubborn areas.
  • Continuously wipe the area with a damp cloth or sponge to remove any loosened grout and monitor your progress.

3. Addressing Grout Haze

Even after the grout is removed, a residual grout haze may remain on the tile surface. This haze not only affects the appearance of your tiles but may also lead to further cleaning challenges.

Removing Grout Haze:

  • Mix a solution of vinegar and water (1:1 ratio) and apply it over the affected area.
  • Allow it to sit briefly before wiping it off with a clean, dry cloth.
  • For stubborn haze, repeat the process until the tile surface is completely free of any residue.

Safety and Best Practices

While our methods are straightforward, we emphasize the importance of safety precautions during the process:

  • Wear Protective Gear: Always use gloves and protective eyewear when handling acidic solutions like vinegar or lemon juice.
  • Test in a Small Area: Before applying any solution to the entire surface, test it on a small, inconspicuous area of the tile to ensure there is no adverse reaction.
  • Proper Ventilation: Make sure the area is well-ventilated, especially if you are using vinegar, to avoid inhaling strong fumes.
  • Tool Maintenance: Regularly inspect and maintain your tools to ensure they remain effective and do not cause unnecessary damage.

Personal Experience: Our Journey with Textured Tile Restoration

Textured Tile Restoration

In our experience, removing dried grout from textured tiles is a process that requires patience and attention to detail. We recall a project where a client had newly installed textured tiles marred by excess grout. Initially, the dried grout had settled into every crevice, detracting from the overall look of the space. Using our recommended methods, we applied a vinegar solution, allowed it to penetrate, and then carefully removed the softened grout with a grout saw and scraper. The transformation was remarkable—the tiles regained their original beauty, and the client was thrilled with the result.

What we learned from this project is that how to get dried grout off tile successfully hinges on taking the time to properly prepare and work with the materials. Our step-by-step approach not only restored the visual appeal of the tiles but also extended their lifespan by preventing the buildup of harsh residues that can degrade tile surfaces over time.

Additional Tips for a Flawless Finish

  • Consistent Maintenance: Regular cleaning and maintenance can prevent grout from drying and hardening excessively.
  • Use Quality Tools: Investing in high-quality tools can make the removal process smoother and reduce the risk of accidental damage.
  • Seek Professional Advice: For larger or more complicated projects, don’t hesitate to consult with a tile restoration specialist who can provide tailored recommendations.
  • Follow Up with Sealant: Once the grout is removed and the tiles are cleaned, consider applying a sealant to protect both the grout and the tile surface from future issues.

Advanced Techniques for Stubborn Grout

Techniques for Stubborn Grout

For particularly challenging situations where conventional methods fall short, we have found that combining manual tools with modern power tools can yield excellent results. An oscillating multi-tool with a grout removal attachment allows for more precision and speed. However, it is important to use such tools with caution and only if you have experience or proper guidance, as they can be more aggressive than manual methods.

The Impact of Proper Grout Removal on Home Aesthetics

By focusing on removing dried grout from textured tiles correctly, homeowners not only improve the appearance of their living spaces but also add value to their properties. Clean, well-maintained tiles create a sense of order and professionalism that is noticeable at first glance. We have witnessed numerous transformations where spaces became significantly brighter and more inviting after a thorough grout removal process. Whether it is a kitchen backsplash, a bathroom wall, or a decorative tiled floor, the meticulous removal of dried grout ensures that every tile can shine in its best condition.

Frequently Asked Questions (FAQs)

1. What is the best solution for removing dried grout from textured tiles?

We have found that natural solutions such as sugar water, vinegar, or lemon juice work exceptionally well. These solutions soften the dried grout without causing damage to the tile surface, making it easier to remove.

2. How long should the solution be left on the grout?

Typically, we recommend allowing the solution to sit on the dried grout for about 10-20 minutes. This gives the solution enough time to penetrate and soften the grout effectively.

3. What tools are most effective for this task?

For removing dried grout from textured tiles, the tools that we prefer include a grout saw, a grout scraper with a plastic handle, and, for stubborn areas, a razor blade scraper. An oscillating multi-tool with a grout removal attachment can also be effective for faster results.

4. How do I get dried grout off tile without damaging the surface?

The key is to soften the grout first using a natural solution and then use gentle, controlled scraping techniques. Always work in small sections and avoid applying too much pressure, which minimizes the risk of scratching the tiles.

5. How can I remove any remaining grout haze after cleaning?

If a haze persists, we recommend using a vinegar and water solution (in a 1:1 ratio) and wiping the tiles with a clean, dry cloth. Repeating the process as necessary will remove any remaining residue and restore the tile’s natural shine.

Conclusion

In conclusion, our detailed guide on removing dried grout from textured tiles provides a reliable, step-by-step approach that balances effectiveness with safety. From choosing the right natural solution to the careful use of tools, our techniques ensure that your tiles remain pristine and damage-free. We believe that by following these methods, you will not only achieve a superior finish but also extend the lifespan of your tiles. Our personal experience underscores the importance of precision and patience in every step of the process. We are confident that our guide will serve as a valuable resource for anyone looking to restore the beauty of their textured tiles without compromise.