

Published: February 25, 2025

By Jack Martin — Grout & Tile Cleaning Specialist, 10+ years testing grout cleaning methods, 500+ products personally tried.
I've mixed more bags of grout than I can count, and the ones that failed early almost never failed because of a bad product — they failed because of how they were mixed, applied, or cured. Grout looks like a simple paste you smear between tiles, but underneath that simplicity is a real chemical process, and understanding it is the difference between grout that holds up for fifteen years and grout that's cracking within eighteen months. This guide breaks down exactly what makes grout strong, what weakens it, and what I actually do differently on jobs where I want the grout to last.
What Is Grout Made Of?
At its core, grout is a mixture of cement, sand, and water, though most modern formulas add polymers and other additives to improve performance. Its job is to fill the gaps between tiles, lock the whole installation together, and keep moisture, dirt, and staining agents from working their way underneath the tile. Not all grout is built the same way, and picking the wrong type for a job is one of the most common reasons I see grout fail early.
Manufacturers also mix in coloring pigments, and on some formulas, anti-microbial agents that slow mold and mildew growth in damp areas like showers. None of these extras change the basic chemistry underneath — the cement is still what does the structural work — but they do affect how the grout looks and behaves day to day. A lot of homeowners assume grout and mortar are the same thing because they're both cement-based, but they serve completely different jobs. Mortar bonds the tile to the substrate underneath it; grout only fills and seals the joints between tiles once the mortar has already cured. Mixing the two up, or trying to use one in place of the other, is a mistake I still see on occasion, and it never ends well structurally.
Grout Types Compared
How the three main grout types stack up against each other
| Type | Made Of | Strength | Best For |
|---|---|---|---|
| Cementitious | Portland cement, sand, additives | Moderate — needs sealing | Standard residential/commercial tile |
| epoxy grout | Resin and hardener | Very high, stain-resistant | Kitchens, showers, industrial floors |
| Urethane | Pre-mixed, flexible polymer blend | High flexibility, crack-resistant | High-moisture areas, no sealing needed |
Cementitious grout is what most homeowners have in their bathrooms and kitchens — it's affordable and easy to work with, but it needs sealing to hold up against moisture and staining. Epoxy grout costs more, but in my testing it's the toughest option by a wide margin — I've used it in commercial kitchen installs where cement-based grout simply wouldn't survive the grease and chemical exposure. Urethane grout is the newer option on this list, and it's become my go-to recommendation for anyone who wants strong, flexible grout without the sealing maintenance.
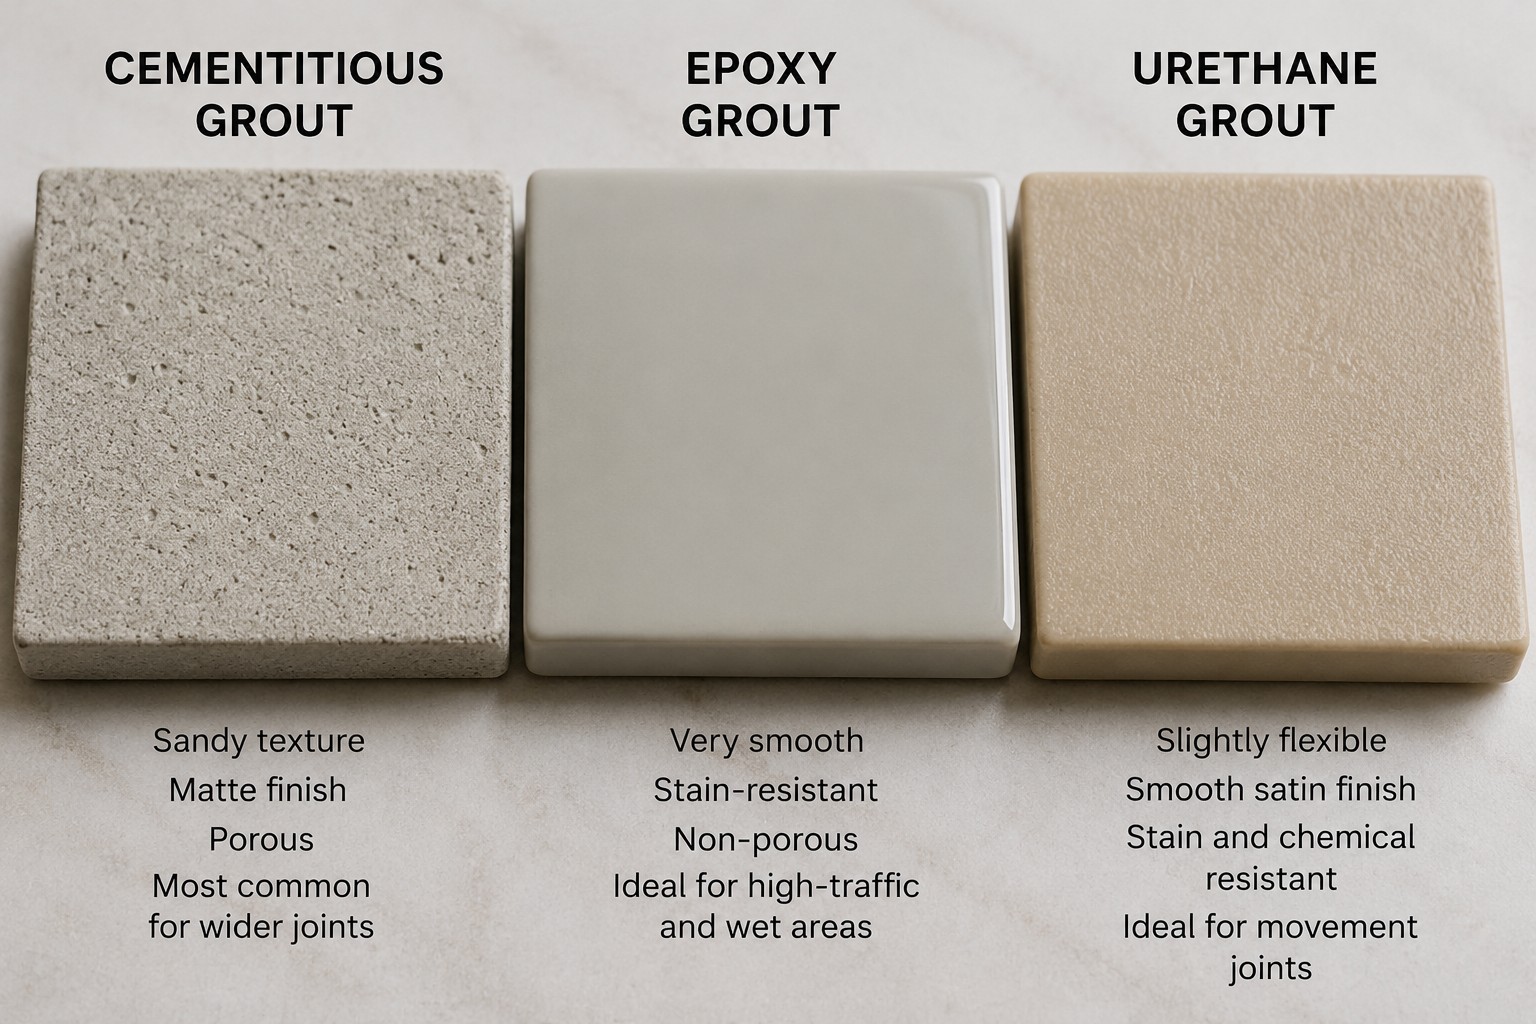
Cementitious, epoxy, and urethane grout side by side — texture and finish differ noticeably by type.
The Chemistry Behind Grout Strength
Grout doesn't get hard just because it dries out — it gets hard through a chemical reaction called hydration. When water hits cement, it reacts with calcium silicates inside the cement to form calcium silicate hydrate, usually shortened to C-S-H gel. That gel is what actually binds the sand and cement particles into a solid mass. The slower and more complete this reaction is, the denser and stronger the finished grout becomes.
This is why rushing a grout job almost always backfires. I've seen plenty of grout that looked perfectly fine the day it was installed, only to start crumbling months later because the hydration process never had the time or moisture it needed to finish properly.
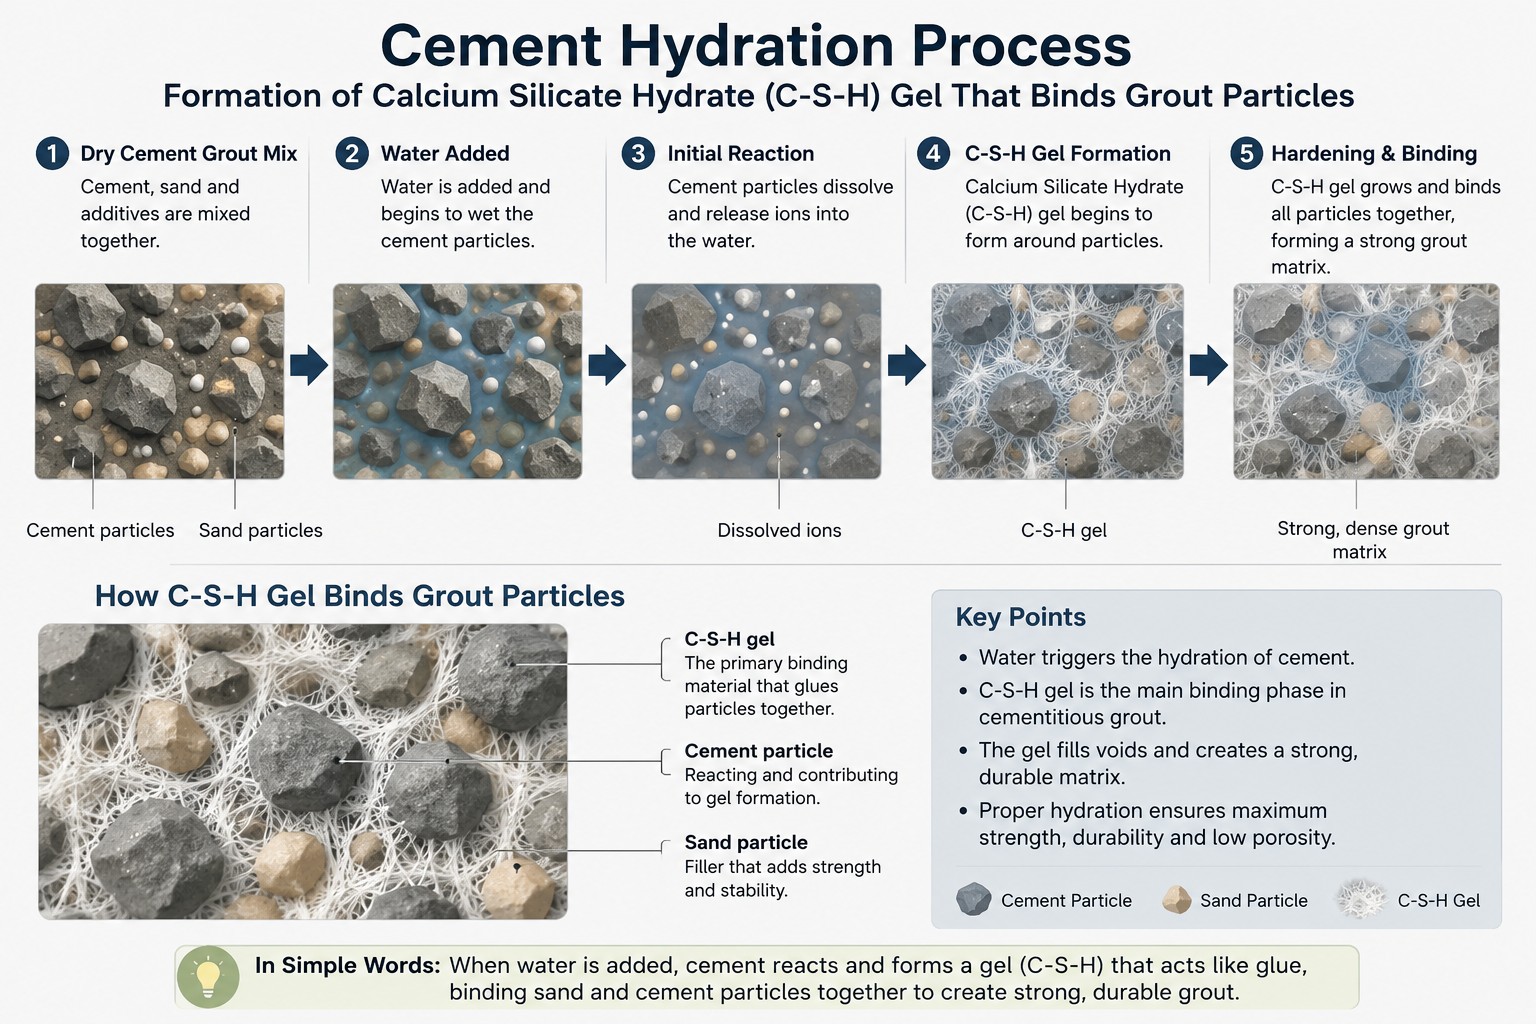
Hydration is a chemical reaction, not simple drying — rushing it leaves grout weaker long-term.
Why Sand Matters More Than People Think
Sand isn't just filler. In sanded grout — which is used for joints wider than about 1/8-inch grout lines — sand plays a structural role. It reduces shrinkage as the grout cures, improves compressive strength, and helps prevent the fine cracking that shows up in wide joints filled with unsanded product. Unsanded grout, on the other hand, is reserved for narrow joints and delicate surfaces like glass tile, where sand particles would scratch the tile edges during application.
Using the wrong one for the joint width is a mistake I still see on plenty of DIY jobs — sanded grout in a hairline glass tile joint, or unsanded grout packed into a wide floor joint where it just isn't strong enough to hold up.
Polymer Additives and Flexibility
Most grout sold today isn't pure cement and sand anymore — it includes polymer additives like latex or acrylic. These additives improve adhesion to the tile, boost water resistance, and — this is the part that matters most in my experience — give the grout enough flexibility to handle the tiny expansion and contraction that happens as temperatures shift throughout the year. Rigid, polymer-free grout has nowhere to go when the substrate moves slightly, so it cracks. Polymer-modified grout flexes instead, which is a big part of why modern grout tends to outlast older formulations.
The Water-to-Cement Ratio Problem
This is the single most common mixing mistake I run into. Adding too much water makes grout easier to spread, but it also creates excess voids inside the cured grout and dilutes the hydration reaction, leaving you with a weaker, more porous result. Too little water goes the other direction — the mix becomes difficult to work with and never fully hydrates either, since there isn't enough water present for the reaction to complete. The right ratio isn't about what feels easiest to apply; it's about following the manufacturer's mixing instructions closely, even when a slightly wetter mix would be more convenient to work with.
Curing Time and Conditions
Grout needs time to reach its full strength, and the conditions during that window matter as much as the mix itself.
- Humidity: Higher humidity slows drying and actually helps the grout hydrate more completely.
- Temperature: Extreme heat or cold can cause grout to dry too fast or stay too soft, both of which weaken the final result.
- Sealing timing: Sealing too early traps moisture inside before curing finishes; sealing too late leaves grout exposed to staining it didn't need to face.
I always tell people to resist walking on freshly grouted floors or running water over fresh shower grout for at least the manufacturer's stated cure window — usually 48 to 72 hours. Cutting that short is one of the fastest ways to undo an otherwise solid mix.
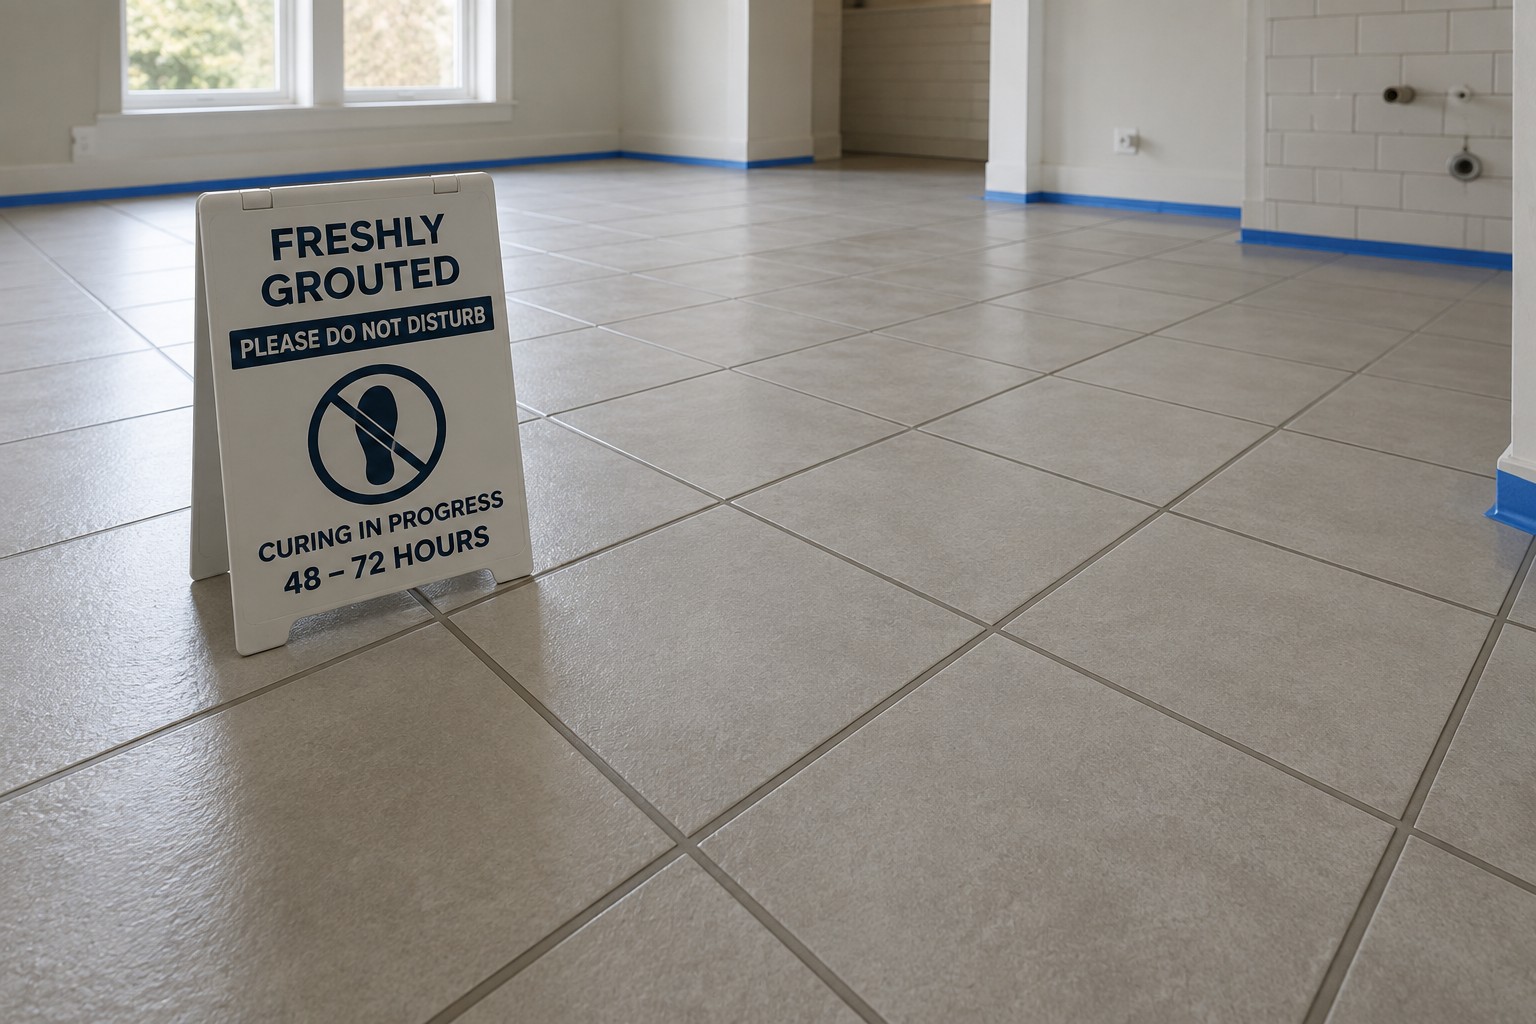
Giving grout its full cure window before foot traffic or water exposure protects the strength it's still building.
What Wears Grout Down Over Time
Even a strong, properly cured grout job doesn't stay strong forever without some help. Three things drive most of the long-term wear I see:
- Environmental exposure — repeated moisture contact, temperature swings, and harsh cleaning chemicals all chip away at grout's integrity over time.
- Installation quality — inconsistent application, air pockets, and mixing errors show up as weak spots years down the line, not immediately.
- Maintenance habits — skipping sealing, using acidic cleaners, and ignoring small cracks until they spread all shorten grout's working life.
Of the three, environmental exposure is the one most homeowners underestimate. A shower gets soaked with water almost daily, and if that grout isn't sealed or isn't a moisture-resistant type to begin with, it's absorbing a small amount of water every single time — which gradually breaks down its structure from the inside, long before any cracking shows up on the surface. Temperature swings work more slowly but just as steadily; every expansion and contraction cycle puts tiny amounts of stress on the grout, and over years, that stress finds the weakest points in the mix and turns them into visible cracks.
Installation quality is the sneaky one, because a poorly mixed or poorly applied grout job can look completely fine for the first year or two. Air pockets left behind during application don't cause problems immediately, but they become the exact spots where cracks start once the grout faces real stress from foot traffic or moisture. This is part of why I always tell people that a grout job's real test isn't how it looks the week it's installed — it's how it looks five years later.
How I Make Grout Stronger on Every Job
These are the practices I actually follow when I want grout to hold up for the long haul:
- Follow the manufacturer's water-to-cement ratio exactly rather than eyeballing it
- Add a polymer-modified formula when flexibility matters, especially over larger tile or subfloors that shift slightly
- Seal cementitious grout once it's fully cured, and reseal on a regular schedule
- Give grout its full cure time before exposing it to water or heavy foot traffic
- Switch to epoxy or urethane grout in kitchens, showers, and other high-moisture, high-traffic areas
Mistakes That Quietly Weaken Grout
Most grout failures I've been called in to look at trace back to one of these mistakes, and almost none of them are obvious the day the work is finished — they show up months or years later as cracking, crumbling, or staining that won't lift no matter how hard you scrub.
- Mixing by feel instead of by measurement — a "looks about right" water ratio is where most weak grout starts
- Grouting over dusty or damp tile — poor surface prep undermines adhesion no matter how good the mix is
- Walking on grout before the cure window ends — this interrupts hydration before it's finished
- Skipping sealer on cementitious grout — leaves it exposed to staining and moisture absorption from day one
- Using harsh acidic cleaners on a regular basis — these slowly break down cured grout's surface over months of use
Frequently Asked Questions
What makes grout stronger?
Grout strength comes from a combination of cement content, the sand-to-cement ratio, the water-to-cement ratio, and proper curing conditions. Polymer additives and correct mixing technique push that strength even further.
Why do some contractors skip sealing grout?
Epoxy and urethane grouts don't require sealing at all, and some contractors treat sealing cementitious grout as an optional extra step. I don't recommend skipping it — sealing meaningfully extends how long cement-based grout resists moisture and staining.
What is the toughest type of grout?
Epoxy grout is the toughest option available, with strong resistance to stains, chemicals, and moisture, which is why it shows up so often in commercial kitchens and industrial settings.
What can I add to grout to make it stronger?
Latex or acrylic polymer additives, the correct sand-to-cement ratio, and full, unrushed hydration all improve grout strength. For the highest durability ceiling, an epoxy-based grout is the strongest option overall.
How long does grout take to fully cure?
Grout is typically dry to the touch within 24 hours, but it doesn't reach full strength until it fully hydrates, which usually takes 48 to 72 hours depending on humidity and temperature. I always wait out the manufacturer's full cure window before sealing or exposing grout to water.
Does grout color affect its strength?
No — coloring pigments are added for appearance and don't change the underlying cement chemistry that gives grout its strength. Strength comes from the cement-to-sand-to-water ratio and curing process, not the color.
Final Thoughts
Grout strength isn't random, and it isn't just about buying a premium bag off the shelf. It comes down to chemistry — hydration, sand ratio, polymer content, water ratio, and curing conditions all working together. Get those right, and grout holds up for well over a decade. Rush any one of them, and even the best grout on the market will crack or crumble ahead of schedule. Whether you're working with cementitious, epoxy, or urethane grout, the fundamentals I've covered here are what separate a grout job that lasts from one that needs redoing in a year or two.