
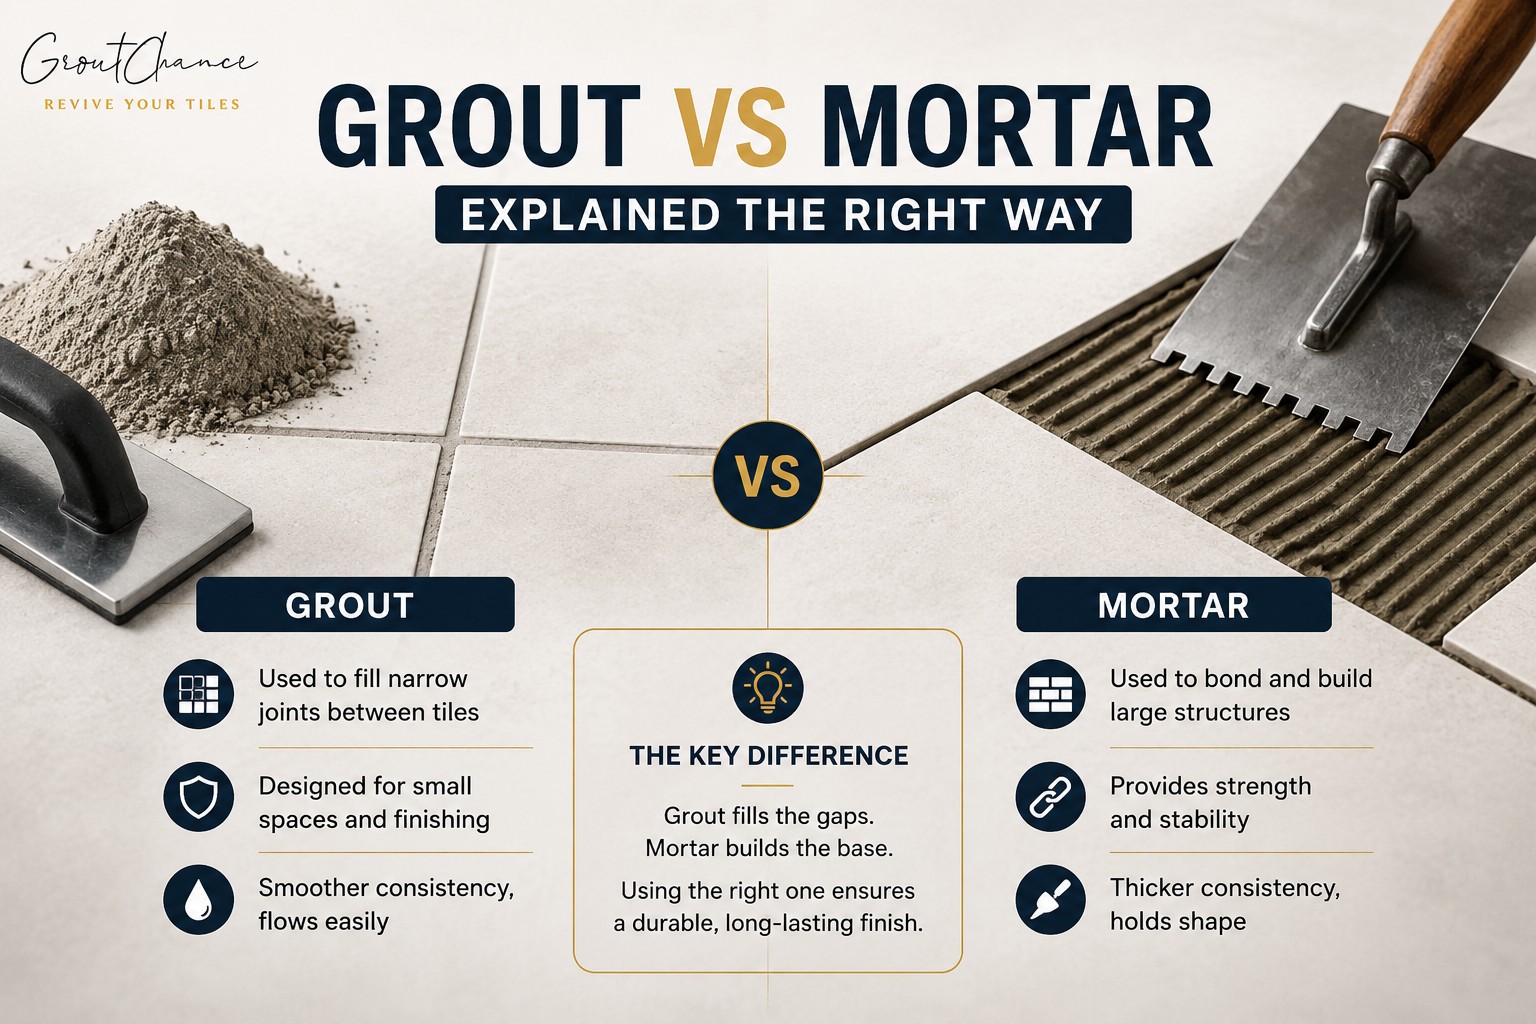
If you’ve ever stared at two bags at the hardware store — one labeled grout, one labeled mortar — and guessed which one to buy, you’re not alone. Millions of homeowners make this exact mistake every year, and it costs them time, money, and a whole lot of frustration.
Here’s the short answer: mortar holds tiles in place. Grout fills the gaps between them. They look similar, they’re sold side by side, but using one where the other belongs can crack your tiles, weaken your floors, and ruin a perfectly good weekend project.
This guide breaks it all down — no contractor jargon, no fluff — so you know exactly what to grab the next time you walk into Home Depot.
What Is Mortar? (And What Is It Actually For?)
Mortar is an adhesive mixture — typically made of cement, sand, and water — used to bond tiles to a surface. Think of it as the glue underneath your tile. It grips the tile from below and holds it firmly to the floor, wall, or countertop.
There are a few common types you’ll see on shelves:
- Thinset mortar — The most popular choice for tile installation. It’s a cement-based adhesive mixed with fine sand and a water-retention agent. Works great on floors, showers, and backsplashes.
- Medium-bed mortar — A thicker version of thinset, used for large-format tiles (12×24 or bigger) where you need more support beneath the tile.
- Epoxy mortar — A heavy-duty, chemical-resistant option used in commercial kitchens, hospitals, and industrial spaces. It’s harder to work with but incredibly durable.
- Mastic — An organic, premixed adhesive that’s easy to apply but not suitable for wet areas like showers. Best for dry wall tiles only.
When to use mortar:
- Setting floor tiles in a bathroom or kitchen
- Installing backsplash tiles on a wall
- Laying tiles in a shower or tub surround
- Any project where the tile needs a strong bond to the substrate
What Is Grout? (And Why Can’t You Skip It?)
Grout is a filler material used to seal the joints between tiles once they’re set. After your mortar cures and the tiles are locked in place, grout goes into those narrow gaps to protect the substrate from moisture, dirt, and debris.
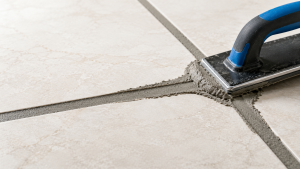 Grout also gives your tile installation a finished, polished look. Without it, you’d have open joints that collect grime and allow water to seep underneath the tiles — leading to mold, cracking, and eventual failure.[/caption]
Common types of grout include:
- Sanded grout — Contains fine sand particles. Used for joints wider than 1/8 inch. Stronger and more resistant to cracking in wider gaps.
- Unsanded grout — Smooth consistency, used for narrow joints (less than 1/8 inch). Common in wall tiles and delicate surfaces like polished marble.
- Epoxy grout — Highly stain-resistant and waterproof. Ideal for kitchen countertops, showers, and commercial spaces. Pricier but nearly maintenance-free.
- Furan grout — Industrial-grade, chemical-resistant grout used in labs and factories. Rarely seen in residential projects.
When to use grout:
- Filling joints between floor or wall tiles
- Sealing gaps in a shower or tub surround after tiles are set
- Finishing a backsplash installation
- Regrouting old, cracked, or discolored tile joints
Grout vs Mortar: Side-by-Side Comparison
| Feature | Mortar | Grout |
|---|---|---|
| Primary purpose | Bonds tile to surface | Fills gaps between tiles |
| Applied | Under the tile | Between the tiles |
| Contains sand? | Yes (usually) | Depends on type |
| Waterproof? | No — needs sealing | Epoxy types are |
| Flexible? | No | Slightly |
| Color options | Limited (gray/white) | Wide variety |
| Curing time | 24–48 hrs | 24–72 hrs |
| Replaces the other? | Never | Never |
The #1 Mistake DIYers Make
The most common error? Using mortar to fill grout lines — or worse, skipping grout altogether because the joints look “sealed enough” after tiling.
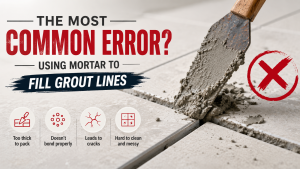
Here’s why that’s a problem:
- Mortar is not flexible. Grout joints need a slight amount of give to handle temperature changes and movement in the subfloor. Mortar in the joints cracks quickly.
- Mortar doesn’t come in finish colors. Your tile job will look unfinished and amateurish.
- Open joints without grout allow moisture to travel under tiles, weakening the mortar bond and eventually causing tiles to pop up or crack.
The fix is simple: always use mortar beneath, always use grout between. No exceptions.
How to Use Mortar Correctly: Step-by-Step
- Mix your thinset — Follow the bag instructions. It should be the consistency of peanut butter — not too runny, not too stiff.
- Back-butter large tiles — For tiles bigger than 8×8, apply a thin layer of mortar to the back of the tile in addition to the floor. This prevents hollow spots.
- Use a notched trowel — The ridges create suction and better adhesion. Use a 1/4″ V-notch for small tiles, 1/2″ square notch for larger formats.
- Press and twist — Set the tile with a slight twisting motion to collapse the ridges and achieve full coverage.
- Check coverage — Lift a tile after setting to confirm at least 95% mortar coverage on the back (80% in dry areas).
- Let it cure — Wait a full 24–48 hours before grouting. Walking on it too soon shifts tiles and breaks the bond.
How to Use Grout Correctly: Step-by-Step
- Remove spacers — Pull out all tile spacers before grouting.
- Mix your grout — Powder grout should reach a smooth, lump-free consistency. Premixed grout is ready to go.
- Apply with a float — Use a rubber grout float held at a 45-degree angle. Work diagonally across the joints to pack them fully.
- Don’t over-water — Excess water weakens grout. Use a damp (not wet) sponge for cleanup.
- Clean in stages — Wipe once to remove excess, wait 15–20 minutes, then wipe again to remove the haze.
- Seal it — Most cement-based grouts need a penetrating sealer applied 72 hours after curing to prevent staining.
LSI Terms You’ll See at the Store (Explained Simply)
- Substrate — The surface underneath your tile (cement board, drywall, plywood)
- Thinset — Another name for cement-based tile mortar
- Grout float — The rubber-faced tool used to press grout into joints
- Grout haze — The white film left on tiles after grouting; removed with a damp sponge
- Back-buttering — Applying mortar to the back of a tile for better coverage
- Lippage — When tile edges are uneven, causing a tripping hazard
- Penetrating sealer — A liquid applied to grout after curing to block moisture and stains
- Open time — How long mortar or grout stays workable after mixing
Grout and Mortar for Specific Projects
Bathroom Floor
Use thinset mortar on cement board substrate. Choose sanded grout for joints over 1/8 inch. Seal grout every 1–2 years.
Kitchen Backsplash
Use thinset or mastic (dry walls only). Choose unsanded grout for subway tiles with tight 1/16 inch joints. Epoxy grout is worth the extra cost here — kitchens get splattered.
Shower Walls and Floor
Always use thinset mortar — never mastic in wet areas. Use epoxy grout or heavily sealed cement grout. Consider schluter strips at corners instead of grout to prevent cracking.
Outdoor Patio Tiles
Use medium-bed mortar for large pavers. Use sanded grout or polymeric sand for wider joints. Freeze-thaw cycles are brutal — choose a flexible, frost-rated mortar.
Pool Tiles
Requires white epoxy mortar and epoxy grout — both must be rated for submerged, chemical-treated water. Standard products will fail within a season.
Pro Tips from Tile Contractors
- Don’t mix too much at once. Mortar has a 30–60 minute open time. Mix small batches to avoid waste.
- Temperature matters. Don’t tile in temps below 50°F or above 95°F. Mortar won’t cure properly at extremes.
- Let the substrate dry. New concrete needs 28 days to fully cure before tiling over it.
- Grout color changes when wet. Test your grout color on a scrap tile and let it dry fully before committing.
- Map your layout first. Dry-lay tiles across the floor before mixing mortar. Adjust to avoid tiny slivers at edges.
- Buy 10% extra. Always order 10% more tile than your square footage — for cuts, breakage, and future repairs.
FAQ: Grout vs Mortar
Q: Can I use grout instead of mortar to set tiles?
No. Grout has no adhesive properties. It will not bond tiles to a surface. Tiles set with grout will come loose within days.
Q: Can I use mortar to fill grout lines?
You shouldn’t. Mortar lacks the flexibility and finish quality of grout. It will crack in the joints and look unprofessional.
Q: How long should I wait before grouting after tiling?
At minimum 24 hours for standard thinset, 48 hours in cold or humid conditions. Check the mortar bag for manufacturer recommendations.
Q: Is grout waterproof?
Standard cement grout is not waterproof on its own — it’s porous and needs a penetrating sealer. Epoxy grout is waterproof and stain-resistant without sealing.
Q: What happens if grout cracks?
Cracked grout usually means the substrate moved, the grout joint was too wide for unsanded grout, or mortar got into the grout joint. Chip out the cracked grout with a grout saw and regrout that section.
Q: How often should I reseal grout?
In high-traffic areas like kitchen floors, seal every 12 months. In low-traffic areas, every 2–3 years is fine. Shower grout should be sealed annually.
Q: Can I tile over existing grout?
Generally no. Old grout creates an uneven, weak surface for new tile. It’s best to remove old tiles and start fresh on the substrate.
Q: What’s the difference between thinset and mastic?
Thinset is cement-based and works in wet and dry areas. Mastic is an organic premix for dry areas only — it softens when wet and causes tiles to slide or pop off.
Conclusion: The Rule Is Simple — Mortar Below, Grout Between
There’s no mystery here once you understand what each product is actually designed to do. Mortar is your bond. Grout is your finish. They work together as a team — one is useless without the other, and neither can do the other’s job.
Before your next tile project, ask yourself two questions:
- Am I sticking something down? → Reach for mortar.
- Am I filling a gap between tiles? → Reach for grout.
Get those two right and you’re already ahead of half the DIYers who walk into the tile aisle. Take it one step further by matching the specific type — thinset vs mastic, sanded vs unsanded, cement vs epoxy — to your project conditions, and your tile work will last decades.
When in doubt, consult the tile manufacturer’s installation guide. They test their tiles with specific mortar and grout systems, and following their recommendations protects your warranty and your investment.