

Why a Quality Grout Removal Blade Matters
Removing grout can be a tedious, time-consuming task—especially if you’re wrestling with hardened, discolored joints between tiles. That’s why choosing the right grout removal blade from the get-go makes all the difference. Not only does a high-quality blade speed up the process, but it also minimizes tile damage, dust, and fatigue. Whether you’re a DIY homeowner or a seasoned tiler, investing in the proper blade pays dividends in precision, efficiency, and end-result beauty.
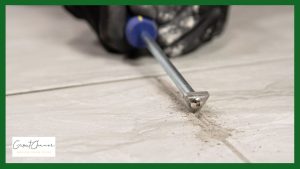
Understanding Grout and Its Composition
Types of Grout
Sanded Grout: Mixed with fine sand; ideal for wider joints (1/8″–½”).
Unsanded Grout: No sand, smoother finish; best for narrow joints (<1/8″).
Epoxy Grout: Exceptionally durable and stain-resistant, but harder to remove.
How Grout Bonds with Tile
Grout seeps into tiny gaps and cures into a hard matrix, creating strong adhesion. Over time, wear and moisture cause cracking and discoloration, necessitating removal and replacement.
Types of Grout Removal Blades
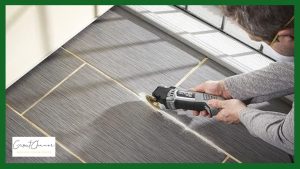
Carbide-Tipped Blades
Pros: Aggressive cutting, long life.
Cons: Can be overkill for delicate tiles.
Diamond-Grit Blades
Pros: Smooth action, excellent for harder grouts.
Cons: Pricier upfront.
Multi-Purpose Blades
Pros: Versatile; handle grout, mortar, and light tile removal.
Cons: Sacrifice some specialized performance.
Key Features to Look for in a Grout Removal Blade
Blade Material & Durability: Carbide vs. diamond grit—choose based on grout hardness.
Teeth Count & Shape: Higher tooth count equals smoother cuts; unique shapes resist clogging.
Tool Compatibility: Ensure blade fits your oscillating tool or rotary cutter snugly.
Power Tools vs. Manual Tools: Pros and Cons
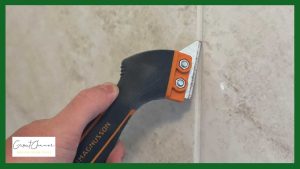
Oscillating Multi-Tools
Pros: Precise, low-vibration; ideal for small areas.
Cons: Slower on really tough grout.
Rotary Tools
Pros: High RPM for quick removal.
Cons: More dust; higher risk of tile nicking.
Manual Grout Saws
Pros: Zero power needed; ultimate control.
Cons: Labor-intensive; slower progress.
Step-by-Step Guide: Using a Grout Removal Blade Safely
Prep & Protection: Wear safety goggles, dust mask, and gloves; tape surrounding tiles.
Blade Installation & Settings: Secure blade per tool instructions; start at low speed to gauge feed.
Proper Cutting Technique: Move steadily along grout lines—avoid tilting blade into tile.
Clean-Up & Disposal: Vacuum debris; inspect lines before installing new grout.
Common Mistakes and How to Avoid Them
Applying Too Much Pressure: Let the blade do the work—excess force causes chatter and chip-outs.
Wrong Blade Choice: Match blade type to grout composition to preserve blade life.
Ignoring Safety Precautions: Always use protective gear to prevent inhalation of silica dust and eye injuries.
Maintenance Tips to Extend Blade Life
Cleaning After Use: Brush away grout particles; wipe with a soft cloth.
Storage Recommendations: Store dry in original packaging or blade case.
When to Replace: If cutting slows or edges appear rounded, swap in a fresh blade.
Comparing Top Brands of Grout Removal Blades
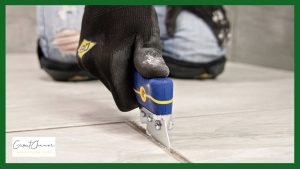
When choosing a grout removal blade, brand reputation, material quality, and intended use all play a role. Below are three popular options and what sets each apart:
Brand A (Carbide-Tipped Series)
• Ideal for: General DIY and light-to-medium grout lines
• Strengths: Aggressive cutting action, long lifespan on standard sanded grout
• Considerations: May wear faster on epoxy grout; best paired with an oscillating multi-toolBrand B (Diamond-Grit Pro Line)
• Ideal for: Professional renovators tackling hard or epoxy grouts
• Strengths: Smooth, even cutting; excels on dense, cured grout; minimal vibration
• Considerations: Higher upfront cost but lower replacement frequencyBrand C (Hybrid Alloy Multi-Purpose)
• Ideal for: Users who need versatility across grout, mortar, and occasional tile trimming
• Strengths: Balanced performance; good edge retention; handles varied materials
• Considerations: Doesn’t match the specialized speed of pure carbide or diamond blades
By focusing on your project’s scope—whether a weekend bathroom touch-up or full-scale kitchen overhaul—you can select the blade that offers the best blend of performance, durability, and value.
Cost Analysis: Is a Premium Blade Worth It?
Initial Investment vs. Long-Term Savings: Higher-end blades cost more but last longer, reducing replacement frequency.
DIY vs. Professional Grade: For occasional home use, mid-range carbide blades suffice. Pro tile installers benefit from diamond grit for heavy daily use.
Environmental and Health Considerations
Dust Control & Respiratory Protection: Use a HEPA-filter vacuum attachment to capture silica dust.
Eco-Friendly Blade Materials: Seek brands that use recycled carbide or responsibly sourced diamonds.
Expert Tips from a Professional Tiler
Insider Tricks for Clean Cuts: Score grout in two perpendicular passes for faster removal.
Time-Saving Shortcuts: Pre-soak grout lines with a grout-softening gel 10 minutes before cutting.
Advanced Techniques: When to Call in the Pros
Large-Scale Renovations: Pro crews use specialized dust-extraction systems and high-capacity oscillating tools.
Specialty Grout Types: Epoxy and urethane grouts often require professional gear for efficient removal.
Conclusion: Achieving Pristine Tile Surfaces with the Right Blade
Selecting and using the right grout removal blade is the cornerstone of any successful tiling renovation. From understanding grout types to wielding an oscillating tool like a pro, these insights help you work smarter—not harder. By integrating the right blade, observing safety best practices, and leveraging expert tips, you’ll achieve beautifully clean grout lines, elevate your tile’s aesthetic, and protect your investment for years to come.
Frequently Asked Questions (FAQs)
Q1. What blade do you use to remove grout?
Typically, a carbide-tipped oscillating blade or diamond-grit blade offers the best mix of speed and durability for most grout types.
Q2. What is the best tool to use to remove grout?
An oscillating multi-tool paired with a grout removal blade is widely considered the most versatile and user-friendly option.
Q3. What is the best way to remove grout?
Combine a grout-softening gel with an oscillating tool at low speed; maintain steady pressure and keep the blade flush with the grout line.
Q4. Can a grout removal blade cut tile?
Yes—a grout removal blade can nick or cut tile if misused. Always keep the blade aligned with the grout line and avoid side-loading.
Q5. Does removing grout damage tiles?
When done correctly—with the right blade, proper speed, and protective measures—tile damage is minimal to none.
Q6. What safety precautions should I take when removing grout?
Wear eye protection, a dust mask (preferably NIOSH-approved), and use dust-extraction attachments on your tool to limit silica dust exposure.