

Integrating radiant heating into tiled floors transforms cold, hard surfaces into warm, inviting spaces. Yet, the often-overlooked component—grout and radiant heating systems—plays a pivotal role in performance and longevity. As seasoned tile installers and home comfort enthusiasts, we’ve learned firsthand that selecting the right grout ensures optimal heat transfer, prevents cracks, and enhances overall aesthetic appeal.

Why Grout Selection Matters for Underfloor Heating Performance
When it comes to grout and radiant heating systems, grout isn’t just filler between tiles. Its thermal conductivity—the ability to conduct heat—directly influences how efficiently warmth travels from the heating mats or cables into the room. Standard cementitious grout can impede heat flow, forcing your heating system to work harder, increasing energy bills, and shortening equipment life.
High-Performance Grout Types
-
Epoxy Grout: Offers superior adhesion, water resistance, and thermal stability. Ideal for wet areas with heated floors.
-
Polymer-Modified Cement Grout: Blends polymers into traditional grout to unlock better flexibility, reduced shrinkage, and improved conductivity.
-
Quick-Setting Grout: Allows for faster installation over heating mats, minimizing downtime and ensuring prompt activation of the radiant system.
How Thermal Conductivity Impacts Heat Distribution
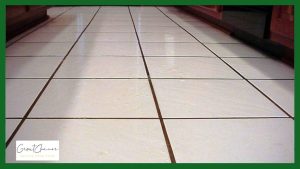
In our experience, grout with low thermal resistance maximizes underfloor heating efficiency. Thermal conductivity values (measured in W/m·K) should be as high as possible without sacrificing flexibility. For example, select grout with conductivity above 0.8 W/m·K to reduce radiator-like hotspots and achieve uniform warmth across the tiled surface.
Personal Experience: Avoiding “Cold Spots”
On a recent kitchen remodel featuring electric heating mats, we noticed cold pockets along the seams. After switching to a polymer-modified grout rated at 1.2 W/m·K, floor temperatures stabilized within hours, proving the impact of grout choice on thermal performance.
Installation Best Practices for Grout and Radiant Heating Systems
Achieving a flawless, long-lasting installation demands meticulous attention to detail:
-
Pre-Test Your Heating System
-
Always measure cable/mat resistance before troweling down the backer board.
-
Document baseline readings to verify system integrity post-grouting.
-
-
Proper Subfloor Preparation
-
Ensure the substrate is flat, clean, and free from debris.
-
Use a flexible cement board or uncoupling membrane to isolate movement and protect heating elements.
-
-
Grout Application Tips
-
Follow manufacturer mixing ratios to achieve ideal viscosity.
-
Apply grout perpendicular to joints, forcing material deep into gaps.
-
Wipe excess grout promptly with a damp sponge to prevent haze on tile faces.
-
-
Curing and Testing
-
Allow grout to cure fully—typically 24–48 hours—before activating radiant heat.
-
Heat in small increments (no more than 5 °C per day) to avoid thermal shock and cracks.
-
Addressing Common Compatibility Challenges
Cracking and Shrinkage
Cracks often result when traditional grout lacks flexibility. We mitigated shrinkage by choosing polymer-enhanced formulations that expand and contract with temperature fluctuations, eliminating unsightly fissures.
Moisture Management
Radiant heating in bathrooms and laundry rooms requires grout that resists moisture absorption. Epoxy grout stands out, sealing joints against mold and mildew while conducting heat effectively.
Maintenance and Longevity
-
Sealing Cementitious Grout: Even high-performance grout benefits from periodic sealing to repel stains and maintain conductivity.
-
Routine Inspection: Every six months, inspect grout lines for hairline cracks or discoloration. Prompt repairs keep your radiant system operating efficiently.
Advanced Tips: Optimizing Grout for Different Tile Types
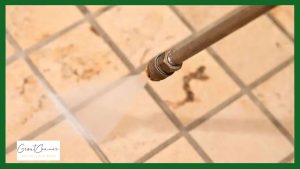
Different tiles—porcelain, ceramic, natural stone—interact uniquely with grout and radiant heating systems:
-
Porcelain Tile
Dense and less porous, porcelain transfers heat efficiently. Pair it with a fine-grain epoxy grout to preserve the tile’s sleek look and maximize heat flow. -
Natural Stone
Porous stones like slate or travertine require grout that accommodates moisture and movement. A high-flex polymer-modified grout ensures stones don’t crack under thermal expansion. -
Large-Format Tile
Wider tiles span greater distances between grout lines; use medium-bed mortars with additives to support tile weight and maintain thermal contact.
Energy Savings and Environmental Considerations
By enhancing the synergy between grout and radiant heating systems, homeowners can enjoy up to 30% reduced energy consumption compared to forced-air systems. Additionally, selecting green-friendly grout—low-VOC, eco-certified—aligns with sustainable building practices and contributes to healthier indoor air quality.
Frequently Asked Questions (FAQs)
Q1. What grout is best for radiant floor heating?
Epoxy grout and polymer-modified cement grout deliver top thermal conductivity, flexibility, and moisture resistance.
Q2. How long should I wait before turning on the heat?
Allow grout to cure 24–48 hours, then increase heat by no more than 5 °C per day to prevent cracks.
Q3. Can I seal epoxy grout?
No sealing is required for epoxy grout; its non-porous nature resists stains and moisture inherently.
Q4. Will radiant heat damage grout?
Properly formulated grout withstands repeated heating cycles; avoid cheap, non-flexible mixes to prevent cracking.
Q5. How do I fix grout cracks in heated floors?
Cut out cracked grout, clean the joint, and re-grout with a flexible, high-conductivity product, then cure and ramp heat slowly.