

Grout stains can be a frustrating eyesore, making even the cleanest tiles look dirty and aged. Over time, grout absorbs dirt, mold, mildew, and spills, resulting in unsightly discoloration. However, with the right cleaning methods, you can remove grout stains and restore your grout to its original brightness. Follow this comprehensive guide to learn how to remove grout stains effectively and prevent future staining.
Why Does Grout Get Stained?
Grout is porous, which makes it susceptible to absorbing moisture, dirt, and spills. Here are some of the most common causes of grout stains:
Mold and Mildew
High-humidity areas like bathrooms encourage the growth of mold and mildew, leading to black or green stains. If left untreated, mold can spread and become a health hazard.
Dirt and Debris
Foot traffic brings in dirt that settles into the grout lines, especially in high-traffic areas like kitchens and hallways. Over time, the accumulation of debris makes grout appear dark and dingy.
Spills and Stains
Liquids such as coffee, wine, and oil can penetrate grout, causing deep discoloration. Because grout is absorbent, these stains can be challenging to remove if not addressed immediately.
Soap Scum
Residue from cleaning products, especially those containing soap, can build up on grout, attracting more dirt and making it look grimy over time.
Step-by-Step Guide to Remove Grout Stains
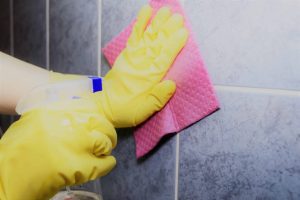
Step 1: Gather Your Cleaning Supplies
Before you start, make sure you have the necessary supplies:
- Baking soda
- Hydrogen peroxide
- White vinegar
- Dish soap
- A toothbrush or grout brush
- A spray bottle
- Warm water
- A microfiber cloth or sponge
- A steam cleaner (optional for deep cleaning)
Step 2: Start with a Simple Cleaning Solution
For mild stains, you can use a basic cleaning solution:
- Mix warm water with a few drops of dish soap.
- Dip a grout brush or toothbrush into the solution.
- Scrub the grout lines thoroughly.
- Wipe with a damp cloth to remove residue.
If stains persist, move on to more powerful methods to remove grout stains effectively.
Step 3: Use Baking Soda and Vinegar
Baking soda and vinegar create a natural yet effective cleaning reaction:
- Sprinkle baking soda over the grout lines.
- Fill a spray bottle with equal parts white vinegar and water and spray over the baking soda.
- Let the mixture fizz and sit for about 5-10 minutes.
- Scrub the grout with a brush and rinse with warm water.
Step 4: Hydrogen Peroxide for Stubborn Stains
For deep stains, hydrogen peroxide is an excellent alternative:
- Mix hydrogen peroxide and baking soda into a paste.
- Apply the paste to the grout and let it sit for 15 minutes.
- Scrub with a grout brush, then rinse with warm water.
Step 5: Try a Steam Cleaner for Deep Cleaning
If stains are still visible, a steam cleaner can break through deep grime and remove grout stains effectively:
- Use a high-pressure steam cleaner with a small nozzle attachment.
- Move it along the grout lines to loosen dirt.
- Wipe clean with a microfiber cloth.
Step 6: Seal the Grout to Prevent Future Stains
Once your grout is clean, apply a grout sealer to protect it from future staining:
- Ensure the grout is completely dry.
- Use a grout sealer applicator or a small brush.
- Apply a thin, even layer of sealer and let it dry for 24 hours.
- Repeat every 6-12 months for long-lasting protection.
Alternative Methods to Remove Grout Stains
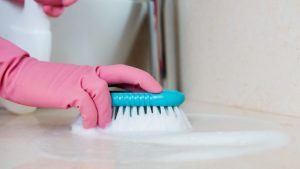
If DIY methods aren’t effective, you can try professional-grade solutions:
Oxygen Bleach
Oxygen bleach is a safer alternative to chlorine bleach and is effective for tough stains:
- Mix oxygen bleach with warm water according to the manufacturer’s instructions.
- Pour over grout lines and let it sit for 15 minutes.
- Scrub and rinse with clean water.
Commercial Grout Cleaners
There are many commercial grout cleaners available. Look for ones labeled as safe for tiles and effective for tough stains.
Hydrogen Peroxide and Dish Soap
For an alternative deep-cleaning solution:
- Mix 1/2 cup hydrogen peroxide with 1 tablespoon dish soap and 1 cup baking soda.
- Apply to grout and let it sit for 10-15 minutes.
- Scrub and rinse thoroughly.
Hydrochloric Acid-Based Cleaners
Use hydrochloric acid-based cleaners only as a last resort to remove grout stains. Follow safety precautions, including gloves and proper ventilation.
Preventing Grout Stains in the Future
Wipe Spills Immediately
To prevent absorption, clean up spills as soon as they happen.
Use a Squeegee in Bathrooms
Minimize mold growth by using a squeegee after showers to remove excess moisture.
Sweep and Mop Floors Regularly
Regular cleaning removes dirt before it settles into the grout.
Avoid Harsh Chemical Cleaners
Some chemical cleaners can damage grout over time. Opt for gentle, pH-neutral cleaners.
Reapply Grout Sealer
To maintain protection, reapply grout sealer every 6-12 months, depending on usage.
Use Door Mats
Placing doormats at entrances can reduce the amount of dirt tracked onto floors.
Ventilate High-Humidity Areas
Good airflow can prevent moisture buildup, reducing the risk of mold and mildew.
Additional Tips for Grout Maintenance

DIY Grout Whitening Paste
If your grout is discolored but not deeply stained, a whitening paste can refresh it:
- Mix 1/2 cup baking soda, 1/4 cup hydrogen peroxide, and 1 teaspoon dish soap into a paste.
- Apply the paste with a toothbrush and let it sit for 10 minutes.
- Scrub and rinse with warm water.
Using Essential Oils for Cleaning
Adding essential oils to your cleaning solutions can provide antimicrobial benefits and a pleasant scent:
- Tea tree oil helps prevent mold and mildew.
- Lemon oil adds a fresh, clean smell and breaks down grime.
- Eucalyptus oil has natural antibacterial properties.
Professional Grout Cleaning Services
If you’re dealing with severe grout stains that DIY methods can’t fix, hiring a professional grout cleaning service may be the best option. Professionals use advanced cleaning solutions and tools like high-powered steam cleaners and industrial-strength cleaning agents to remove grout stains and restore your grout to its original color.
Repairing Damaged Grout
Over time, grout can crack and deteriorate. If you notice missing or crumbling grout, it’s best to repair it before it leads to more significant issues. Here’s how:
- Remove the damaged grout using a grout removal tool.
- Vacuum away any dust or debris.
- Mix new grout according to the manufacturer’s instructions.
- Apply the new grout with a rubber float, pressing it into the joints.
- Wipe away excess grout with a damp sponge and let it cure according to the instructions.
Final Thoughts
Grout stains may seem difficult to tackle, but with the right approach, you can remove grout stains and maintain clean grout lines. By using effective cleaning techniques and taking preventive measures, you can keep your grout looking fresh for years to come. If DIY methods don’t work, consider professional cleaning services for a deep clean. Regular maintenance and sealing are key to long-term grout preservation.
Frequently Asked Questions (FAQs)
Q1. What is the best homemade cleaner for grout stains?
A mixture of baking soda and hydrogen peroxide is one of the most effective homemade grout cleaners. It lifts stains while being safe for tiles.
Q2. Can bleach damage grout?
Yes, prolonged use of bleach can weaken and erode grout. It should be used sparingly and diluted with water.
Q3. How often should I clean my grout?
For best results, grout should be cleaned at least once a month and sealed every 6-12 months to prevent staining.
Q4. Does steam cleaning damage grout?
No, steam cleaning is a safe and effective method for deep cleaning grout. However, excessive moisture can weaken grout if not dried properly afterward.
By following these steps, you can keep your grout clean and stain-free for years to come.