

Acrylic grout is a versatile and durable material used in tile installations to fill gaps between tiles. Made from a combination of acrylic resins and fillers, it is known for its excellent adhesion, water resistance, and flexibility. Whether you’re working on a bathroom renovation or tiling a kitchen backsplash, acrylic grout can be a practical choice for achieving a clean and polished finish.
In this comprehensive guide, we’ll delve into everything you need to know about what is acrylic grout, including its pros and cons, how it compares to epoxy grout, alternatives, and the different types of grouting available. Let’s dive in!
Characteristics of Acrylic Grout
Acrylic grout stands out for its unique characteristics, which include:
- Water Resistance: Perfect for areas like showers and sinks where water exposure is constant.
- Mold and Mildew Resistance: Thanks to its non-porous nature, it prevents the growth of mold, keeping your space hygienic.
- Flexibility: Acrylic grout can handle slight movements and shifts in the tiles without cracking, which is especially useful in areas with fluctuating temperatures.
- Variety of Colors: Available in a wide range of colors to match different tiles and designs, ensuring a cohesive look.
Acrylic Grout Pros and Cons
Pros
- Water Resistance: Acrylic grout is highly resistant to water, making it perfect for wet areas.
- Ease of Application: It spreads easily, reducing the effort required during installation.
- Flexibility: Unlike rigid cementitious grout, it accommodates slight movements in tiles.
- Cost-Effectiveness: More affordable than epoxy grout while offering decent durability.
Cons
- Durability Concerns: Not as robust as epoxy grout, particularly in high-traffic areas.
- Limited Color Options: May not offer the extensive palette available in other types of grout.
Types of Grouting
Grouting plays a crucial role in tile installation, providing structural integrity and enhancing aesthetics. Here are the three primary types:
1. Cementitious Grouts
- Made from a mixture of cement, water, and sand.
- Commonly used in traditional tiling projects.
- Affordable but prone to cracking and staining.
2. Epoxy Grouts
- Composed of epoxy resins and fillers.
- Extremely durable and stain-resistant.
- Expensive and requires skilled application.
3. Acrylic Grouts
- Combines acrylic polymers with other materials.
- Offers a balance between performance and cost.
- Suitable for wet and dry environments.
Acrylic Grout vs. Epoxy Grout
Strength and Durability
Epoxy grout wins in terms of durability and is resistant to cracks, while acrylic grout may wear out faster in high-use areas.
Water and Stain Resistance
Both are water-resistant, but epoxy grout offers superior stain resistance.
Application Process
Acrylic grout is easier to apply, especially for DIYers, while epoxy grout requires more precision.
Cost Comparison
Acrylic grout is more budget-friendly, whereas epoxy grout comes at a premium price.
Alternatives to Acrylic Grouts
While acrylic grout offers many advantages, other options might be better suited for certain scenarios:
- Cementitious Grouts: Ideal for budget-conscious projects, though less durable.
- Epoxy Grouts: Best for high-traffic or heavily stained areas.
- Silicone Sealants: Often used in conjunction with grouts for added water resistance.
Consider the specific requirements of your project before making a decision.
Applications of Acrylic Grout
Acrylic grout works well in a variety of settings:
- Bathrooms: Perfect for shower walls, floors, and sink surrounds due to its water resistance.
- Kitchens: Resists stains and is easy to clean, making it ideal for backsplashes and countertops.
- Outdoor Areas: Works well in patios and pool areas, thanks to its ability to handle moisture and temperature fluctuations.
How to Make Acrylic Grout
Making acrylic grout requires precision. Here’s a step-by-step guide:
Materials Needed
- Acrylic polymer mixture
- Sand (if required)
- Mixing container
- Stirring tool
Steps
- Mix the acrylic polymer with water as per manufacturer instructions.
- Gradually add sand if required for textured grout.
- Stir until a smooth, lump-free paste forms.
- Apply to tile joints using a grout float, pressing firmly to fill gaps.
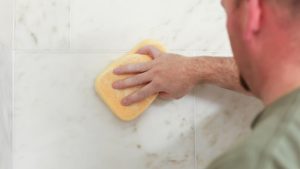
- Wipe excess grout with a damp sponge.
- Allow it to dry and cure as recommended.
Maintenance and Care
To ensure acrylic grout lasts, follow these tips:
- Regular Cleaning: Use mild detergents and soft brushes to clean grout lines.
- Sealing: Apply a grout sealant periodically to enhance its water-resistant properties.
- Repair Damage: Address cracks or discoloration promptly to prevent further deterioration.
Conclusion
Acrylic grout is a practical choice for many tiling projects, offering ease of use, water resistance, and cost-effectiveness. Whether you’re a DIY enthusiast or a professional, understanding its features and applications can help you achieve the perfect finish. Don’t forget to weigh its pros and cons and explore alternatives to make the best decision for your specific needs.
Frequently Asked Questions (FAQs)
What’s the difference between acrylic grout and epoxy grout?
Acrylic grout is easier to apply and more budget-friendly, but epoxy grout is more durable and stain-resistant.
Does acrylic grout need to be sealed?
While it’s not mandatory, sealing can provide additional protection and enhance its lifespan.
What are the three types of grout?
The three main types are cementitious, epoxy, and acrylic grout.
How to make acrylic grout?
Combine acrylic resin, fillers, and water, mixing them until a smooth paste forms.