
Tile adhesive and grout are essential components for achieving durable, attractive tile installations in both residential and commercial settings. This comprehensive guide explores types, application techniques, professional tips, and eco-friendly options to ensure flawless results.
Understanding Tile Adhesive: Types and Applications
When it comes to installing tiles—whether porcelain, ceramic, or natural stone—the right choice of tile adhesive can make or break the project. Adhesive selection impacts bond strength, curing time, flexibility, and resistance to moisture. In this section, we delve into the three primary tile adhesive categories: cement-based adhesives, epoxy adhesives, and acrylic adhesives.
Cement-Based Adhesives
Cement-based tile adhesive remains the industry standard for general installations, particularly in dry interior settings and on standard subfloors. Cement adhesives, often sold as thinset mortar, consist of a blend of Portland cement, graded sand, and additives such as latex or polymers, which improve bond strength and flexibility. These mortars can be mixed on-site by adding water to the powdered product until a smooth consistency is achieved.
Pros:
Excellent bond strength for a variety of tile types, including floor tile adhesive and grout installations
Cost-effective and widely available at home improvement centers
Versatile: can be modified with additives for faster setting or improved flexibility
Cons:
Longer cure time compared to epoxy; not ideal when rapid turnaround is needed
Less flexible, making it susceptible to cracking under substrate movement
Cement-based adhesives excel when paired with stable substrates like cement backer board or cured concrete. For floors, choose a medium-bed or large-format tile mortar if working with tiles larger than 12×12 inches to prevent sagging or slippage.
Epoxy Adhesives
Epoxy tile adhesive is a two-part system composed of resin and hardener that forms a chemically resistant bond after curing. Due to its waterproof and stain-resistant qualities, epoxy is ideal for moisture-prone areas such as showers, swimming pools, and commercial kitchens. When mixed, the epoxy adhesive remains workable for a limited window (pot life), typically between 15 and 45 minutes, after which it hardens.
Pros:
Outstanding adhesion to nonporous substrates like glass or metal, as well as natural stone, where cement mortars may struggle
Superior chemical resistance, making it suitable for laboratories or industrial flooring
Waterproof qualities ensure minimal moisture penetration beneath tiles
Cons:
Expensive relative to cement-based options, often costing up to three times more per unit
Short working time can be challenging for beginners; requires precise mixing and rapid application
Difficult cleanup: once cured, epoxy residues must be chiseled away
For kitchens or areas exposed to harsh chemicals, epoxy adhesives paired with epoxy grout form a virtually impervious barrier. General contractors often reserve epoxy adhesives for specific zones rather than entire installations due to cost considerations.
Acrylic Adhesives
Acrylic tile adhesive—also called premixed or mastic adhesive—is a ready-to-use paste that contains acrylic polymers to boost flexibility and adhesion. No on-site mixing is required; simply open the container and spread directly. Acrylic adhesives cure through evaporation of moisture and are popular for small bathroom walls or backsplashes.
Pros:
Convenient: no mixing, less chance of batch inconsistencies
Fast-setting: some formulas allow tile setting within hours, speeding up project timelines
Highly flexible for minor substrate movement, reducing tile cracks
Cons:
Not recommended for wet areas like floors or showers: prolonged moisture can weaken the bond
Shelf life is limited once opened—requires careful storage to prevent skin formation on the surface
Lower bond strength compared to cement mortar; unsuitable for heavy or large-format tiles
Acrylic adhesives shine in vertical tile installations such as kitchen backsplashes or accent walls. However, they’re not suited for areas expecting constant water exposure or heavy foot traffic.
Exploring Tile Grout: Varieties and Uses
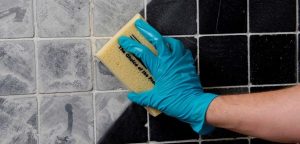
Grout plays a dual role: it fills the gaps between tiles for aesthetic uniformity and structural stability, and it prevents water ingress beneath the tile bed. Selecting the right type of tile grout and color—such as tile adhesive and grout grey for a contemporary finish—ensures the longevity and beauty of your tiling project.
Sanded vs Unsanded Grout
Whether you choose sanded or unsanded grout hinges primarily on joint width. For joints 1/8 inch or wider, sanded grout is recommended. It contains fine sand particles that add strength and prevent shrinkage during curing.
Sanded Grout (1/8″–1/2″): Best for floor tile grout joints where movement or weight distribution is a factor. The sand reduces shrinkage cracks and helps the grout fill larger gaps.
Unsanded Grout (<1/8″): Ideal for narrow wall tile grout joints to avoid scratching delicate tile surfaces. It provides a smooth finish for mosaic tiles and polished stone.
When mixing, follow manufacturer guidelines precisely—adding too much water can reduce strength, while too little might lead to inconsistent workability.
Epoxy Grout
Epoxy grout differs from cementitious grouts in that it’s a two-component system: resin and hardener. Once combined, epoxy grout cures into a dense, impermeable substance.
Advantages:
Ultimate Stain Resistance: Epoxy grout resists oil, grease, and harsh cleaners, making it popular in commercial kitchens and healthcare facilities.
Mold and Mildew Resistance: Its nonabsorbent nature inhibits microbial growth in damp areas like showers.
Minimal Color Fade: Epoxy grout retains color vibrancy far longer than cement-based products.
Considerations:
Challenging Application: Epoxy can cure in minutes; excess haze on tile surfaces may be difficult to remove without scratching.
Higher Cost: Significantly pricier than traditional grout, making it a selective choice rather than a default.
Despite the added cost, epoxy grout’s performance in high-moisture and heavy-use areas often justifies the investment.
Grout Color Options Including Grey Grout
Grout color substantially impacts the visual outcome of a tiled surface. Neutral shades like beige or white produce a classic look, but grey grout—particularly tile adhesive and grout grey—offers several benefits:
Concealed Dirt: Medium- to dark-grey hues hide stains better than white grout, reducing maintenance frequency.
Modern Aesthetic: Grey grout accentuates tile outlines without stark contrast, ideal for contemporary designs.
Versatility: Works well with both light and dark tile palettes, such as white subway tiles or charcoal porcelain.
When selecting a grout pigment, consider tile color, room lighting, and the level of foot traffic. Many brands offer custom pigments to match or contrast with the tile. To view extensive color samples, check out the Tile Council of North America’s Grout Color Guide for inspiration and technical details (external link).
Preparing the Surface for Installation
Before spreading tile adhesive and grout, substrate preparation is non-negotiable. Without proper cleaning, leveling, and priming, tiles may loosen, get uneven, or develop cracks over time. Here’s how to ensure your surface is tile-ready.
Surface Cleaning and Priming
Remove Contaminants: Sweep or vacuum to clear debris, then scrub with a mild detergent solution to eliminate grease, oil, or old adhesive residues.
Check Moisture Content: Use a moisture meter for wood subfloors and concrete slabs; moisture above manufacturer-specified limits can impede curing and cause bond failure.
Apply Primer/Sealer: On porous substrates like concrete or cement board, a primer improves adhesion and prevents rapid moisture loss from the thinset mortar. For wooden decks or tongue-and-groove planks, consider a cement backer board or tile-ready membrane to create a stable, non-flexing surface.
Cure Time: Let primers dry fully—typically 24 to 48 hours—before proceeding. Avoid rushing this step; inadequate drying may lead to bubbling or delamination of tile.
Ensuring Level Substrate
Identify High and Low Spots: Use a straightedge or 6-foot level to locate uneven areas. Small dips can be smoothed with floor patching compound, while peaks may require grinding or chipping away.
Self-Leveling Underlayment: For larger irregularities, pour a self-leveling compound over the clean surface. These formulations spread out and harden to create a perfectly flat plane.
Backer Board Installation: On floors prone to movement—like plywood subfloors—attach cement backer board with appropriate screws and joint tape. This offers a stable, rigid platform for tile and prevents flex-induced cracking.
Expansion Joints: In rooms larger than 200 square feet or where floor heating is installed, plan expansion joints as per ANSI standards to accommodate slight shifts in the substrate.
Following these steps minimizes tile lippage (uneven edges) and ensures a long-lasting installation that won’t fail under everyday stresses.
Application Techniques for Tile Adhesive
Proper application of tile adhesive is pivotal to achieve a uniform, crack-free installation. Below we outline the critical steps—from mixing to troweling—to guarantee a reliable bond between tile and substrate.
Mixing Adhesive Correctly
Measure Precisely: Follow manufacturer ratios, typically displayed on packaging, for water-to-powder (for cement-based) or resin-to-hardener (for epoxy). Using a digital scale or measuring buckets improves consistency.
Use Clean Water and Tools: Contaminated water can alter the pH and reduce bond strength. Always mix in a clean bucket with a stirring paddle attached to a low-RPM drill.
Achieve Desired Consistency: For cement-based thinset, aim for a smooth, peanut butter–like texture—thick enough to hold ridges from the trowel but not so stiff that it crumbles. For epoxy adhesives, combine parts A and B thoroughly, scraping sides and bottom of container to eliminate unmixed resin pockets.
Monitor Pot Life: Epoxy adhesives may have a working time of 15–30 minutes at 70°F (21°C). Ambient temperature and humidity can accelerate curing; plan tile placement accordingly to avoid waste.
Troweling Methods
Choose the Right Trowel: Trowel notch size depends on tile size and substrate type. As a rule of thumb:
For 12×12″ Tiles (Standard Ceramic): 1/4″ x 1/4″ square-notched trowel
For Large-Format Tiles (Over 12×12″): 1/2″ x 1/2″ square-notched or 1/2″ x 1/2″ u-notched trowel
For Wall Tiles (Small-Format): 3/16″ x 5/32″ square-notched trowel
Apply with Consistency: Spread the adhesive at a 45-degree angle to the direction of trowel movement, ensuring uniform ridge height. Avoid applying too much; excess thinset can cause uneven tiles and increase grout line thickness.
Back-Buttering for Large or Heavy Tiles: For tiles larger than 15×15 inches or natural stones with back-adhesion grooves, dab a thin coat of adhesive on the tile’s backside (back-buttering) to eliminate voids beneath the tile and strengthen the bond.
Check Coverage: After laying a few tiles, remove one to verify at least 80–90% full contact (for interior walls) or 95% for floors or wet areas. Inadequate coverage can lead to hollow spots that trap moisture or allow tile edges to chip.
Following these troweling guidelines ensures tiles have full contact area with the adhesive, minimizing movement and preventing future cracking.
Best Practices for Grouting Tile
Grout does more than fill gaps; it seals joints, contributes to structural integrity, and affects the overall look of your tile project. Below are methods to apply grout evenly, clean up excess, and seal for maximum durability.
Applying Grout Evenly
Mix to a Smooth Paste: Whether using cementitious or epoxy grout, achieve a lump-free, creamy consistency. Let the grout slake (for cement grout) per manufacturer recommendations—usually 5–10 minutes—then remix without adding extra water.
Work in Small Sections: Divide the area into manageable segments (e.g., 4×4-foot squares). Apply grout across joints at a 45° angle using a rubber grout float. Holding the float at a slight angle helps push grout into joints completely.
Remove Excess in Time: Once joints are filled and a thin film forms, scrape diagonally across tiles to remove most of the surplus grout. Timing is critical: waiting too long makes removal difficult, while too soon can cause grout to be pulled from joints.
Tool Grout Joints if Needed: For concave or rounded joints, use a grout-finishing tool or a rounded-edge plastic tool before initial set. This helps create uniform joint profiles and compacts grout for added strength.
Cleaning Excess Grout
Initial Wash: After grout sets (typically 10–15 minutes for cement grout, shorter for epoxy), use a damp sponge (not soaking wet) to wipe tiles diagonally across grout lines. Rinse the sponge frequently and change water as it becomes dirty.
Final Haze Removal: Wait an additional 30–60 minutes, then buff residual haze with a slightly damp microfiber cloth or a haze-removal sponge. Epoxy grout may require a solvent-based cleaner recommended by the manufacturer to eliminate stubborn haze.
Inspect for Gaps or Air Pockets: Once the haze is removed, ensure joints are completely filled. If you find voids, reapply grout as needed before final cure.
Sealing Grout for Durability
Wait for Full Cure: For cement-based grout, wait at least 72 hours before sealing. Epoxy grout usually does not require sealing since it’s inherently nonabsorbent.
Choose a High-Quality Sealer: Opt for a penetrating sealer that repels water and stains but won’t alter the grout’s appearance. Test on a small inconspicuous area to confirm compatibility.
Apply Evenly with a Brush or Pad: Work the sealer into grout lines, avoiding pooling on tile surfaces. Let sealer dwell for 5–10 minutes, then wipe away excess.
Reapply Periodically: In high-traffic or moisture-rich environments, reseal grout every 1–2 years to maintain performance.
Proper grouting combined with sealing significantly extends the life of tile installations and keeps floors and walls looking fresh.
Troubleshooting Common Issues
Even with meticulous care, tiling projects can encounter issues like adhesive curing failures or grout cracking. Recognizing root causes early helps prevent costly repairs down the line.
Adhesive Curing Problems
Substrate Moisture: Excessive moisture in concrete slabs or wood substrates can prevent thinset from setting. Always test moisture levels and use an appropriate moisture barrier or primer.
Incorrect Mixing Ratios: Too much water weakens bond strength; too little water makes the adhesive crumbly. Follow manufacturer guidelines and use a kitchen scale or measuring jug for precision.
Low Temperature or High Humidity: Thinset adhesives typically require ambient temperatures between 50°F (10°C) and 95°F (35°C) for proper curing. Cold environments drastically slow cure times, while extremely high humidity can create surface tackiness without full internal set.
Expired or Improperly Stored Product: Thinset that has passed its shelf life or has been stored in a damp environment may clump or refuse to adhere properly. Always check the manufacture date and store in a cool, dry place.
If tiles loosen or there are hollow-sounding areas when tapped, remove affected tiles, clean away old adhesive, and reapply fresh adhesive under correct conditions.
Grout Cracking and Shrinking
Overwatering Grout Mix: Excess water in the mixing stage can lead to increased shrinkage as grout dries. Aim for a peanut butter consistency—wet enough to work but not soupy.
Lack of Expansion Joints: Large expanses of tile without movement joints are prone to grout cracking as the substrate expands or contracts. Incorporate expansion joints per ANSI A108/A118 guidelines.
Substrate Movement: Flexible floors (wood subfloors not reinforced with backer board) can flex under load, causing grout lines to crack. Ensure a rigid substrate by using cement backer board or a decoupling membrane.
Rapid Drying Conditions: Direct sunlight or high airflow can cause grout to dry too quickly, resulting in surface cracking. After application, maintain moderate humidity by misting lightly with water to slow curing.
Minor grout cracks can be repaired by removing the damaged section and packing fresh grout into the void. Major failures may require partial tile removal and reseating.
Professional Tips and Tools for Optimal Results
While DIY enthusiasts can handle many tiling projects, professional tile installers rely on specialized tools and insider knowledge to achieve flawless results. Below are recommended tools and expert advice to elevate your installation.
Recommended Tools
Tile Spacers: Plastic or reusable spacers in various sizes (1/8″, 3/16″, 1/4″) ensure consistent joint width. For uneven tiles, consider wedge-style spacers that allow slight leveling adjustments.
Tile Leveling System: Clip-and-wedge or cap-and-clip systems help prevent lippage on large-format tiles. They maintain uniform tile height and compress thinset to 100% contact.
Dual-Head Grout Float: A high-quality rubber grout float with one side for applying cement grout and the other for epoxy grout streamlines the process.
Margin Trowel and Notched Trowel Set: A margin trowel helps scoop, spread, and clean small areas, while various notched trowels ensure proper adhesive thickness under different tile sizes.
Rubber Mallet and Level: A rubber mallet gently taps tiles into place without chipping, while a long spirit level or laser level ensures a flat plane.
Notched Roller or Roller Trowel: For large areas, a roller trowel can speed up thinset application and ensure uniform adhesive beds for back-buttered stone tiles.
Investing in premium tools reduces wasted materials, decreases installation time, and produces a more professional finish.
Expert Advice for Long-Lasting Floors
Plan Layout Meticulously: Dry-layout tiles without adhesive to determine cut pieces and achieve balanced margins. A thoughtful layout minimizes small cuts at edges and maximizes visual harmony.
Monitor Environmental Conditions: Professional installers often use jobsite heaters or humidifiers to maintain optimal curing conditions—especially in winter or extremely dry climates.
Test for Surface Flatness: Before any adhesive, sweep a 10-foot straightedge over the substrate. If deviations exceed 1/8″ in 10 feet, correct with a self-leveling underlayment.
Perform Periodic Sound Checks: After initial set (24–48 hours), lightly tap tiles with a rubber mallet to detect hollow spots. Address any voids immediately to prevent future tile cracking under load.
Use Proper Personal Protective Equipment (PPE): Eye protection, knee pads, and dust masks safeguard against silica dust and impact-related injuries. Professional practices ensure safety and quality are prioritized.
Following these professional tips substantially reduces callbacks, enhances client satisfaction, and ensures a tile installation that will stand the test of time.
Eco-Friendly Options: Hemp-Based and Green Adhesives
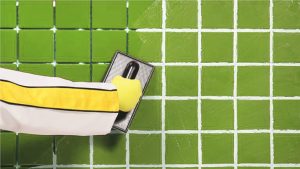
As sustainability becomes a priority for builders and homeowners, eco-friendly tile adhesives—such as hemp-based products—offer impressive performance with a reduced environmental footprint. Below, we explore the advantages and brands leading the green movement.
Benefits of Sustainable Products
Low VOC Emissions: Traditional tile adhesives may emit volatile organic compounds (VOCs) that affect indoor air quality. Eco-friendly adhesives minimize VOC content, contributing to healthier living spaces and aiding in achieving LEED or WELL certifications.
Biodegradable or Recyclable Packaging: Some green brands use minimal plastic and offer recyclable containers to reduce jobsite waste.
Renewable Raw Materials: Hemp-based adhesives replace a portion of synthetic polymers with natural fibers, delivering adequate bond strength while reducing reliance on petrochemicals.
Energy-Efficient Manufacturing: Many manufacturers adopt green energy sources and water recirculation in production, slashing carbon footprints per unit of adhesive produced.
By choosing sustainable adhesives, installers demonstrate environmental stewardship and appeal to eco-conscious clients.
Brands to Consider
GreenSeal™ Hemp Tile Adhesive: Infused with hemp fibers, this cement-based mortar offers a balanced compromise between flexibility and strength. Its packaging is 100% recyclable, and it features a GREENGUARD Gold certification.
EcoBond™ Epoxy Grout & Adhesive: Combining epoxy’s durability with eco-friendly resins, EcoBond™ minimizes VOCs while providing a waterproof seal—a top pick for green commercial projects.
TerraGreen™ Premixed Adhesive: A ready-to-use acrylic adhesive that boasts 90% naturally derived ingredients; best for non-moisture-prone applications like interior accent walls.
SustainCrete™ Fast-Setting Thinset: Uses recycled glass and plastic in its formulation, reducing landfill waste. Ideal for projects requiring rapid returns to service.
Always consult Technical Data Sheets (TDS) for curing times, coverage rates, and substrate compatibility to ensure the green product meets project-specific requirements.
Maintenance and Care for Tile and Grout
Once tiles are laid and grout is sealed, proper maintenance preserves aesthetic appeal and extends the lifespan of your installation. Adopting a regular cleaning regimen and addressing issues promptly will keep floors and walls looking pristine for years.
Regular Cleaning Tips
Gentle Sweep or Vacuum: Remove loose dirt and grit that can scratch the tile surface or abrade grout lines. A soft-bristle broom or vacuum with a brush attachment works best.
Use pH-Neutral Cleaners: Avoid acidic or harsh chemical cleaners that can erode grout sealers or etch natural stone surfaces. Products labeled “tile-safe” or “stone-friendly” are recommended.
Mop with Warm Water: For everyday cleaning, damp mopping with warm water is often sufficient. Change water frequently to avoid redistributing grime.
Dry Immediately: After mopping, use a microfiber cloth or dry mop to prevent water spots, especially on glossy or polished tiles.
Consistent, gentle cleaning prevents the buildup of soap scum, hard water deposits, and mold in grout lines.
Dealing with Stains and Mold
Identify Stain Type: Oil-based stains (grease, cooking oil) require alkaline cleaners, while organic stains (coffee, tea) respond to hydrogen peroxide or mild bleach solutions. Always spot-test in an inconspicuous area to avoid discoloration.
Scrub Grout Lines: Use a nylon-bristle brush (not metal) to avoid gouging. For persistent mold or mildew growth, dilute a mixture of one part bleach to four parts water, apply to grout, let sit for 5–10 minutes, then rinse thoroughly.
Avoid Steam Cleaners on Sealed Grout: High-pressure steam can degrade grout sealants prematurely. If using steam, reapply grout sealer afterward.
Periodic Deep Cleaning: Every 6–12 months, employ a pH-neutral tile cleaner with a specialized grout brush to lift deep-seated dirt. Re-seal grout lines if water no longer beads on the surface.
Addressing stains and mold growth promptly prevents irreversible grout discoloration and maintains hygienic conditions—especially crucial in kitchens and bathrooms.
Frequently Asked Questions(FAQ’S)
Q1. What is the difference between tile adhesive and grout?
Tile adhesive (thinset, epoxy, or mastic) is used to bond tiles to the substrate. In contrast, grout fills the joints between tiles and provides structural support as well as sealing. Adhesive attaches tiles; grout stabilizes them and prevents water ingress.
Q2. Can I use tile adhesive and grout grey for a modern kitchen backsplash?
Yes. Grey grout creates a sleek, contemporary look that complements white or colored tiles, while hiding minor stains. Ensure you choose a grout formula suitable for vertical surfaces (e.g., unsanded grout for narrow joints).
Q3. How long should I wait before grouting after laying tiles?
Most cement-based thinset requires 24–48 hours to cure before grouting. Epoxy adhesives may allow grouting after as little as 2–4 hours, depending on manufacturer specifications and ambient conditions. Always check technical data sheets for precise cure times.
Q4. Is it necessary to seal grout, and when should I do it?
Yes, sealing cementitious grout is important to prevent water penetration and staining. Apply a penetrating sealer 48–72 hours after grouting, once grout has fully cured. Epoxy grout does not require sealing due to its inherently nonabsorbent nature.
Q5. What size of notched trowel should I use for 12×12 tiles?
For standard 12×12 ceramic or porcelain tiles on a flat substrate, use a 1/4″ x 1/4″ square-notched trowel. If tiles are large-format (over 12×12) or have uneven backs, a 1/2″ x 1/2″ square-notched or U-notched trowel, plus back-buttering, is recommended.
Conclusion
Achieving a flawless tile installation hinges on selecting the right tile adhesive and grout, preparing the substrate meticulously, and applying materials with precision. Whether you’re using a cement-based adhesive for general flooring, epoxy grout for a moisture-prone shower, or an eco-friendly hemp-based thinset to support green building goals, following best practices ensures long-lasting results. Professional tools such as tile leveling systems and high-quality grout floats, combined with expert tips—like monitoring environmental conditions and performing periodic sound tests—reduce callbacks and produce aesthetically pleasing, durable surfaces.