

Not because I didn’t notice it — I noticed it every single time I walked in there. That dull, grey-brown staining crawling along the joints between my floor tiles. The kind of thing you tell yourself you’ll deal with “next weekend” until next weekend becomes next year.
The problem wasn’t motivation. It was that I genuinely didn’t know what would actually work. I’d tested hundreds of cleaning products on tile and grout over more than a decade of writing about home cleaning, and I’d seen a lot of promises fall flat. Commercial grout cleaners often contain harsh acids or bleach that can degrade cement-based grout over time. DIY recipes online are everywhere — but most of them just repeat each other without any real testing behind them.
So I decided to do what I always do: test it properly myself.
I picked three DIY grout cleaning methods that come up constantly in search results and cleaning communities. I tested them side by side on the same section of stained bathroom floor tile. Same grout, same conditions, same scrubbing effort. Then I tracked exactly what happened.
Here’s the honest breakdown — no exaggeration, no skipping the methods that didn’t work.
Why DIY Grout Cleaners Make Sense (But Not All of Them Work)
Before getting into the results, it’s worth understanding what you’re actually dealing with when you try to clean grout.
Grout is porous. Unlike the tile itself — which has a glazed, sealed surface that repels most staining — the grout between tiles acts almost like a sponge. Dirt, moisture, soap residue, mould spores, and general grime all get absorbed into those tiny pores over time. That’s why grout stains so easily and why a quick wipe with a damp cloth rarely does anything useful.
Effective grout cleaning works in one of three ways:
- Mechanical action — scrubbing physically dislodges dirt from the surface and pores
- Chemical reaction — an ingredient breaks down or dissolves the bond between the stain and the grout
- Oxidation — an ingredient (like hydrogen peroxide) releases oxygen that bleaches discolouration and kills organic matter like mould
The most effective DIY methods combine at least two of these. That’s why some combinations dramatically outperform others — it’s not marketing, it’s chemistry.
With that in mind, here’s what I tested.
The Test Setup
To make this a fair comparison, I set up proper testing conditions:
- Same grout type: Cement-based (sanded) grout, which is the most common in residential bathrooms
- Same staining level: All three test sections chosen from the same area of the floor, with similar discolouration. No cherry-picking.
- Same wait time: Each mixture sat on the grout for exactly 10 minutes before scrubbing
- Same scrubbing tool: Old toothbrush for all three (more on why I’d change this next time)
- Same rinse: Two rounds of warm water, wiped dry with a clean cloth
My bathroom floor tile is standard ceramic with light grey grout that had gone significantly darker after years of use and zero sealing. No prior treatment had been applied in at least three years. In other words — a real-world worst case.
I photographed each section before and after. Here’s what happened.
Method 1: Baking Soda + Water
What You Need
- Baking soda (bicarbonate of soda)
- Water
- Stiff brush or old toothbrush
How to Make It
Mix baking soda with just enough water to form a smooth, thick paste — roughly 2 tablespoons of baking soda to 1 tablespoon of water. It should hold its shape when applied to the grout without running.
How to Apply
Spread the paste directly over the grout lines using your finger or a small brush. Press it in so it fills the texture of the grout surface. Leave it for 10 minutes, then scrub in circular motions with a stiff brush. Rinse thoroughly with warm water and wipe dry.
What Happened
The baking soda paste was the easiest to work with. It goes on cleanly, stays where you put it, and the mild abrasive texture does immediately start to lift surface-level grime when you start scrubbing.
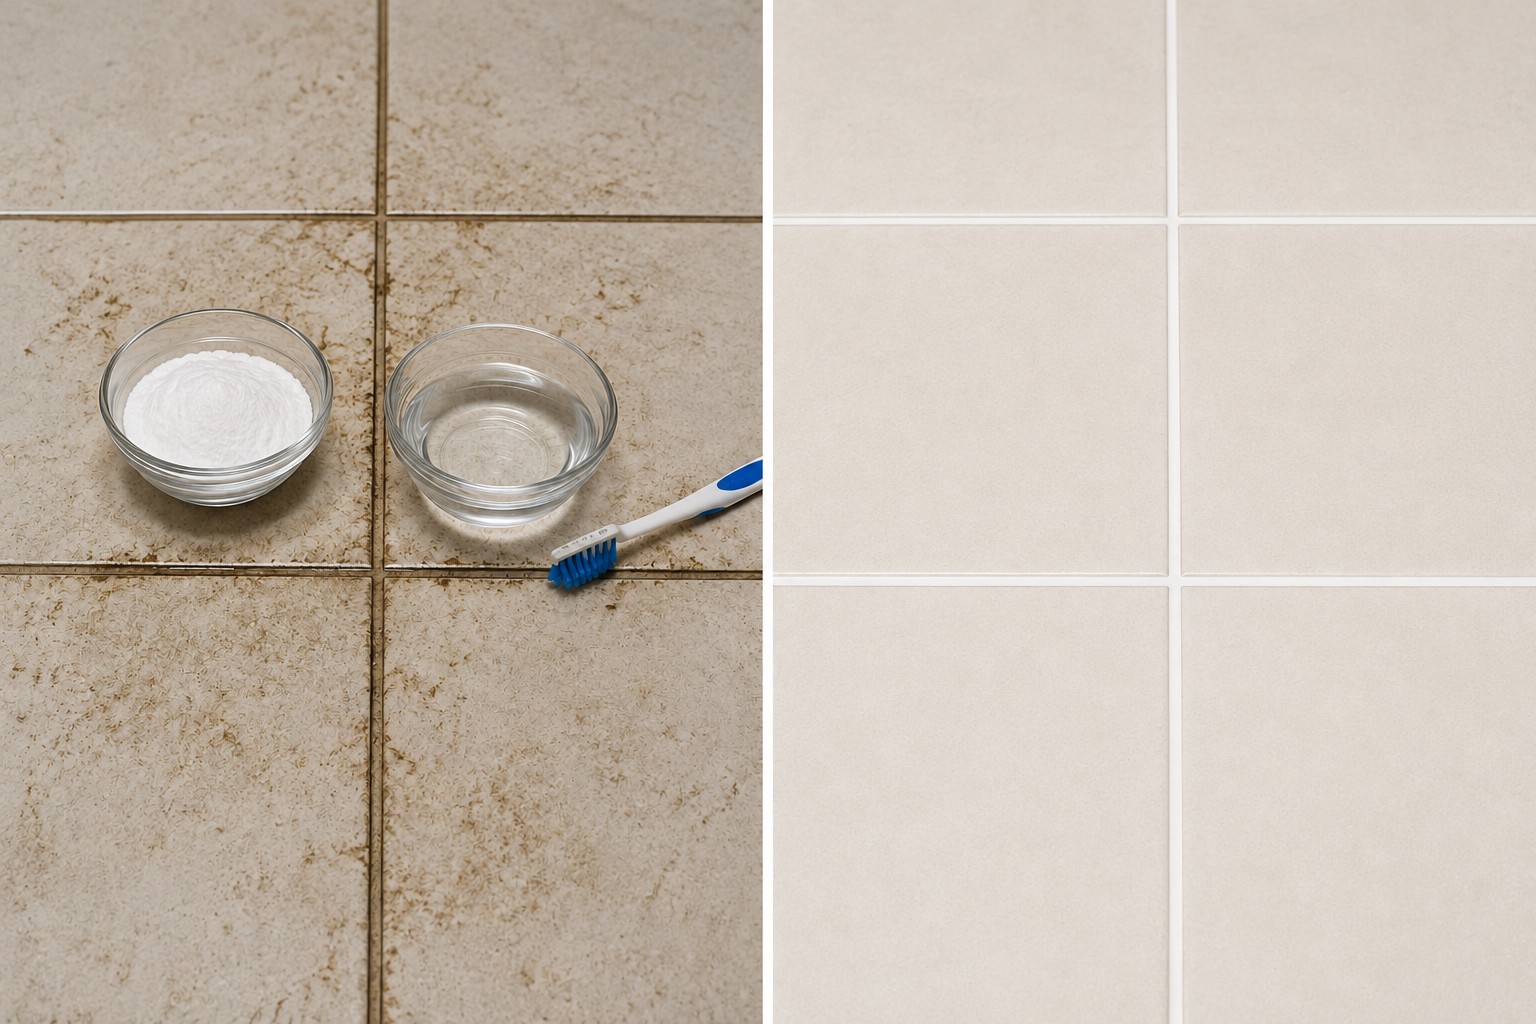
On my test section, this method removed a noticeable layer of surface dirt. The grout came up lighter than when I started. But — and this is important — it didn’t touch the deeper discolouration. The staining that had soaked into the grout pores over the years was still clearly visible. The grout looked cleaner, but not clean.
This makes sense chemically. Baking soda is a physical abrasive and a mild alkaline — it can break down some organic residue, but it doesn’t have any oxidising or bleaching action to deal with deep staining or mould.
Best for: Weekly or monthly maintenance cleaning on grout that’s already in reasonable condition. Not the right tool for neglected or heavily stained grout.
Rating: 5/10
Method 2: White Vinegar + Water
What You Need
- White vinegar (distilled)
- Water
- Spray bottle
- Scrub brush
How to Make It
Mix equal parts white vinegar and warm water in a spray bottle. No measuring required — half and half is fine.
How to Apply
Spray directly onto the grout lines until saturated. Leave for 10 minutes to let the acid work on any mineral deposits or soap scum. Scrub with a stiff brush and rinse well with warm water.
What Happened
I want to be upfront: I had higher hopes for this one than it deserved.
The vinegar solution did something — it removed loose surface particles and left the grout looking marginally cleaner. But after scrubbing for several minutes and rinsing, the actual staining was nearly unchanged. The discolouration I was trying to lift was still sitting right there in the grout.
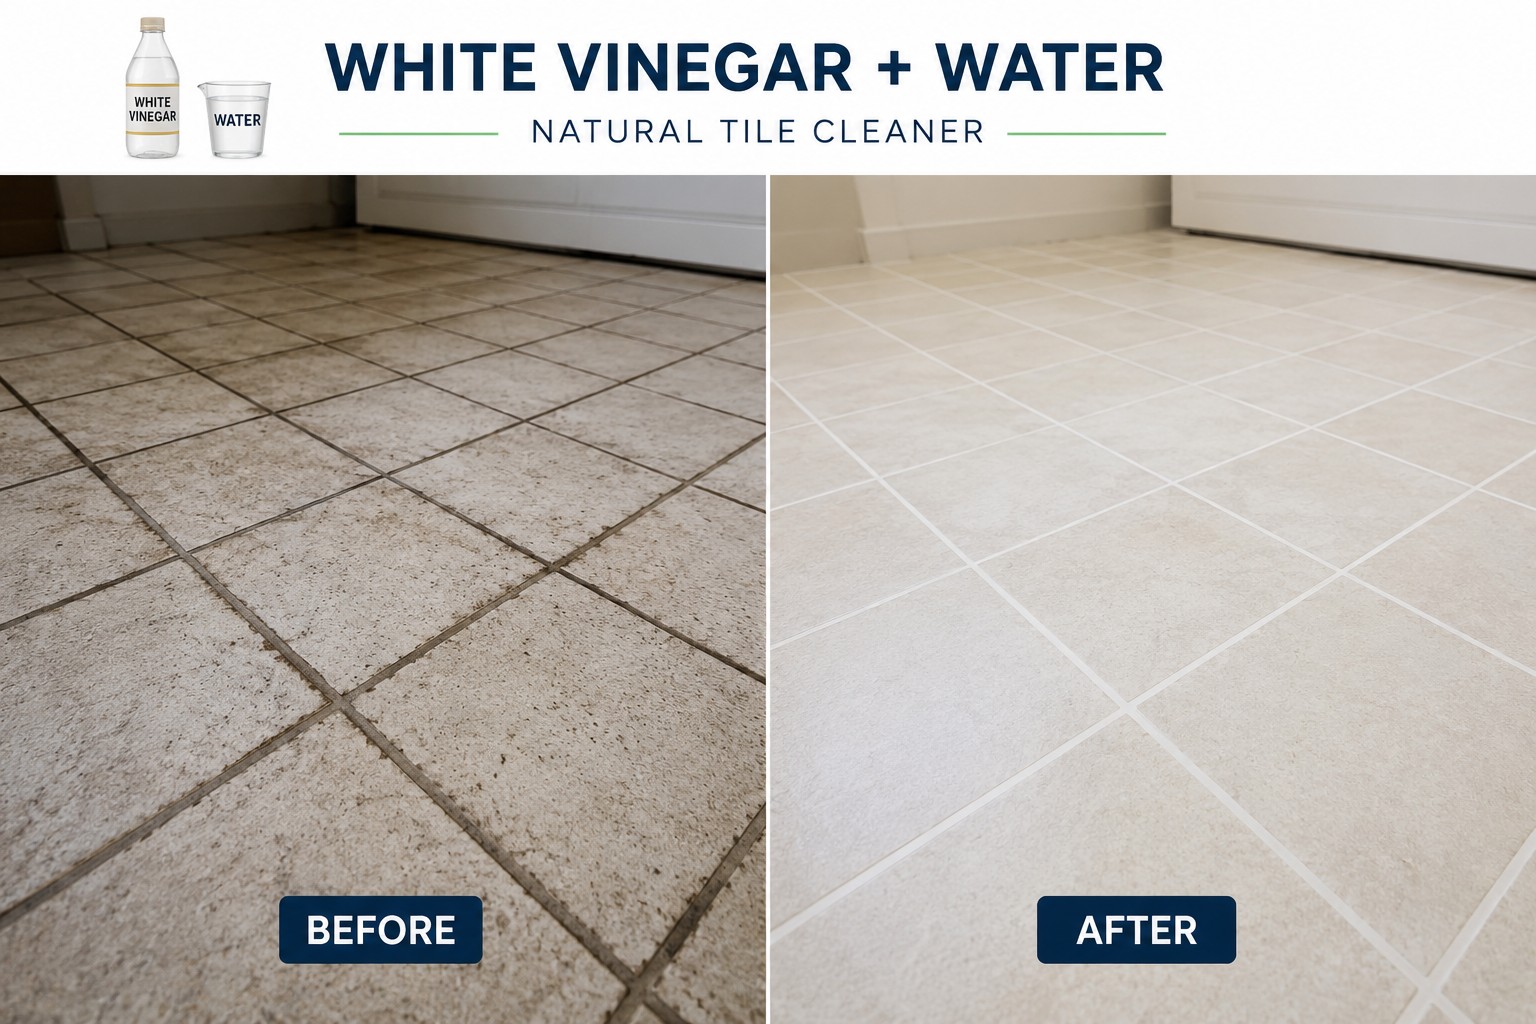
The smell was also more unpleasant than I expected, even with the dilution. It dissipated after about 20 minutes but wasn’t a pleasant cleaning experience.
From a chemistry standpoint, vinegar’s acidity (acetic acid) is useful for dissolving alkaline deposits — hard water scale, calcium buildup, some soap scum. But most grout staining is organic matter — dirt, mould, skin cells, body oils — and acid doesn’t break those down effectively. For that, you need either alkaline chemistry or oxidation.
Important Warning
Do not use vinegar on natural stone tiles. Marble, travertine, limestone, and granite are all calcium-based materials. Acetic acid will etch the surface and cause permanent damage that’s expensive to repair. This method is only appropriate on ceramic or porcelain tile with cement-based grout.
Best for: Hard water spots and light mineral deposits on ceramic or porcelain only. Not effective on organic staining.
Rating: 4/10
Method 3: Baking Soda + Hydrogen Peroxide Winner
What You Need
- Baking soda
- Hydrogen peroxide (3% solution — standard pharmacy strength)
- Optional: 2–3 drops of dish soap for greasy grout
How to Make It
Mix 2 parts baking soda with 1 part hydrogen peroxide into a thick paste. It will fizz gently when combined — that’s the reaction you want. If you’re dealing with kitchen grout or grease-contaminated areas, add 2–3 drops of dish soap and stir it in.
How to Apply
Apply the paste generously to the grout lines. You can use a finger, spoon, or small brush. Let it sit for 10–15 minutes — you’ll see the paste continuing to react slightly as it sits. Then scrub in circular motions with a stiff brush. Rinse thoroughly with warm water. A second rinse is worth doing to remove any residue.
What Happened
This was the result I was genuinely surprised by.
Within about five minutes of the paste sitting on the grout, I could already see brightening happening. The staining that had been soaking into those grout lines for years started visibly lifting. When I scrubbed and rinsed, the difference was remarkable — the grout went from dull brownish-grey back to something close to its original light colour.
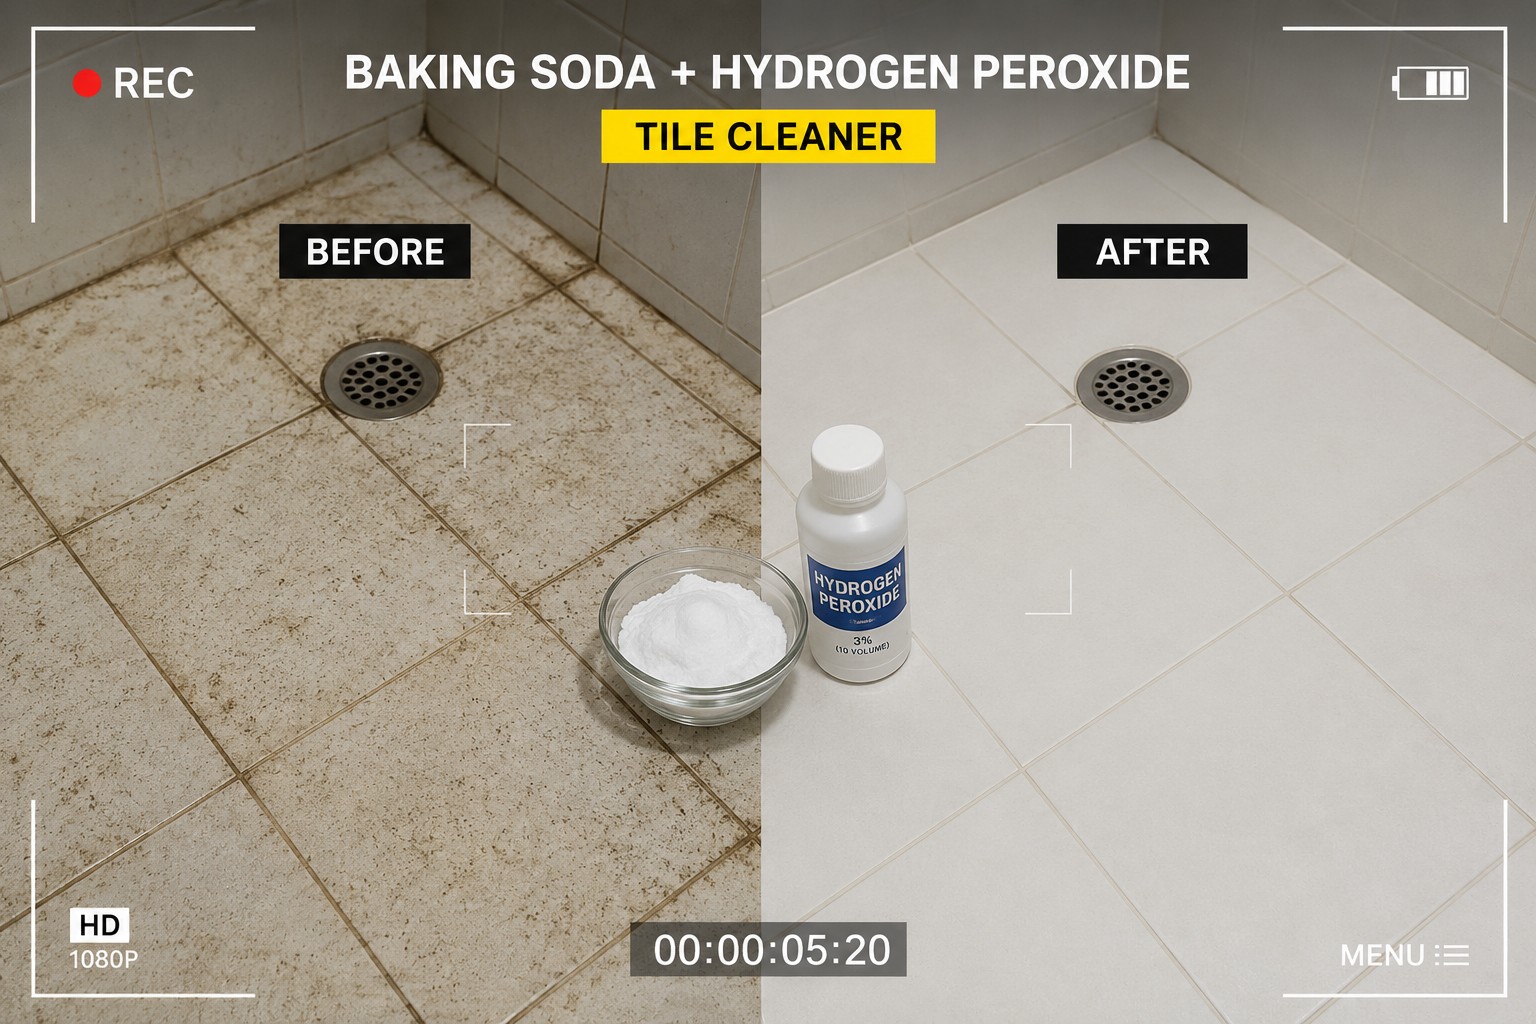
This is the method that actually worked on deeply stained, neglected grout.
The reason it outperforms everything else comes down to that combination of mechanisms:
- Baking soda provides mild abrasion to physically scrub dirt from the surface
- Hydrogen peroxide is an oxidising agent — it releases oxygen that breaks down organic staining, kills mould and mildew at the root, and bleaches discolouration naturally
- Together, the chemical reaction between the two creates a fizzing action that helps the mixture penetrate into the pores of the grout rather than just sitting on the surface
This is also why it works on mould — hydrogen peroxide doesn’t just bleach the surface appearance of mould, it disrupts the cell structure. You’re not just masking the problem.
Best for: Heavily stained grout, mould or mildew, neglected grout that hasn’t been cleaned in a long time, and any situation where you want a genuine deep clean rather than just a surface refresh.
Rating: 9/10
Side-by-Side Results
| Method | Ease of use | Surface dirt | Deep staining | Mould / mildew | Natural stone safe? | Rating |
|---|---|---|---|---|---|---|
| Baking soda + water | ★★★★★ | ★★★★☆ | ★★☆☆☆ | ★★☆☆☆ | ✓ Yes | 5/10 |
| Vinegar + water | ★★★★★ | ★★★☆☆ | ★☆☆☆☆ | ★★☆☆☆ | ✗ No | 4/10 |
| Baking soda + H₂O₂ ✓ Winner | ★★★★☆ | ★★★★★ | ★★★★★ | ★★★★★ | ✓ Yes | 9/10 |
What I’d Do Differently Next Time
After this test, I made a few notes for the next time I do a deep clean:
Use a proper grout brush, not a toothbrush. A dedicated stiff-bristle grout brush or an electric spin scrubber makes this significantly faster and more effective. The toothbrush works but it’s slow, your hand aches after five minutes, and the small head means it takes forever to cover a floor. An electric spin scrubber with a small attachment brush is probably the single biggest upgrade you can make to this process.
Let the paste sit longer on heavily stained areas. For my test I used 10 minutes across the board. On sections with especially bad staining, I’ve since tried 20–25 minutes and the results are noticeably better. Don’t scrub too early — give the hydrogen peroxide time to do its work.
Rinse more than you think you need to. Any baking soda residue left in the grout will attract fresh dirt and can leave a slightly chalky appearance. Two full warm water rinses, followed by a wipe with a clean damp cloth, gets it all out.
Work in sections. On a full bathroom floor, don’t apply the paste to the entire surface at once. Work in 2–3 square foot sections so the paste doesn’t dry out before you get to it. Dried paste is harder to scrub off and less effective.
Protect your knees. This is not glamorous advice but it’s practical — get a kneeling pad. Spending 30–45 minutes on a bathroom floor tile with bare knees is miserable.
After Cleaning: Should You Seal the Grout?
Once you’ve done a proper deep clean, it’s worth considering sealing the grout — especially if, like me, you’d left it unsealed for years.
Grout sealer creates an invisible barrier over the porous grout surface. It doesn’t make the grout stain-proof, but it makes staining much slower and cleaning much easier. Spills sit on the surface instead of soaking in immediately, which means routine cleaning with baking soda and water is enough to keep things looking good between deep cleans.
A few things to know about sealing:
- Wait at least 24–48 hours after cleaning before sealing. The grout needs to be completely dry — any moisture trapped under the sealer will cause problems.
- Apply in thin, even coats using an applicator brush or pen. Wipe away any excess that gets on the tile surface before it dries.
- Penetrating sealers (also called impregnating sealers) are generally better than surface sealers for bathroom floors. They soak into the grout rather than sitting on top, so they don’t peel or chip.
- Reseal every 1–2 years in high-moisture areas like showers. Annual resealing takes about 20 minutes and keeps the grout protected.
If you want a full walkthrough, I’ve covered the sealing process step by step in a separate guide — How to Seal Grout in 7 Easy Steps.
Common Mistakes to Avoid
A few things I’ve seen go wrong — both in my own testing and in questions I get from readers:
Using bleach as a regular cleaner.
Bleach will whiten grout fast, but repeated use breaks down the binding agents in cement-based grout, making it more porous and more prone to future staining. It’s a short-term fix that makes the long-term problem worse. If you need to use bleach for a severe mould situation, use it once, rinse very thoroughly, and don’t make it a habit.
Scrubbing too aggressively.
Stiff brushing is fine and necessary, but metal scrubbers or wire brushes can physically damage grout, creating micro-scratches that trap more dirt. Use nylon bristle brushes.
Not rinsing properly.
Cleaning solution residue left in grout attracts dirt faster than bare grout does. Every cleaning session should end with a thorough warm water rinse.
Applying vinegar to natural stone.
Already mentioned above, but worth repeating — if your tile is marble, travertine, slate, limestone, or any other natural stone, don’t use anything acidic on the grout. Stick to pH-neutral or alkaline cleaners only.
Expecting one clean to fix years of neglect.
If grout has been stained and unsealed for a long time, one application of hydrogen peroxide paste will dramatically improve it — but may not fully restore it to original colour in one go. A second treatment after a 48-hour gap will go further. Patience pays off here.
The Bottom Line
If your grout is stained, discoloured, or hasn’t been properly cleaned in a long time, baking soda and hydrogen peroxide is the method that actually works. It’s not expensive, it doesn’t require any special equipment, and it tackles both the surface dirt and the deeper staining that other methods leave behind.
Baking soda and water is a good everyday maintenance option — just not strong enough for anything serious. Vinegar and water is largely overhyped for grout and should be avoided entirely on natural stone.
The combination that genuinely surprised me was the hydrogen peroxide paste. After years of testing cleaning products, I’d become fairly skeptical of DIY “hacks.” But this one earned its reputation. My bathroom floor looked better after 30 minutes of work than it had in years — and I avoided a re-grouting job that I’d convinced myself was inevitable.
Try it. Give the paste 15 minutes to work before scrubbing. You’ll see what I mean.
Frequently Asked Questions
How long should I leave baking soda and hydrogen peroxide on grout?
10–15 minutes is a good starting point. For heavily stained or neglected grout, up to 20–25 minutes gives better results. Don’t let it dry out completely — if it starts to dry before you scrub, mist it lightly with water.
Can I use hydrogen peroxide on coloured grout?
Yes, standard 3% hydrogen peroxide is generally safe on coloured grout. That said, always do a patch test in a hidden area first, especially on darker or very saturated grout colours. Let it sit for the full time and check for any lightening before proceeding to the full area.
How often should I deep clean my grout?
In high-moisture areas like showers or bathroom floors, a deep clean every 3–6 months keeps staining manageable. Sealed grout can go longer between deep cleans — often 6–12 months depending on traffic and use.
Is hydrogen peroxide safe to use around kids and pets?
Standard 3% hydrogen peroxide (the kind sold in pharmacies) is non-toxic once dry and rinsed. Rinse the grout thoroughly after cleaning and allow the area to dry fully before letting children or pets back in. Avoid higher-concentration hydrogen peroxide — only use the 3% pharmacy-grade version.
What’s the best brush for cleaning grout?
A stiff-bristle nylon grout brush is the most effective manual option. For faster results and less physical effort, an electric spin scrubber with a small attachment brush is excellent — it covers more ground and scrubs more consistently than manual brushing.
Disclaimer: Results vary depending on grout type, tile material, stain severity, and how long staining has been present. Always test any cleaning solution on a small, hidden area before treating the full surface. Do not use acidic cleaners (including vinegar) on natural stone tiles. The author is not responsible for damage caused by improper use of cleaning products.