

Grouting a tile backsplash is a rewarding DIY project that enhances your kitchen or bathroom. If you’re wondering how to grout tile backsplash, whether it’s a new installation or a re-grout, following the right steps will give you a smooth, professional finish. This guide covers everything from selecting the right grout to applying and maintaining it for long-lasting results.
Understanding Grout and Its Importance
Grout serves a vital purpose in tile installation. It not only helps hold tiles in place but also prevents water, dirt, and grime from getting behind them, which could lead to mold or mildew growth. Furthermore, grout helps create a uniform, finished look between your tiles. Whether you’re grouting a ceramic, porcelain, or mosaic backsplash, understanding grout’s role ensures your backsplash is both functional and visually appealing.
Choosing the Right Grout
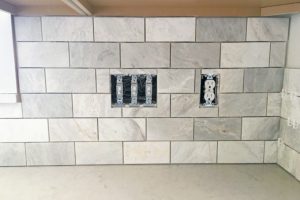
Choosing the right grout is a crucial step in achieving a perfect tile finish. There are two main types of grout to consider: sanded and unsanded grout.
- Sanded Grout: This type of grout contains sand particles, making it thicker and more durable. It’s ideal for larger grout joints, typically those greater than 1/8 inch wide. Sanded grout is often used in areas with heavy foot traffic, such as floors or larger wall spaces.
- Unsanded Grout: As the name suggests, this grout doesn’t contain sand. It’s finer and smoother, making it perfect for smaller grout lines (less than 1/8 inch). It’s commonly used for tile backsplashes, as these areas typically have tighter grout joints.
Besides the grout type, you’ll also need to select the right color. Grout color can either contrast with your tile for a striking visual effect or blend in to create a seamless appearance. When choosing, remember that lighter grout can show stains more easily, whereas darker grout may highlight imperfections.
Preparing for the Job
Before you begin grouting, preparation is essential for a smooth process and a beautiful finish.
Cleaning the Tiles
Ensure the tile surface is free from dust, debris, or any previous adhesive residue. Use a mild detergent and water to clean the tiles thoroughly. If there’s leftover adhesive from the tile installation, scrape it off carefully with a putty knife or a similar tool.
Protecting Adjacent Surfaces
If you want to protect the areas around your backsplash, like the countertop or cabinets, apply painter’s tape along the edges. This ensures you don’t accidentally get grout on areas that should remain clean. You can also use plastic sheeting to cover surrounding surfaces for added protection.
Mixing the Grout
Follow the manufacturer’s instructions to mix your grout. The consistency should be thick but spreadable, resembling peanut butter. If the grout is too runny, it will be harder to control and can cause uneven application. Conversely, if it’s too thick, it may not fill the gaps properly. Allow the grout to sit for about 10 minutes before using, as this allows it to thicken slightly and become more workable.
How to Grout a Tile Backsplash: The Step-by-Step Process
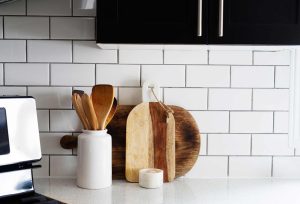
Once your tiles are ready, and you’ve gathered all the necessary tools, it’s time to start the grouting process. The following steps outline how to grout a tile backsplash effectively.
Step 1: Apply the Grout
Start by scooping some grout onto your grout float. Hold the float at a 45-degree angle and spread the grout across the tile surface, pressing it into the gaps. Work in small sections, focusing on one area at a time. Don’t worry about the grout that spills over the edges of the tile; it’s easier to clean off later.
Step 2: Press Grout Into the Joints
Once you’ve applied grout to a small section, use the grout float to press the grout firmly into the joints between the tiles. Make sure the grout fills all gaps completely, and work in a diagonal motion to avoid pulling grout out of the joints. If you’re grouting mosaic tiles, be sure to press the grout evenly into the tiny spaces to ensure full coverage.
Step 3: Remove Excess Grout
Tilt the grout float at a steep angle and use it to scrape off excess grout from the tiles. Be gentle during this step to avoid pulling grout out of the joints. Clean the float frequently by wiping it with a damp cloth.
Step 4: Clean the Tiles
After removing most of the excess grout, use a damp sponge to clean the tiles. Work in small circles, starting from the top of the backsplash and moving downward. Make sure to rinse your sponge frequently to avoid smearing the grout back onto the tiles. This step is essential for achieving a smooth, clear surface.
Step 5: Smooth the Grout Lines
Once the grout is applied, take a damp sponge and gently smooth out the grout lines. This step ensures that your grout joints are uniform in appearance and depth.
Step 6: Let the Grout Cure
Allow the grout to cure for at least 24 hours. This is crucial for the grout to fully set and harden. Avoid touching the grout or applying any pressure during this time.
Grouting Mosaic Tiles
Mosaic tiles have unique challenges due to their small size and intricate designs. The key to grouting mosaic tiles is to use unsanded grout and apply it with a light hand. Since the grout lines are often tiny, you’ll need to be extra careful not to scratch the surface of the tiles while applying the grout.
Work in sections and ensure you fill every gap completely. If any grout gets on the face of the tiles, wipe it off immediately with a damp sponge to avoid staining.
Grouting Corners and Edges
The corners of a backsplash often require extra attention to detail. To grout the inside corners, use a small amount of grout and smooth it into place with a finger or rounded tool. Take your time to ensure the corners look neat and tidy. For outside corners, consider using a corner tool to achieve a crisp line.
Sealing the Grout
Once your grout has cured, it’s important to seal it. Grout sealers help protect the grout from moisture, stains, and dirt buildup. Use a grout sealer that is appropriate for the type of grout you’ve used, and follow the manufacturer’s instructions carefully.
Sealing grout is especially important in areas exposed to water, such as kitchens and bathrooms. Apply the sealer with a clean, dry cloth, and make sure to cover all the grout lines evenly.
Maintaining Your Grouted Backsplash
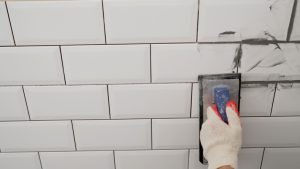
A grouted backsplash, when properly maintained, can last for years. To keep it looking great, regularly clean it with a mild soap and water solution. Avoid harsh chemicals or abrasive scrubbing tools, as these can damage both the grout and the tiles.
It’s also a good idea to reseal the grout every 12-18 months, especially in high-moisture areas like the kitchen and bathroom.
Common Grouting Mistakes to Avoid
Even experienced DIYers make mistakes during the grouting process. Here are a few things to watch out for:
- Over-Grouting: Applying too much grout at once can result in a messy cleanup and uneven grout lines. Work in small sections to avoid this.
- Delaying Cleanup: If you leave grout on the tiles for too long, it can harden and become much harder to remove. Clean the tiles promptly after grouting.
- Incorrect Grout Thickness: Grouting too thick or too thin can lead to uneven joints, which could affect the overall appearance of your backsplash.
Conclusion
Grouting a tile backsplash may seem like a complicated task, but with the right tools and techniques, it’s an achievable and rewarding DIY project. Whether you’re installing a new backsplash or refreshing an old one, following these steps will help you create a professional, durable finish that enhances your space. Don’t forget the importance of proper maintenance to ensure your grouted backsplash stays beautiful and functional for years.
Frequently Asked Questions (FAQs)
Q1. What’s the best way to grout a backsplash?
The best way is to apply grout with a float, clean excess grout promptly, and finish with a damp sponge for a smooth finish.
Q2. How long do you leave grout before wiping off?
Wait about 10-15 minutes after applying grout to wipe off the excess with a damp sponge.
Q3. Do you grout inside the corners of a backsplash?
Yes, but apply sparingly and smooth with a finger or tool for a clean, professional look.
Q4. Do I really need a grout float?
Absolutely. A grout float ensures even application and makes the process faster and easier.