Grout Cleaner

How to Remove Mold from Shower Grout (Safe & Fast Methods)

Quick Answer: To remove mold from shower grout, mix baking soda with hydrogen peroxide into a paste, apply it directly onto the moldy grout lines, let it sit for 10–15 minutes, then scrub with a stiff nylon brush and rinse with hot water. For stubborn black mold in grout, a diluted bleach solution (1 part bleach to 3 parts water) applied for 10 minutes gives faster results, but always ventilate the bathroom and wear gloves. Repeat weekly and dry grout lines after every shower to stop mold from coming back.

Why Mold Grows in Shower Grout

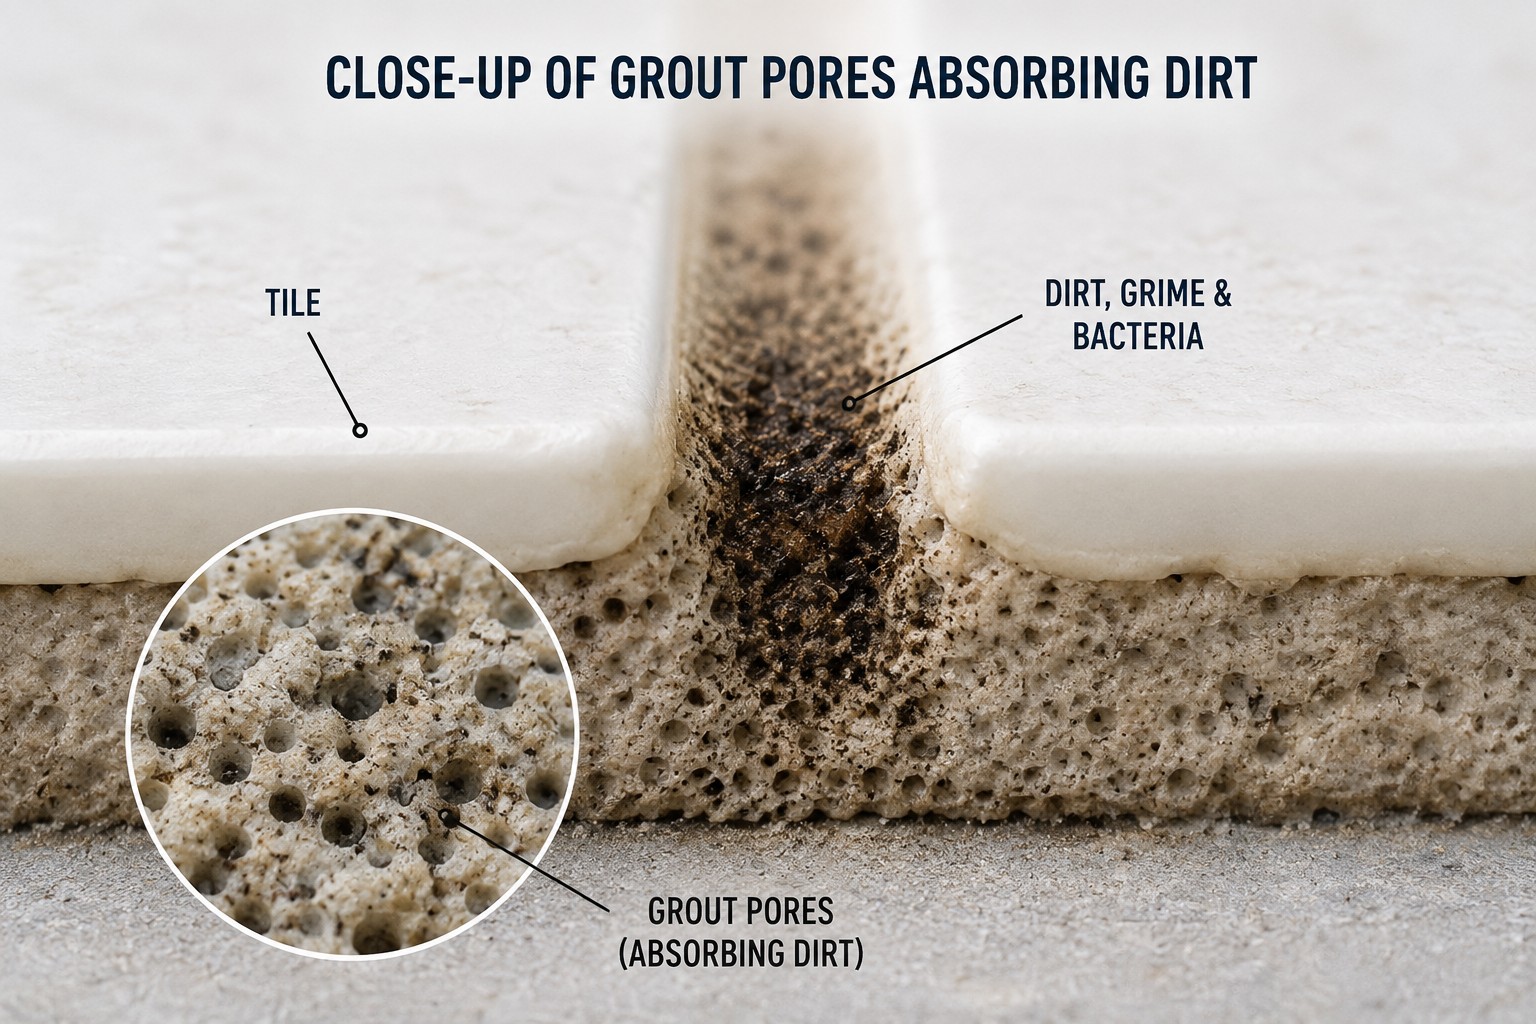
Grout is porous by nature, which makes it a magnet for moisture. Every time you shower, water seeps into the tiny pores of unsealed or aging grout and stays trapped there long after the tiles feel dry to the touch. Add warmth, low light, and soap residue, and you've created the exact conditions mold needs to colonize. This is why mold in shower grout is one of the most common complaints homeowners search for — it isn't a sign of a dirty bathroom, it's simply how porous cement-based grout behaves in a humid environment.

Bathrooms with poor ventilation, exhaust fans that aren't used enough, or grout that was never sealed are especially prone to this. Older grout lines that have started to crack or crumble give mold spores even more surface area and depth to root into, which is why the problem tends to get worse over time if it isn't treated early. Soap scum plays a bigger role than most people realize too — the fatty residue left behind by bar soap and some body washes actually feeds mold and mildew, which is one reason a bathroom can look "clean" on the surface while grout mold keeps returning underneath.

Temperature also plays a role that's easy to overlook. Mold spores are naturally present in almost every home's air, and they only need three things to establish a colony: moisture, warmth, and an organic food source. A shower delivers all three at once, which is why grout mold is one of the most common household maintenance issues rather than a sign of neglect. Bathrooms without windows are particularly at risk, since they rely entirely on mechanical ventilation — if that fan is undersized, rarely used, or vented improperly, humidity can linger in the room for hours after a shower, giving mold spores ample time to settle into the grout.

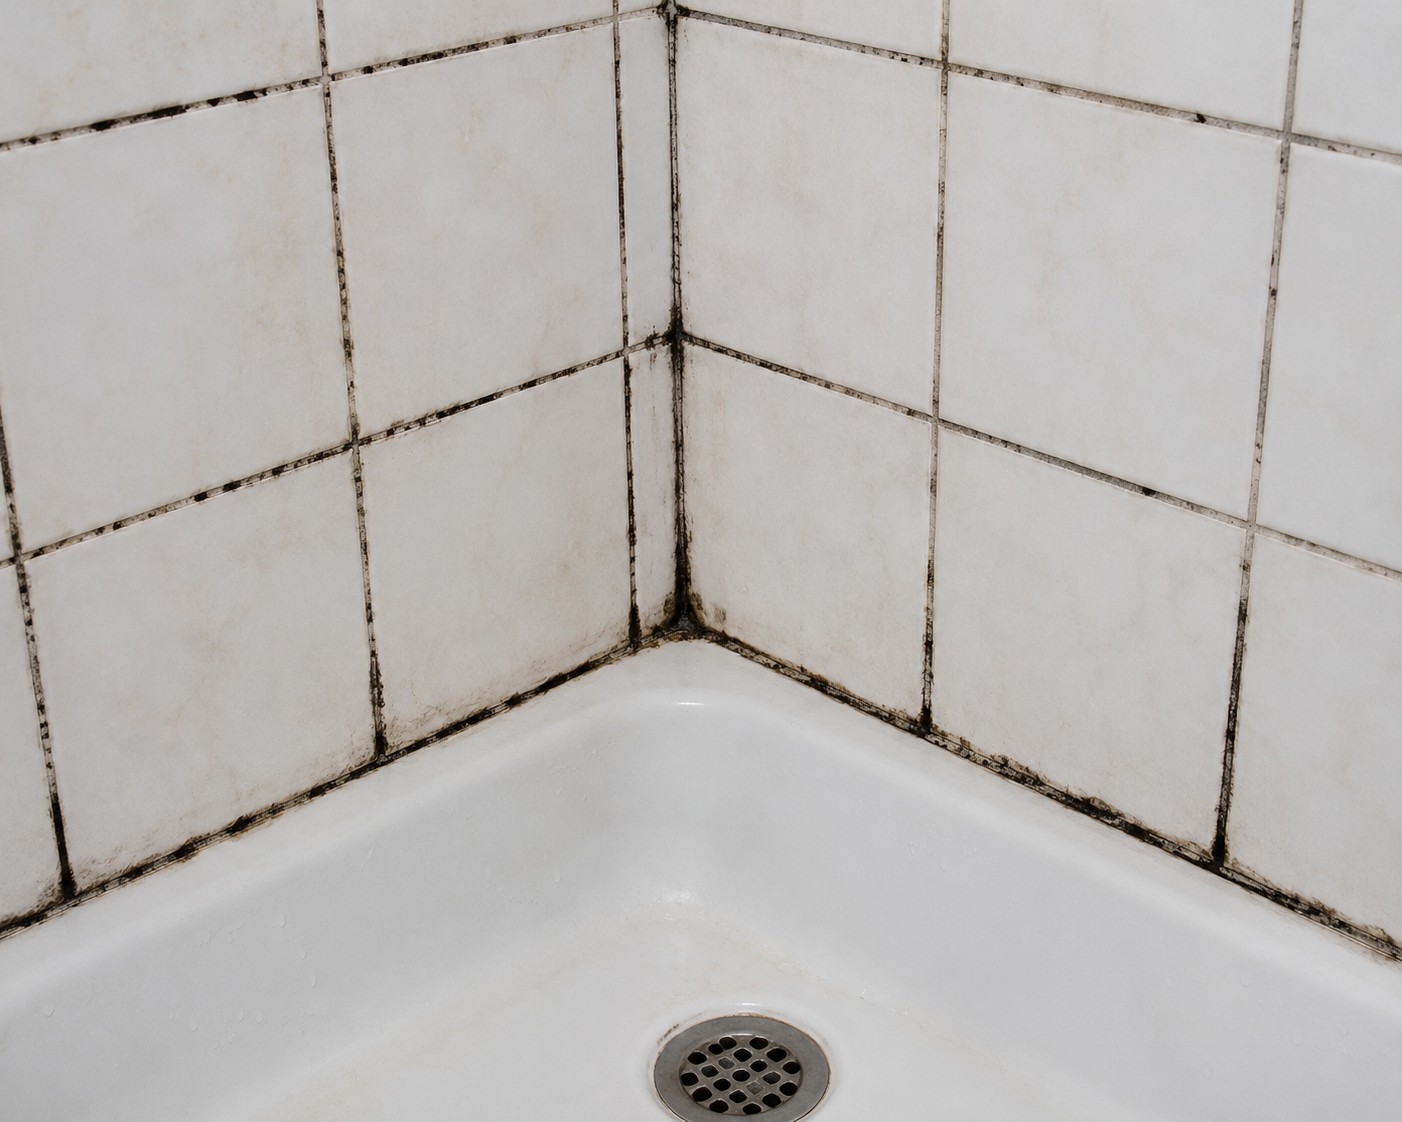
Close-up of dark mold growth along white shower grout lines between ceramic tiles
Mold typically starts as faint gray speckles before darkening along grout lines.

Tools & Supplies You'll Need

Before you start, gather everything so you're not scrubbing with wet gloves halfway through the job:

  • Rubber gloves and a well-ventilated bathroom (open window or exhaust fan running)
  • A stiff nylon grout brush or an old toothbrush for tight lines
  • Baking soda and 3% hydrogen peroxide, or household bleach, depending on the method you choose
  • A spray bottle for mixing and applying liquid solutions
  • A microfiber cloth or squeegee for drying afterward
  • Optional: a handheld steam cleaner, which many readers researching a steam tile grout cleaner find useful for loosening mold without any chemicals at all

If you'd rather skip store-bought chemicals entirely, several homemade shower cleaner recipes use pantry ingredients you likely already have, which is worth checking before you buy anything new.

A grout brush with angled or tapered bristles tends to reach into narrow grout lines far more effectively than a flat-bristled scrub brush, so it's worth the small investment if you're treating mold regularly. Keep a separate brush dedicated to bathroom mold treatment rather than reusing a kitchen scrub brush, since cross-contaminating food-prep tools with bleach or mold spores is worth avoiding entirely. If your grout lines are unusually wide or deeply textured, a small handheld pick or an old flathead screwdriver wrapped in cloth can help dislodge built-up grime before you apply any cleaning solution.

How Different Tile Types Affect Grout Mold

The tile surrounding your grout doesn't cause mold directly, but it does influence how aggressively you can treat it. Ceramic and porcelain tile are non-porous and highly resistant to chemicals, which means the bleach and peroxide methods in this guide can be used at full strength without worrying about damaging the tile itself — only the grout needs careful handling.

Natural stone tile, such as marble, travertine, or slate, is a different story. These materials are porous and reactive to acidic or highly alkaline cleaners, so bleach and vinegar should be avoided entirely around natural stone, even if only the grout is being treated, since splashes and vapor can etch or discolor the stone surface. For natural stone showers, the baking soda and hydrogen peroxide method is the safer choice, and a pH-neutral stone cleaner should be used for the surrounding tile itself.

Glass tile and mosaic showers tend to have narrower grout lines, which trap moisture differently than standard 3-inch tile. Mold here often appears as thin dark threads rather than broad patches, and a toothbrush or narrow-bristle detail brush works better than a wide grout brush for these applications. Because glass tile is also non-porous, it's easy to assume mold on the surrounding glass has been fully removed with a quick wipe, but the real problem almost always sits in the grout lines between the pieces, so it's worth focusing the bulk of your scrubbing time there rather than on the glass itself.

Is It Black Mold? How to Tell

Not every dark patch on grout is dangerous "black mold." Most household grout mold is a combination of mildew and common mold species like Cladosporium, which appear grayish-black and are unpleasant but manageable with regular cleaning. True black mold grout growth (often assumed to be Stachybotrys) tends to look darker, slightly slimy, and spreads in irregular patches rather than a thin uniform line.

A simple way to check: dab a small amount of diluted bleach on the stain. If it lightens within a minute or two, you're dealing with surface mold or mildew — very treatable with the methods below. If the stain doesn't lighten and keeps returning within days of cleaning, or if you notice a persistent musty smell in the bathroom, it's worth having it assessed professionally, since deep-rooted mold behind tiles is a different problem than surface mold on grout.

Safety note: Always open a window or run the exhaust fan when treating mold, wear rubber gloves, and never mix bleach with ammonia-based cleaners — the combination produces toxic fumes.

Grout Mold vs Silicone/Caulk Mold

A lot of readers assume the mold along their shower corners and the mold on their grout lines are the same problem, but they behave differently. Grout is cement-based and porous, so mold roots into it and needs to be scrubbed and treated as described in this guide. Silicone caulk, on the other hand, is non-porous — mold usually sits only on the surface of caulk, which is why it often wipes away more easily but also returns faster if the underlying moisture issue isn't fixed. If your caulk lines are heavily discolored and scrubbing isn't helping, it's typically more efficient to strip and replace the caulk rather than keep treating it, whereas grout almost always responds well to the cleaning methods below before any replacement is needed.

Another practical difference is how each material ages. Silicone caulk has a working lifespan of roughly 5 years in a wet environment before it starts to shrink, pull away from the tile edge, or develop micro-tears that trap moisture — once that happens, mold gets a foothold that no amount of surface cleaning will permanently solve. Grout, by contrast, can last decades if it's properly sealed and maintained, which is part of why persistent grout mold is usually a cleaning and sealing issue rather than a sign that the grout itself has failed. If you notice mold returning specifically at the corners and edges where tile meets tub or floor, check the caulk there first before assuming the grout treatment isn't working.

Comparison: Best Shower Grout Mold Removers

Comparing the most effective ways to remove mold from shower grout
MethodEffectiveness on Black MoldTime NeededSafetyCost
Diluted BleachVery High10–15 minUse gloves + ventilationLow
Baking Soda + Hydrogen PeroxideHigh10–15 minChild/pet-safeVery Low
White Vinegar SprayModerate30–60 min soakVery safeVery Low
Commercial Shower Grout Mold RemoverVery High5–10 minFollow label; ventilateModerate
Steam CleaningModerate–High15–20 minVery safeOne-time tool cost

If you want a full breakdown of chemical-free options ranked by strength, our dedicated guide on the best grout cleaner for shower use compares these and several commercial products side by side.

Fast Method: Bleach-Based Removal

When you need the fastest way to remove mold from shower grout — especially for dark, stubborn black mold grout patches — a diluted bleach solution remains the most reliable option.

Steps

  1. Ventilate the bathroom fully — open windows, turn on the exhaust fan.
  2. Mix 1 part household bleach with 3 parts water in a spray bottle.
  3. Spray directly onto the moldy grout lines, avoiding contact with colored grout or natural stone.
  4. Let it sit for 10 minutes — do not scrub immediately.
  5. Scrub with a stiff nylon grout brush in small circular motions.
  6. Rinse thoroughly with hot water and dry the area with a towel or squeegee.

Avoid this method on colored or epoxy grout, as bleach can lighten the pigment over time. It's best reserved for white or light-colored cement grout only. If your grout is colored, skip ahead to the safe method below, which won't strip pigment.

Safe & Natural Method: Baking Soda + Hydrogen Peroxide

If you have kids, pets, or simply prefer a chemical-free approach, this combination is nearly as effective as bleach without the fumes or discoloration risk, and it works on any grout color. For a deeper look at exactly how peroxide breaks down mold at a chemical level and additional dilution ratios for tougher stains, see our full guide on cleaning grout with hydrogen peroxide.

Recommended Product

3% Hydrogen Peroxide for Cleaning Grout

The 3% strength used in every recipe in this guide. Check the label for 3% concentration and skip anything above 6%.

As an Amazon Associate I earn from qualifying purchases, at no extra cost to you.

Check Price on Amazon →
Recommended Product

Baking Soda for Grout Cleaning

The gentle abrasive in the spray and paste recipes above. A large box or bag goes a long way and also works for general household cleaning.

As an Amazon Associate I earn from qualifying purchases, at no extra cost to you.

Check Price on Amazon →

Steps

  1. Make a thick paste using 3 tablespoons baking soda and enough hydrogen peroxide (3% strength) to form a spreadable consistency.
  2. Apply the paste directly onto mold-affected grout lines with an old toothbrush.
  3. Let it sit for 10–15 minutes so the peroxide can penetrate and break down the mold.
  4. Scrub firmly along the grout lines, working in one direction to avoid pushing debris back into the pores.
  5. Rinse with warm water and wipe dry immediately.

For those who prefer a simple pantry-only routine without measuring peroxide ratios, our baking soda grout cleaner guide walks through a lighter maintenance version of this same paste that works well for weekly upkeep once the mold is gone.

For light mildew rather than deep mold in grout, a plain white vinegar spray left to sit for 30–60 minutes before scrubbing can also work well as a gentler, more frequent maintenance option between deep cleans.

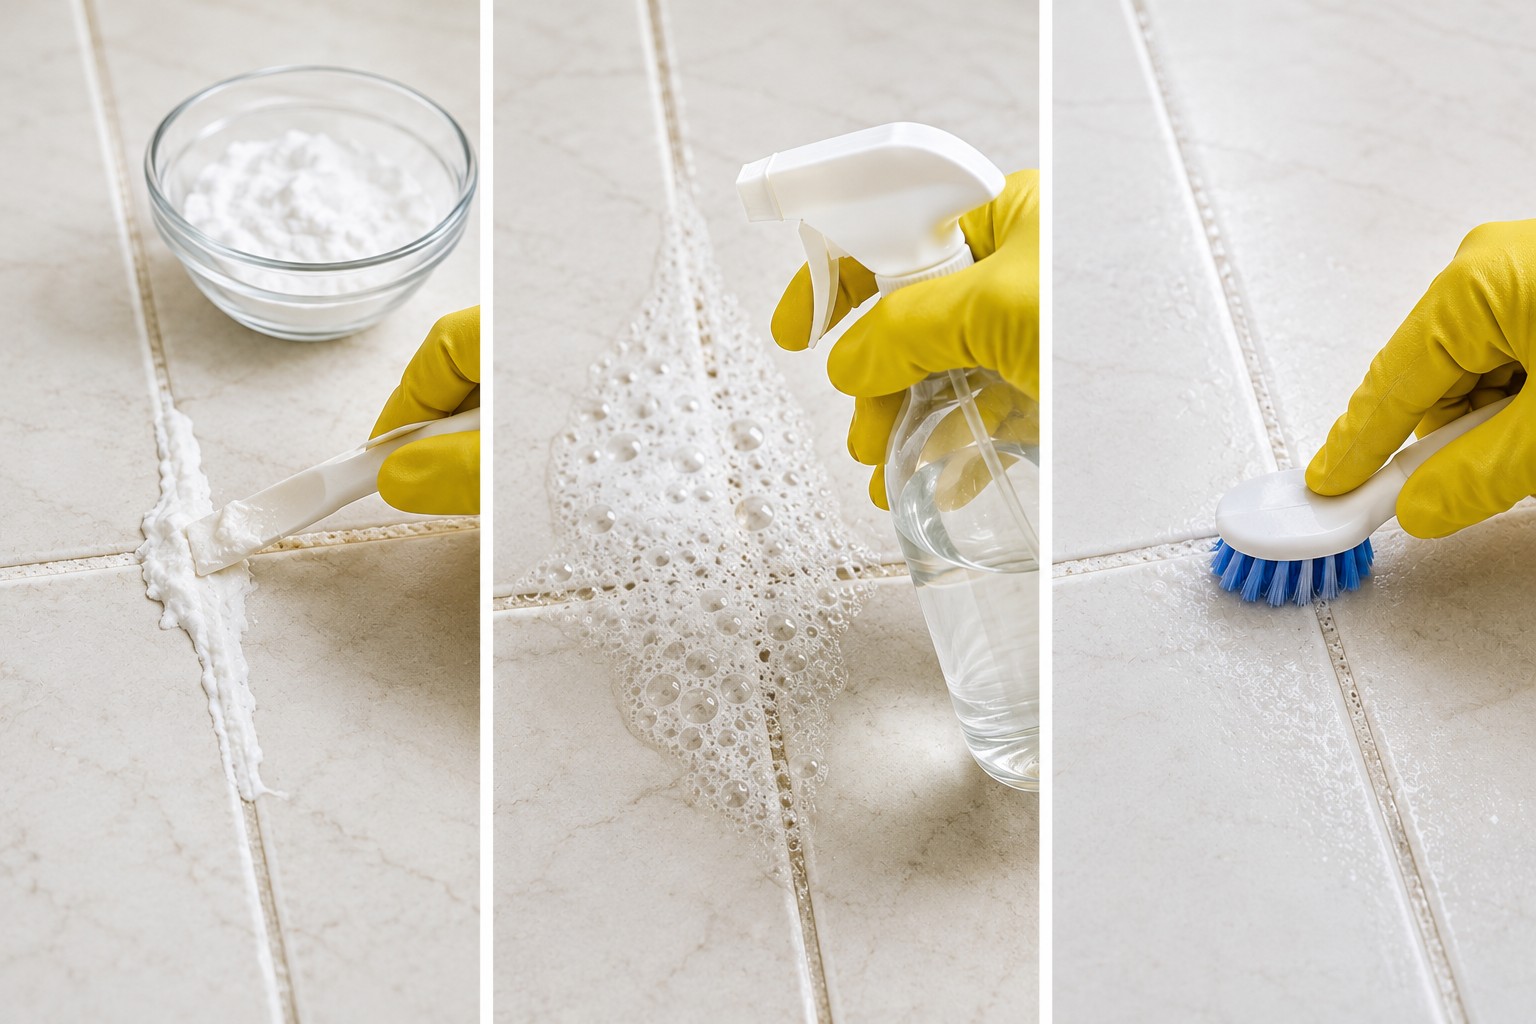
Baking soda and hydrogen peroxide paste being scrubbed onto shower grout with a toothbrush
A baking soda and peroxide paste is a safe, effective shower grout mold remover for daily-use bathrooms.

Grout Sealing: Your Long-Term Defense

Cleaning removes mold that has already taken hold, but sealing is what actually changes how vulnerable your grout is in the first place. Unsealed grout behaves like a sponge — it absorbs water, soap, and body oils directly into its pores, all of which mold feeds on. A penetrating grout sealer fills those pores from the inside without changing the grout's color or texture, so water beads on the surface instead of soaking in.

Most penetrating sealers last 12–18 months in a shower environment before they need reapplying, though heavily used bathrooms may need it closer to the 12-month mark. Applying sealer is straightforward: the grout must be completely clean and fully dry (24 hours minimum after any wet cleaning) before the sealer is brushed or sprayed on, left to absorb for a few minutes, and any excess wiped from the tile surface before it cures. Skipping this step is one of the most common reasons homeowners find themselves fighting the same grout mold problem every few months despite regular cleaning — the mold isn't coming from nowhere, it's simply re-entering grout that was never protected in the first place.

DIY vs Professional Cleaning: Cost & When to Call a Pro

For the vast majority of shower grout mold cases, DIY treatment with the methods in this guide is both effective and inexpensive — most households already have baking soda, peroxide, or bleach on hand, meaning the entire treatment costs well under a few dollars in supplies and roughly 20–30 minutes of active time.

Professional grout cleaning services typically charge based on square footage or per shower, and pricing varies significantly by region, so it's worth getting a couple of local quotes if you're considering this route. Professionals generally use higher-strength, commercial-grade oxygen bleach solutions along with rotary or steam equipment, which can be worthwhile for grout that's severely stained, cracked, or hasn't been treated in years.

It's worth calling in a professional, or even a mold remediation specialist, when: the mold keeps returning within a week or two of every cleaning despite following proper technique, the grout is visibly crumbling or pulling away from the tile, there's a persistent musty odor even when the visible mold is gone, or the affected area extends behind the tile into drywall, which is outside the scope of a surface cleaning and points to a moisture or plumbing issue that needs to be fixed first.

Common Mistakes to Avoid

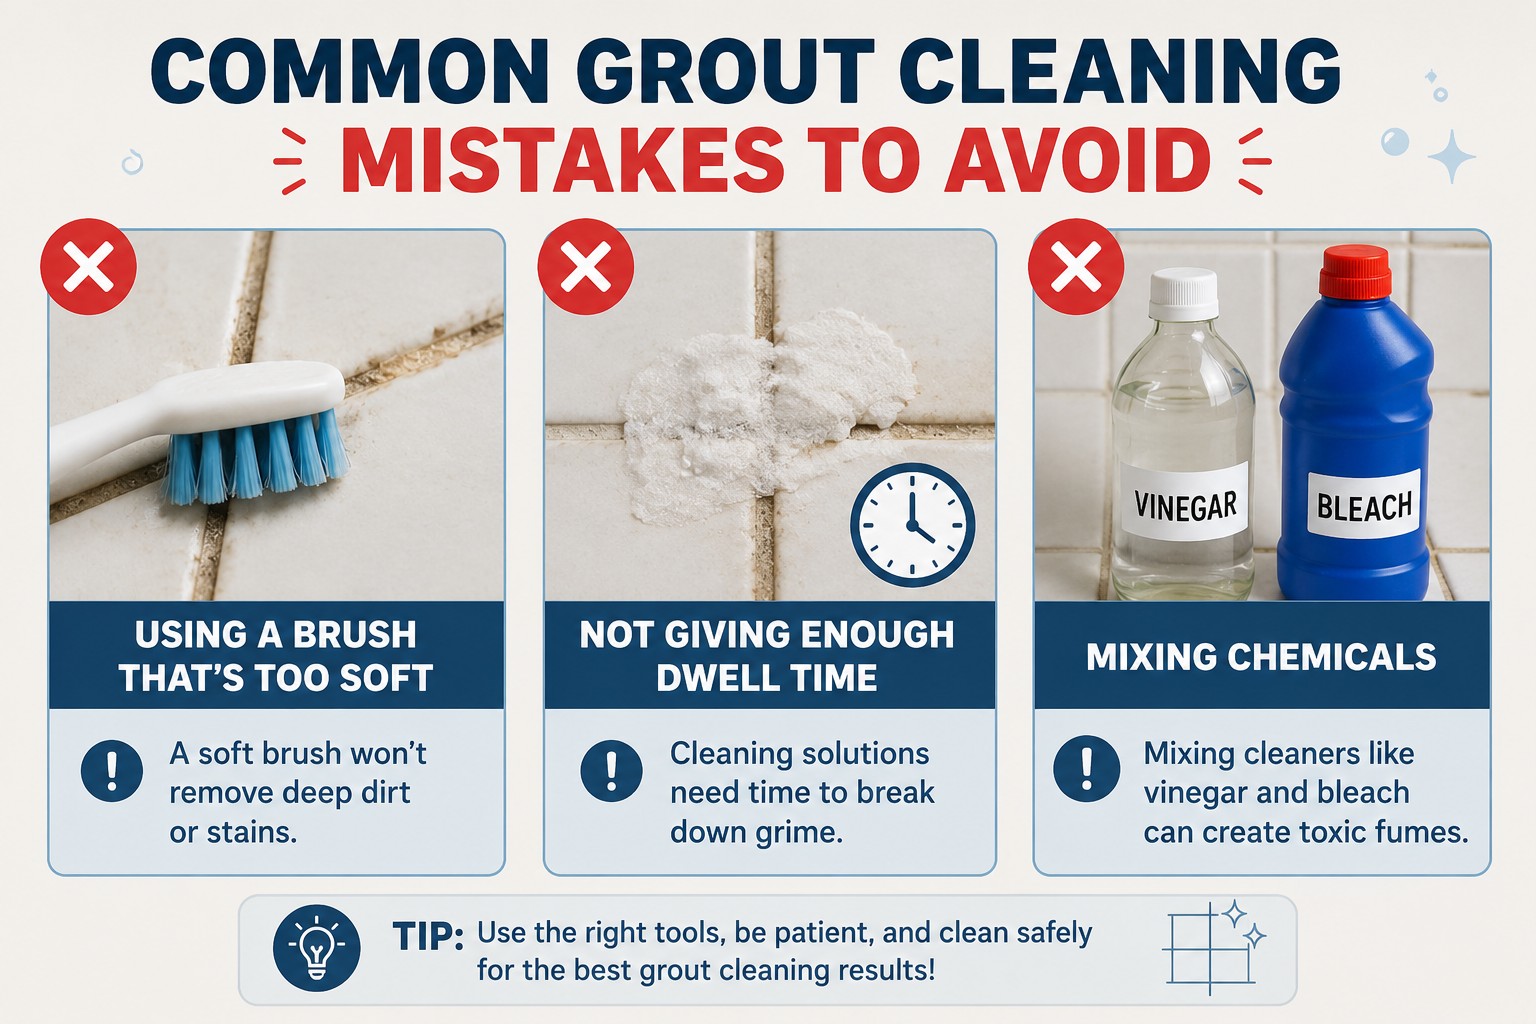
  • Scrubbing before letting the solution sit: Both bleach and peroxide need dwell time to break down mold at the root — scrubbing immediately just spreads spores across the surface.
  • Mixing bleach and vinegar or ammonia: This creates dangerous fumes and should never be done, even accidentally.
  • Using a metal brush: Wire or metal bristles can scratch grout and create more pores for mold to grow into. Stick to nylon.
  • Skipping the rinse: Leftover cleaning residue can attract dirt and moisture just as easily as the mold did.
  • Not drying the grout afterward: Wet grout left overnight is basically an invitation for mold to return within days.
  • Sealing over mold instead of removing it first: A sealer locks in whatever is already in the grout — applying it before the mold is fully cleaned traps the problem beneath a protective layer, making it harder to treat later.
  • Ignoring the caulk lines while focusing only on grout: Mold spreads easily between grout and adjacent silicone caulk, so treating one while ignoring the other often means it reappears within days from the untreated surface.

Signs Your Grout Needs Replacing, Not Just Cleaning

Occasionally, mold keeps returning not because the cleaning method is wrong but because the grout itself has broken down past the point where cleaning can help. Crumbling, powdery grout that comes away when you run a fingernail along it has lost its structural seal, meaning water is getting in through cracks that no amount of surface scrubbing can close. Similarly, grout that has visibly separated from the tile edge, leaving a gap you can see or feel, is allowing water to travel behind the tile itself rather than staying on the surface where cleaning can reach it.

In these cases, the mold is really a symptom of a bigger structural issue, and regrouting the affected area — removing the old grout with a grout saw and applying fresh grout — will do more good than another round of bleach or peroxide. This is usually only needed in isolated sections rather than an entire shower, and many homeowners handle small regrouting jobs themselves with a basic grout repair kit, though larger areas or shower pan concerns are worth having a tiler assess.

How to Stop Mold from Coming Back

Once the mold is gone, the real work is making sure it doesn't have the conditions to return. These habits target the root causes covered earlier in this guide — trapped moisture, warmth, and an organic food source — rather than just treating symptoms after they appear.

  • Run the exhaust fan for at least 20–30 minutes after every shower, or longer in bathrooms without a window, since this is the single biggest factor in how quickly humidity clears the room.
  • Squeegee the tiles and grout immediately after use to remove standing moisture — this simple 30-second habit removes the majority of water that would otherwise sit in grout pores overnight.
  • Reseal grout every 12–18 months with a penetrating grout sealer to reduce porosity, checking sooner in bathrooms used daily by multiple people.
  • Wipe down weekly with a light vinegar spray as a preventive habit rather than waiting for mold to appear, since catching early mildew before it darkens is far easier than treating established mold.
  • Fix any leaks around the shower pan or tile edges promptly — hidden moisture behind tiles is a common source of recurring black mold grout problems and won't be solved by surface cleaning alone.
  • Launder shower curtains and bath mats regularly, since these fabric items hold moisture close to the grout and floor tile and are a frequently overlooked mold source in otherwise well-maintained bathrooms.

If mold keeps returning to the same spots despite regular treatment, it's worth reviewing your full cleaning routine — our bathroom grout cleaner comparison breaks down which products actually hold up in high-humidity bathrooms long-term versus which ones just mask the problem temporarily.

Frequently Asked Questions

What kills mold in shower grout permanently?

No single treatment gives permanent immunity, since grout stays porous, but combining a bleach or peroxide treatment with a quality grout sealer and consistent post-shower ventilation dramatically reduces regrowth for months at a time. Think of it as ongoing maintenance rather than a one-time fix — the goal is keeping mold from re-establishing rather than eliminating the possibility of it forever.

Is black mold in shower grout dangerous?

Surface mold and mildew on grout are generally more of an aesthetic and allergy irritant than a serious health hazard, but persistent, spreading, slimy black patches with a musty smell should be evaluated, since they may indicate deeper moisture issues behind the tile. People with asthma, allergies, or compromised immune systems may want to be more cautious around any mold exposure and can consider wearing a mask during cleaning as a simple precaution.

Can I use vinegar and baking soda together on grout mold?

It's better to use them separately — combining vinegar and baking soda causes a fizzing neutralization reaction that reduces the cleaning power of both, so apply a baking soda paste first, rinse, then follow up with a vinegar spray on a different day if needed.

How often should I clean grout to prevent mold?

A light wipe-down once a week and a deeper treatment (bleach or peroxide method) once a month is usually enough to keep mold from establishing itself in a normally ventilated bathroom.

Does bleach damage grout over time?

Frequent, undiluted bleach use can gradually weaken and discolor grout, so it's best used diluted, occasionally, and followed by a thorough rinse — for regular maintenance, the baking soda and peroxide method is gentler on grout longevity.

Final Thoughts

Mold in shower grout is almost always a moisture problem before it's a cleaning problem. Treating the visible mold with bleach or a baking soda and peroxide paste will get your grout looking clean again, but pairing that with better ventilation and a sealed grout line is what actually keeps it from returning month after month. Start with the safe method if your bathroom is used daily by family, and reserve the bleach-based fast method for stubborn black mold spots that need immediate results. Whichever method you choose, staying consistent with a short weekly wipe-down will do more to keep grout mold-free than any single deep clean ever will. Treat mold removal, sealing, and ventilation as three parts of the same routine rather than separate one-off tasks, and grout mold becomes a rare inconvenience instead of a recurring bathroom battle.

Posted in DIY

How to Clean Shower Grout with a Steam Cleaner (Step-by-Step)

Jack Martin — Grout and Tile Cleaning Specialist at GroutCleaner.com

Jack Martin · Grout & Tile Cleaning Specialist

10+ years experience · 500+ products personally tested on real bathroom and kitchen tile. Every method on this page has been verified by Jack himself. Last reviewed: July 2026.

⚡ Quick Answer

To clean shower grout with a steam cleaner, fill the tank with distilled water, let it heat 3-5 minutes, then hold the nozzle 1-2 inches from the grout line and move in slow back-and-forth strokes for 10-15 seconds per section. Wipe away loosened grime with a microfiber cloth as you go. No chemicals needed.

Tested by Jack Martin · 5-step method · Last reviewed: July 2026

Scrubbing shower grout by hand is one of those chores that never really ends. You clean it, and a few weeks later that gray film is back. That's exactly why I switched to a steam cleaner for shower grout years ago. To clean shower grout with a steam cleaner, fill the tank, let it heat for 3-5 minutes, then hold the nozzle 1-2 inches from the grout line and move in slow back-and-forth strokes for 10-15 seconds per section, wiping away the loosened grime as you go.

I've tested more than 500 grout and tile cleaning products over the last 10+ years, and this is still one of the few methods I recommend without hesitation. No harsh chemicals, no kneeling on a bath mat scrubbing until your arm gives out, just heat and pressure doing the work for you. If you want the full breakdown of why steam works so well on grout, I cover that in the complete guide to steam cleaning grout, this post focuses specifically on shower grout.

If you've never used a steam cleaner on grout before, it can feel a little intimidating. Where do you point it? How long do you hold it there? Do you need a special attachment? I'll walk you through exactly what I do, step by step, so you get streak-free grout without redoing the job three times.

Quick Steps to Steam Clean Shower Tiles and Grout

  • Fill the steam cleaner's water tank with distilled water
  • Attach the narrow nozzle or grout brush head
  • Let the unit heat up for 3-5 minutes until steam is ready
  • Ventilate the bathroom (crack a window or run the fan)
  • Hold the nozzle 1-2 inches from the grout line
  • Move in short, slow back-and-forth strokes for 10-15 seconds per foot
  • Wipe loosened grime immediately with a microfiber cloth
  • Rinse with plain water and let the grout air dry
Steam cleaner nozzle held close to dirty shower grout line before cleaning

What You'll Need to Steam Grout Shower Walls and Floors

Before you start, gather these items. I keep all of mine in a small caddy under the sink so I'm not hunting for them mid-clean.

  • A steam cleaner with a narrow nozzle or grout brush attachment (handheld units like the Bissell Power Steamer or McCulloch MC1275 work well for this)
  • Distilled water (tap water leaves mineral deposits inside the tank over time)
  • A microfiber cloth or two
  • An old toothbrush for tight corners the nozzle can't reach
  • Rubber gloves, since the nozzle and steam get genuinely hot

You don't need a grout brush attachment to get started, but I'll be honest, it makes a noticeable difference on grout that's textured or slightly recessed. Check out my grout calculator if you're deciding what to buy first.

Step 1: Prep the Shower

Start with a dry-ish shower. You don't need it bone dry, but standing water will dilute the steam's effect and make it harder to see what you're actually cleaning. Clear out shampoo bottles, loofahs, and anything else sitting on the shower floor or in corner shelves.

I also recommend doing a quick dry sweep with a toothbrush over any grout lines with visible mold or heavy soap scum buildup. This isn't a deep clean, just enough to knock loose surface debris so the steam can focus on what's actually embedded in the grout. If mold keeps coming back no matter what you try, my guide on bathroom grout cleaning guide covers the deeper fix.

Step 2: Heat Up the Steam Cleaner

Fill the tank with distilled water up to the fill line, no higher. Overfilling is one of the most common mistakes I see, and it can cause sputtering or uneven steam pressure. Plug in the unit and give it 3-5 minutes to reach full temperature. Most units have a ready light or a hiss that changes pitch once they're at pressure.

While it's heating, crack a window or turn on your bathroom exhaust fan. Steam cleaning in a small, sealed bathroom gets humid fast, and you'll want the airflow both for comfort and to help the grout dry faster afterward.

Step 3: Steam the Grout Lines

This is the part people rush, and it's the part that actually matters most. Hold the nozzle about 1-2 inches from the grout line, angled slightly so the steam hits the grout directly rather than glancing off the tile. Move in short, slow back-and-forth strokes, spending roughly 10-15 seconds per linear foot of grout.

You'll notice the grime start to loosen and darken slightly as the steam breaks down the buildup. That's your cue to wipe. Don't wait until you've steamed the whole shower, wipe as you go, section by section. If you let steamed grime sit, it can re-settle into the grout as it cools.

Before and after comparison of bathroom shower grout cleaned with a steam cleaner

Left: shower grout before steaming. Right: after one pass with a handheld steam cleaner, 10-15 seconds per foot.

Step 4: Work Corners and Tight Spots

Nozzles are great for straight runs of grout, but corners, around the shower floor drain, and grout behind faucet handles are trickier. This is where the old toothbrush earns its keep. Steam the area first to loosen grime, then follow up with a few passes of the dry toothbrush to lift what the steam softened.

Step 5: Wipe, Rinse, and Dry

Once you've worked through every grout line, do a final wipe-down with a clean microfiber cloth, then rinse the whole shower with plain water to clear away any residue. Leave the bathroom fan running or the window open for another 15-20 minutes so the grout dries fully. Damp grout that doesn't dry out properly is exactly the environment mold likes best. Once everything's dry, it's a good time to check whether your grout needs a deeper refresh, my DIY grout cleaner recipes pair well with regular steam maintenance.

How Often Should You Steam Clean Shower Grout?

For most households, once every 2-3 weeks keeps grout looking fresh without letting grime build back up to the point where you need a deep scrub. If you have hard water or a household of four or more people sharing one shower, I'd lean toward weekly. Hard water brings its own issues too, I break those down in my post on my homemade grout cleaner recipes.

Steam Cleaner vs. Other Grout Cleaning Methods

I get asked a lot whether steam is actually better than a baking soda paste or a store-bought chemical cleaner. Here's how they stack up based on my own testing.

Method Effort Level Chemicals Used Best For
Steam Cleaner Low None Regular maintenance, mold-prone bathrooms
Baking Soda Paste Medium (scrubbing required) None Light, occasional stains
Chemical Grout Cleaner Low to Medium Yes, often bleach-based Heavy, set-in stains
Grout Brush + Vinegar High Mild acid Budget cleaning, small areas

My honest take? Steam wins for regular upkeep because there's no chemical residue sitting in a wet, humid room. But if you're dealing with grout that hasn't been cleaned in years, you might need one heavy-duty chemical pass first, then switch to steam for maintenance going forward. For a full rundown of options, see my best steam cleaner picks for grout.

Mistakes to Avoid When You Steam Clean Shower Tiles

A few things I see people get wrong when they first try steam cleaning grout:

  • Holding the nozzle too far away. Steam loses effectiveness fast over distance. Get in close, within 1-2 inches.
  • Moving too quickly. Rushing through a grout line means the steam doesn't have time to penetrate. Slow down.
  • Using tap water. Mineral buildup inside the tank shortens the unit's lifespan and can clog the nozzle.
  • Skipping ventilation. A sealed, humid bathroom makes the whole process less comfortable and slower to dry.
  • Not wiping as you go. Letting loosened grime cool and resettle undoes a chunk of your work.
Gloved hand wiping shower grout clean with a microfiber cloth after steam treatment

Is It Safe to Steam Clean Colored or Sealed Grout?

Generally, yes, as long as your grout is properly sealed. Steam won't strip a good sealant the way some chemical cleaners can. That said, I'd avoid holding the nozzle in one spot for more than 15-20 seconds on colored or epoxy grout, since prolonged direct heat can occasionally dull the finish over time. If your grout hasn't been sealed in over a year, it's worth resealing before you start a regular steam cleaning routine.

FAQ

Does steam cleaning actually kill mold in shower grout?

Yes. Steam reaches temperatures above 200°F, which is well above the threshold needed to kill most household mold and mildew spores on contact. It won't remove deep-set mold stains on its own, but it does kill the active growth.

Can I use a regular steam mop on shower grout?

You can, but a handheld steam cleaner with a narrow nozzle attachment works much better for grout lines specifically. Steam mops are built for flat floor surfaces and don't concentrate steam into a tight enough area for grout.

How long does it take to steam clean an entire shower?

For an average-sized shower stall, I usually budget 20-30 minutes total, including heat-up time. Larger showers or ones with heavy grime can take closer to 45 minutes.

Do I need to use any cleaning solution with the steam, or just water?

Just distilled water. That's the whole point of steam cleaning, it uses heat and pressure instead of chemicals to break down grime. Adding cleaning solution to most steam cleaner tanks can actually void the warranty.

Will steam cleaning damage my shower tile?

Steam is safe for most ceramic, porcelain, and natural stone tile. The one exception is unsealed natural stone like marble or travertine, where repeated heat and moisture exposure can affect the surface over time. Always check your tile manufacturer's care guidelines first.

Final Thoughts

Steam cleaning shower grout isn't complicated once you've done it a time or two. The technique matters more than the equipment, close nozzle distance, slow strokes, and wiping as you go will get you further than any premium steam cleaner used the wrong way. Out of everything I've tested over the years, this is still the method I tell friends and family to start with before they spend money on chemical cleaners that just end up sitting under the sink half-used. Give it a try this weekend and see the difference for yourself.

Posted in DIY

Baking Soda Grout Cleaner: The Complete Guide (No Bleach Needed)

Jack Martin — Grout and Tile Cleaning Specialist at GroutCleaner.com

Jack Martin · Grout & Tile Cleaning Specialist

10 years experience · 500+ products personally tested on real bathroom and kitchen tile. Every method on this page has been verified by Jack himself. Last reviewed: July 2026.

⚡ Quick Answer

Baking soda cleans grout because it is a mild abrasive (pH 8.3) that physically scrubs dirt from porous grout lines and breaks down grease chemically. Most effective method: mix 2 parts baking soda + 1 part hydrogen peroxide into a paste, apply to grout, wait 15 minutes, scrub, and rinse. No bleach required.
Here is a question I hear constantly: "I scrubbed my grout for an hour and it still looks grey — what am I doing wrong?" Almost always, the answer is not the product. It is the technique — and usually, the waiting time. Baking soda is one of the most effective DIY grout cleaner options available. But most people apply it and immediately start scrubbing, which is exactly what you should not do. This guide covers three methods tested on real tile, when to use each one, what actually happens chemically, and the five mistakes that cause most people to give up and reach for bleach.

Why Baking Soda Works on Grout

Close-up of porous grout lines between white ceramic bathroom tiles before cleaning with baking soda paste

Grout is porous — dirt and grease embed deep inside the surface, not just on top. That is why surface wiping alone never works. Grout is made from cement, sand, and water — and it is genuinely porous. Under a microscope it looks like a sponge. Every time you mop, shower, or cook, moisture carries dirt, soap scum, grease, and mineral deposits straight into those pores. Surface wiping just smears it around. Baking soda (sodium bicarbonate) tackles this two ways:

  • Physical abrasion: Baking soda crystals are mildly gritty — gentle enough not to scratch tile glaze, but rough enough to scrub loosened particles out of grout pores when you apply friction with a brush.
  • Alkaline chemistry: At pH 8.3, baking soda breaks the molecular bonds in grease and soap scum, making them water-soluble so they rinse away rather than spreading across the tile.
What baking soda alone cannot do: kill mold at the root, remove oxidised deep discoloration, or whiten grout darkened by years of mineral buildup. For those, you need to combine it with hydrogen peroxide — and the difference is dramatic. If you want to compare all homemade grout cleaner options side by side, we have tested six recipes in detail.

Method 1: Baking Soda + Water Paste

Best for: Regular maintenance, natural stone tile, first-time cleaning

Baking Soda + Water

✅ Safe on Natural Stone
⏱ Prep: 2 min ⏳ Dwell: 10–15 min 💰 Cost: <£0.50 🧱 All tile types safe
What you need: 3 tbsp baking soda · 1 tbsp water · Old toothbrush or grout brush · Microfiber cloth
  1. Mix 3 parts baking soda + 1 part water into a thick paste — toothpaste consistency. If it drips, add more baking soda.
  2. Press paste into grout lines with a toothbrush. Do not scrub yet — just coat evenly. Work in 2-foot sections.
  3. Leave for 10–15 minutes. This is the step most people skip. The baking soda needs contact time to pull dirt from inside the pores.
  4. Scrub using short back-and-forth strokes along the grout line — never circular. Circular motion spreads grime onto surrounding tile.
  5. Rinse thoroughly with warm water. Remove all white residue — leftover baking soda attracts new dirt.
Test Result: 6.5/10 — Excellent for light-to-moderate dirt. Safest option for marble and natural stone. Not enough power for deep stains or mold.

✅ Pros

  • Safe for ALL tile types including marble and travertine
  • Under £0.50 per application
  • No fumes, no gloves required
  • Perfect for weekly maintenance

⚠️ Cons

  • Will not remove deep stains or mold
  • Needs more scrubbing than Method 2
  • Less effective on heavily discolored grout
Recommended Product

Baking Soda for Grout Cleaning

The gentle abrasive in the spray and paste recipes above. A large box or bag goes a long way and also works for general household cleaning.

As an Amazon Associate I earn from qualifying purchases, at no extra cost to you.

Check Price on Amazon →

Method 2: Baking Soda + Hydrogen Peroxide

Best for: Deep stains, mold, yellowed or discolored grout, bathrooms and showers

Baking Soda + Hydrogen Peroxide Paste

⭐ Best Overall Results
⏱ Prep: 2 min ⏳ Dwell: 15–20 min 💰 Cost: ~£1 ⚠️ Patch test on natural stone
Bowl of baking soda and hydrogen peroxide mixed into a thick white paste for cleaning tile grout lines in bathroom

Paste should be thick enough to stay on the grout line without dripping. Mix fresh each time — hydrogen peroxide loses potency when stored after mixing. What you need: 2 parts baking soda · 1 part hydrogen peroxide (3%) · Optional: 2–3 drops dish soap for kitchen grout · Grout brush · Spray bottle Here is what actually happens: hydrogen peroxide is an oxidising agent. When it meets organic stains — mold, mildew, grease — it breaks down their chemical bonds at a molecular level. Combined with baking soda's abrasion, you are physically lifting that dissolved grime out of the pores. This is why results beat commercial tile and grout cleaners costing ten times as much.

  1. Mix 2 parts baking soda + 1 part hydrogen peroxide (3%) into a thick paste. Add dish soap if tackling kitchen grout.
  2. Apply paste firmly to grout lines. Work in sections — do not let paste dry on tile.
  3. Wait 15–20 minutes. You will see small bubbles forming — that is the oxidisation reaction working. Leave it.
  4. Scrub with a stiff grout brush using back-and-forth strokes. Paste turns slightly grey as it lifts embedded grime.
  5. Rinse thoroughly with a spray bottle to flush paste out of pores. Wipe dry with a clean cloth.
  6. Make fresh paste each time — do not store it. Hydrogen peroxide degrades within hours once mixed.
Test Result: 9/10 — Best of any DIY method tested. Removed deep staining and restored grout to near-original colour in one application on bathroom floor tile.

✅ Pros

  • Removes deep stains and kills mold
  • Whitens discoloured grout without bleach
  • Low fumes — safe in enclosed bathrooms
  • Under £1 per session

⚠️ Cons

  • Patch test required on dark natural stone
  • Cannot store — make fresh each use
  • Hydrogen peroxide not always on hand
Recommended Product

Baking Soda for Grout Cleaning

The gentle abrasive in the spray and paste recipes above. A large box or bag goes a long way and also works for general household cleaning.

As an Amazon Associate I earn from qualifying purchases, at no extra cost to you.

Check Price on Amazon →

Method 3: Baking Soda + Vinegar

Best for: Light surface dirt on sealed ceramic or porcelain tile only

Baking Soda + White Vinegar

⚠️ Limited Use — Read First
⏱ Prep: 1 min ⏳ Dwell: Max 5 min ❌ Never on natural stone ❌ Never on unsealed grout
This is the most shared grout tip online — and the most misunderstood. The fizzing reaction looks powerful but is actually a neutralisation reaction: acid (vinegar) and alkali (baking soda) cancel each other out, leaving water and carbon dioxide with very little cleaning power remaining. For light surface dirt on sealed ceramic tile, the brief mechanical fizzing dislodges some loose particles. Beyond that it is outperformed by every other method here. More importantly, vinegar (pH 2–3) permanently etches marble, travertine, limestone, and slate — and gradually erodes unsealed cement grout with repeated use. For a full breakdown of what works and what does not, see our DIY grout cleaner recipes guide. If using it anyway — sealed ceramic tile only:
  1. Apply baking soda paste to grout lines first and leave 5 minutes.
  2. Spray white vinegar onto the paste — fizzing starts immediately.
  3. Scrub within 2 minutes while fizzing is still active.
  4. Rinse immediately and completely. Do not let vinegar sit on the surface.
Test Result: 3.5/10 — Last resort only, sealed ceramic tile only. Outperformed by both other methods.
Recommended Product

Baking Soda for Grout Cleaning

The gentle abrasive in the spray and paste recipes above. A large box or bag goes a long way and also works for general household cleaning.

As an Amazon Associate I earn from qualifying purchases, at no extra cost to you.

Check Price on Amazon →

Which Method Should You Use?

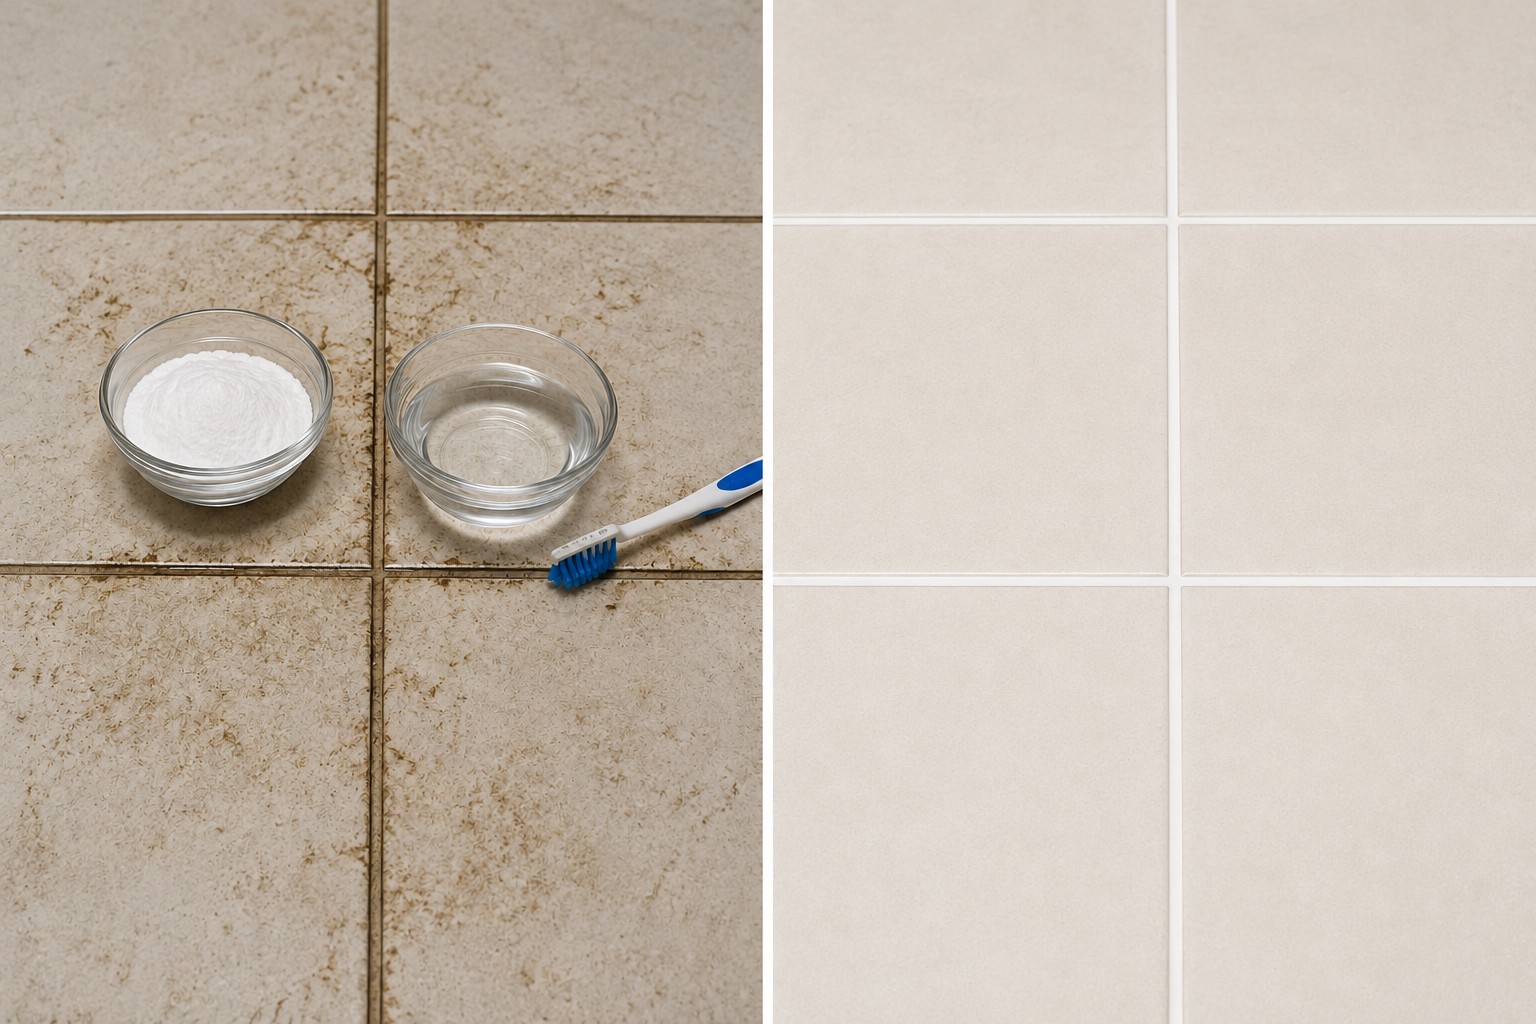
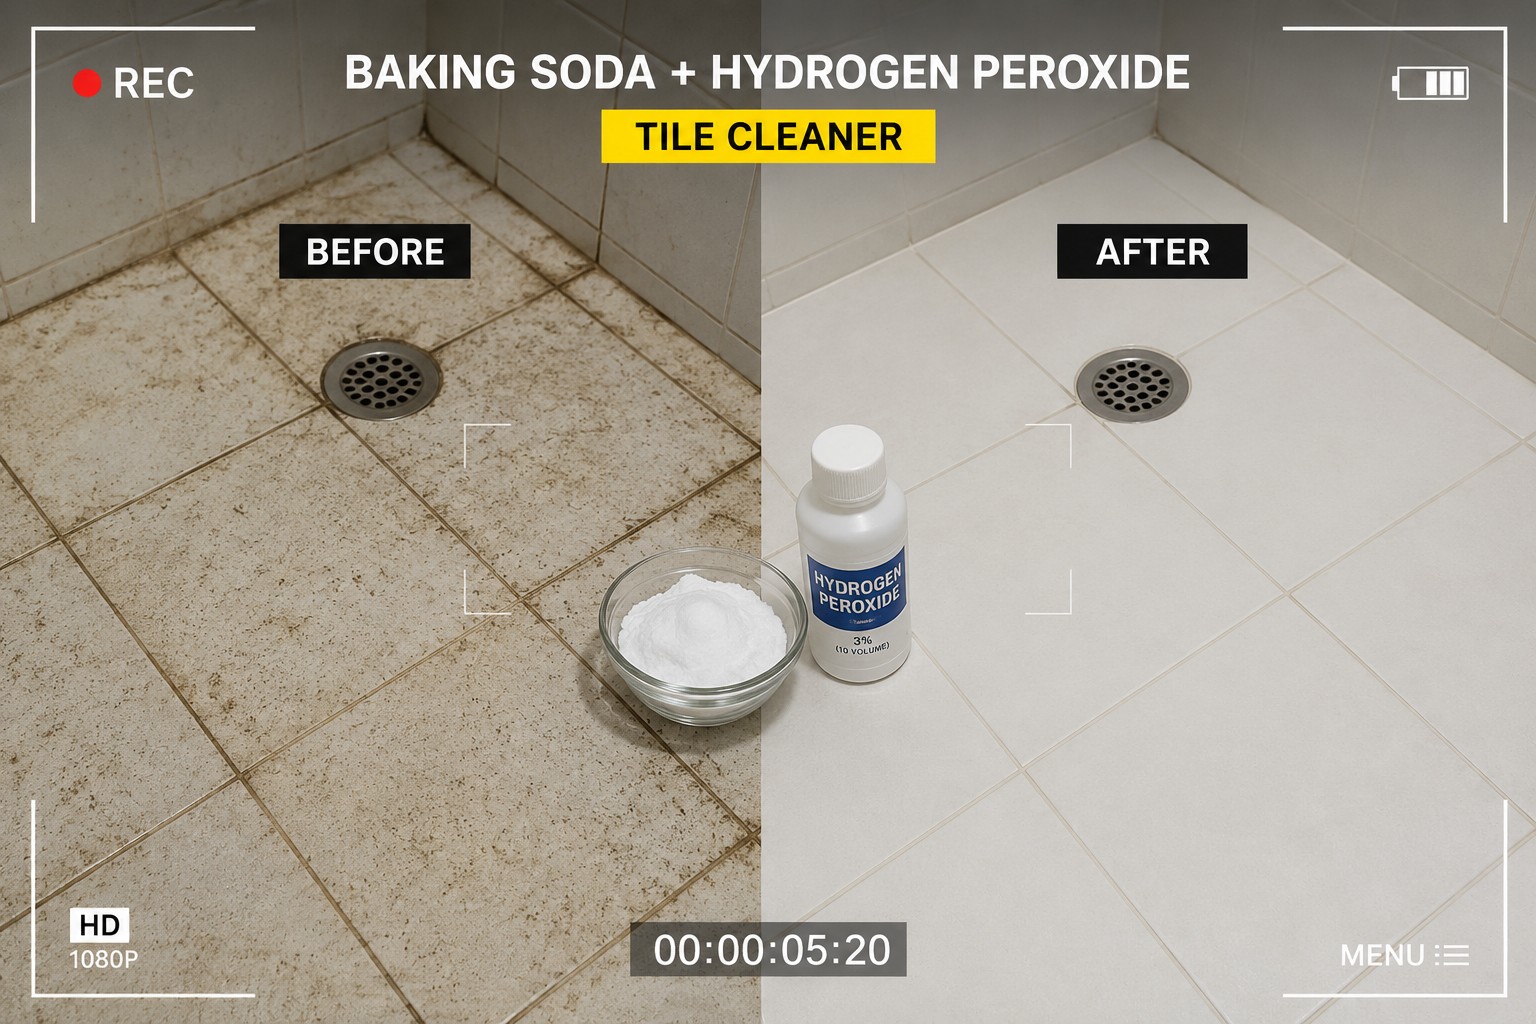
Not sure which to reach for? This table makes the decision straightforward: Before and after comparison of bathroom floor grout cleaned with baking soda and hydrogen peroxide paste — one application, 20 minute dwell time

Left: bathroom floor grout before. Right: after one application of baking soda + hydrogen peroxide — 20 minutes dwell, one round of scrubbing.

Your Situation Best Method Safe on Natural Stone? Score
Weekly maintenance / light dirt Baking soda + water ✅ Yes 6.5/10
Deep stains, yellowing, discoloration Baking soda + hydrogen peroxide ⭐ ⚠️ Patch test first 9/10
Mold and mildew (bathroom/shower) Baking soda + hydrogen peroxide ⚠️ Patch test first 9/10
Kitchen grease stains Baking soda + dish soap ✅ Yes 7.5/10
Light dirt on sealed ceramic only Baking soda + vinegar ❌ Never 3.5/10
Natural stone (marble, travertine) Baking soda + water only ✅ Yes 6/10

Baking Soda vs Bleach: The Honest Answer

Chlorine bleach whitens grout by oxidising colour pigments in stains — it does not remove the dirt, it just changes the colour so it looks invisible. Within a few weeks the discoloration often returns because the underlying grime was never actually removed. Baking soda with hydrogen peroxide uses oxidisation too, but baking soda's abrasion physically removes the loosened dirt at the same time. You are cleaning the grout, not just bleaching it. If you are looking for the best grout cleaner for heavy-duty situations where DIY is not enough, we have compared the top commercial options with test scores. Two more reasons to avoid chlorine bleach for regular grout cleaning:
  • Long-term damage: Repeated bleach applications slowly break down the calcium silicate binders in cement grout, making it brittle and prone to cracking earlier than it should.
  • Safety: Bleach fumes in an enclosed bathroom without ventilation are genuinely harmful — especially if any residue of other cleaning products remains on surfaces.
The one situation bleach has any advantage: very heavy black mold in cracked or aged grout. Even then, oxygen bleach (sodium percarbonate — e.g. OxiClean) is safer and more effective than chlorine bleach.

5 Mistakes That Kill Your Results

Person using stiff grout brush in correct back-and-forth scrubbing technique along white ceramic tile grout lines after applying baking soda paste

Always scrub back-and-forth along the grout line — never in circles. Circular motion spreads grime from the grout onto surrounding tile.

  • Scrubbing immediately without dwell time. Baking soda needs at least 10 minutes of contact to work chemically. Scrubbing right away cuts effectiveness by more than half. The cleaning happens during the wait, not the scrub.
  • Making the paste too thin. A watery paste runs off the grout onto the tile and loses contact with the surface. It should be thick enough to stay on a vertical grout line without dripping.
  • Scrubbing in circles. Circular motion spreads dirt from the grout line outward onto the surrounding tile. Always scrub back and forth, following the direction of the grout line.
  • Using vinegar on the wrong tile. Marble, travertine, limestone, and slate are calcium-based — vinegar etches them permanently on contact. Test a drop in an inconspicuous corner first: if it fizzes, it is stone. Do not use vinegar.
  • Not rinsing thoroughly. Baking soda residue left on grout attracts new dirt faster than clean grout does. Rinse until water runs completely clear with no white residue visible.
⚠️ Never Mix These Combinations: Vinegar + bleach → toxic chlorine gas. Hydrogen peroxide + vinegar → peracetic acid, a respiratory irritant. Bleach + ammonia-based cleaners → chloramine gas.Use one product at a time. Rinse thoroughly before switching.

After Cleaning: The Step Most People Skip

Cleaning grout without sealing it afterwards is like washing your car and parking it back in mud. Grout is porous — without a sealer, it re-stains within weeks because nothing is blocking dirt and moisture from re-entering those pores. After your baking soda clean:
  • Allow grout to dry fully — at least 24 hours, ideally 48 hours before sealing.
  • Apply a penetrating grout sealer — not a membrane-forming sealer (those peel). A penetrating sealer soaks into the pores and blocks absorption from the inside.
  • Apply a second coat after the first dries (3–4 hours).
  • Re-seal annually, or every 6 months for kitchen floors and shower walls.
A good sealer reduces deep-clean frequency from monthly down to every 4–6 months in high-traffic bathrooms. Not sure how much sealer you need? Use the free grout calculator — enter your room dimensions and tile size for an instant estimate. For room-specific advice, see our guides on bathroom grout cleaner methods and best tile grout cleaners ranked by surface type.

Frequently Asked Questions

Does baking soda actually clean grout?Yes. Baking soda cleans grout through mild abrasion and alkaline chemistry (pH 8.3) — it physically scrubs grime out of porous grout and breaks down grease chemically. For light to moderate staining, baking soda paste alone works well. For deep stains or mold, combining it with hydrogen peroxide delivers significantly better results, tested at 9/10 by Jack Martin on real bathroom tile.
Is baking soda and vinegar good for cleaning grout?Only for light surface dirt on sealed ceramic or porcelain tile. The fizzing reaction is a neutralisation reaction — acid and alkali cancel each other out and leave very little cleaning power. Never use vinegar on natural stone tile — it permanently etches marble, travertine, and limestone. Baking soda + hydrogen peroxide is far more effective for most situations.
How long do you leave baking soda on grout?10–15 minutes for baking soda + water paste. 15–20 minutes for baking soda + hydrogen peroxide on deep stains. No more than 5 minutes if using vinegar. The dwell time is the single most important variable — most people rush this step and get poor results.
Can I use baking soda on natural stone tile grout?Yes — baking soda + water paste is safe for marble, travertine, and limestone. It is one of the only DIY options that is. Do not use vinegar, lemon juice, or hydrogen peroxide on natural stone without a patch test first — these can cause permanent etching on polished surfaces.
What is better for grout — baking soda or bleach?Baking soda (especially with hydrogen peroxide) is better long-term. Chlorine bleach changes the colour of stains without removing the underlying dirt — results are temporary. Repeated bleach use also weakens cement grout structure over time. Baking soda physically removes grime, produces minimal fumes, and does not damage grout with regular use.
How often should I clean grout with baking soda?Bathroom floors: every 3–6 months. Kitchen grout: every 2–3 months. Shower walls: monthly. After each deep clean, seal the grout — it dramatically reduces how quickly re-staining occurs and extends time between deep cleans.

How Much Grout Sealer Do You Need?

Use the free Grout Calculator — TCNA industry formula, instant results based on your tile size and room dimensions. Try the Free Calculator →
Posted in DIY

Homemade Grout Cleaner: Best DIY Recipes with Baking Soda & Vinegar

Quick Answer: The best homemade grout cleaner is a paste made from baking soda and water, activated with white vinegar. Spread the paste over the grout lines, spray with white vinegar, let it fizz for 10–15 minutes, then scrub with a stiff brush and rinse. This combination lifts dirt, kills mild mold, and whitens grout without harsh chemicals or added cost. For mold and gray discoloration, swap the vinegar for hydrogen peroxide instead.

Key Takeaways

  • Baking soda and vinegar is the most balanced homemade grout cleaner, handling roughly 80% of everyday grime.
  • For mold and gray discoloration, hydrogen peroxide outperforms vinegar — use one or the other, never mixed together in the same container.
  • Kitchen grease needs dish soap, not vinegar — vinegar alone won't break down cooking splatter.
  • Oxygen bleach soaks handle years-old, neglected stains without weakening grout the way chlorine bleach can.
  • Avoid straight vinegar and oxygen bleach on natural stone tile; stick to a baking soda-only paste near stone surfaces.
  • Let any paste sit for the full recommended time (10–30 minutes depending on the recipe) — rinsing early is the most common mistake that wastes effort.

Introduction

I've mixed, tested, and scrubbed with more homemade grout cleaner recipes than I can count over the past decade, and the question I get asked more than any other is simple: do these DIY pastes actually work, or is that just something people repeat on Pinterest? Short answer yes, a proper homemade grout cleaner works, but only if you use the right combination for the problem in front of you and give it enough time to do the job. I've run store-bought grout cleaners that cost $12 a bottle side by side against a paste I mixed from ingredients already sitting in my kitchen cabinet, and more often than not, the homemade version held its own. Sometimes it won outright. This guide walks through every recipe I actually use, when to reach for each one, which grout types they're safe on, and the mistakes that waste your time. No miracle claims just what gets grimy grout lines clean using stuff you probably already own.

homemade grout cleaner ingredients baking soda vinegar

Why DIY Grout Paste Actually Works

Grout is porous. That's the entire problem in one sentence. It soaks up spills, soap scum, body oils, and moisture like a sponge, and once dirt settles into those pores, a quick wipe with a paper towel isn't going to touch it. A good homemade grout cleaner attacks that embedded dirt in a few distinct ways, and understanding the mechanism actually helps you pick the right recipe instead of guessing:

  • Baking soda is a mild abrasive and a natural alkali. It physically scrubs away grime while neutralizing acidic stains from things like coffee, wine, and hard water minerals.
  • White vinegar is acidic and dissolves mineral deposits, soap scum, and light mold. When it hits baking soda, the fizzing reaction agitates and lifts loosened dirt out of the grout's pores.
  • Hydrogen peroxide is a mild bleaching agent. It brightens grout and kills mold spores without the fumes or grout-damaging strength of chlorine bleach.
  • Dish soap cuts through grease, which shows up constantly in kitchen grout near the stove and around cutting boards.
  • Oxygen bleach (sodium percarbonate) breaks down into hydrogen peroxide and washing soda in water, giving you a stronger whitening punch for old, set-in stains without the surface damage chlorine bleach can cause.

None of these ingredients are as aggressive as commercial bleach-based cleaners, and that's actually an advantage. Bleach can weaken grout over time and isn't safe on every surface. Homemade recipes are gentler, cheaper, and in most cases just as effective for regular maintenance and moderate staining. Where they fall short is grout that's been neglected for years, has deep mold penetration, or has never been sealed. For that level of buildup, a stronger commercial cleaner or a professional steam clean as a first pass, followed by a homemade routine for upkeep, is the realistic path.

porous grout absorbing dirt and stains

How I Test Every DIY Recipe on This List

Every recipe in this guide has been run on real grout in my own bathroom and kitchen, plus a handful of test tiles I keep specifically for side-by-side comparisons same stain, same dwell time, different formula, photographed before and after under the same lighting. I track dwell time, scrub effort, and whether the result held up a week later, not just how it looked immediately after rinsing. That last part matters more than most guides let on, because a lot of pastes look great right after rinsing and then the grime creeps back within days because the pores weren't actually cleared out. The recipes that made this list are the ones that held up over repeat testing, not just a single good photo.

Homemade Grout Cleaner Recipe 1: Baking Soda and Vinegar Paste (Best All-Around)

This is my go-to homemade grout cleaner and the one I recommend to almost everyone starting out. It's cheap, fast, and handles the majority of everyday grime, and it's the formula I'd point to first if you only try one homemade grout cleaner from this guide.

What you'll need:

  • ½ cup baking soda
  • 2–3 tablespoons water
  • White vinegar in a spray bottle
  • A stiff-bristled grout brush or old toothbrush
  • Microfiber cloth

Steps:

  1. Mix the baking soda with water until it forms a thick, spreadable paste similar to toothpaste consistency.
  2. Apply the paste directly onto the grout lines using an old toothbrush or your finger (gloves recommended).
  3. Spray white vinegar generously over the paste. It will foam up immediately that's the reaction doing the work.
  4. Let it sit for 10–15 minutes. Don't let it dry out completely; mist with a little more vinegar if needed.
  5. Scrub in small circular motions with the brush, focusing on discolored spots.
  6. Rinse thoroughly with warm water and wipe dry with a microfiber cloth.

This method works especially well as a natural grout cleaner paste for weekly or biweekly maintenance, and it's gentle enough to use on colored grout without fading it.

baking soda vinegar grout cleaner step by step

Baking Soda and Hydrogen Peroxide Paste (Best for Mold & Discoloration)

This is the recipe I switch to when grout starts turning gray or black from mold and mildew common in shower stalls and around tubs. Hydrogen Peroxide has mild bleaching properties without the harshness of chlorine bleach.

What you'll need:

  • ½ cup baking soda
  • ¼ cup hydrogen peroxide (3% solution, the kind sold at any pharmacy)
  • 1 teaspoon dish soap (optional, for extra grease-cutting power)

Steps:

  1. Combine the baking soda and hydrogen peroxide in a bowl to form a paste. Add dish soap if the area also has grease buildup.
  2. Spread the paste over moldy or discolored grout lines.
  3. Let it sit for 15–20 minutes longer than the vinegar method, since this recipe relies more on chemical action than fizzing agitation.
  4. Scrub thoroughly, applying extra pressure to stained spots.
  5. Rinse well and ventilate the room while it dries.
"Baking soda and vinegar is fine for weekly upkeep, but on grout that's gone dark gray, I've never seen it beat a hydrogen peroxide paste left on for a full 15 minutes. The difference showed up in the before-after photos every single time." Jack Martin

A quick safety note: never mix hydrogen peroxide with vinegar directly in the same container. Separately, both are safe cleaning agents, but combined they can form peracetic acid, which is irritating to skin, eyes, and lungs. Use one recipe or the other, not both together.

moldy grout hydrogen peroxide treatment

Vinegar Spray Method (Best for Quick Maintenance)

Sometimes you don't need a full paste treatment you just need to knock down soap scum and light grime before it builds up. This is my low-effort, high-frequency option.

What you'll need:

  • Equal parts white vinegar and water in a spray bottle
  • Soft brush or sponge

Steps:

  1. Spray the vinegar-water solution directly onto grout lines.
  2. Let it sit for 5 minutes.
  3. Wipe or lightly scrub with a soft brush.
  4. Rinse and dry.

This won't tackle deep stains, but as a vinegar grout cleaner used weekly, it keeps grime from ever reaching the point where you need a heavier paste treatment. Think of it as prevention rather than restoration. One caution: avoid using straight vinegar on natural stone tile (marble, travertine, limestone) since the acidity can etch the stone surface. It's safe on ceramic and porcelain grout lines, which cover the vast majority of homes.

Dish Soap and Baking Soda Paste (Best for Kitchen Grease)

Kitchen grout especially the stretch in front of the stove has a different problem than bathroom grout, and that's where most generic DIY advice falls short. It's not mold and soap scum, it's baked-on grease and cooking splatter. Vinegar alone doesn't cut grease well, so this is the recipe I reach for near the stovetop.

What you'll need:

  • 3 tablespoons baking soda
  • 1 tablespoon dish soap (a degreasing formula works best)
  • Warm water, just enough to form a paste

Steps:

  1. Mix the baking soda and dish soap, adding warm water a little at a time until you get a spreadable paste.
  2. Apply directly to greasy grout lines and let it sit for 10 minutes the soap needs time to break the grease bond.
  3. Scrub with a stiff brush, working in small sections.
  4. Rinse with warm water; grease residue rinses more easily with warm water than cold.

This recipe won't do much for mold or mineral staining — it's purpose-built for grease, and it's the one I recommend when someone tells me their kitchen grout "just looks dingy" rather than discolored.

Oxygen Bleach Soak (Best for Old, Set-In Stains)

For grout that's been neglected for a long stretch think a rental you just moved into, or a floor nobody's deep-cleaned in years the paste recipes above sometimes aren't enough on their own. Oxygen bleach (sold as powdered stain removers with sodium percarbonate as the active ingredient) gives you more whitening power than baking soda and vinegar, without the grout-weakening risk of chlorine bleach.

What you'll need:

  • ¼ cup oxygen bleach powder
  • 1–2 cups warm water
  • Stiff grout brush

Steps:

  1. Dissolve the oxygen bleach powder in warm water according to the package ratio.
  2. Pour or sponge the solution directly onto the grout lines, saturating them fully.
  3. Let it sit for 20–30 minutes. Oxygen bleach works slower than vinegar or peroxide, so don't rush this step.
  4. Scrub thoroughly and rinse well.
  5. For severe cases, repeat the next day rather than trying to force results in one session.

This is the closest a homemade grout cleaner gets to matching a commercial deep-clean product, and it's my recommendation before you spend money on a professional steam clean try this first, since it solves a meaningful share of "years of neglect" cases on its own.

before after homemade grout cleaner results

Comparison Table: Which Homemade Grout Cleaner Should You Use?

MethodBest ForTime NeededDifficultyEffectiveness on Heavy Stains
Baking Soda + Vinegar Paste Everyday grime, general cleaning 15–20 min Easy Moderate–High
Baking Soda + Hydrogen Peroxide Mold, mildew, gray/black discoloration 20–25 min Easy High
Vinegar Spray Only Light maintenance, soap scum prevention 5–10 min Very Easy Low
Dish Soap + Baking Soda Kitchen grease and cooking splatter 10–15 min Easy Moderate
Oxygen Bleach Soak Old, set-in, years-neglected stains 20–30 min Easy–Moderate Very High
Commercial Bleach Cleaner (for reference) Severe, years-old staining 10–15 min Easy Very High (damages grout over time)

If you're not sure where to start: begin with the baking soda and vinegar paste. It's the most balanced option and handles roughly 80% of the grout problems I see in typical homes. Reach for the oxygen bleach soak only when that doesn't get you where you need to be.

Does Grout Type Change Which Homemade Grout Cleaner You Should Use?

Yes, and this is a detail a lot of homemade grout cleaner guides skip over. Not every homemade grout cleaner recipe is safe on every surface:

  • Cement-based grout (sanded and unsanded) the type in the vast majority of homes handles all five recipes above without issue.
  • Natural stone tile (marble, travertine, limestone, slate) avoid straight vinegar and oxygen bleach directly on the stone surface, since the acidity and abrasion risk can etch or dull the finish. Stick to the baking soda paste alone, applied carefully to the grout lines and kept off the stone itself.
  • Colored or dark grout hydrogen peroxide and oxygen bleach are both safe and won't cause the blotchy fading that chlorine bleach sometimes produces on colored grout.
  • Epoxy grout much more stain-resistant to begin with, and can handle any of these recipes, though you'll rarely need anything beyond the vinegar spray for maintenance since epoxy doesn't absorb stains the way cement grout does.

Common DIY Grout Cleaning Mistakes That Waste Your Effort

I've made most of these mistakes myself over the years, so consider this the shortcut version of learning them the hard way:

  • Not letting the paste sit long enough. Rinsing after 2–3 minutes barely gives the ingredients time to break down dirt. Give it the full 10–30 minutes depending on the recipe.
  • Scrubbing before the reaction finishes. With baking soda and vinegar, wait for the fizzing to calm down before you start scrubbing that reaction is doing real work.
  • Using a brush that's too soft. A dish sponge won't cut it on grout lines. Get a dedicated grout brush or a firm toothbrush.
  • Skipping the rinse. Leftover residue attracts more dirt faster, undoing the cleaning you just did.
  • Mixing hydrogen peroxide and vinegar together. As mentioned above, keep these separate.
  • Using vinegar or oxygen bleach on natural stone. Test in an inconspicuous spot first, or skip straight to the baking-soda-only method.
  • Expecting one treatment to fix years of neglect. Heavily stained grout sometimes needs two or three rounds, spaced a few days apart, especially if mold has penetrated deep into the pores.

grout cleaning mistakes to avoid

Tools That Make These Recipes More Effective

The recipe matters, but so does what you're scrubbing with. A few tool notes from years of testing:

  • Stiff nylon grout brush the single best upgrade over a toothbrush. The bristles are firmer and the handle angle puts more pressure directly into the grout line.
  • Electric spin brush worth it if you're cleaning a full bathroom floor or shower; cuts scrubbing time significantly on large areas, though a toothbrush still wins for tight corners and edges.
  • Spray bottle with a fine mist setting controls how much vinegar hits the paste so it doesn't run off the grout line and onto the tile face.
  • Microfiber cloth pulls up residue better than paper towels and won't leave lint behind in the grout texture.

How to Maintain Grout After Using a Homemade Grout Cleaner

Getting your grout clean is only half the job keeping it that way is where most people drop the ball. A few habits make a real difference:

  • Wipe down tiled surfaces after showers or cooking to prevent soap scum and grease from settling.
  • Do a quick vinegar spray wipe-down weekly in high-moisture areas like showers.
  • Reapply grout sealer once a year. Sealed grout resists staining dramatically better than unsealed grout, which means less scrubbing for you long-term.
  • Use a bath mat or rug at entry points to reduce dirt tracked onto tiled floors.
  • Run the bathroom exhaust fan during and after showers moisture control does more to prevent mold regrowth than any cleaner applied after the fact.

If your grout was sealed properly and you keep up with light weekly maintenance, you may only need a full deep-clean treatment two or three times a year instead of constantly fighting stains.

sparkling clean grout after homemade cleaning

When to Skip DIY and Call a Professional

I'm a big believer in homemade grout cleaner for the majority of cases, but I'll say plainly where it stops being the right call. If grout has visible black mold penetrating deep into the material rather than sitting on the surface, if it's crumbling or cracked, or if you've run the oxygen bleach soak twice with no real improvement, that's the point to bring in a professional steam cleaning service or consider re-grouting the affected section. Pushing harder with home remedies past that point usually just means more scrubbing for a result that a $150 professional visit would fix in an afternoon.

Final Thoughts on Homemade Grout Cleaner

Homemade grout cleaners aren't a gimmick they're genuinely effective when you use the right recipe for the right problem and give the ingredients time to work. I keep all five of these recipes in rotation depending on what I'm dealing with: baking soda and vinegar for general cleaning, hydrogen peroxide for mold and discoloration, a quick vinegar spray for weekly upkeep, dish soap and baking soda for kitchen grease, and an oxygen bleach soak for the stuff that's been neglected for years. Start with whichever recipe matches the mess in front of you right now, and build a light maintenance habit around it. Your grout and your wallet will thank you.

Frequently Asked Questions About Homemade Grout Cleaner

What is the best homemade grout cleaner?

For most households, a baking soda and vinegar paste is your best bet — it's cheap, safe on cement-based grout, and handles roughly 80% of everyday staining. For mold and gray discoloration, swap in hydrogen peroxide instead; it performs noticeably better on that type of staining.

Is baking soda and vinegar safe on all grout types?

Yes, for cement-based grout (the most common type in homes), this combination is safe. Avoid straight vinegar on natural stone tiles since the acidity can etch the surface — stick to a baking soda paste alone in those cases.

How often should I clean grout with DIY methods?

Once a month is enough for most households. High-moisture areas like shower grout may need it every two to three weeks, especially without a sealant.

Can DIY methods remove years of built-up grout stains?

They can help significantly, especially an oxygen bleach soak, but severe, long-neglected staining sometimes needs multiple rounds or a stronger commercial product as a first pass, followed by regular upkeep afterward.

Does hydrogen peroxide discolor grout?

No, it's safe on both white and colored grout at the concentrations used here. It brightens rather than discolors, unlike chlorine bleach, which can sometimes cause uneven fading on colored grout.

What's the fastest option for a quick clean before guests arrive?

A vinegar spray is fastest — spray, wait 5 minutes, wipe. It won't fix deep stains but works well for surface-level freshening.

Is DIY grout cleaning as effective as store-bought products?

For everyday grime and moderate staining, yes — in my side-by-side testing, the baking soda and vinegar paste held up as well as several $10–$15 commercial sprays. Store-bought products still have an edge on years-old, deeply set stains.

Is it safe to use these recipes near natural stone accents?

Use a baking soda-only paste on any grout adjacent to natural stone, and keep vinegar, hydrogen peroxide, and oxygen bleach off the stone surface itself. A small test patch in a hidden area is always worth the extra minute.

How long does a mixed paste last once made?

Mix only what you need for one session. Baking soda paste dries out and loses effectiveness within a few hours, and combining it with vinegar or peroxide starts a reaction that's spent within minutes of mixing.

DIY Grout Cleaner: 7 Homemade Recipes That Actually Work

Published: June 28, 2026

Quick Answer

The best DIY grout cleaner is a paste made from baking soda and hydrogen peroxide (2:1 ratio). Apply it to grout lines, let it sit for 10–15 minutes, scrub with a stiff brush, and rinse. For mild everyday stains, a baking soda and dish soap paste works without bleaching. Avoid vinegar on natural stone tile — it etches the surface. All 7 recipes below use ingredients you already have at home.

I'll be honest with you — the first time I tried to clean my bathroom grout, I made every mistake in the book. I grabbed the strongest bleach spray I could find, doused the tiles, scrubbed for 20 minutes, and ended up with grout that looked exactly the same but smelled like a swimming pool for three days.

That was years ago. Since then, I've tested over 500 grout cleaning products and dozens of homemade formulas on real tile — bathroom floors, kitchen backsplashes, shower walls, you name it. And here's what I've learned: the most effective recipes don't come from a store. They come from your kitchen cupboard.

These 7 DIY grout cleaner recipes are the ones I actually use and recommend. I'll tell you exactly what works, what doesn't, and — just as importantly — which ingredients can quietly damage your tile if you use them in the wrong situation.

Why Make a Homemade Grout Cleaner?

Look, I get it. When your grout looks bad enough, you want to reach for the most powerful thing on the shelf. But commercial grout cleaners come with real trade-offs — most of them contain chlorine bleach or phosphoric acid, they need proper ventilation, and in a small bathroom, the fumes hit you fast. I've had to step outside mid-clean more than once just to catch my breath.

Homemade grout cleaners don't have that problem. Here's why I keep coming back to them:

  • Cheaper. A bottle of hydrogen peroxide costs less than $1.50. Baking soda is pennies per use. One box handles a whole bathroom.
  • Safer for your lungs — and your pets. Natural ingredients won't send you running for fresh air or worry you if your dog wanders in while the floor's still damp.
  • Genuinely effective for regular maintenance and moderate staining. Not just "good enough" — actually good.
  • Already in your home. No last-minute run to the hardware store at 10pm when you've already decided tonight's the night.

That said, I'll be upfront: if you're dealing with severely discoloured or years-of-neglect staining, DIY might not fully cut it. In that case, our complete 2026 grout cleaning guide covers professional-grade products that genuinely deliver when the homemade stuff hits its limit.

What You'll Need Before You Start

One thing I've noticed after years of this: people obsess over the cleaning formula and completely underestimate the tools. The right brush makes a bigger difference than most people expect. Grout lines are narrow and porous — a soft cloth just pushes dirt around. You need something that can actually get in there.

  • Stiff-bristle grout brush — a dedicated grout brush is ideal, but an old toothbrush works fine for small areas or tight corners. I keep both.
  • Spray bottle — for liquid formulas, especially vinegar-based ones
  • Small mixing bowl or jar — for paste recipes. An old mug works perfectly.
  • Old cloth or microfibre towel — for rinsing and drying the surface after
  • Rubber gloves — non-negotiable for hydrogen peroxide or any bleach recipe
  • Bucket of warm water — have it ready before you start; rinsing properly matters

One thing I always do: test in a hidden corner first — behind the toilet, under the vanity, a back corner of the floor. Takes 2 minutes and has saved me from ruining tile more than once. If you want a broader checklist of things to check before you clean, our grout cleaning tips guide has everything laid out.

7 DIY Grout Cleaner Recipes That Actually Work

Recipe 1: Baking Soda + Hydrogen Peroxide Paste (My Go-To, Best Overall)

Ingredients:

  • ½ cup baking soda
  • ¼ cup hydrogen peroxide (3% — standard pharmacy strength)
  • 1 tsp dish soap (optional — add it for kitchen grout or greasy areas)

How to make it: Mix in a bowl until you get a thick paste that holds its shape. If it's too runny, add a bit more baking soda. You want it to sit on the grout, not slide off.

How to use it: Spread the paste over your grout lines — I use an old toothbrush for this part, it gives you more control. Leave it for 10–15 minutes. Longer if the staining is serious. Then scrub firmly with your grout brush and rinse well with warm water.

Why it works: The hydrogen peroxide breaks down organic stains — mould, mildew, food residue — at a chemical level. Baking soda keeps the mixture in contact with the grout surface and adds just enough abrasion to help lift what the peroxide loosens. It's a genuinely powerful combination. I've gone deeper on this in our dedicated post about cleaning grout with hydrogen peroxide if you want the full breakdown.

Best for: White or light-coloured grout, bathroom tile, kitchen backsplash, moderate-to-heavy staining.

Avoid on: Natural stone (marble, limestone, travertine) — repeated use of peroxide can lighten the stone itself, not just the grout.

Recipe 2: Baking Soda + Dish Soap Paste (The Safe, Everyday Option)

Ingredients:

  • ½ cup baking soda
  • 2–3 tbsp liquid dish soap
  • A little warm water to adjust consistency

How to use it: Mix into a spreadable paste. Apply to grout, let it sit for 5 minutes, scrub, rinse clean.

Why it works: Dish soap is a surfactant — it physically lifts grease and grime off surfaces and lets water carry it away. Baking soda adds gentle mechanical scrubbing without scratching tile. This recipe won't bleach anything, which is exactly why it's my recommendation for coloured grout or anywhere near natural stone.

Best for: Weekly maintenance, light soiling, coloured grout, natural stone tile. Basically: when you want to keep things clean without any risk of discolouration.

Recipe 3: White Vinegar Spray (For Soap Scum & Hard Water — with One Big Warning)

Ingredients:

  • Equal parts white vinegar and warm water
  • Optional: 10 drops tea tree essential oil for extra antimicrobial power

How to use it: Pour into a spray bottle, shake gently. Spray generously on grout, let it sit 5–10 minutes, scrub and rinse.

Why it works: The acetic acid in vinegar dissolves calcium deposits, soap scum, and hard water build-up — the chalky white residue you get in showers and around taps. It's genuinely effective for this specific type of grime.

The warning I can't skip: Never use vinegar on marble, granite, travertine, limestone, or slate. I learned this the hard way helping a neighbour clean her kitchen — the vinegar etched the grout near her marble tiles and the damage was visible and permanent. Acid + natural stone = bad. Always.

Best for: Shower tile, bathroom walls, ceramic or porcelain floors with hard water staining.

Recipe 4: Baking Soda + Vinegar Fizz (Satisfying to Watch, Solid Results)

Ingredients:

  • Baking soda — sprinkled dry directly onto grout
  • White vinegar — sprayed straight over the top

How to use it: Sprinkle baking soda over the grout lines, then spray undiluted white vinegar over it. Watch it fizz. Leave it for 5 minutes, then scrub and rinse. It looks more dramatic than it is — but it does work.

The honest truth about this one: When baking soda and vinegar react, they largely neutralise each other — the fizz is carbon dioxide, not cleaning power. The actual cleaning comes from each ingredient individually before they cancel each other out, plus the brief mechanical action of the bubbles lifting surface dirt. It's effective, but not as powerful as Recipe 1. Think of it as a solid middle-ground option for ceramic tile with general household grime.

Best for: Ceramic or porcelain tile floors, kitchen grout, everyday cleaning.

Avoid on: Natural stone — same vinegar warning applies here.

Recipe 5: Oxygen Bleach Solution (The Deep Clean That Doesn't Choke You)

Ingredients:

  • 2 tbsp oxygen bleach powder (OxiClean or similar)
  • 1 cup warm water

How to use it: Dissolve the powder in warm water — it takes about 30 seconds of stirring. Apply to grout with a brush or cloth. Leave it for 15–30 minutes, or up to an hour for seriously stained areas. Scrub, then rinse thoroughly.

Why it works: When oxygen bleach dissolves, it releases hydrogen peroxide. This bleaches stains without producing the harsh chlorine fumes you get from standard bleach. I've used this in enclosed bathrooms without needing to crack a window — that's a real practical difference.

For shower grout specifically, this recipe pairs really well with the techniques in our homemade shower cleaner guide — the two together make a complete deep-clean routine.

Best for: Heavily stained white or cream grout, bathroom mould and mildew, any floor that hasn't seen a proper clean in a while.

Avoid on: Dark-coloured grout (may lighten it), natural stone.

Recipe 6: Lemon Juice + Baking Soda (Light Stains, Kitchen-Friendly)

Ingredients:

  • Juice of 1 fresh lemon (or 2 tbsp bottled lemon juice)
  • 3 tbsp baking soda

How to use it: Mix into a paste, apply to grout, leave 5 minutes, scrub, rinse. Simple.

Why it works: Citric acid in lemon juice dissolves light mineral deposits and surface discolouration. It's not the most powerful formula here, but it genuinely works for light staining and it smells good — which matters when you're cleaning the kitchen at 7am.

Best for: Light staining, kitchen backsplash grout, anywhere you want a fresh scent without chemicals.

Avoid on: Natural stone — citric acid will etch it just like vinegar does.

Recipe 7: Borax Paste (For Mould That Keeps Coming Back)

Ingredients:

  • 1 cup borax (sodium borate — found in the laundry aisle)
  • ¼ cup warm water
  • Optional: 5–10 drops tea tree oil

How to use it: Mix into a thick paste and apply to mould-affected grout. Leave for 20–30 minutes — don't rush this one. Scrub firmly and rinse. Unlike vinegar or soap, you don't need to rinse borax completely off. A thin residue left behind actually helps prevent mould from coming back.

Why it works: Borax is a naturally occurring mineral with genuine antifungal and antibacterial properties. Most of the other recipes remove mould that's visible on the surface. Borax does that and then inhibits regrowth — which is exactly what you need in a shower that gets humid every single day.

If you've cleaned the same shower grout three times this year and the mould keeps returning, this is the recipe to try. The issue usually isn't the cleaning — it's that nothing is stopping mould from re-establishing itself.

Best for: Shower grout with recurring black mould, bathrooms without good ventilation, humid climates.

Note: Borax is naturally-derived but not fully non-toxic. Keep away from kids and pets, and rinse food-contact surfaces thoroughly if you ever use it in a kitchen.

Recommended Product

Baking Soda for Grout Cleaning

The gentle abrasive in the spray and paste recipes above. A large box or bag goes a long way and also works for general household cleaning.

As an Amazon Associate I earn from qualifying purchases, at no extra cost to you.

Check Price on Amazon →

DIY Grout Cleaner Recipes Tested: How Each One Actually Performed

I don't just write these grout cleaner recipes down — I test them on real tile. A while back, I ran a proper side-by-side comparison of three popular DIY grout cleaning methods on my own bathroom floor: same grout, same staining, same wait time, same scrubbing effort for each. Here's what actually happened when I put baking soda, vinegar, and hydrogen peroxide head-to-head.

Quick takeaway: Baking soda + hydrogen peroxide won by a wide margin — 9/10 vs. 5/10 for plain baking soda and 4/10 for vinegar. It was the only DIY grout cleaner that touched deep, years-old staining and mould, not just surface dirt.

DIY grout cleaner comparison: baking soda vs. vinegar vs. hydrogen peroxide, tested on the same stained grout
Method Ease of Use Surface Dirt Deep Staining Mould/Mildew Natural Stone Safe? Rating
Baking Soda + Water ★★★★★ ★★★★☆ ★★☆☆☆ ★★☆☆☆ ✓ Yes 5/10
Vinegar + Water ★★★★★ ★★★☆☆ ★☆☆☆☆ ★★☆☆☆ ✗ No 4/10
Baking Soda + H₂O₂ ✓ Winner ★★★★☆ ★★★★★ ★★★★★ ★★★★★ ✓ Yes 9/10

Want the full breakdown with before/after photos, my exact test setup, and what I'd do differently? I wrote up the whole thing here: I Tested 3 DIY Grout Cleaners — Here's the One That Actually Worked.

What I Learned From Testing DIY Grout Cleaners (That I Didn't Know Going In)

  • Skip the toothbrush for full floors. It works, but your hand gives out fast and coverage is slow. An electric spin scrubber with a small attachment brush cut my time down dramatically and scrubbed more evenly.
  • Work in 2–3 sq ft sections. Paste that sits too long before you scrub starts drying out and gets harder to remove. Don't cover a whole floor at once.
  • Give heavily stained grout more time. 10 minutes is the baseline, but on years-old staining I've since pushed it to 20–25 minutes with noticeably better results.
  • One clean might not be enough. If grout's been neglected for years, a second treatment 48 hours later gets you the rest of the way — don't expect total restoration in one pass.

Which Recipe Should You Use? (Quick Reference)

Not sure which recipe fits your situation? Here's the cheat sheet I wish someone had given me when I started:

Your Situation Best Recipe
Everyday maintenance / weekly clean Recipe 2 — Baking Soda + Dish Soap
Moderate staining on white grout Recipe 1 — Baking Soda + Hydrogen Peroxide
Soap scum / hard water deposits Recipe 3 — White Vinegar Spray
Heavy mould and mildew Recipe 5 — Oxygen Bleach or Recipe 7 — Borax
Natural stone tile (marble, travertine) Recipe 2 — Baking Soda + Dish Soap only
Coloured grout Recipe 2 — Baking Soda + Dish Soap
Mould that keeps coming back Recipe 7 — Borax Paste
Kitchen grout (grease + food) Recipe 1 with dish soap added

Mistakes I See People Make All the Time (And Made Myself)

Getting the recipe right is only half the battle. These are the mistakes that undo good cleaning work — some of them I learned the hard way.

1. Using Acid on Natural Stone

This is the big one. Vinegar, lemon juice, and citric acid-based cleaners etch polished stone surfaces — marble, travertine, limestone — and the damage is permanent. I've seen beautiful marble floors dulled by a well-meaning DIY cleaner. If your tile is natural stone, Recipe 2 (baking soda + dish soap) is your only safe homemade option.

2. Not Waiting Long Enough

I used to apply a paste and start scrubbing almost immediately. Waste of time. Homemade cleaners need 10–20 minutes sitting on the grout to actually break down stains — applying and immediately scrubbing is only about 30% as effective. Set a timer, walk away, come back.

3. Using the Wrong Brush

A sponge or soft cloth won't reach into grout lines. You need a stiff-bristle brush that can actually get into the narrow channel and do some work. I use a purpose-made grout brush for floors and an old electric toothbrush (on a cheap spare head) for wall tiles — it does a surprisingly good job.

4. Skipping the Rinse

Baking soda left to dry leaves a white powdery film that looks like a mess. Vinegar left on the surface smells. Rinse with warm water, then dry the area — it only takes a minute and makes a real difference to the final result.

5. Mixing Vinegar and Bleach

I'm going to say this plainly: mixing vinegar and bleach creates chlorine gas. It's toxic. These two should never be in the same cleaning session, let alone the same bottle. Every recipe in this guide is designed as a standalone formula — use them that way.

6. Cleaning Unsealed Grout and Wondering Why It Gets Dirty Again Immediately

If your grout has no sealer, stains go straight into the porous surface and no surface cleaner fully reaches them. Drop water on your grout — if it soaks in rather than beading, the seal is gone. Clean first, then seal. Our 7-step grout sealing guide walks you through the whole process — it's easier than most people expect.

How to Keep Grout Clean Longer (So You're Not Doing This Every Month)

The honest truth: most people deep clean their grout once, feel great about it, and then watch it get dirty again in two months because nothing changed about their routine. Here's what actually keeps grout looking clean between deep cleans:

  • Seal your grout immediately after a deep clean. I cannot overstate this. A good penetrating sealer fills the porous surface and dramatically slows down staining. Reapply every year in high-traffic areas, every 2 years elsewhere.
  • Wipe shower walls after every use. Takes 20 seconds with a squeegee. Removes the soap residue and moisture before they bond to the grout. This single habit makes more difference than any cleaning product.
  • Run your bathroom fan for at least 20 minutes after every shower. Mould doesn't need much — a persistently damp grout surface is all it needs. Ventilation removes that moisture before mould gets established.
  • Do a quick clean weekly with Recipe 2 (baking soda + dish soap) rather than letting build-up accumulate to the point where you need a full deep clean.
  • Dry mop tile floors regularly. Grit and dirt act like sandpaper on grout over time. Keeping them swept up extends the life of both the grout and the tile.

Frequently Asked Questions

What is the best homemade grout cleaner?

In my experience, homemade grout cleaner made with baking soda and hydrogen peroxide paste (2:1 ratio) is the best all-round solution. It handles moderate-to-heavy staining on ceramic and porcelain tile without harsh fumes or expensive ingredients. For natural stone tile, swap the peroxide for dish soap — it's gentler and won't risk bleaching the stone itself.

Does vinegar clean grout effectively?

Yes — for soap scum and hard water deposits on ceramic or porcelain tile, white vinegar works really well. But I want to be clear: it should never go on natural stone tile or grout that's already deteriorating. I've seen vinegar cause permanent damage to marble grout, and it's not something you can undo. Use it only on ceramic or porcelain, and don't use it too frequently — regular acid exposure weakens cementitious grout over time.

How do you make grout cleaner at home without scrubbing?

The closest thing to a no-scrub option is an oxygen bleach solution — 2 tbsp OxiClean dissolved in 1 cup of warm water. Apply it, leave it for 30–60 minutes, and rinse. It does most of the chemical work for you. That said, a little light brushing still helps on anything but the mildest staining. There's no truly zero-effort method that fully cleans grout — some physical action is always part of it.

Is baking soda safe for all grout types?

Yes — baking soda is pH-neutral and safe for every grout type, including coloured grout and grout near natural stone. It won't bleach, etch, or erode. It's the one ingredient I use without hesitation regardless of what type of tile I'm working on.

How often should I clean my grout?

A light clean once a week with baking soda and dish soap keeps build-up from forming. A moderate clean with the baking soda and hydrogen peroxide paste once a month keeps white grout looking fresh. A full deep clean with oxygen bleach or borax should happen every 3–6 months, depending on how much humidity and traffic the area gets. Always seal after the deep clean.

Can I use toothpaste as a DIY grout cleaner?

White (non-gel) toothpaste has mild abrasives that can lift light surface staining from grout. It's not particularly cost-effective compared to baking soda — you'll use more of it for less result — but it works in a pinch for a quick spot clean. Stick to white paste only; coloured gel toothpastes can stain light-coloured grout.

What natural grout cleaner works on black mould?

Oxygen bleach (Recipe 5) removes black mould effectively. But if the mould keeps coming back, switch to borax paste (Recipe 7) — it's one of the few natural options that actually inhibits future mould growth rather than just removing what's on the surface. For severe, deep-set black mould that keeps returning despite cleaning, it may be time for a professional treatment. Surface cleaning won't reach mould that's penetrated deep into damaged grout.

Final Thoughts

After years of testing products and methods, the thing that still surprises me is how well the simple stuff works. Baking soda and hydrogen peroxide out of a pharmacy bag, mixed in a kitchen bowl, applied with an old toothbrush — it cleans tile grout as well as products that cost ten times more. Sometimes better.

If you're starting out, go with Recipe 1 for most situations. Switch to Recipe 2 if you have natural stone or coloured grout. Pull out Recipe 5 or 7 when you're dealing with mould. And once your grout is clean, please seal it — one coat of sealer will do more for the long-term cleanliness of your tile than any recipe I've listed here.

Got a tricky tile situation — old grout, unusual stone, staining that nothing seems to touch? Drop a question in the comments below. I read all of them and I'll point you in the right direction.

Posted in DIY

Best Grout Cleaner for Shower Tiles: How to Choose the Right Solution for Stubborn Grout Stains (2026 Guide)

The best grout cleaner for shower tiles depends on the type of stain you are dealing with. Oxygen-based cleaners are ideal for routine cleaning, mold removers work best for black mildew stains, and steam cleaners provide a chemical-free way to deep-clean grout. Choosing the right cleaner can restore discolored grout, prevent mold growth, and make future maintenance much easier. If you have ever spent a long time scrubbing shower grout only to see the stains come back a few days later, you are not alone. Shower grout is exposed to constant moisture, soap residue, hard water, humidity, and everyday bathroom buildup, which makes it one of the hardest surfaces in the home to keep clean. Standard bathroom cleaners may improve the appearance for a short time, but they often fail to remove the buildup trapped deep inside the grout lines. That is why choosing the right grout cleaner matters so much. The right product does more than improve appearance; it helps solve the real cause of the problem so the stains do not return as quickly.

“Shower grout is a different beast from floor grout because it never fully dries out. In my testing, cleaners that worked great on kitchen floors often failed on shower walls simply because the grout stayed damp and the product couldn’t sit long enough to work.”

Jack Martin
Jack Martin Grout & Tile Cleaning Specialist · 500+ products tested

Expert Answer: Best Grout Cleaner for Shower Tiles

If you want a Expert answer, here is the simplest way to choose the right cleaner:
  • For routine cleaning: Use an oxygen-based grout cleaner
  • For black mold or mildew stains: Use a mold and mildew remover
  • For deep cleaning without chemicals: Use a steam cleaner
  • For severe, long-term staining: Use a professional-grade grout cleaner
  • For light maintenance: Use a grout-safe DIY cleaner or pH-neutral formula
The best choice depends on whether your grout is dirty from soap scum, hard water, mold, mildew, or years of buildup. Matching the cleaner to the stain is the fastest way to get better results.

Why Most Shower Grout Cleaners Fail

Many homeowners assume that any bathroom cleaner will work on grout, but grout is very different from tile. Tile has a smooth surface, while grout is porous and absorbs dirt, moisture, and cleaning residue over time. That means a cleaner that works well on tile may not be strong enough to lift stains from grout lines. In many cases, the problem is not that the grout cleaner is bad, but that it is being used on the wrong type of stain. Why Most Shower Grout Cleaners Fail For example, a cleaner made to remove soap scum may not do much against mold, and a mold remover may not be the best choice for hard water buildup. Before buying a product, it helps to understand what is actually causing the discoloration. Black stains usually point to mold or mildew, yellow or dull stains often come from soap scum and body oils, and chalky buildup is usually linked to hard water. Once you identify the stain, it becomes much easier to choose a cleaner that actually works instead of wasting time on repeated scrubbing.

Common reasons grout cleaners fail

  • The cleaner is designed for tile, not porous grout
  • The stain is mold, but the product only removes soap scum
  • The grout has deep buildup that surface cleaners cannot reach
  • The bathroom stays damp, so stains return quickly
  • The grout is unsealed and absorbs moisture too easily

How to Choose the Best Grout Cleaner for Your Shower

The best grout cleaner is not always the strongest one. In fact, using a harsh cleaner on the wrong stain can sometimes make the problem worse or damage the grout over time. A better approach is to match the cleaner to the condition of the grout and the type of buildup you are dealing with. If your shower grout has black spots or dark patches, a mold and mildew remover is usually the best place to start. These products are designed to target fungal growth and help lift stains caused by moisture. If the grout looks dull, yellow, or lightly stained from everyday use, an oxygen-based cleaner is often a safer and more effective option. It works well for regular maintenance and is usually gentler on grout than bleach-based formulas. When the grout has years of buildup and nothing seems to work, a professional-grade cleaner or steam cleaning may be necessary because those methods can reach deeper into the grout pores.

Best cleaner by stain type

  • Black stains: Mold and mildew remover
  • Yellow stains: Oxygen-based cleaner
  • White chalky residue: Hard water stain remover
  • Heavy buildup: Professional-grade cleaner
  • Chemical-free deep cleaning: Steam cleaner

Why Your Shower Grout Gets Dirty So Fast

Shower grout gets dirty quickly because it is constantly exposed to the conditions that cause staining. Every shower leaves behind moisture, soap residue, shampoo, body oils, and minerals from the water. Over time, these substances settle into the grout and create a layer of buildup that becomes harder to remove with each cleaning. If the bathroom does not have good ventilation, the problem gets worse because damp grout gives mold and mildew the perfect environment to grow. This is why many people feel like they are cleaning the same stains over and over again. The grout may look clean on the surface, but the deeper buildup remains inside the pores. Without proper cleaning and sealing, the stains continue to return. That is also why prevention matters just as much as cleaning. A good grout cleaner can remove the visible stain, but regular maintenance is what keeps the grout from becoming dirty again so quickly.

Main causes of dirty shower grout

  • Constant moisture exposure
  • Soap scum and shampoo residue
  • Hard water minerals
  • Body oils and bathroom grime
  • Poor ventilation
  • Missing or worn grout sealer

Best Types of Grout Cleaners for Shower Tiles

There are several types of grout cleaners, and each one works best for a different situation. Oxygen-based cleaners are a strong choice for routine cleaning because they break down stains without being overly harsh. They are especially useful if you clean your shower regularly and want to keep the grout looking fresh. Mold and mildew removers are better when the grout has dark stains caused by moisture and fungal growth. These products are made to attack the source of the stain, which makes them useful in bathrooms that stay damp for long periods. Steam cleaners are another excellent option, especially for people who prefer to avoid chemicals. High-temperature steam can loosen dirt, soften buildup, and help lift stains from deep inside the grout lines. This makes steam cleaning a good choice for deep cleaning or for households that want a more natural approach. Professional-grade grout cleaners are usually the strongest option and are best for severe staining, neglected grout, or restoration projects where standard cleaners have already failed. In many cases, the best solution is not one product alone but the right combination of cleaner, scrubbing method, and regular upkeep.

1. Oxygen-Based Grout Cleaners

Best for:

  • Routine cleaning
  • Light discoloration
  • White or light-colored grout
  • Weekly or monthly maintenance
Oxygen-based cleaners are popular because they are effective without being overly harsh. They work by releasing oxygen that helps break down organic stains, soap residue, and everyday grime. For homeowners who want a safer and more balanced cleaning option, this is often the best place to start.

2. Mold and Mildew Removers

Best for:
  • Black stains
  • Humid bathrooms
  • Recurring mildew
  • Shower grout that stays damp
These cleaners are designed to target fungal growth and remove the dark stains that often appear in shower corners and grout lines. If your bathroom has poor airflow or the grout keeps turning black, a mold and mildew remover may be the most effective solution.

3. Steam Cleaners

Best for:
  • Chemical-free cleaning
  • Deep cleaning
  • Sensitive households
  • Regular maintenance of heavily used showers
Steam cleaners use heat and pressure to loosen dirt and grime from grout pores. They are especially useful when you want to avoid chemical residue or when you need a deep clean without using strong products.

4. Professional-Grade Grout Cleaners

Best for:
  • Severe staining
  • Old grout buildup
  • Restoration projects
  • Grout that has not been cleaned in a long time
Professional-grade cleaners are stronger than typical household products and are often used when standard cleaners fail. They can be a good choice for neglected grout, but they should still be used carefully according to the label instructions.

5. DIY Grout Cleaners

Best for:
  • Light maintenance
  • Budget-friendly cleaning
  • Small problem areas
DIY cleaners can help with light stains, but they are usually not strong enough for deep mold or heavy buildup. They are best used for maintenance rather than restoration.

Steam Cleaner vs Chemical Grout Cleaner

A common question is whether steam cleaning is better than using a chemical grout cleaner. The answer depends on what you need. Steam cleaning is often the better choice if you want to avoid harsh chemicals, if children or pets are in the home, or if you are dealing with routine deep cleaning. Steam can penetrate grout pores and loosen dirt without leaving behind chemical residue, which makes it appealing for regular maintenance. Chemical cleaners, on the other hand, may work faster on heavy mold, stubborn stains, or grout that has not been cleaned in a long time. They can be especially useful when immediate results are needed. For many homeowners, the best approach is to use chemical cleaners when the grout needs a strong reset and then maintain it with lighter cleaning or steam cleaning afterward. That way, the grout stays cleaner for longer without being exposed to harsh products all the time.

When deciding between a steam cleaner and a chemical grout cleaner, the right choice depends on your priority — chemical-free safety, mold removal, or fast stain results. Here’s how the two methods compare across the six factors that matter most.

Steam cleaner vs chemical grout cleaner — feature comparison
Feature Steam cleaner Chemical grout cleaner
Chemical-free Yes No
Best for mold Good Excellent
Best for deep cleaning Excellent Good
Safe for frequent use Yes Depends on formula
Fast stain removal Moderate Often faster
Best for sensitive homes Yes Sometimes
✓ = Best option for this feature. Steam cleaners use only heat and water—no chemicals needed. Chemical grout cleaners may perform better for deep mold or heavy staining. Using both methods together often delivers the best results.

Common Grout Cleaning Mistakes

One of the biggest mistakes people make is using vinegar too often. Vinegar is popular because it is inexpensive and easy to find, but its acidity can slowly weaken grout, especially if the grout is unsealed. Another common mistake is scrubbing too aggressively. It may feel like harder scrubbing should produce better results, but too much pressure can wear away the grout surface and make it easier for dirt to settle in again. Common Grout Cleaning Mistakes Poor ventilation is another issue that often gets overlooked. If the bathroom stays damp after every shower, mold and mildew will keep coming back no matter how good the cleaner is. Skipping grout sealing is also a mistake because unsealed grout absorbs moisture much more easily. Once grout starts absorbing water and dirt, stains become harder to remove and return more quickly. Avoiding these mistakes can make a big difference in how long your grout stays clean.

Mistakes to avoid

  • Using vinegar too often
  • Scrubbing too hard with abrasive brushes
  • Leaving the bathroom damp after showers
  • Ignoring cracked or damaged grout
  • Skipping grout sealing
  • Using the wrong cleaner for the stain type

How to Keep Shower Grout Clean Longer

Cleaning grout is only part of the solution. If you want the results to last, you also need to reduce the conditions that cause stains in the first place. One of the simplest things you can do is run an exhaust fan after showering so moisture does not stay trapped in the bathroom. Wiping down the shower walls with a squeegee also helps remove excess water before it settles into the grout. Regular maintenance matters too. A light weekly cleaning can prevent soap scum and dirt from building up, while a deeper cleaning every one to three months helps keep stains under control. If the grout is cracked or damaged, repairing it quickly can prevent water from getting deeper into the surface. Applying a grout sealer once a year is another smart step because it creates a protective barrier that makes future cleaning easier. These habits may seem small, but together they can dramatically extend the life and appearance of your shower grout.

Best ways to prevent grout stains

  • Run the exhaust fan after every shower
  • Use a squeegee on shower walls
  • Clean lightly every week
  • Deep clean every one to three months
  • Seal grout once a year
  • Repair cracks as soon as possible

Final Thoughts

The best grout cleaner for shower tiles is not always the strongest product on the shelf. It is the one that matches your specific problem and helps prevent the stain from coming back. Oxygen-based cleaners are a good choice for routine maintenance, mold removers are better for black mildew stains, and steam cleaners offer a powerful chemical-free option for deeper cleaning. If you combine the right cleaner with good ventilation, regular maintenance, and proper sealing, your shower grout can stay cleaner, brighter, and easier to manage for much longer.

Frequently Asked Questions

Yes, vinegar can damage shower grout if it is used too often. Because vinegar is acidic, repeated use can slowly weaken grout lines, especially if the grout is unsealed. While it may seem like a simple natural cleaner, it is usually safer to use a pH-neutral or grout-specific product for regular cleaning.

Yes, steam cleaning can work very well on grout. The heat helps loosen dirt, soap scum, and mold that are trapped inside the porous surface. It is especially useful for deep cleaning and for people who want to avoid harsh chemicals. However, very old or severely stained grout may still need a stronger cleaner before steam cleaning gives the best result.

Light cleaning should be done weekly to prevent buildup from becoming a bigger problem. A deeper grout cleaning is usually needed every one to three months, depending on how often the shower is used and how much moisture the bathroom holds. Bathrooms with poor ventilation or hard water may need more frequent cleaning.

Black stains are usually caused by mold or mildew growing in damp grout lines. Bathrooms that stay humid or do not dry properly after showers are especially likely to develop this problem. If the stains keep returning, improving ventilation and sealing the grout can help reduce future growth.

Bleach can be used occasionally, but it should not be relied on too often. Repeated bleach use may weaken grout and cause discoloration over time. For regular cleaning, many homeowners prefer oxygen-based cleaners or grout-specific formulas because they are often safer for long-term use.

Best Grout Cleaner Methods 2026: Tools, Techniques & Step-by-Step Guide

Have you ever scrubbed your bathroom tiles until they gleamed — only to step back and realize the grout lines still looked dark, dingy, and years older than the tiles themselves? You’re not alone. Dirty grout is one of the most common home maintenance frustrations, and it’s also one of the most misunderstood. Here’s the thing: grout isn’t just a cosmetic problem. When grout lines turn black, yellow, or start growing mold, it’s a sign that moisture, bacteria, and contaminants have worked their way deep into a porous material that doesn’t clean the same way tile does. This complete grout cleaning guide covers everything you need to know in 2026 — from understanding why grout gets dirty in the first place, to the best DIY cleaning methods, steam cleaning, mold removal, grout sealing, and long-term maintenance tips. Whether you’re dealing with black shower grout, stubborn kitchen tile stains, or just want to keep clean grout looking fresh, this guide will walk you through it all step by step.

What Is Grout and Why Does It Get So Dirty?

Grout is the material that fills the gaps between tiles. It keeps tiles stable, prevents water from seeping underneath, protects tile edges, and gives tiled surfaces their finished, polished look. Most residential grout is cement-based — a mixture of cement, water, sand, and additives — and while it’s incredibly functional, it has one significant weakness: it’s porous. Unlike the smooth, sealed surface of a ceramic or porcelain tile, grout contains microscopic pores throughout its structure. Every time water, steam, soap, grease, or any other substance touches your grout, a small amount gets absorbed into those pores. Over days and weeks and months, this gradual absorption builds up into deep-set staining, discoloration, and in humid environments, mold and mildew. This is why you can mop your bathroom floor every week and still find that the grout lines look darker every year. Regular surface cleaning simply doesn’t reach deep enough to remove what’s accumulated inside the grout itself.

What Grout Is Made Of

Most common residential grout types contain:
  • Portland cement as the base binder
  • Sand (in sanded grout) for strength and filler
  • Pigments for color
  • Water to activate the cement
  • Polymer additives in some modern formulas to improve flexibility and stain resistance
The cement-based composition makes standard grout highly absorbent unless it’s been properly sealed — and even sealed grout becomes vulnerable again once the sealer breaks down.

Types of Grout and Why It Matters for Cleaning

Understanding your grout type is essential before you choose a cleaning method. Using the wrong product on the wrong grout can cause fading, crumbling, or permanent damage.

Sanded Grout

  • Best for: Floor tiles, large grout joints (wider than 1/8 inch)
  • Characteristics: Contains fine sand particles for added strength and durability
  • Cleaning note: Generally tolerates more aggressive scrubbing than other types

Unsanded Grout

  • Best for: Wall tiles, narrow grout joints, delicate tile materials
  • Characteristics: Smooth texture without sand
  • Cleaning note: More prone to scratching; use soft-bristle brushes only

Cement Grout (General)

  • Most common in homes
  • Pros: Affordable, widely available, easy to install
  • Cons: Highly porous, stains easily, requires regular sealing
  • Cleaning note: Avoid strong acids (like undiluted vinegar) — they can weaken the cement binder over time

Epoxy Grout

  • Pros: Waterproof, stain-resistant, mold-resistant, extremely durable
  • Cons: More expensive, harder to install, less common in older homes
  • Cleaning note: Much easier to clean — most stains wipe off without scrubbing
Pro tip: If you’re not sure what type of grout you have, check with the original tile installer or look up the product used during installation. The cleaning approach can vary significantly.

Grout Types at a Glance

Grout Type Best Used For Stain Resistance Requires Sealing Cleaning Difficulty
Sanded Cement Floor tiles, wide joints Low ✅ Yes Moderate
Unsanded Cement Wall tiles, narrow joints Low ✅ Yes Easy–Moderate
Epoxy Wet areas, commercial Very High ❌ No Easy
Polymer-Modified General use, modern installs Medium ✅ Recommended Moderate
Sanded Cement
Floor tiles, wide joints
Stain ResistanceLow
Requires Sealing✅ Yes
Cleaning DifficultyModerate
Unsanded Cement
Wall tiles, narrow joints
Stain ResistanceLow
Requires Sealing✅ Yes
Cleaning DifficultyEasy–Moderate
Epoxy
Wet areas, commercial
Stain ResistanceVery High
Requires Sealing❌ No
Cleaning DifficultyEasy
Polymer-Modified
General use, modern installs
Stain ResistanceMedium
Requires Sealing✅ Recommended
Cleaning DifficultyModerate

Main Causes of Grout Discoloration

Knowing why grout gets dirty helps you choose the right cleaning method — and more importantly, helps you prevent the problem from coming back.

Humidity and Moisture

Bathrooms are the most common site of grout problems for a simple reason: they’re perpetually damp. Warm, humid air settles into every porous surface after a shower. If the bathroom isn’t well ventilated, that moisture stays trapped in the grout for hours — creating ideal conditions for mold and mildew to grow.

Soap Scum Buildup

Every time you shower, soap residue, shampoo, conditioner, and body wash rinse off your body and onto the tile and grout. Over time, this leaves a film that builds up inside grout pores, darkening the color and creating a sticky surface that traps even more dirt.

Hard Water Minerals

In areas with hard water (water that contains high levels of calcium and magnesium), mineral deposits accumulate on both tiles and grout. These deposits show up as white, yellow, or chalky stains that are resistant to standard cleaning products.

Grease and Food Residue (Kitchen Grout)

Kitchen grout faces a different set of challenges. Cooking releases grease particles and oil vapor into the air, and these settle on every nearby surface — including grout. Food spills, sauces, and cooking residue penetrate grout pores and create stubborn, dark stains that smell over time.

Poor Ventilation

Bathrooms and kitchens without proper airflow trap moisture and odors that speed up grout staining. Without an exhaust fan or open window, humidity after a shower can stay elevated for 30–60 minutes — giving mold spores plenty of time to take hold.

Lack of Sealing

Unsealed grout absorbs contaminants dramatically faster than sealed grout. If your grout has never been sealed, or if the sealer has worn off, you’re essentially cleaning a sponge — the dirt comes out temporarily, but goes right back in.

Using Dirty Mop Water

One often-overlooked cause of grout darkening is mopping floors with dirty water. When mop water gets dark and murky, you’re essentially spreading a thin layer of grime across every grout line with each pass.

Grout Discoloration Causes Quick Reference

Cause Where It Happens Most Stain Color Prevention
Humidity & moisture Bathrooms, showers Dark gray/black Exhaust fan, squeegee after shower
Soap scum Shower walls, tub surround Dark brown/gray Weekly wipe-down
Hard water minerals Showers, sinks White, yellow, chalky Water softener, vinegar rinse
Grease & food Kitchen floors & backsplash Dark brown/black Weekly wipe, degreaser
Mold & mildew Corners, shower grout Black, green Ventilation, sealing, drying
Dirty mop water Floor grout General darkening Change mop water frequently
Lack of sealing All areas Any color Reseal every 1–2 years
Warning Signs Your Grout Needs Immediate Attention Most grout problems get worse the longer they’re left untreated. Here are the signs you shouldn’t ignore:
  • Black grout lines — usually indicates mold, mildew, or deep-set dirt buildup
  • Yellow or orange discoloration — often caused by hard water minerals or soap scum
  • Mold spots — visible fuzzy or dark patches, especially in corners and along caulk lines
  • Persistent mildew smell — even after cleaning the surface tiles
  • Cracked or crumbling grout — structural damage that may allow water to penetrate behind tiles
  • Sticky residue — soap scum and grease buildup that feels tacky underfoot
  • Loose or hollow-sounding tiles — may indicate water has already gotten beneath the tile
If you notice cracked grout, loose tiles, or persistent mold despite regular cleaning, it’s worth investigating for water damage behind the wall or beneath the floor. Left untreated, moisture damage behind tiles can cause significant structural harm — and expensive repairs.

Best Grout Cleaning Methods in 2026

There’s no single “best” method for cleaning grout — the right approach depends on the type of staining, the grout material, the type of tile, and whether mold is involved. Here’s a breakdown of the most effective methods available today.

Grout Cleaning Methods Comparison

Cleaning Method Best For Strength Safe for Daily Use Chemical Level Tile Safe?
Baking Soda Paste Light stains, maintenance ⭐⭐ ✅ Yes None All types
Baking Soda + Vinegar Soap scum, mild mildew ⭐⭐⭐ Limited Low Not natural stone
Hydrogen Peroxide Mold, black stains ⭐⭐⭐⭐ ✅ Yes Low–Medium All types
Steam Cleaning Deep sanitization, mold ⭐⭐⭐⭐⭐ ✅ Yes None Most types
Oxygen Bleach Heavy discoloration ⭐⭐⭐⭐ Moderate Medium Most types
Commercial Cleaner Severe buildup ⭐⭐⭐⭐⭐ Depends High Check label

For step-by-step instructions on each method — including exact ratios, dwell times, and safety tips — see our dedicated guides: baking soda grout cleaner, hydrogen peroxide method, and steam cleaning grout.

How to Clean Bathroom Grout Step by Step

The bathroom is where most grout problems begin, and a systematic approach works far better than random spot-cleaning.

Preparation

  • Open a window or turn on the exhaust fan for ventilation
  • Remove any rugs, mats, or items from the floor or shower
  • Put on rubber gloves (and a mask if using chemical cleaners)

Shower Grout Specifics

Shower grout needs more frequent attention than floor or wall grout because it’s exposed to moisture multiple times daily. Consider:
  • Doing a light spray-and-wipe with diluted hydrogen peroxide after every few showers
  • Using a squeegee on shower walls after each use to reduce moisture buildup
  • Running the exhaust fan for at least 15–20 minutes after every shower
Mold in grout needs a slightly different approach than general staining — from choosing between bleach and hydrogen peroxide to knowing when it’s actually black mold. Read our complete mold removal guide →

For Deep Dirt Buildup

If the black color is dirt rather than mold (no smell, appears more on floor grout than shower grout), steam cleaning combined with an oxygen bleach soak is usually the most effective approach. Apply oxygen bleach, wait 20 minutes, then go over with a steam cleaner.

How to Clean Kitchen Tile Grout

Kitchen grout has a different enemy than bathroom grout: grease. Cooking releases aerosolized oil particles that settle on every nearby surface and get absorbed into grout pores over time. Kitchen grout also faces coffee, wine, tomato sauce, and countless other food stains.

Grout Brush

A dedicated grout brush has stiff, narrow bristles designed to fit directly into grout lines. This is your most important tool. Options include:
  • Manual grout brushes — affordable, effective for small areas and detail work
  • Electric scrubbers with grout brush attachment — much faster for large floor areas, significantly reduces physical effort
  • Old toothbrush — excellent for corners, edges, and small sections

Steam Cleaner

As covered above, a steam cleaner with a grout nozzle attachment is one of the most effective investments for regular grout maintenance. Entry-level handheld steam cleaners start around $50–$80 and are more than adequate for bathroom and kitchen grout.

Spray Bottles

For applying hydrogen peroxide, vinegar, or diluted cleaners evenly to grout lines, a simple spray bottle is invaluable. Label each bottle clearly if you use multiple cleaning solutions.

Microfiber Cloths and Towels

For drying surfaces after cleaning. Grout left damp after cleaning is a fast track back to mold growth.

Grout Sealer Applicator

A foam applicator brush or roller specifically designed for sealer application ensures even coverage without waste.

Grout Cleaning Tools Comparison

Tool Best Use Case Effort Level Cost Range Recommended For
Manual grout brush Targeted scrubbing, small areas High $5–$15 All homeowners
Electric scrubber Large floor areas, tough stains Low $30–$80 Big bathrooms, kitchens
Handheld steam cleaner Deep cleaning, mold, no chemicals Low–Medium $50–$150 Regular maintenance
Old toothbrush Corners, tight spaces High Free Detail work
Spray bottle Applying solutions evenly Low $2–$5 All cleaning methods
Microfiber cloth Drying surfaces after cleaning Low $5–$15 Essential after every clean

Common Grout Cleaning Mistakes to Avoid

Many homeowners damage their grout — often permanently — by using the wrong methods repeatedly. Here are the most common mistakes and how to avoid them.

Using Too Much Chlorine Bleach

Chlorine bleach is widely available and seems like an obvious choice for blackened grout, but it’s one of the most damaging options for long-term grout health. Regular chlorine bleach use can:
  • Weaken the cement structure of the grout over time
  • Cause colored grout to fade unevenly
  • Create harsh fumes that are unpleasant and potentially harmful in enclosed bathrooms
  • Provide only temporary results — mold often returns faster after bleach treatment
Better alternative: Hydrogen peroxide or oxygen bleach delivers comparable mold-killing and whitening power without the structural damage.

Scrubbing Too Aggressively

It’s tempting to scrub harder when grout isn’t coming clean, but excessive pressure — especially with metal brushes or steel wool — can erode the surface of grout, making it rougher and more porous. Rougher grout stains even faster. Better alternative: Use a stiff-bristle nylon grout brush. Let the cleaning product do the chemical work; use the brush for mechanical assist.

Ignoring Grout Sealing

The single most common reason grout stains so quickly is that it was never sealed, or the sealer has worn off. Sealing is not optional maintenance — it’s the difference between grout that stays clean for years and grout that darkens within weeks.

Leaving Surfaces Wet After Cleaning

Rinsing and walking away is the fastest way to undo a good cleaning job. Standing water in grout lines after cleaning creates ideal conditions for mold to re-establish within days.

Using Acidic Cleaners on Natural Stone Tiles

Vinegar, lemon juice, and many commercial tile cleaners are acidic. On ceramic and porcelain, this is usually fine. On natural stone — marble, travertine, limestone, slate — acid causes etching that permanently damages the surface. Always use pH-neutral cleaners on natural stone.

Cleaning Too Infrequently

Grout that’s cleaned once a year requires far more effort to restore than grout that gets light maintenance monthly. Deep staining that has been building for 12 months is exponentially harder to remove than the same staining caught at 4 weeks.

Common Grout Cleaning Mistakes at a Glance

Mistake What Goes Wrong Better Alternative
Using chlorine bleach regularly Weakens grout structure, fading Oxygen bleach or hydrogen peroxide
Scrubbing with metal brush Erodes grout surface, makes it rougher Stiff nylon grout brush
Leaving surfaces wet after cleaning Mold returns within days Dry with towel, run exhaust fan
Never sealing grout Stains absorb much faster Seal every 1–2 years
Using acid cleaners on stone Permanent etching and surface damage pH-neutral stone-safe cleaner
Mixing bleach + ammonia Toxic chloramine gas — dangerous Never mix cleaning chemicals
Cleaning too infrequently Deep stains become nearly impossible Monthly light scrub routine
Using dirty mop water Spreads grime into grout lines Change water regularly while mopping

How to Whiten Grout Naturally

If your white grout has turned gray, yellow, or dingy and you want to restore it without harsh chemicals, there’s a natural whitening approach that works well for moderate staining.

Natural Whitening Method

What you need:

  • Baking soda
  • Hydrogen peroxide (3%)
  • A grout brush
  • Warm water
Steps:
  1. Make a paste using baking soda and hydrogen peroxide (roughly 2:1 ratio)
  2. Apply generously to the grout lines
  3. Let it sit for 15–20 minutes
  4. Scrub firmly with your grout brush
  5. Rinse with warm water and dry immediately
For very yellowed grout, repeat this process 2–3 times over a few days for best results. Once the grout is clean and dry, apply a grout sealer to maintain the brightness. Lemon juice note: Lemon juice is sometimes recommended for grout whitening. It can help with mild odors and very light surface staining, but its acidity makes it unsuitable for regular use on cement grout or anywhere near natural stone tiles.

How to Seal Grout and Why It Matters

Sealing grout is the single most effective thing you can do to keep it clean long-term. A quality sealer fills the microscopic pores in cement grout with a protective barrier that repels moisture, oil, and staining agents.

Benefits of Sealing Grout

  • Significantly reduces staining — liquids bead up rather than absorbing
  • Slows mold growth by blocking moisture penetration
  • Makes regular cleaning much easier — less scrubbing required
  • Extends the overall lifespan of the grout
  • Protects color in colored grout

How Often Should You Seal Grout?

  • Bathroom grout: Every 1–2 years (high moisture exposure)
  • Kitchen grout: Every 1–2 years (grease and food exposure)
  • Dry area floor grout: Every 2–3 years
  • Shower grout: At least annually, possibly every 6 months in heavy-use showers

Grout Sealing Frequency by Location

Location Recommended Sealing Frequency Risk Without Sealing
Shower walls & floor Every 6–12 months Mold, deep discoloration
Bathroom floor Every 1–2 years Soap scum absorption, staining
Kitchen backsplash Every 1–2 years Grease penetration, dark stains
Kitchen floor Every 1–2 years Food stains, grease buildup
Dry area floors (hallway, living room) Every 2–3 years Dirt absorption over time
Outdoor tiles Every 1–2 years Moss, weathering, freeze damage
A quick test: drop a few water droplets onto your grout. If they bead up, the sealer is still working. If they absorb immediately, it’s time to reseal.

How to Apply Grout Sealer

  1. Clean the grout first. Sealer locks in whatever is on the surface — seal clean grout, not dirty grout.
  2. Let the grout dry completely — at least 24 hours after cleaning, 72 hours for new grout.
  3. Apply the sealer using a small foam brush, roller, or applicator bottle, working it into the grout lines.
  4. Wipe away any sealer on tile surfaces within 5–7 minutes before it dries.
  5. Apply a second coat after 30–60 minutes for maximum protection.
  6. Allow full cure time — typically 24–48 hours before exposing to water.

Types of Grout Sealer

  • Penetrating sealers — absorb into the grout for deep protection; the most durable option
  • Topical/film-forming sealers — coat the surface; easier to apply but less durable
  • Antimicrobial sealers — newer formulation that incorporates mold-inhibiting agents; excellent for high-humidity bathrooms

Grout Maintenance Schedule

Consistent light maintenance is far easier and more effective than infrequent deep cleaning. Here’s a practical schedule to follow:

Grout Maintenance Schedule Overview

Frequency Tasks Time Required
After every shower Squeegee walls, run exhaust fan 15–20 min 1–2 minutes
Weekly Wipe grout lines, dry corners, check for mold 5–10 minutes
Monthly Light baking soda scrub, inspect for cracks 20–30 minutes
Every 3–6 months Deep clean with H₂O₂ or oxygen bleach, steam clean 45–90 minutes
Annually Full reseal, repair cracked grout, professional steam clean 2–4 hours

After Every Shower (Takes 30 seconds)

  • Squeegee shower walls and doors to remove standing water
  • Run the exhaust fan for 15–20 minutes

Weekly Maintenance

  • Wipe tile surfaces and grout lines with a damp microfiber cloth
  • Dry shower corners and edges where moisture collects
  • Check for any early signs of mold or discoloration

Monthly Maintenance

  • Do a light scrub of grout lines with a baking soda paste
  • Check grout for cracks or areas where the sealer may be wearing off
  • Inspect for early mold growth in corners and along caulk lines

Every 3–6 Months

  • Do a full deep clean using hydrogen peroxide or oxygen bleach
  • Steam clean grout if you have a steamer
  • Re-evaluate sealer condition and reapply if needed

Annually

  • Professional or thorough DIY steam cleaning
  • Full resealing of bathroom and kitchen grout
  • Inspect for cracked grout lines and repair if needed

When to Repair or Replace Grout

Sometimes cleaning isn’t enough. Knowing when grout needs repair or full replacement saves you from both wasted effort and more expensive future damage.

Repair vs. Replace: Quick Decision

Situation Repair Replace
Minor cracks in a few spots ✅ ❌
Small gaps along tile edges ✅ ❌
Discoloration with solid structure ✅ After cleaning ❌
Large sections crumbling ❌ ✅
Water behind tiles detected ❌ ✅
Persistent mold after 3+ treatments ❌ ✅
Grout fully separated from tiles ❌ ✅
Want to change grout color ❌ ✅
Minor cracks in a few spots
Repair✅
Replace❌
Small gaps along tile edges
Repair✅
Replace❌
Discoloration with solid structure
Repair✅ After cleaning
Replace❌
Large sections crumbling
Repair❌
Replace✅
Water behind tiles detected
Repair❌
Replace✅
Persistent mold after 3+ treatments
Repair❌
Replace✅
Grout fully separated from tiles
Repair❌
Replace✅
Want to change grout color
Repair❌
Replace✅

Repair Grout When:

  • Minor cracks have appeared in isolated sections
  • Small gaps exist between tiles in limited areas
  • The grout has some discoloration but the structure is still solid
  • Water isn’t penetrating behind the tiles
How grout repair works: Remove the damaged grout with a grout saw or oscillating tool, clean out the debris, apply new matching grout, smooth it, let it cure, and seal.

Replace Grout When:

  • Large sections are crumbling or missing
  • Water has gotten behind tiles (soft spots in the wall, hollow-sounding tiles)
  • Severe mold damage that persists despite repeated treatment
  • The grout has completely separated from multiple tile edges
  • You want to change the grout color entirely
Full regrout is a bigger project — usually requiring a professional — but it completely restores the surface and gives you the opportunity to apply high-quality epoxy grout that resists future staining.

Eco-Friendly Grout Cleaning Options

More homeowners are moving toward non-toxic, low-chemical cleaning routines — both for indoor air quality and environmental reasons. The good news is that some of the most effective grout cleaners are also among the most eco-friendly.

Top Eco-Friendly Grout Cleaning Options

  • Baking soda — biodegradable, non-toxic, effective for light to moderate cleaning
  • Steam cleaning — pure water, zero chemicals, highly effective
  • Hydrogen peroxide — breaks down into water and oxygen; much safer than chlorine bleach
  • Plant-based commercial cleaners — look for EPA Safer Choice certified products
  • Castile soap — gentle, plant-derived, good for maintenance cleaning

What to Avoid for Indoor Air Quality

  • Chlorine bleach (particularly in enclosed bathrooms)
  • Strong acid-based cleaners
  • Products with strong artificial fragrances
  • Any cleaner that causes eye irritation or requires a respirator
If you have young children, pets, or anyone in the household with respiratory sensitivities, steam cleaning combined with hydrogen peroxide is the most effective and safest combination available. Professional vs. DIY Grout Cleaning

DIY vs. Professional Grout Cleaning Comparison

Factor DIY Cleaning Professional Cleaning
Cost $5–$50 Products + tools $100–$300 Per bathroom
Time 45–120 minutes 30–60 minutes (pros work fast)
Equipment Basic brushes, steam cleaner Industrial-grade machines
Effectiveness on light stains ⭐⭐⭐⭐⭐ Excellent ⭐⭐⭐⭐⭐ Excellent
Effectiveness on severe staining ⭐⭐⭐ Moderate ⭐⭐⭐⭐⭐ Excellent
Sealing after cleaning DIY sealer ($10–$30) Usually included or add-on
Best for Maintenance, moderate staining Neglected grout, pre-sale prep

DIY Grout Cleaning

Best for:
  • Routine maintenance and light cleaning
  • Moderate staining that hasn’t been neglected for years
  • Homeowners comfortable with a few hours of work
  • Budget-conscious situations

What you can realistically achieve at home:

  • Removal of soap scum, light mold, and surface staining
  • Significant brightening of yellowed or grayed grout
  • Mold treatment in early to moderate stages
  • Full cleaning of grout that’s been regularly maintained

Professional Grout Cleaning

Best for:

  • Grout that hasn’t been cleaned in several years
  • Severe black staining, deep mold infestation
  • Large areas (entire house floors, large-format shower areas)
  • Before selling a home or after major renovations
What professionals bring:
  • Industrial-grade steam cleaning and extraction equipment
  • Truck-mounted hot water extraction systems
  • Professional-grade sealers applied after cleaning
  • Faster results on large areas
Typical cost: Professional grout cleaning generally runs $0.75–$3.00 per square foot depending on condition and region. For a standard bathroom, expect $100–$300 total. Grout Quantity Calculator: Estimate How Much Grout You Need Choosing the best grout cleaner helps keep your tiles looking fresh, but if you’re starting a new tile installation or regrouting project, calculating the right amount of grout is equally important. Use our free Grout Quantity Calculator to estimate exactly how much grout you’ll need based on your tile size, grout joint width, and project area. An accurate grout estimate helps reduce waste, save money, and ensure you have enough material to complete your project without interruptions.

Frequently Asked Questions

Yes, it can. White vinegar is acidic, and while a single use is unlikely to cause problems, regular application to cement-based grout can slowly dissolve the cement binder, leading to weakened, crumbly grout over time. Avoid vinegar entirely on natural stone tiles.

Steam cleaning is generally safe for ceramic, porcelain, and cement grout. However, avoid using steam on certain waxed surfaces, and check manufacturer guidance for natural stone tiles, as some stones are sensitive to sudden temperature changes. When in doubt, test a small hidden area first.

A standard bathroom with a shower, floor, and vanity backsplash can typically be cleaned in 45–90 minutes. Heavily neglected grout requiring multiple treatment rounds may take longer, spread across two sessions.

The most effective combination is: improve ventilation (run exhaust fan 15–20 minutes after every shower), squeeze shower walls after use, clean and dry grout regularly, and seal grout annually. Antimicrobial grout sealers add an additional layer of mold prevention.

Cement-based grout (sanded and unsanded) should always be sealed. Epoxy grout is naturally non-porous and does not require sealing. If you’re unsure what type of grout you have, sealing it won’t hurt — and will almost certainly help.

The water droplet test: place a few drops of water on the grout line. If the water beads on the surface, the sealer is intact. If the water soaks in immediately and darkens the grout, it’s time to reseal.

How to Clean Ceramic Tile in Kitchens and Bathrooms

One of the popular products of contemporary houses is ceramic tiles. They offer a stylish and low-maintenance solution for areas such as kitchen backsplashes and bathroom floors. Their durability, water resistance, and modern appearance make them a favorite choice for many homeowners. However, even though ceramic tiles are known for being easy to maintain, keeping them clean and fresh over time can still be a challenge.

Clean Ceramic Tile

Many homeowners notice that their ceramic tile surfaces begin to lose their shine after months or years of daily use. Grease from cooking, soap scum from showers, and everyday dirt can slowly build up on the tiles and grout lines. As this layer of residue accumulates, even the most beautiful tiles can start to look dull, stained, and neglected.

I personally tested several cleaning methods while maintaining ceramic tiles in my own kitchen and bathroom. Through this experience, I discovered that the right cleaning techniques can completely restore the appearance of tile surfaces without the need for expensive cleaning products.

Knowing how to clean ceramic tile floors, walls, and backsplashes properly can make a significant difference in the overall appearance and feel of your home. With the right approach, you can remove buildup, restore shine, and prevent long-term damage to both tiles and grout.

The good news is that you don’t need complicated tools or harsh chemical cleaners to keep your tiles looking great. Many effective solutions can be made using simple household items that are already available in most homes.

In this guide, you will discover simple, practical, and personally tested methods for cleaning ceramic floor tiles in kitchens and bathrooms. These techniques are easy to follow, budget-friendly, and effective at keeping your tiles bright, clean, and long-lasting.

Why Ceramic Tile Needs Regular Cleaning

Most humans believe that tiles are very hard, and therefore they do not need lots of maintenance since they are waterproof. Although this is partly the case, dirt and grime may still develop on the surface and in grout lines.

Kitchens are particularly susceptible to food splashes and droplets of grease. The stove or sink may get an oil and cooking residue that is easily accumulated on a ceramic tile backsplash behind the appliance. With time this accumulation forms a glue-like substance, which blunts the natural gloss of the tile.

This is not the case with bathrooms. Ceramic tile flooring and walls may be stained by moisture, soap, and mineral deposits. When cleaning is postponed for a considerable length of time, it is also possible that mold and mildew can begin to grow in grout lines.

Frequent cleaning makes your tiles clean and better looking, and it does not allow permanent stains.

Understanding Ceramic Tiles Before Cleaning

Before starting any cleaning routine, it helps to understand the surface you are working with.

Ceramic tiles are made from natural clay that is shaped and fired at high temperatures. Most tiles have a protective glaze that gives them their smooth, shiny finish. This glaze makes cleaning easier because dirt usually stays on the surface rather than penetrating the tile.

Clean Ceramic Tile

However, grout lines between tiles are more porous. That means they can absorb moisture and dirt if they are not cleaned properly.

You might also hear homeowners compare porcelain vs ceramic tile when discussing cleaning and durability. Porcelain tiles are generally denser and less porous because they are fired at higher temperatures. Ceramic tiles are slightly softer but still strong enough for kitchen and bathroom use. Both types are cleaned using similar methods, although porcelain tends to resist stains a bit better.

Basic Supplies for Cleaning Ceramic Tile

You do not need expensive products to keep tiles clean. In most homes, the right supplies are already available in the kitchen or laundry room.

Common cleaning items include:

  • Warm water
  • Mild dish soap
  • Baking soda
  • White vinegar
  • Soft sponge or microfiber cloth
  • Soft brush or old toothbrush
  • Mop for larger floors

Avoid abrasive tools such as steel wool or harsh scrubbing brushes. These can damage the glazed surface of a ceramic floor tile and reduce its shine over time.

Daily Cleaning for Ceramic Tile Flooring

Regular cleaning can be used to avoid accumulation of dirt on tiles. Even a couple of minutes per day can help a lot in keeping your floors.

Begin by sweeping or vacuuming the floor in order to sweep up dust, crumbs, and loose dirt. The reason behind this move is due to the fact that even the smallest particles have the potential to scratch the surface of the tile in case they are forced about during mopping.

When sweeping, wipe down the ceramic tile flooring using warm water with slight additions of mild dish soap. A microfiber mop is effective, as it does not spread but traps dirt.

After cleaning the floor, wash it off with ordinary water to destroy traces of the soap. The soap remaining on tiles may form a hazy film, particularly in localities where the water is hard.

Let the floor dry, or dry it in a light manner by wiping it with a clean cloth.

Deep Cleaning Ceramic Floor Tile

Sometimes regular cleaning is not enough, especially if tiles have been neglected for a while. Deep cleaning removes stubborn stains and restores brightness.

Start by mixing warm water with a few drops of dish soap. Apply the solution to the ceramic floor tile using a mop or sponge.

For tougher stains, sprinkle a small amount of baking soda on the affected area. Use a soft brush to gently scrub the surface in circular motions. Baking soda works as a mild abrasive that removes grime without scratching the glaze.

After scrubbing, rinse the area thoroughly with clean water and dry it with a towel.

This method works well for kitchens, bathrooms, and entryways where tiles experience heavy use.

Cleaning Ceramic Tile Backsplash in the Kitchen

A ceramic tile backsplash often collects grease from cooking, especially near the stove. Over time, this grease can become sticky and difficult to remove.

To clean it effectively, mix warm water with a small amount of dish soap. Dip a sponge into the mixture and wipe the tile surface from top to bottom.

If grease stains remain, create a paste using baking soda and water. Apply the paste to the stained area and let it sit for a few minutes before gently scrubbing.

After cleaning, wipe the backsplash with a damp cloth to remove residue. Finally, dry the tiles with a microfiber cloth to restore their shine.

Regular wiping after cooking can prevent grease from building up in the first place.

Removing Soap Scum from Bathroom Tiles

The tiles used in the bathroom are in constant contact with soap, shampoo, and minerals in hard water. These materials may cause a glazed surface on the floor tiles of ceramic tunnels as well as wall tiles.

The vinegar solution can be used to dissolve soap scum; a simple solution will do. Combine warm water with white vinegar in an equal ratio in a spray bottle.

Spray the mixture on the tiles and leave after several minutes. The vinegar will soften the mineral deposits and the residue of soap.

Wipe the surface with a sponge or soft brush and then run it under clean water. Wipe the tiles using a cloth to avoid moisture.

Remember not to use vinegar very often on grout, as it can be a weak material after a certain period of time.

Cleaning Tile Grout Lines

Even when tiles look clean, grout lines can still appear dark and dirty. Because grout is porous, it absorbs stains more easily than tile surfaces.

Cleaning Tile Grout Lines

A baking soda paste is one of the safest ways to clean grout. Mix baking soda with a small amount of water until it forms a thick paste.

Apply the paste along the grout lines and gently scrub with a toothbrush or soft brush. This helps lift dirt without damaging the grout.

After scrubbing, rinse the area with warm water and wipe it dry.

For long-term protection, consider sealing grout once or twice a year. Sealing prevents moisture and stains from penetrating the grout lines.

Natural Cleaning Methods for Ceramic Tile

Many homeowners prefer natural cleaning solutions instead of chemical products. Fortunately, ceramic tiles respond well to simple household ingredients.

Baking soda is excellent for removing stains and odors. Vinegar can dissolve mineral deposits and soap buildup. Lemon juice also works well for cutting through grease on a ceramic tile backsplash.

When using natural cleaners, always rinse tiles thoroughly with water afterward. This ensures no residue remains on the surface.

Natural cleaning methods are not only affordable but also safer for families with children and pets.

Common Mistakes to Avoid When Cleaning Tiles

Although cleaning tile seems simple, some mistakes can damage the surface or reduce its shine.

One common mistake is using harsh chemical cleaners. Strong acids or bleach can gradually wear down the protective glaze on ceramic tiles.

Another mistake is using too much soap while mopping ceramic tile flooring. Excess soap leaves a slippery residue that attracts more dirt.

Skipping the rinsing step is also a frequent problem. Cleaning solutions left on the tile surface can cause streaks or dull spots.

Finally, avoid using abrasive pads that can scratch the tile finish.

Maintaining Ceramic Tile for Long-Term Shine

Once your tiles are clean, proper maintenance will keep them looking new for years.

Sweep or vacuum floors regularly to remove dirt before it builds up. Wipe kitchen backsplashes after cooking to prevent grease stains. In bathrooms, dry tiles occasionally to reduce water spots and soap residue.

Placing mats near sinks and entryways can also protect ceramic tile flooring from excessive moisture and dirt.

With consistent care, ceramic tiles can remain attractive and durable for decades.

Ceramic Tile vs. Other Tile Types

When homeowners choose tiles for kitchens or bathrooms, they often compare porcelain vs ceramic tile.

Ceramic Tile vs. Other Tile Types

Both materials are made from clay and fired in kilns, but porcelain tiles are typically denser and less porous. This makes them slightly more resistant to water and stains.

Ceramic tiles, however, are usually more affordable and easier to install. They are also available in a wide range of colors, textures, and patterns.

In terms of cleaning, both materials are fairly simple to maintain. Regular sweeping, gentle washing, and proper grout care will keep either tile type in good condition.

Frequently Asked Questions

1. How often should ceramic tile flooring be cleaned?

Sweeping or vacuuming should be done several times a week, especially in high-traffic areas. Mopping once a week is usually enough to maintain clean ceramic tile flooring in most homes.

2. Can vinegar damage ceramic tiles?

Vinegar is generally safe for glazed tiles, but it should not be used too often on grout lines because its acidity may weaken grout over time.

3. What is the best cleaner for a ceramic tile backsplash?

A mixture of warm water and dish soap works well for everyday cleaning. Baking soda paste can be used for stubborn grease on a ceramic tile backsplash.

4. Is ceramic tile good for kitchen floors?

Yes, ceramic floor tile is a popular choice for kitchens because it is durable, water resistant, and relatively easy to clean.

5. What is the main difference between porcelain and ceramic tiles?

When comparing porcelain vs ceramic tile, porcelain is denser and more water resistant, while ceramic tiles are usually more affordable and easier to cut during installation.

Final Thoughts

Ceramic tiles are still among the most suitable surfaces that can be used in the kitchen and the bathroom since they are durable and attractive. To be placed as either flooring in the form of ceramic tiles, wall tiles, or as a decorative backsplash, they can be used to improve the appearance of any room.

Tiles do not need any complicated equipment or high-priced cleaning solutions. Most accumulation and stains can be removed using simple techniques of warm water, mild soap, and natural ingredients. Constant maintenance also avoids the accumulation of dust in the grout and ensures the glossy finish of the tile.

With the various procedures that were outlined in this guide, a homeowner can keep his/her ceramic floor tile surfaces in the most efficient way. Ceramic tiles can shine and work effectively over a long period of time with regular cleaning and regular maintenance.

I Tested 3 DIY Grout Cleaners — Here’s the One That Actually Worked

Not because I didn’t notice it — I noticed it every single time I walked in there. That dull, grey-brown staining crawling along the joints between my floor tiles. The kind of thing you tell yourself you’ll deal with “next weekend” until next weekend becomes next year.

The problem wasn’t motivation. It was that I genuinely didn’t know what would actually work. I’d tested hundreds of cleaning products on tile and grout over more than a decade of writing about home cleaning, and I’d seen a lot of promises fall flat. Commercial grout cleaners often contain harsh acids or bleach that can degrade cement-based grout over time. DIY recipes online are everywhere — but most of them just repeat each other without any real testing behind them.

So I decided to do what I always do: test it properly myself.

I picked three DIY grout cleaning methods that come up constantly in search results and cleaning communities. I tested them side by side on the same section of stained bathroom floor tile. Same grout, same conditions, same scrubbing effort. Then I tracked exactly what happened.

Here’s the honest breakdown — no exaggeration, no skipping the methods that didn’t work.

Why DIY Grout Cleaners Make Sense (But Not All of Them Work)

Before getting into the results, it’s worth understanding what you’re actually dealing with when you try to clean grout.

Grout is porous. Unlike the tile itself — which has a glazed, sealed surface that repels most staining — the grout between tiles acts almost like a sponge. Dirt, moisture, soap residue, mould spores, and general grime all get absorbed into those tiny pores over time. That’s why grout stains so easily and why a quick wipe with a damp cloth rarely does anything useful.

Effective grout cleaning works in one of three ways:

  1. Mechanical action — scrubbing physically dislodges dirt from the surface and pores
  2. Chemical reaction — an ingredient breaks down or dissolves the bond between the stain and the grout
  3. Oxidation — an ingredient (like hydrogen peroxide) releases oxygen that bleaches discolouration and kills organic matter like mould

The most effective DIY methods combine at least two of these. That’s why some combinations dramatically outperform others — it’s not marketing, it’s chemistry.

With that in mind, here’s what I tested.

The Test Setup

To make this a fair comparison, I set up proper testing conditions:

  • Same grout type: Cement-based (sanded) grout, which is the most common in residential bathrooms
  • Same staining level: All three test sections chosen from the same area of the floor, with similar discolouration. No cherry-picking.
  • Same wait time: Each mixture sat on the grout for exactly 10 minutes before scrubbing
  • Same scrubbing tool: Old toothbrush for all three (more on why I’d change this next time)
  • Same rinse: Two rounds of warm water, wiped dry with a clean cloth

My bathroom floor tile is standard ceramic with light grey grout that had gone significantly darker after years of use and zero sealing. No prior treatment had been applied in at least three years. In other words — a real-world worst case.

I photographed each section before and after. Here’s what happened.

Method 1: Baking Soda + Water

What You Need

  • Baking soda (bicarbonate of soda)
  • Water
  • Stiff brush or old toothbrush

How to Make It

Mix baking soda with just enough water to form a smooth, thick paste — roughly 2 tablespoons of baking soda to 1 tablespoon of water. It should hold its shape when applied to the grout without running.

How to Apply

Spread the paste directly over the grout lines using your finger or a small brush. Press it in so it fills the texture of the grout surface. Leave it for 10 minutes, then scrub in circular motions with a stiff brush. Rinse thoroughly with warm water and wipe dry.

What Happened

The baking soda paste was the easiest to work with. It goes on cleanly, stays where you put it, and the mild abrasive texture does immediately start to lift surface-level grime when you start scrubbing.

Baking Soda + Water

On my test section, this method removed a noticeable layer of surface dirt. The grout came up lighter than when I started. But — and this is important — it didn’t touch the deeper discolouration. The staining that had soaked into the grout pores over the years was still clearly visible. The grout looked cleaner, but not clean.

This makes sense chemically. Baking soda is a physical abrasive and a mild alkaline — it can break down some organic residue, but it doesn’t have any oxidising or bleaching action to deal with deep staining or mould.

Best for: Weekly or monthly maintenance cleaning on grout that’s already in reasonable condition. Not the right tool for neglected or heavily stained grout.

Rating: 5/10

Method 2: White Vinegar + Water

What You Need

  • White vinegar (distilled)
  • Water
  • Spray bottle
  • Scrub brush

How to Make It

Mix equal parts white vinegar and warm water in a spray bottle. No measuring required — half and half is fine.

How to Apply

Spray directly onto the grout lines until saturated. Leave for 10 minutes to let the acid work on any mineral deposits or soap scum. Scrub with a stiff brush and rinse well with warm water.

What Happened

I want to be upfront: I had higher hopes for this one than it deserved.

The vinegar solution did something — it removed loose surface particles and left the grout looking marginally cleaner. But after scrubbing for several minutes and rinsing, the actual staining was nearly unchanged. The discolouration I was trying to lift was still sitting right there in the grout.

White Vinegar + Water

The smell was also more unpleasant than I expected, even with the dilution. It dissipated after about 20 minutes but wasn’t a pleasant cleaning experience.

From a chemistry standpoint, vinegar’s acidity (acetic acid) is useful for dissolving alkaline deposits — hard water scale, calcium buildup, some soap scum. But most grout staining is organic matter — dirt, mould, skin cells, body oils — and acid doesn’t break those down effectively. For that, you need either alkaline chemistry or oxidation.

Important Warning

Do not use vinegar on natural stone tiles. Marble, travertine, limestone, and granite are all calcium-based materials. Acetic acid will etch the surface and cause permanent damage that’s expensive to repair. This method is only appropriate on ceramic or porcelain tile with cement-based grout.

Best for: Hard water spots and light mineral deposits on ceramic or porcelain only. Not effective on organic staining.

Rating: 4/10

Method 3: Baking Soda + Hydrogen Peroxide Winner

What You Need

  • Baking soda
  • Hydrogen peroxide (3% solution — standard pharmacy strength)
  • Optional: 2–3 drops of dish soap for greasy grout

How to Make It

Mix 2 parts baking soda with 1 part hydrogen peroxide into a thick paste. It will fizz gently when combined — that’s the reaction you want. If you’re dealing with kitchen grout or grease-contaminated areas, add 2–3 drops of dish soap and stir it in.

How to Apply

Apply the paste generously to the grout lines. You can use a finger, spoon, or small brush. Let it sit for 10–15 minutes — you’ll see the paste continuing to react slightly as it sits. Then scrub in circular motions with a stiff brush. Rinse thoroughly with warm water. A second rinse is worth doing to remove any residue.

What Happened

This was the result I was genuinely surprised by.

Within about five minutes of the paste sitting on the grout, I could already see brightening happening. The staining that had been soaking into those grout lines for years started visibly lifting. When I scrubbed and rinsed, the difference was remarkable — the grout went from dull brownish-grey back to something close to its original light colour.

Baking Soda + Hydrogen Peroxide Winner

This is the method that actually worked on deeply stained, neglected grout.

The reason it outperforms everything else comes down to that combination of mechanisms:

  • Baking soda provides mild abrasion to physically scrub dirt from the surface
  • Hydrogen peroxide is an oxidising agent — it releases oxygen that breaks down organic staining, kills mould and mildew at the root, and bleaches discolouration naturally
  • Together, the chemical reaction between the two creates a fizzing action that helps the mixture penetrate into the pores of the grout rather than just sitting on the surface

This is also why it works on mould — hydrogen peroxide doesn’t just bleach the surface appearance of mould, it disrupts the cell structure. You’re not just masking the problem.

Best for: Heavily stained grout, mould or mildew, neglected grout that hasn’t been cleaned in a long time, and any situation where you want a genuine deep clean rather than just a surface refresh.

Rating: 9/10

Side-by-Side Results

MethodEase of useSurface dirtDeep stainingMould / mildewNatural stone safe?Rating
Baking soda + water★★★★★★★★★☆★★☆☆☆★★☆☆☆✓ Yes5/10
Vinegar + water★★★★★★★★☆☆★☆☆☆☆★★☆☆☆✗ No4/10
Baking soda + H₂O₂ ✓ Winner★★★★☆★★★★★★★★★★★★★★★✓ Yes9/10

What I’d Do Differently Next Time

After this test, I made a few notes for the next time I do a deep clean:

Use a proper grout brush, not a toothbrush. A dedicated stiff-bristle grout brush or an electric spin scrubber makes this significantly faster and more effective. The toothbrush works but it’s slow, your hand aches after five minutes, and the small head means it takes forever to cover a floor. An electric spin scrubber with a small attachment brush is probably the single biggest upgrade you can make to this process.

Let the paste sit longer on heavily stained areas. For my test I used 10 minutes across the board. On sections with especially bad staining, I’ve since tried 20–25 minutes and the results are noticeably better. Don’t scrub too early — give the hydrogen peroxide time to do its work.

Rinse more than you think you need to. Any baking soda residue left in the grout will attract fresh dirt and can leave a slightly chalky appearance. Two full warm water rinses, followed by a wipe with a clean damp cloth, gets it all out.

Work in sections. On a full bathroom floor, don’t apply the paste to the entire surface at once. Work in 2–3 square foot sections so the paste doesn’t dry out before you get to it. Dried paste is harder to scrub off and less effective.

Protect your knees. This is not glamorous advice but it’s practical — get a kneeling pad. Spending 30–45 minutes on a bathroom floor tile with bare knees is miserable.

After Cleaning: Should You Seal the Grout?

Once you’ve done a proper deep clean, it’s worth considering sealing the grout — especially if, like me, you’d left it unsealed for years.

Grout sealer creates an invisible barrier over the porous grout surface. It doesn’t make the grout stain-proof, but it makes staining much slower and cleaning much easier. Spills sit on the surface instead of soaking in immediately, which means routine cleaning with baking soda and water is enough to keep things looking good between deep cleans.

A few things to know about sealing:

  • Wait at least 24–48 hours after cleaning before sealing. The grout needs to be completely dry — any moisture trapped under the sealer will cause problems.
  • Apply in thin, even coats using an applicator brush or pen. Wipe away any excess that gets on the tile surface before it dries.
  • Penetrating sealers (also called impregnating sealers) are generally better than surface sealers for bathroom floors. They soak into the grout rather than sitting on top, so they don’t peel or chip.
  • Reseal every 1–2 years in high-moisture areas like showers. Annual resealing takes about 20 minutes and keeps the grout protected.

If you want a full walkthrough, I’ve covered the sealing process step by step in a separate guide — How to Seal Grout in 7 Easy Steps.

Common Mistakes to Avoid

A few things I’ve seen go wrong — both in my own testing and in questions I get from readers:

Using bleach as a regular cleaner.

Bleach will whiten grout fast, but repeated use breaks down the binding agents in cement-based grout, making it more porous and more prone to future staining. It’s a short-term fix that makes the long-term problem worse. If you need to use bleach for a severe mould situation, use it once, rinse very thoroughly, and don’t make it a habit.

Scrubbing too aggressively.

Stiff brushing is fine and necessary, but metal scrubbers or wire brushes can physically damage grout, creating micro-scratches that trap more dirt. Use nylon bristle brushes.

Not rinsing properly.

Cleaning solution residue left in grout attracts dirt faster than bare grout does. Every cleaning session should end with a thorough warm water rinse.

Applying vinegar to natural stone.

Already mentioned above, but worth repeating — if your tile is marble, travertine, slate, limestone, or any other natural stone, don’t use anything acidic on the grout. Stick to pH-neutral or alkaline cleaners only.

Expecting one clean to fix years of neglect.

If grout has been stained and unsealed for a long time, one application of hydrogen peroxide paste will dramatically improve it — but may not fully restore it to original colour in one go. A second treatment after a 48-hour gap will go further. Patience pays off here.

The Bottom Line

If your grout is stained, discoloured, or hasn’t been properly cleaned in a long time, baking soda and hydrogen peroxide is the method that actually works. It’s not expensive, it doesn’t require any special equipment, and it tackles both the surface dirt and the deeper staining that other methods leave behind.

Baking soda and water is a good everyday maintenance option — just not strong enough for anything serious. Vinegar and water is largely overhyped for grout and should be avoided entirely on natural stone.

The combination that genuinely surprised me was the hydrogen peroxide paste. After years of testing cleaning products, I’d become fairly skeptical of DIY “hacks.” But this one earned its reputation. My bathroom floor looked better after 30 minutes of work than it had in years — and I avoided a re-grouting job that I’d convinced myself was inevitable.

Try it. Give the paste 15 minutes to work before scrubbing. You’ll see what I mean.

Frequently Asked Questions

How long should I leave baking soda and hydrogen peroxide on grout?

10–15 minutes is a good starting point. For heavily stained or neglected grout, up to 20–25 minutes gives better results. Don’t let it dry out completely — if it starts to dry before you scrub, mist it lightly with water.

Can I use hydrogen peroxide on coloured grout?

Yes, standard 3% hydrogen peroxide is generally safe on coloured grout. That said, always do a patch test in a hidden area first, especially on darker or very saturated grout colours. Let it sit for the full time and check for any lightening before proceeding to the full area.

How often should I deep clean my grout?

In high-moisture areas like showers or bathroom floors, a deep clean every 3–6 months keeps staining manageable. Sealed grout can go longer between deep cleans — often 6–12 months depending on traffic and use.

Is hydrogen peroxide safe to use around kids and pets?

Standard 3% hydrogen peroxide (the kind sold in pharmacies) is non-toxic once dry and rinsed. Rinse the grout thoroughly after cleaning and allow the area to dry fully before letting children or pets back in. Avoid higher-concentration hydrogen peroxide — only use the 3% pharmacy-grade version.

What’s the best brush for cleaning grout?

A stiff-bristle nylon grout brush is the most effective manual option. For faster results and less physical effort, an electric spin scrubber with a small attachment brush is excellent — it covers more ground and scrubs more consistently than manual brushing.

Disclaimer: Results vary depending on grout type, tile material, stain severity, and how long staining has been present. Always test any cleaning solution on a small, hidden area before treating the full surface. Do not use acidic cleaners (including vinegar) on natural stone tiles. The author is not responsible for damage caused by improper use of cleaning products.

Grout Line Size Chart: What No One Tells You But Should

Have you ever tried to lay tile on a floor or wall and gotten totally stumped about the right grout line size? You're not the only one. Most people never think about grout line size until the moment they start installing tile — and suddenly it feels like this one tiny detail could change the entire look of the space.

When I was working on my own kitchen, I spent hours choosing the perfect tiles. But the thing that actually confused me was the grout line size — that small gap between each tile had me scratching my head:

  • Is 1/16 inch too narrow?
  • Is 3/8 inch too wide?

The truth is, there's no single grout line size that works for every tile project. The right size depends on the tile type, tile size, and where the tile is being installed. That's why a grout line size chart can be extremely helpful.

Grout line size chart comparing 1/16 inch, 1/8 inch, and 1/4 inch grout lines on porcelain, ceramic, and natural stone tile
Comparing common grout line sizes side by side — 1/16", 1/8", and 1/4" — across different tile types.

Quick Summary: Grout Line Size

A grout line size chart helps homeowners and professionals choose the correct grout line size based on tile type, tile size, and installation location. Standard grout spacing ranges from 1/16 inch for rectified porcelain and glass tiles to 1/4 inch for natural stone and rustic tiles. Choosing the proper grout line size improves tile alignment, reduces the risk of cracking, allows for natural movement, and enhances the overall appearance of the installation. For most ceramic tile projects, 1/8-inch grout lines provide the best balance between durability, appearance, and ease of installation.

Key Takeaways

  • The most common grout line size for ceramic and porcelain tile is 1/8 inch, paired with sanded grout.
  • Use a narrower 1/16-inch grout line size with unsanded grout for rectified porcelain or glass tile.
  • Use a wider 3/16- to 1/4-inch grout line size with sanded grout for natural stone, slate, or handmade tile.
  • Grout line size should match tile edge precision — rectified (machine-cut) tile can go narrower, handmade or natural tile needs a wider joint.
  • A wider grout line size helps compensate for an uneven subfloor; a narrower one requires a flatter surface.
  • Always check the tile manufacturer's spacing recommendation before finalizing your grout line size.

What Is the Standard Grout Line Size?

The standard grout line size depends on the type of tile being installed. Most ceramic and porcelain tiles use 1/8-inch grout spacing, while rectified porcelain tiles can use 1/16-inch grout lines for a modern appearance. Natural stone and handmade tiles typically require a 3/16-inch to 1/4-inch grout line size because their edges are less uniform. A grout line size chart is the best way to choose the correct spacing for your specific tile project.

What Is a Grout Line Size, Exactly?

Think of the grout line as the breathing space between tiles. It isn't just there to look pretty — grout holds tiles in place, allows them to shift slightly with the floor or wall, and keeps dirt and water out.

Not enough of a gap, and your tiles may crack. Too wide, and the finish can look rough or dated. That's why getting your grout line size right matters more than most people expect.

Why Does Grout Line Size Matter?

Here's the deal — your grout line size affects:

  • The overall look — sleek and modern, or rustic and vintage? Grout line size changes everything.
  • Tile performance — tiles shift slightly with temperature or weight. The right grout line size gives them room to move without damage.
  • Cleaning and maintenance — a smaller grout line size means fewer areas for dirt to collect. Wider lines mean more scrubbing.

I learned this the hard way in a rental property. I used a wide grout line size for a "handmade" look, and a year later I was regretting it during every deep clean.

Understanding Common Grout Line Sizes

Grout Line Size Comparison Chart — Recommended Spacing by Tile Type
Tile Type Grout Line Size Best For Grout Type Needed
Rectified Porcelain1/16 in (1.5 mm)Modern bathrooms, large-format floorsUnsanded
Glass Tile1/16 in (1.5 mm)Shower walls, backsplashesUnsanded
Ceramic Tile1/8 in (3 mm)Floors, walls, kitchen backsplashesSanded
Large-Format Tile1/8 in (3 mm)Living rooms, hallways, open floor plansSanded
Natural Stone1/8–3/16 in (3–5 mm)Bathrooms, entryways, feature wallsSanded
Slate & Travertine3/16–1/4 in (5–6 mm)Patios, rustic kitchens, outdoor spacesSanded
Handmade / Rustic Tile1/4 in (6 mm)Farmhouse, Mediterranean, traditional designsSanded

Quick answer: Most ceramic tile projects use a 1/8-inch grout line size with sanded grout. Go narrower (1/16 inch, unsanded) for rectified porcelain or glass; go wider (3/16–1/4 inch, sanded) for natural stone or handmade tile.

1/16 Inch — The Sleek, Modern Grout Line Size

This is your best bet when working with precision-cut tiles like rectified porcelain or glass tile. The lines are so fine they're barely visible, which gives the whole surface a clean, minimal look.

Best for:

  • Modern bathrooms
  • Subway tiles
  • Smooth porcelain floors

Heads up: a 1/16-inch grout line size needs flat surfaces and near-perfect tile spacing. If your wall or floor is uneven, it might not work out.

1/8 Inch — The Most Popular Grout Line Size

This is the happy medium, and it's the grout line size I recommend most often. Not too tight, not too loose — it gives the grout enough room to do its job without overpowering the tile.

Great for:

I've used a 1/8-inch grout line size on three bathroom floors now — it's forgiving if you're not a pro tiler.

3/16 to 1/4 Inch — The Rustic Grout Line Size

A wider grout line size gives a more traditional, handcrafted look. It works well with uneven or natural tile like slate or travertine, where perfect alignment isn't realistic.

Best for:

  • Rustic kitchens
  • Outdoor patios
  • Natural stone tiles

Pro tip: this grout line size requires sanded grout for stability, and it takes more elbow grease to keep clean.

What Influences Your Grout Line Size Choice?

Grout line size isn't just about personal style. Your tile choice, surface condition, and even room location all play a part. Here's what I've learned from real projects.

1. Tile Type

  • Rectified tiles (machine-cut, super straight edges) can handle a narrower grout line size.
  • Handmade or natural tiles need a wider grout line size because no two tiles are exactly the same.

2. Room Functionality

Wet rooms like bathrooms and kitchens need a grout line size that keeps water out but is still easy to clean. Go a bit tighter if you hate scrubbing. Go wider if you want more grip and texture underfoot.

3. Movement and Subfloor

Ever walked into a room where the tiles creak or shift slightly? That's usually bad prep. If your subfloor isn't perfectly level, a wider grout line size can save the day by giving the tile some room to move.

My Personal Experience Choosing Grout Line Sizes

In my own house, I used:

  • A 1/16-inch grout line size with white subway tile in the bathroom — it looked slick, but spacing it perfectly was a full-day job.
  • A 1/8-inch grout line size for large-format tile in the hallway — it looked modern, and installation was manageable even solo.
  • A 1/4-inch grout line size with rough-cut terracotta tile in my sunroom — warm, rustic, and far simpler to match.

The lesson here: match your grout line size to the look you're going for and to the tile itself. It's not only about what looks good on Pinterest.

Sanded vs. Unsanded Grout: Which Grout Line Size Needs Which?

Once you've picked a grout line size, you'll also need to decide on the type of grout.

Sanded vs. Unsanded Grout — quick comparison
  • Sanded grout is gritty and works best for a grout line size of 1/8 inch or wider.
  • Unsanded grout is smoother and better suited to a grout line size smaller than 1/8 inch.

I once used unsanded grout on a 1/4-inch grout line size because I had some leftover — it cracked right away. Lesson learned.

How to Choose the Right Grout Line Size for Your Project

Still stuck on which grout line size to pick? Here's a quick cheat sheet based on common scenarios:

  • Going modern? Stick to a 1/16 or 1/8-inch grout line size. Clean and seamless.
  • Using natural tile? A 3/16 or 1/4-inch grout line size embraces the irregularity.
  • Want easy maintenance? A narrower grout line size is easier to clean.
  • Doing it yourself? Give yourself grace — go with a 1/8-inch grout line size or wider.

Final Word on Choosing Your Grout Line Size

Grout line size may sound like a small decision, but it can shift the entire mood of a room. It's not only about the tile — everything has to work together.

When you're tiling for the first time, it's tempting to eyeball the spacing or grab whatever plastic spacers the hardware store has on hand. Once you understand how different grout line sizes actually perform, you'll walk into any project with a much better plan.

There's no shame in dry-fitting a few tiles with different spacers and just looking at them before you commit — that's exactly what I do. Trust your eye and your tape measure equally.

Quick Recap: Grout Line Sizes at a Glance

  • 1/16 inch — sleek and modern, but harder to install.
  • 1/8 inch — balanced and beginner-friendly. The most common grout line size.
  • 3/16–1/4 inch — rustic, natural, and more forgiving.
  • Use sanded grout for wider lines, unsanded for tighter ones.
  • Your tile type, room, and subfloor condition all affect the right grout line size for you.

If there's one thing I'd tell anyone starting a tiling job, it's this: respect the grout line size. It's the unsung hero of a flawless floor or backsplash. Get it right, and your tile will thank you — quietly, with no cracks or stains.

Calculate Your Grout Line Size Needs

Your grout line size has a big impact on how much grout you'll actually need. Use our free Grout Coverage Calculator to get an accurate estimate before you buy materials — it helps you avoid waste, save money, and plan your project with confidence.

Recommended Grout Line Tools

Based on the grout line sizes above, here's what I actually use on my own jobs.

Most Versatile Multi-size tile spacers set

Multi-Size Tile Spacer Set

One pack covers 1/16", 1/8", 3/16" and 1/4" grout line sizes — no need to buy separate spacers for every project.

Check Price on Amazon
For Wide Lines Sanded grout

Sanded Grout

Go with this for any grout line size 1/8" or wider — it resists cracking and holds up in high-traffic floors.

Check Price on Amazon
For Tight Lines Unsanded grout

Unsanded Grout

Use this for any grout line size under 1/8" — smoother finish, won't scratch glass or polished tile edges.

Check Price on Amazon
For Application Rubber grout float

Rubber Grout Float

Makes packing grout into narrow grout line sizes way easier if you're doing this solo, like I usually do.

Check Price on Amazon

Final Thoughts on Grout Line Size

Choosing the right grout line size is one of those small decisions that has a surprisingly big impact on the finished look and durability of your tile project. Whether you're installing a kitchen backsplash, bathroom floor, or outdoor patio, the right grout line size helps prevent tile movement, improves durability, and creates a clean, professional finish.

There isn't a one-size-fits-all answer. The best grout line size depends on your tile type, installation area, and the style you're trying to achieve. That's why using a grout line size chart before you begin is one of the easiest ways to avoid costly mistakes and get better results.

If you're still unsure, test a few spacers with your tiles before installation. Seeing different grout line sizes in person makes it much easier to choose the spacing that looks and performs best. A little planning today will help your tile installation look great and last for years.

Frequently Asked Questions About Grout Line Size

A grout line of 1/8 inch to 3/16 inch is optimal with most floor tiles a grout line that is too thick will weaken the installation, where too thin will not provide the look.

Not always. Thin grout lines (such as 1/16 inch) are effective only when your tiles are carefully off and flawlessly even, i.e. rectified tiles only.

Yes! Contrasting grout color will emphasize grout lines more and matching color will merge them together- this distorts overall appearance size.

There’s no strict rule, but 1/8 inch is a commonly used “safe bet” size for many residential tile installations.